By Selena KomezUpdated on January 24, 2018
“I wanna perform iOS 11 downgrade on my iPhone 7, but I heard that downgrade iOS system may lead to data loss. It is true? How can I backup iPhone data before the downgrade?”
Especially for iOS users, both you and I, who are hoping to get a taste of what’s the newest iOS system of Apple each year. And for this year, it gets pretty special with the new iOS 11. So if you’re thinking of making the update to iOS 11, then just hold on for a few minutes because the iOS 11 is not as great as you think and instead it is packed with bugs and errors. Some iOS users compained that iOS 11 is not so good and prefer to use the old iOS 10 so they performed the iOS downgrade job on device. However, before you beginning the downgrade task you’d better to backup your iOS device, to protect your personal data, avoid losing data during or after iOS 11 downgrade. Here we will show you how to backup iPhone data before iOS 11 downgrade on computer safely with two solutions.
Extra Tips: If you want to lean more about how to downgrade iOS 11 for iPhone without losing data, you could click this tutorial:
How to Downgrade from iOS 11 to iOS 10 on iPhone without Data Loss
iOS ToolKit – iOS Backup & Restore is capable of backup iPhone data on computer before iOS 11 downgrade completely, as well as restoring data from backup to iPhone directly. This outstanding data backup & restore program is useful for backup and restore various files on iOS devices, like contacts, messages, photos, videos, notes, call logs and other personal documents. It offers full support for iPhone 7, iPhone 6 and 6S, 6 Plus and 6S Plus, iPhone SE, iPhone 5S/5C/5/4S/4 and iPad, iPod. It works with all iOS versions, including iOS 11 and lower.


Step 1.Run the iOS Backup & Restore Program and Connect iPhone to the Computer
After runing iOS Backup & Restore on computer, click on “More Tools”from the left column, select “Device Data Backup & Export”option from the tool list. Then use the USB cable to connect your iPhone to computer. By default, iOS Backup & Restore will automatically detect your iPhone soon.
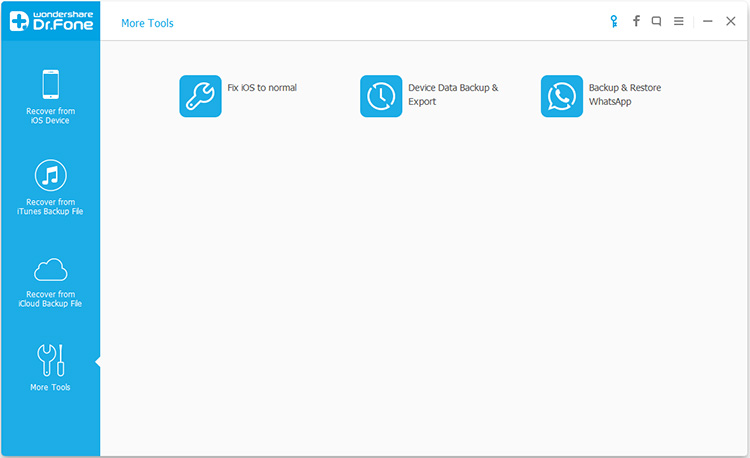
Tip:If you have used iOS Backup & Restore to backup your device previously, you can click on “To view the previous backup file” to view the previous backup files list.
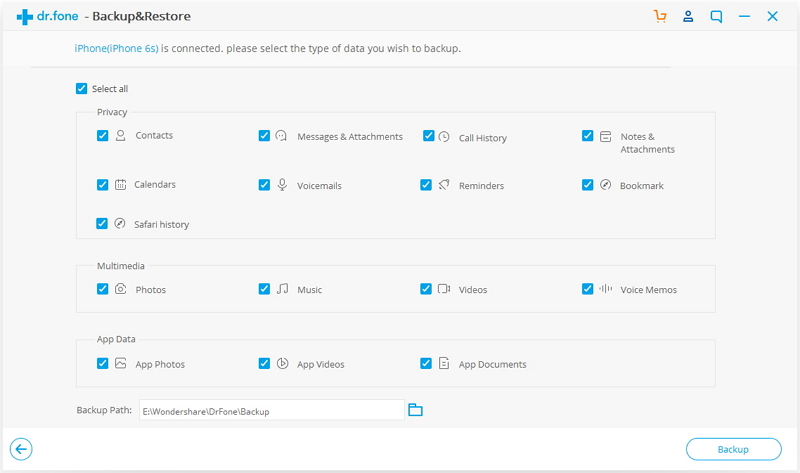
Step 2.Select File Types to Backup from iPhone
When your iPhone is connected successfully, iOS Backup & Restore will detect the file types on your device automatically and you can select what file types to backup. Then click on “Backup”.
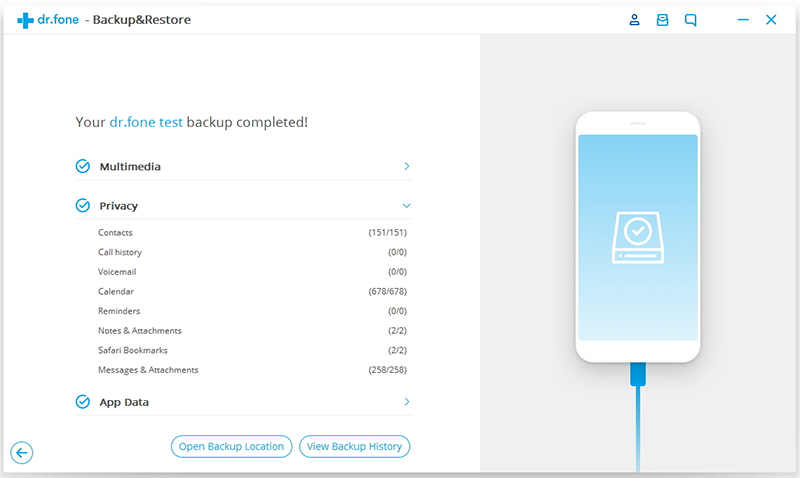
The whole backup process will take a few minutes, depending on the data storage on your device. Then iOS Backup & Restore will display all the supported data, like Photos & Videos, Messages & Call Logs, Contacts, Memos and other data.
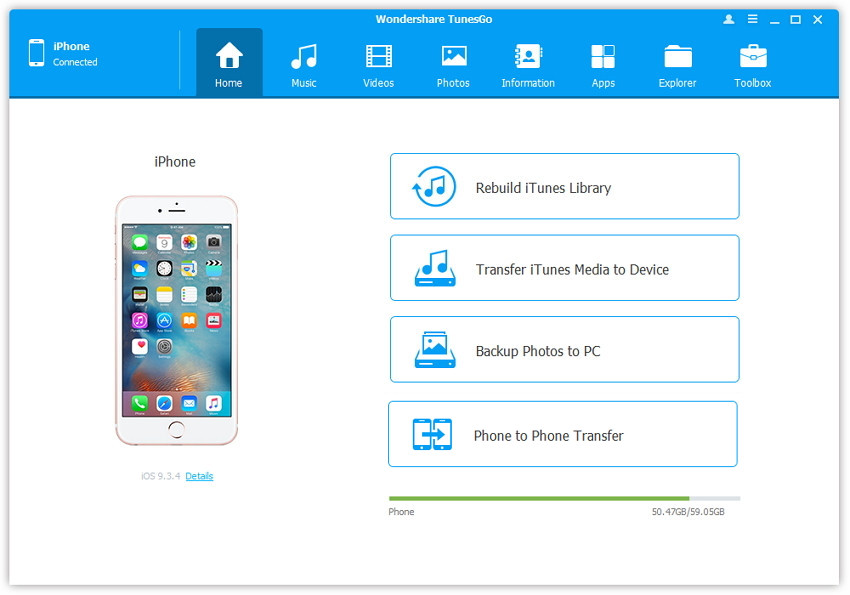
Another backup tool here are recommended for you is iOS Manager, which is a terrific program use to manage & transfer data for iOS device, photos, music, videos, apps and more are included. iOS Manager allows to backup data from iPhone to computer before iOS 11 downgrade. What’s more, this program enables to transfer iTunes media to iOS device with one click, transfer files between iOS device, transfer files between iOS device and Android device. Almost all iOS devices are compatible with iOS Manager, insist of iPhone 7, iPhone 6 and 6S, 6 Plus and 6S Plus, iPhone SE, iPhone 5S/5C/5/4S/4 and iPad, iPod. It works with all iOS versions, including iOS 11 and lower.
Here we will take the photos for example to expain how to backup iPhone data on computer via iOS Manager:
Step 1. Run iOS Manager and Connect iPhone to the Computer
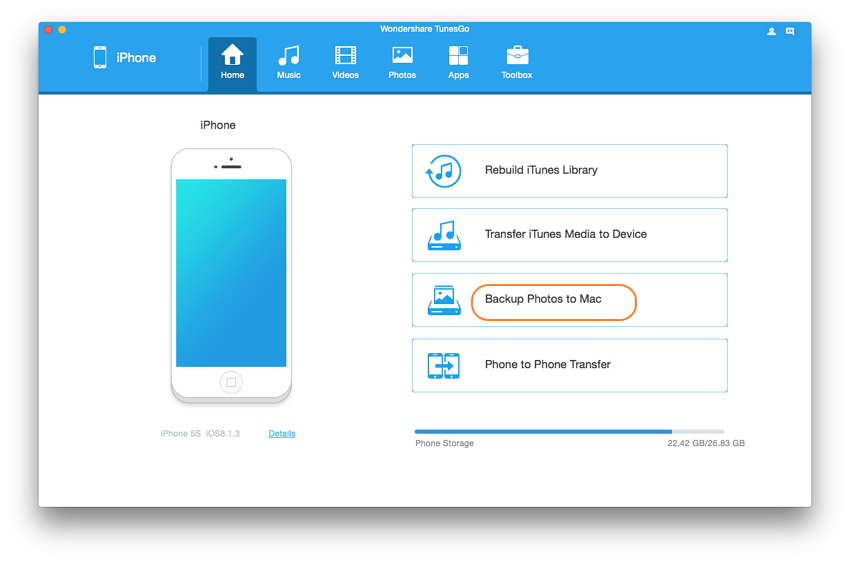
Step 2. Backup iPhone Photos to the Computer
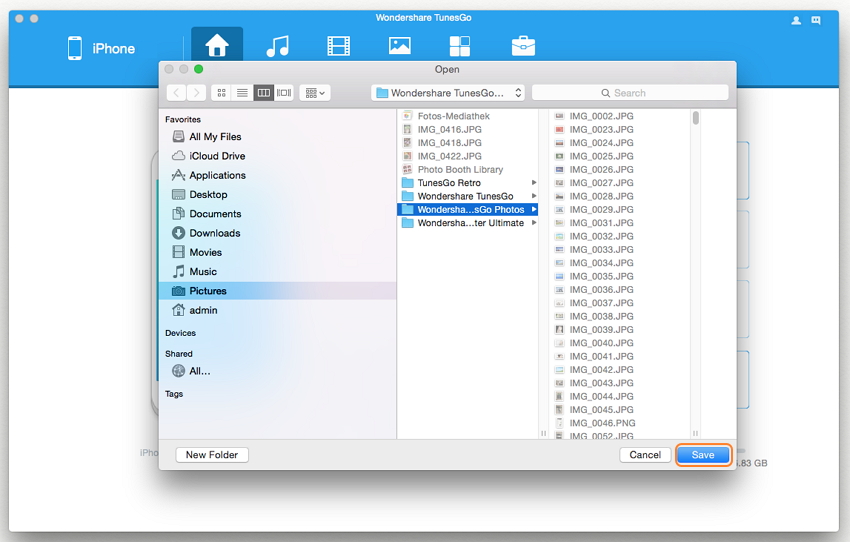
Click Backup Photos to Mac on the main interface. From the pop-up window, browse and select the destination folder for photos, click Save to start the backup.
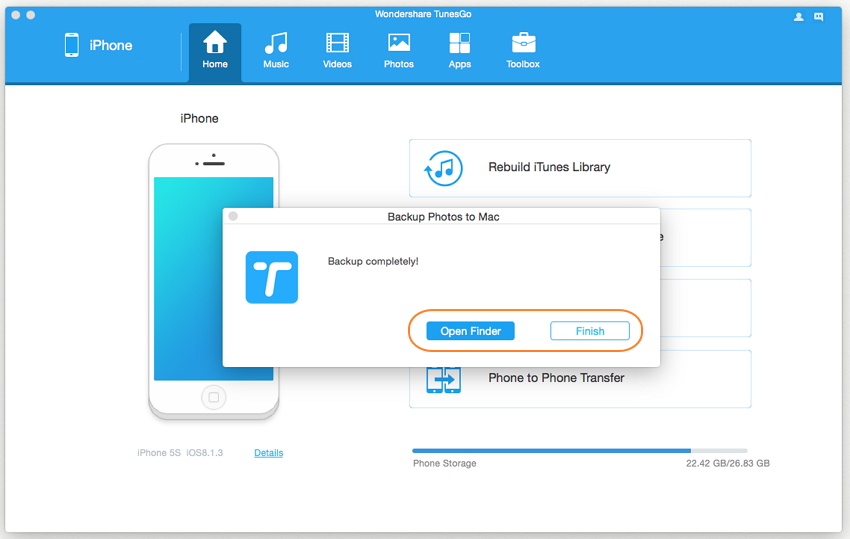
Step 3. Export Photos to Mac
Click Open Folder to see the exported photos on the selected path of your computer, or click Finish to close the dialog.
Related Articles:
How to Restore iPhone System to Normal after iOS 11 Downgrade
How to Fix iPhone Stuck in Recovery Mode after iOS 11 Downgrade
How to Fix iOS 11 Downgrading Stuck on Apple Logo Issue
How to Restore Lost iPhone Data after iOS 11 Downgrade
Two Ways to Backup and Restore Data from iPhone
How to Fix iPhone System to Normal after iOS 11 Update
Prompt: you need to log in before you can comment.
No account yet. Please click here to register.
 (No Ratings Yet)


No comment yet. Say something...