By Selena KomezUpdated on January 25, 2018
[Summary]As we all know, backup our mobile data regularly is an important habit of protecting important data against loss. But how to backup or restore Samsung Galaxy Note 9 data safely and efficiently? This article will provide the best and most secure data backup software to help you back up and restore Samsung Galaxy Note 9 data when you need it.
It is reported that Samsung will soon start the development of the next generation of Galaxy Note smart machine—–Galaxy Note 9, code-named “Crown”. Galaxy Note 9 will be equipped with facial recognition capabilities, with 6.3-inch full-color curved screen, is expected early next year’s test produce.These advanced devices and features are attracting the attention of many Samsung enthusiasts. Although there is no clear report on the launch date, it is traditionally expected to be released in 2018.
If you plan to replace your old phone, then how to back up the Galaxy Note 9 data to computer should be one of the issues you need to consider.This is an era of inflation data, and backup data regularly can effectively reduce the risk of data loss. To handle unexpected situations such as possible file loss, data loss, or corruption, you should backup your files regularly and restore them when you need.Currently, there are many kinds of software and methods for backing up data on the market, but not every method is user-friendly and easy to operate. After careful screening and testing, now we will recommend a powerful data backup tool for you. This program can also help you to recover lost data, which can help you solve backup and restore Samsung Galaxy Note 9/Note 8/Note 7 data problems.
U.Fone Android Toolkit – Android Data Backup & Restore as a handy tool can successfully backup your precious data and restored the backup files for Galaxy Note 9 without deleting existing data.With this Android Data Backup & Restore program, you can backup and restore everything you want like Contacts, Message, Call History, Gallery, Videos, Documents, Audios, freely in a few simple clicks.In addition, this powerful toolkit can backup and restore various types of data saved in your Samsung Galaxy Note/Samsung Galaxy S, LG, Moto, Sony, Nokia, Google Nexus, and more Android device with computer.
The U.Fone Android Toolkit – Android Data Backup & Restore(Mac version/Windows version) compatible with Android 2.0 to Android 8.0.Here is the trial version for you to download on your Windows PC or Mac.


During the text instructions, there are some pictures displayed and some tips below to help you understand the process.
Step 1.Run Android Data Backup & Restore on Computer
Firstly, you should download the Android Data Backup & Restore on your computer and run it to start the process.

Step 2.Connect Galaxy Note 9 to Computer
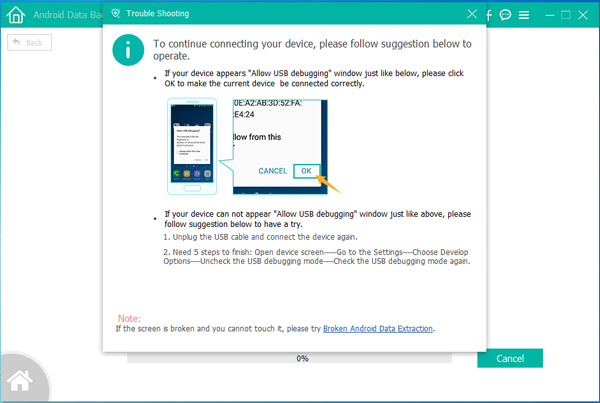
Secondly,link your device to the PC and wait a few minutes till the USB debugging mode on the device. If you are not sure how to do this, you can follow the instruction to try it.
Attention:You must tap “OK“ to allow the USB debugging on your phone when it shows up on the device screen.
Step 3.Select Data to Backup from Device to Computer
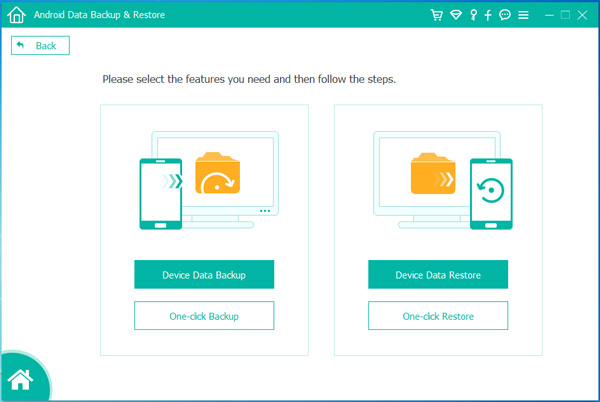
When it is successfully connected, you can choose to either backup or restore. Then click “Device Data Backup” option to go on.
Step 4.Choose File Types to Backup
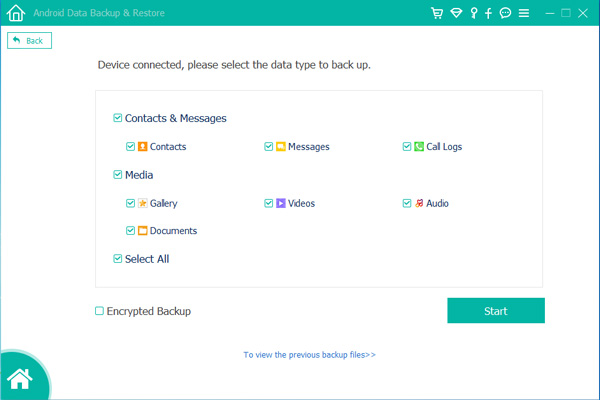
In this step you can choose the file types to backup,such as Contacts, Messages,Photos,Videos, etc,. and click “Start“.
Step 5.Select the Folder for the Output Files
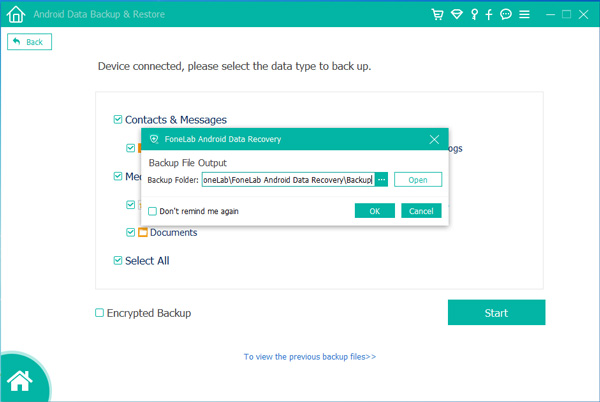
Now you need to select a location to save your backed up data and click “OK” to continue.
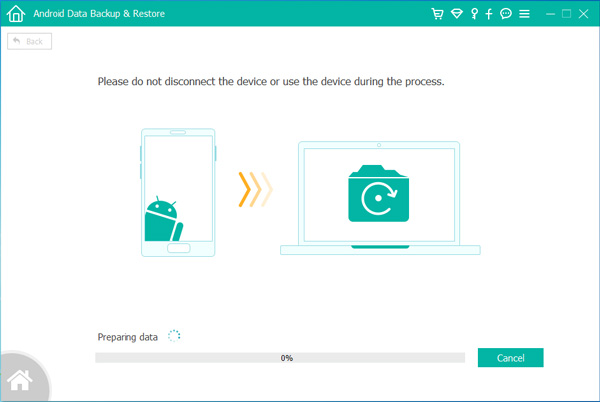
Step 6.Finish Backup Process
Just simply tick “Start” button to backup the selected data from Galaxy Note 9 to computer.
After finishing the backup process, now you can restore your data from the backup to Galaxy Note 9 or Other Devices by this U. Fone Android Toolkit – Android Data Backup & Restore.Actually the method is almost the same as the backup process.The only different step is the step 4. You should click “Device Data Restore” selection instead of ‘Device Data Backup’ selection.
Related Articles:
How to Recover Deleted Data from Samsung Galaxy Note 9
How to Transfer iTunes Music to Samsung Galaxy Note 9
How to Transfer iTunes Videos to Samsung Galaxy Note 9
How to Root Android on Computer with One Click
How to Manage Android on Computer
Prompt: you need to log in before you can comment.
No account yet. Please click here to register.
 (No Ratings Yet)


No comment yet. Say something...