By Selena KomezUpdated on December 29, 2017
“I need to transfer the iOS 11 photos from backed up on the computer to my old iPhone 6. However, the photos format not compatible with it. Any ideas to convert the photos from HEIC to JPG? Any tricks to fix it?”
HEIC is a new image format that used by default on new photos in iOS 11. When you take photos on iPhone 7 or newer models, you will get a high-quality photos with HEIC. It just as only at half of the file size compare with JPG photos, without any loss of quality, which can help you save storage on device while saving photos. Though HEIC is newly adopted, the incompatibility is inevitable. You may need a more common format, like JPG. For example, you need to convert the HEIC photos to JPG to save on non-iOS 11 device, you need to view the HEIC photos on devices that run on Windows, Android etc,. In these cases, you should convert HEIC to JPG windows. Here are the best way to convert iOS 11 HEIC photos to JPG files.
HEIC/HEIF Photos to JPG Converter is a terrific program designed for convert Apple’s latest iOS 11 images from HEIC/HEIF to JPG with ease. This powerful program is capable of converting all the HEIF/HEIC photos to JPEG with its original quality. HEIC/HEIF Photos to JPG Converter enable to convert HEIC photos on computer or in iOS 11 that you don’t need to transfer HEIC photos to PC first. After the conversion, you can view the converted JPG photos on different compatible mobile devices. The photos conversion is easy and simple, you can convert HEIC photos one at a time, or in batch.


Step 1. Install HEIC/HEIF Photos to JPG Converter on Computer
Download and install the HEIC/HEIF Photos to JPG Converter and launch it on computer.
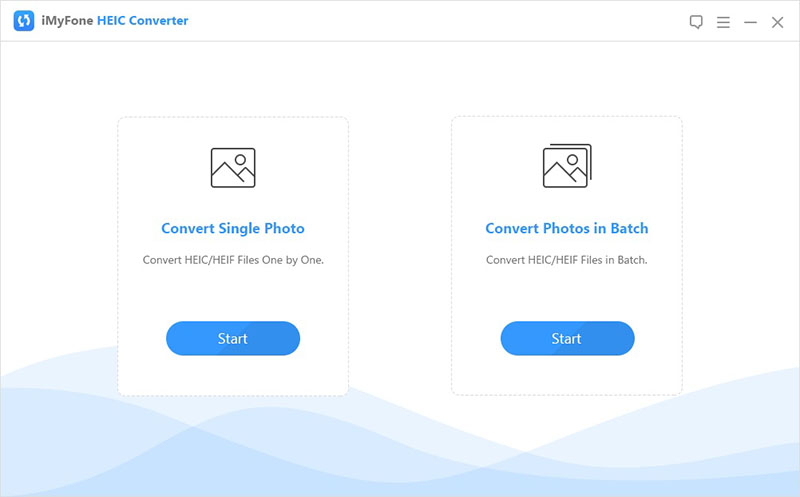
Step 2. Select the Conversion Mode
Select the function that suit you either convert single photo or convert photos to batch.
Step 3. Select Photos to Convert
Click on “Select files” to pick out the files you want to convert.
Step 4. Select the Quality of Converted Photos
Click on “Convert” and then select the photo quality.
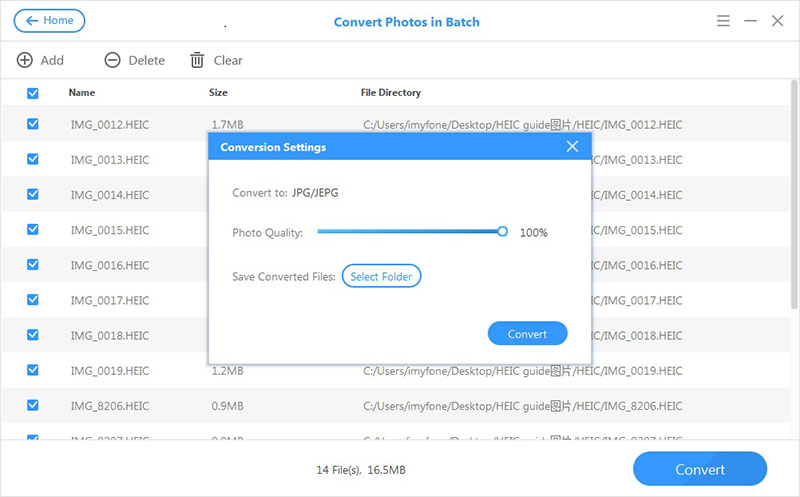
Step 5. Select the Target Folder
Select the target folder to save the converted photos.
Step 6. Begin to Convert Photos from HEIC to JPG
Finally, click “Convert” to begin the process and then preview the converted photos in the folder when you are done.
Related Articles:
4 Ways to Transfer Photos from Computer to Mobile Phone
How to Transfer Photos from Computer to iPhone
How to Transfer Photos from Computer to iPod
How to Transfer Photos between Computer and Samsung
How to Manage Files on iPhone X/8/7/6S/6
Prompt: you need to log in before you can comment.
No account yet. Please click here to register.
 (No Ratings Yet)


No comment yet. Say something...