By Selena KomezUpdated on November 21, 2016
“I try to copy the birthday photos from computer to my new iPhone 7 but it was failed.I don’t know why.Anybody give me some extra advice to transfer the photos to my device conveniently?”Emma
Simple as it sounds,I guess a lot of people are confused about this:How to easily transfer photos to iPhone whatever from computer,iTunes library or other mobile devices.So we thought we’ll get this right. It’s a page that guide you to transfer photos to iPhone 7/SE/6S/6 correctly.Most of us are like to take photos everywhere and are accustomed to browse photos on device or share it with others anytime.However,a part of person reflect that the make some problems when try to transfer photos from computer/mobile device to iPhone 7.Now we are going to share the solutions available to complete the photos transfer task on iPhone 7.
There is no more better than use iOS Manager to export photos to iPhone 7/SE/6S/6,it’s an useful program to transfer photos between computer and iPhone/iPad/iPod,transfer photos between iOS/Android device and iPhone/iPad/iPod.Furthermore,this program support to transfer & manage videos and music for iOS device.Not only iPhone 7,all the functions of iOS Manager is applicable to all models of iOS devices,such as iPhone SE,iPhone 6S/6/5S/5,iPad & iPod.


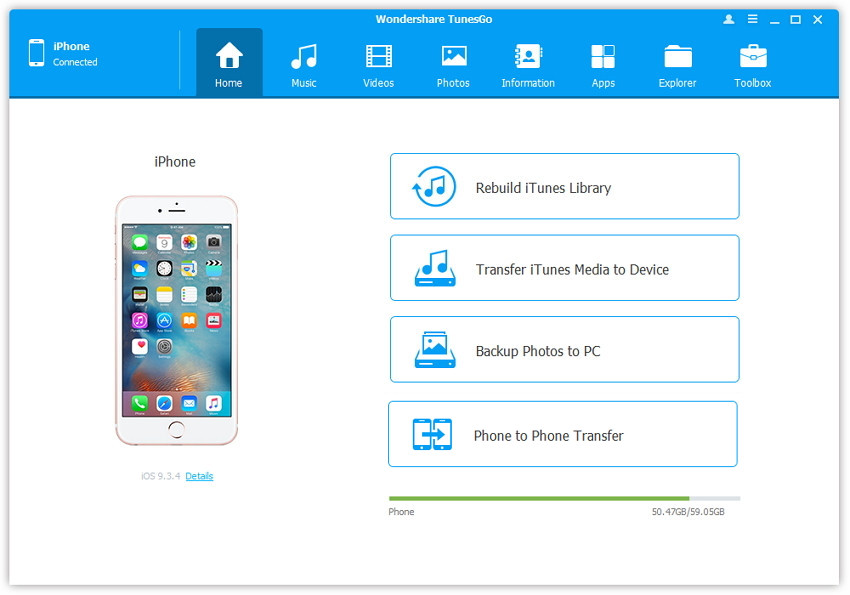
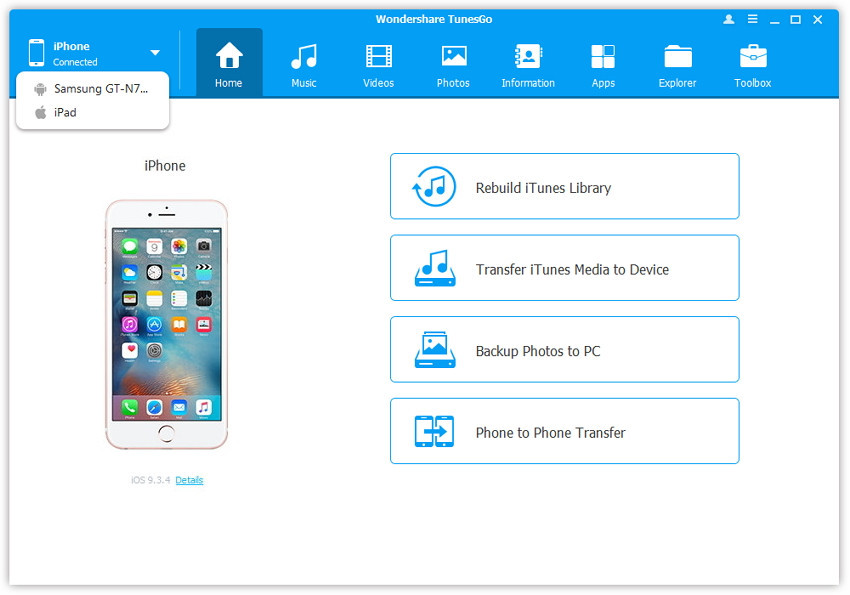
Step 1.Launch iOS Manager and connect your iPhone 7 with the computer.
Method 1:Transfer Photos by Tapping Buttons
Step 2.Add photos from your computer to your iPhone 7
Click Photos icon at the top of the main interface, then select the specific option Photo Library. Please note that Camera Roll, Photo Stream and Photo Shared are not available to add photos.
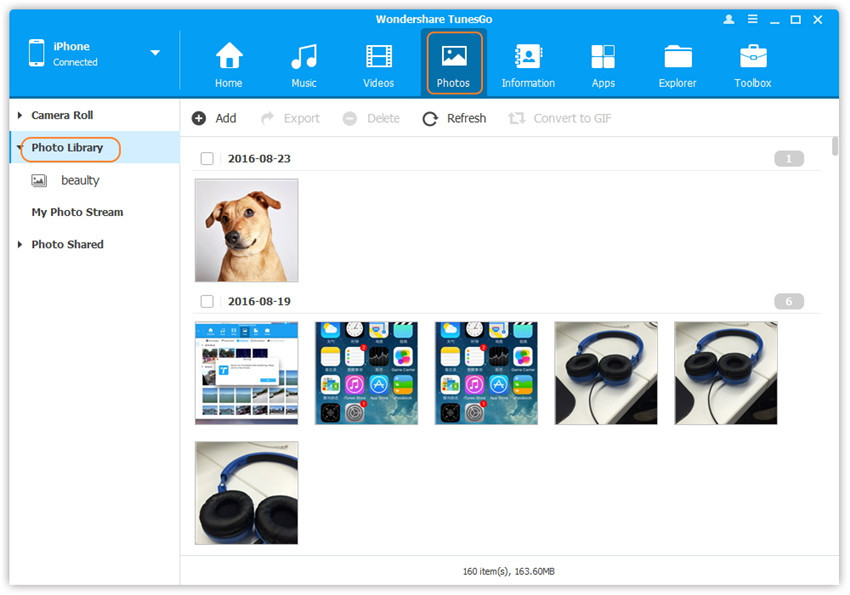
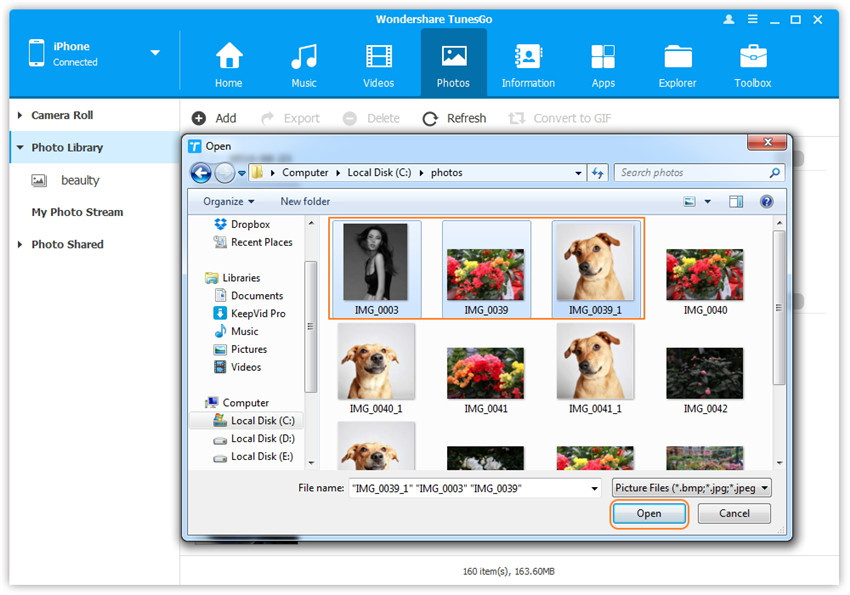
Later,click Add and then select Add File or Add Folder to add photos from your computer.If you only want to select some photos,then click Add File, and then hold down Shift or Ctrl key to choose multiple photos; if you want to transfer all the photos in one folder, then click Add Folder. After that, click Open to import the selected photos. Here we only add photos to iPhone 7 by clicking Add File for example.

Method 2:Transfer Photos by Drag and Drop
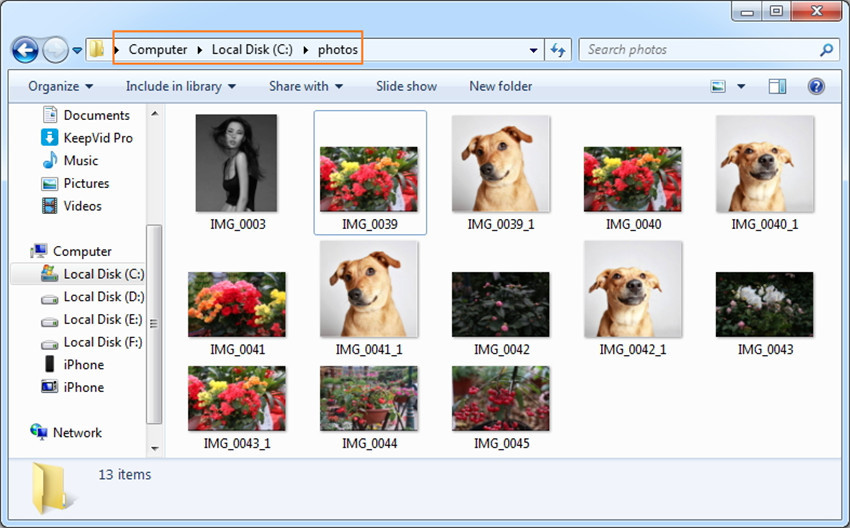
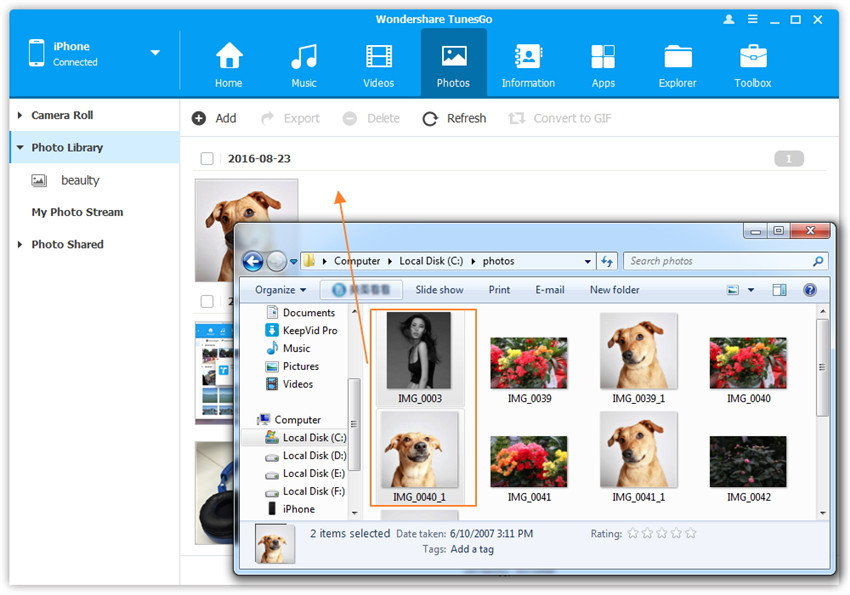
Step 2. Find photos on your computer.
Find and open the photo folder on your computer which includes the photos that you wish to transfer to iPhone 7.
Step 3.Export the photos to iPhone 7 by Drag and Drop
Click Photos icon on the main interface of iOS Manager,then go to the Photo Library window.Drag and drop the selected photos from your computer to the Photo Library window of iOS Manager.
Note:With the two methods above, you can also select to add photos to one of the photo albums under Photo Library.

Method 1: Transfer All The Photos With One Click
Step 1.Launch iOS Manager and connect your iPhone 7 with the computer
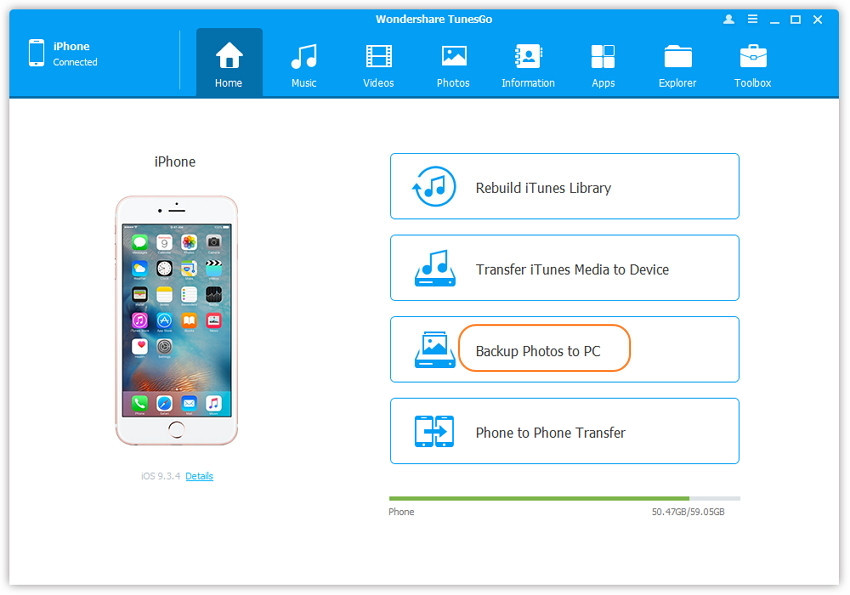
Step 2. Backup photos to the computer
If you use Windows PC:
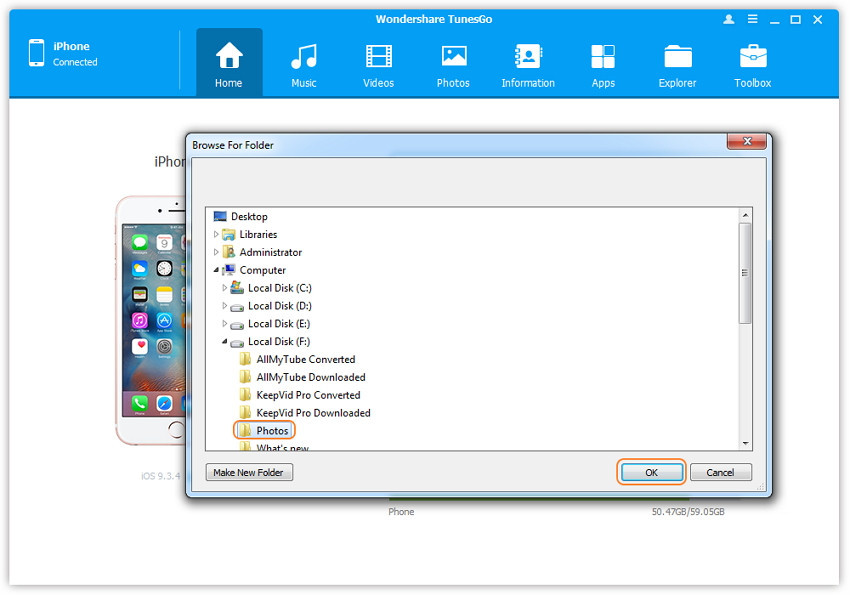
Click Backup Photos to PC icon on the main interface. From the pop-up window, browse and select the destination folder for photos, click OK to start the export.
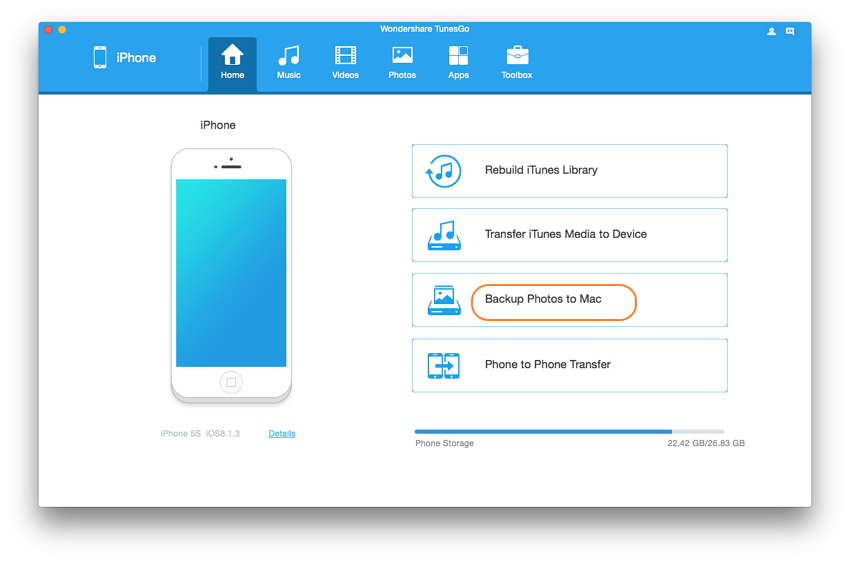
If you use Mac:
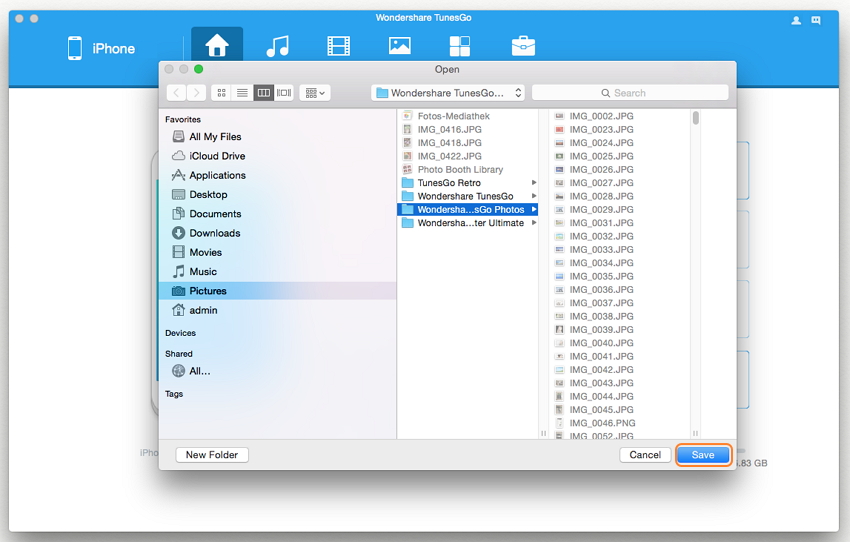
Click Backup Photos to Mac icon on the main interface. From the pop-up window, browse and select the destination folder for photos, click Save to start the export.
Step 3. Export Photos to Computer
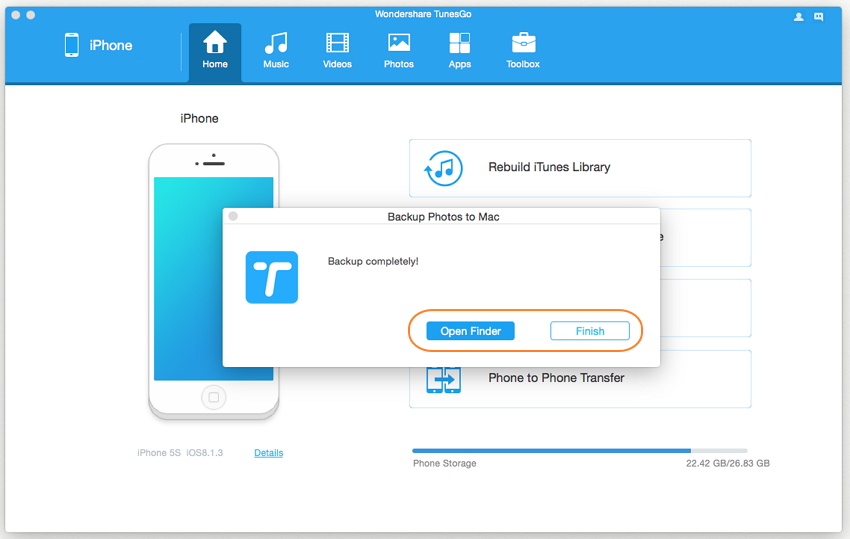
Click Open Folder to see the exported photos on the selected path of your computer, or click Finish to close the dialog.
Method 2: Selectively Transfer Photos by Tapping Buttons
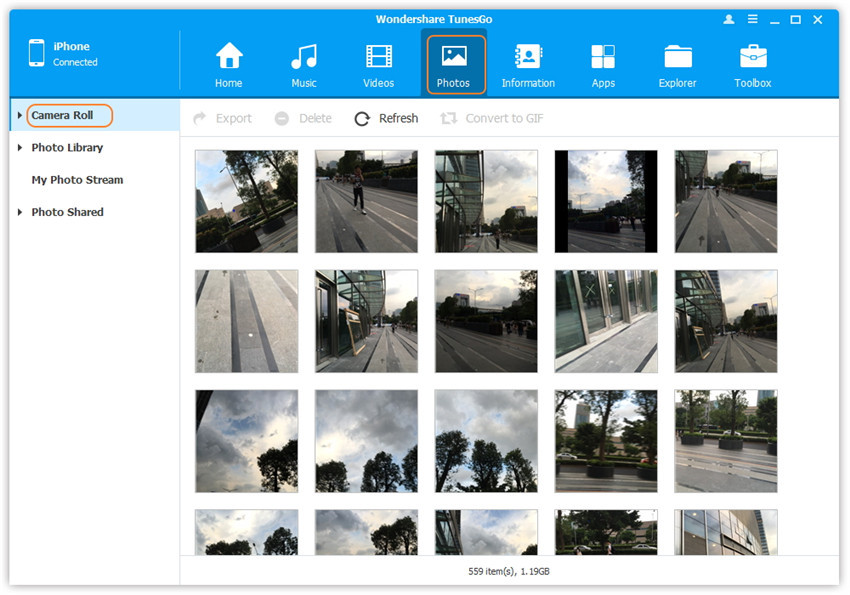
Step 1. Launch iOS Manager and connect your iPhone 7 with the computer. Then click Photos icon at the top of the main interface, you will enter the default photo type: Camera Roll.
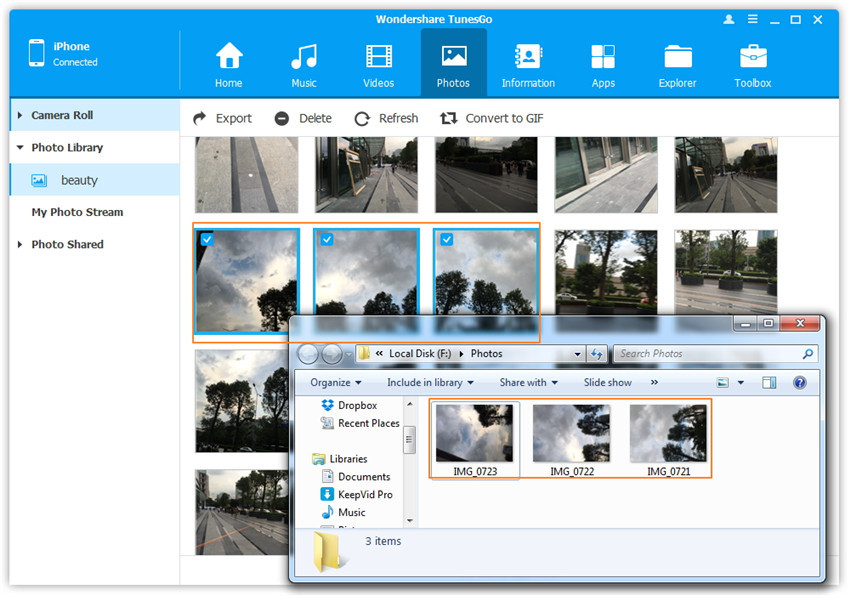
Situation 1.Transfer Photos from iPhone 7 to Computer Selectively
Step 2. Export photos from your iPhone 7 to the computer.
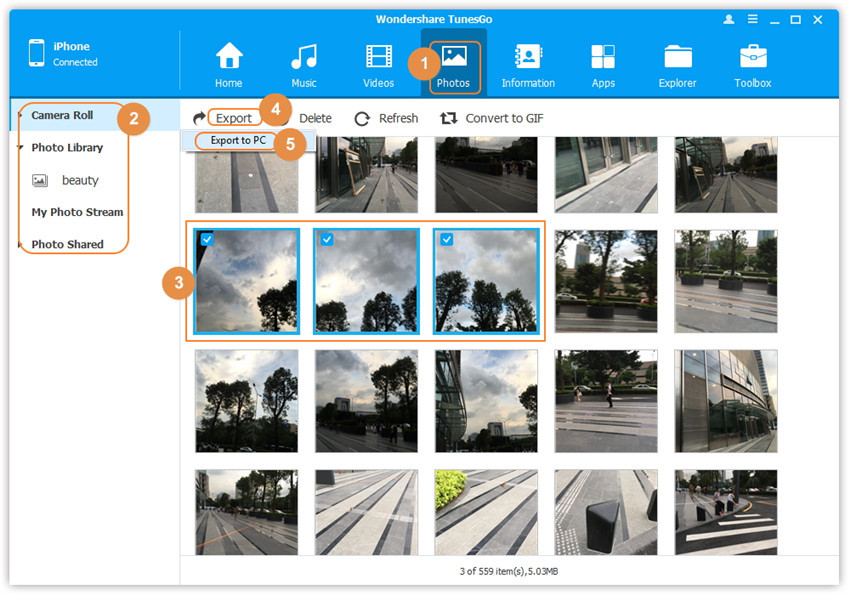
a. Select a specific photo type: Camera Roll/Photo Library/ Photo Stream/Photo Shared( Camera Roll is the default type), all the photos under this type will be shown on the right panel. Optionally, you can select one specific album under one photo type to enter the album window, then all the photos in this album will be shown on the right panel. Later, check the photos you want to transfer to your computer, and click Export > Export to PC or right-click on the selected photos and then select Export > Export to PC from the drop down list. Here we only make photos under Camera Roll type for example.

b. Browse and choose the target folder on the computer to export. And click OK to start the export process.

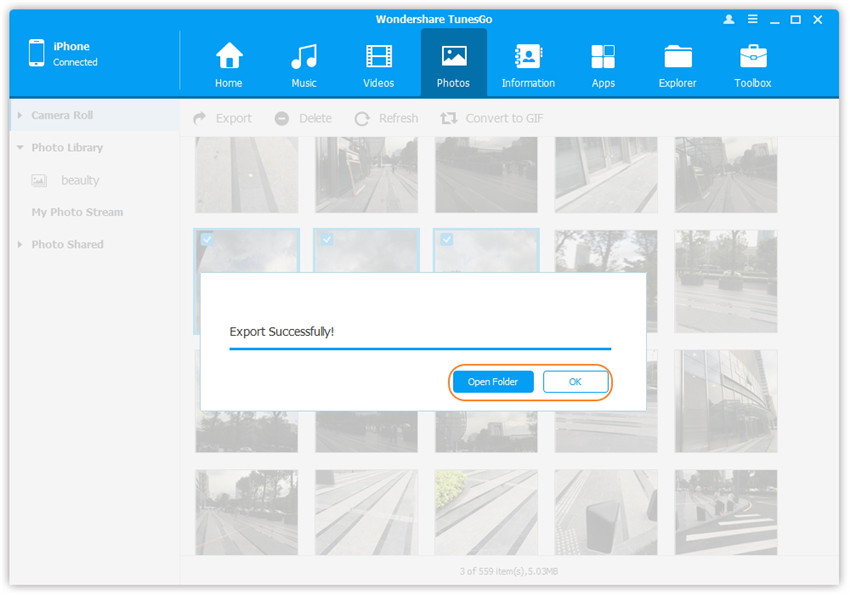
Step 3. Export successfully
Click Open Folder to see the exported photos on the computer or click OK to close the dialog.
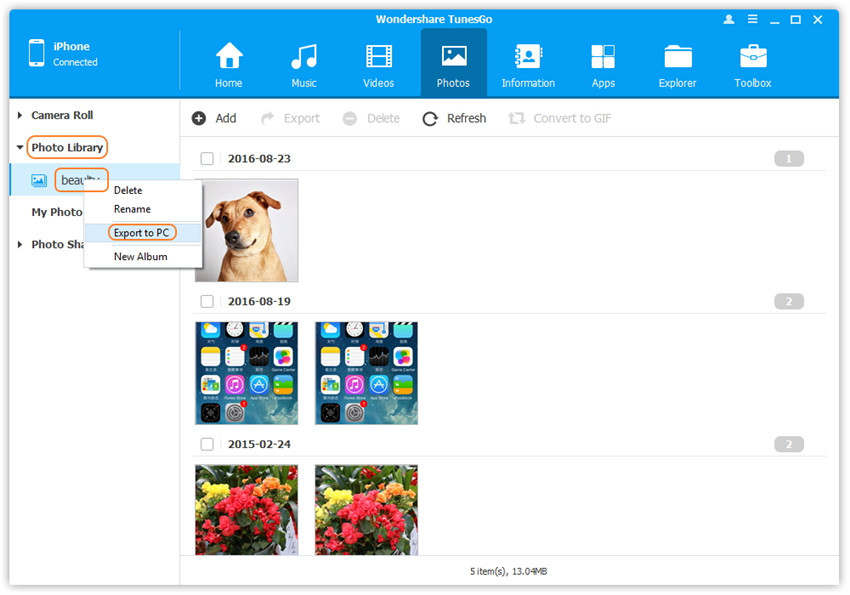
Situation 2. Transfer All The Photos in One Photo Type from iPhone 7 to Computer
Step 2. Select a specific photo type: Camera Roll/Photo Library/ Photo Stream/Photo Shared, right-click on it, and choose Export to PC from the drop down list. After that, browse and select the target folder on your computer to export. Please see the screenshot to transfer all the photos in Photo Library below for reference.

Situation 3. Transfer All The Photos in One Photo Album from iPhone 7 to Computer
Step 2. Select a specific photo album under Camera Roll, Photo Library, Photo Stream or Photo Shared, right-click on it, and choose Export to PC from the drop down list. After that, browse and select the target folder on your computer to export. Please see the screenshot to transfer all the photos in the “beauty” album under Photo Library below for reference.
Method 1: Transfer All The Photos
Step 1. Launch iOS Manager and connect iPhone 7 with the computer
Launch iOS Manager and connect more than one iPhone/iPad/iPod/Android device with the computer, here we name the connected devices: A, B, C.
Step 2. Select the source device from which you want to transfer contents
Select the source device A, and click Phone to Phone Transfer option on the main interface. Then a new window will pop up.
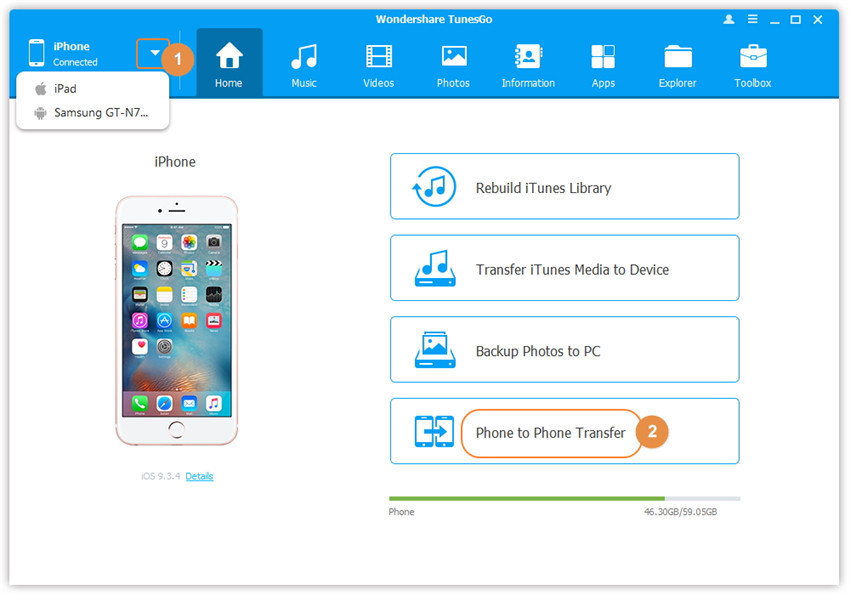
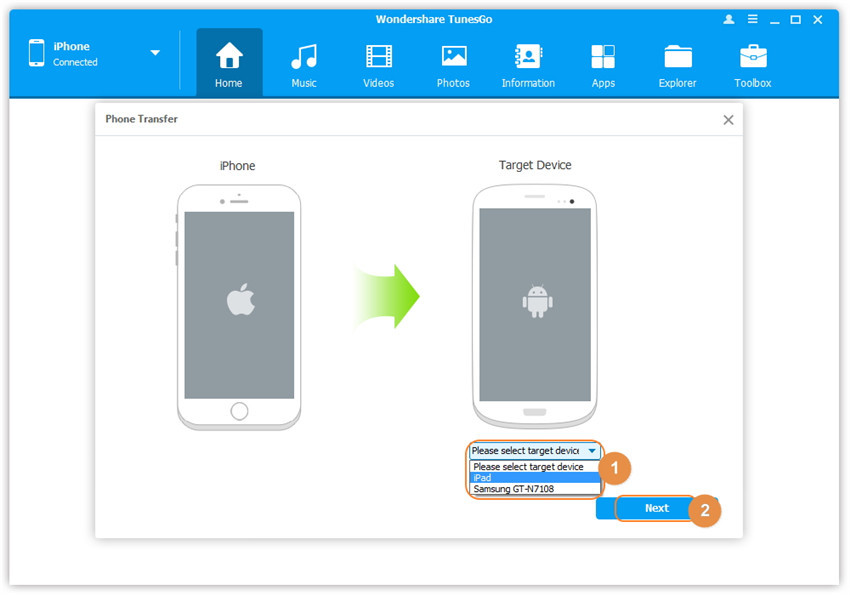
Step 3. Select the target device to which you want to transfer contents
From the pop-up window, select the target device B or C from the drop-down list and click Next.
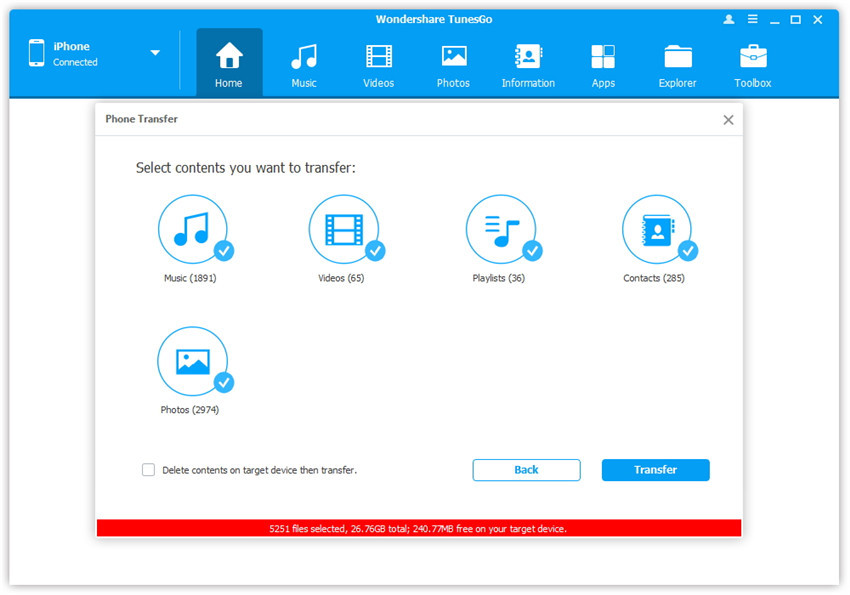
Step 4. Transfer contents from one device to another
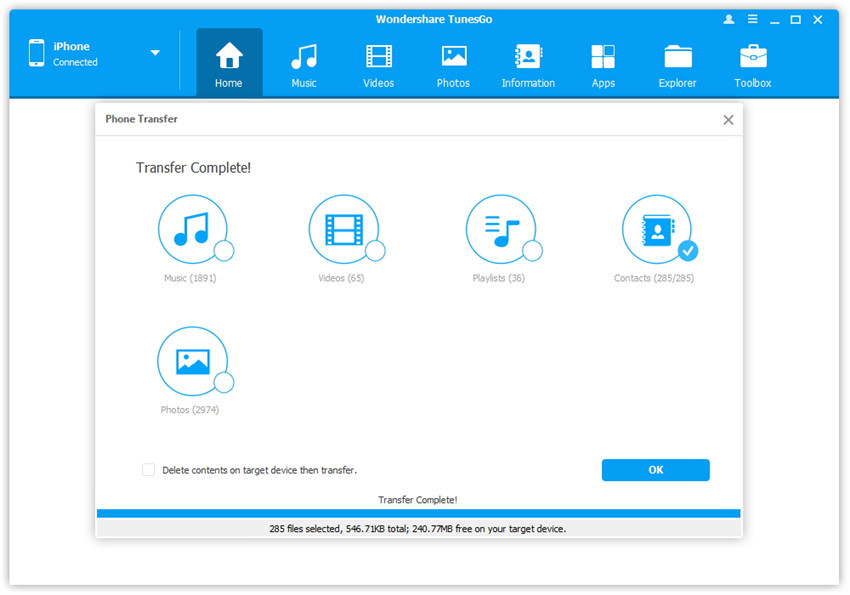
By default, all the content on your source device A that can be transferred are checked, namely Music and Videos, Playlists, Photos, Contacts( Note: Contacts are not supported by Mac version). You can uncheck the contents which you don’t want to transfer. Then, click Transfer. In the whole transfer process, DO NOT disconnect either of the devices. When the transfer completes, click OK.
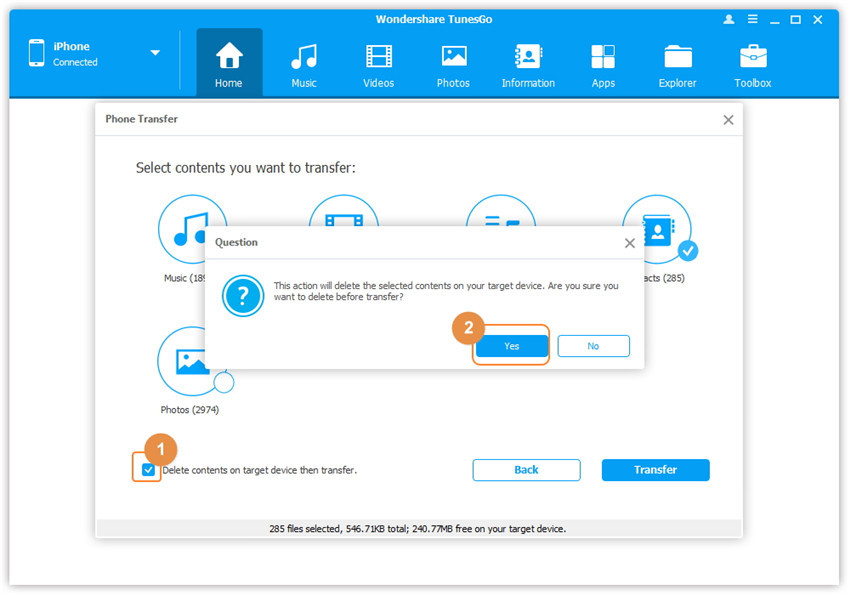
Note: Only for Windows version, you’re enabled to tick the option: “Delete contents on target device then transfer” before clicking Transfer button, then the selected contents on the target device will be deleted firstly before the transfer.
Method 2: Transfer Photos Selectively
Step 1. Launch iOS Manager and connect iPhone 7 with the computer
Launch iOS Manager and connect more than one iPhone/iPad/iPod/Android device with your computer, here we name the devices: A, B, C.
Step 2. Select and transfer photos between devices
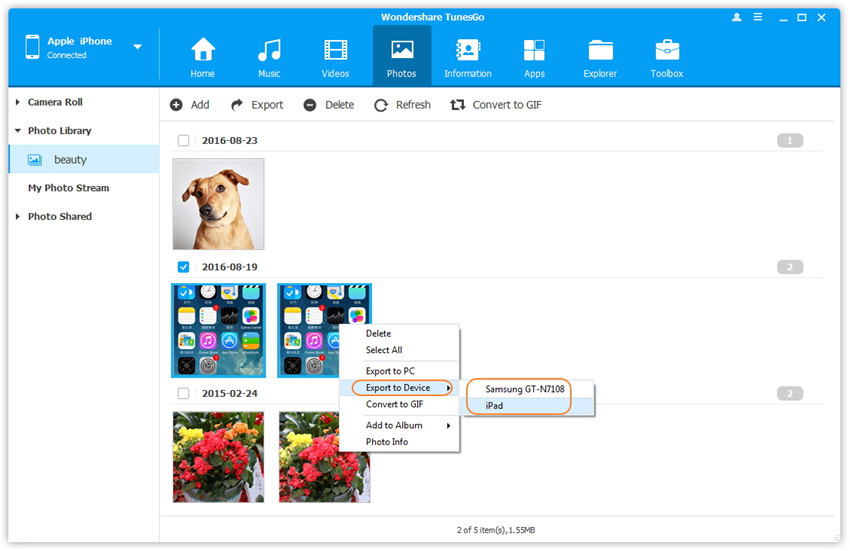
Select the device A from which you want to transfer photos, and click Photos icon at the top of the main interface, then select a specific photo type: Camera Roll/Photo Library/ Photo Stream/Photo Shared( Camera Roll is the default type), all the photos under this type will be shown on the right panel. Optionally, you can select one specific album under the photo type to enter the album window, then all the photos in this album will be shown on the right panel. After that, check the photos which you want to transfer from A to B or C, then click Export > Export to Device > B or C. As for the following screenshot, the selected photos in “beauty” album under Photo Library on the iPhone 7 can be transferred to the Samsung Phone or another iPad.
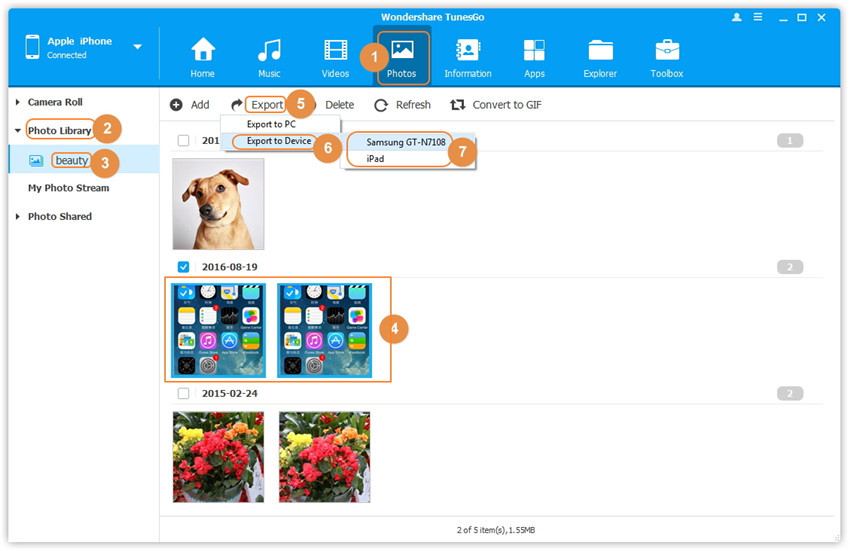
Note: Here you can right-click on the selected photos and then select Export to Device > B or C as well.
Related Article:
How to Transfer Music from Computer to iPhone 7/SE/6S/6
How to Sync Videos from Computer to iPhone 7/SE/6S/6
How to Transfer Photos from Computer to iPod
How to Transfer Music from Android to iPhone/iPad/iPod
How to Transfer Music from iTunes Library to iPod
Prompt: you need to log in before you can comment.
No account yet. Please click here to register.
 (No Ratings Yet)


No comment yet. Say something...