Many people use Samsung Galaxy S and Alpha series smart phone, like Galaxy A9,A8,A7, S7 Edge/S7, S6,S6 Edge. The Samsung Galaxy A9/A8 running Android 5.1 to Android 6.0 Lollipop.Some users like taking photos by Samsung Galaxy A9,A8 for it’s HD camera. Once the important pictures lost or deleted by accident, lost contacts and SMS due to failure Android OS upgrading or rooting.Don’t worry,we still can recover them back to Samsung Galaxy A9/A8/A7/A5 without backup.
Samsung Galaxy Alpha Data Recovery: Retrieve Lost Data from Samsung Galaxy A9/A8/A7,etc,.
Lost data on your Samsung Galaxy A9/A8/A7? Accidentally deleted files on your Galaxy Alpha series phone? If you want to restore lost text messages, contacts, photos, documents from Galaxy A9,A9 Pro,A8 smartphone,you may the help of Android Data Recovery software, which is a quick, simple and safe data recovery for Samsung users to recover lost contacts, messages, photos and other lost data from Galaxy A9/A8. No matter you accidentally deleted files or corrupt your Android Samsung OS through software update or ROM flashing, the Android Data Recovery can recover your lost data on Galaxy A8/A9 smart phone,because the Galaxy A9/8 running Android 6.0 Lollipop comes. However,with the help of a Android Recovery,you can restore contacts, text messages, call history, photos, music, videos, android documents, WhatsApp chats and attached files from Samsung Galaxy A8/A9/A7/A5,etc,.
* How to Recover Data from Broken Samsung Phone
* How to Manage Samsung Data on Computer
Best Data Recovery Software for Samsung Galaxy A9/A9 Pro/A8/A7/A5
Android Data Recovery not only can help you recover deleted data from Samsung Galaxy A8/A9,but also support restore contacts, SMS, photos, videos and other document from Samsung Galaxy S7/S6/S5/S4/S3, Galaxy Note 5/4/3/2, Samsung Ace,etc,. No matter your Samsung data lost due to accidental deletion, factory restore, formatting, rooting, flashing ROM, or Android system crash. The Android Data Recovery software also recover other data ,like Photos,Messages,Videos,call logs,WhatsApp, etc,. And supports any other Android phones and tablets running Android L, 4.4 and newer, Android 3.0 to 4.3, Android 2.3, Android 6.0.1, Android 7.0, Android 7.1.1 or earlier.


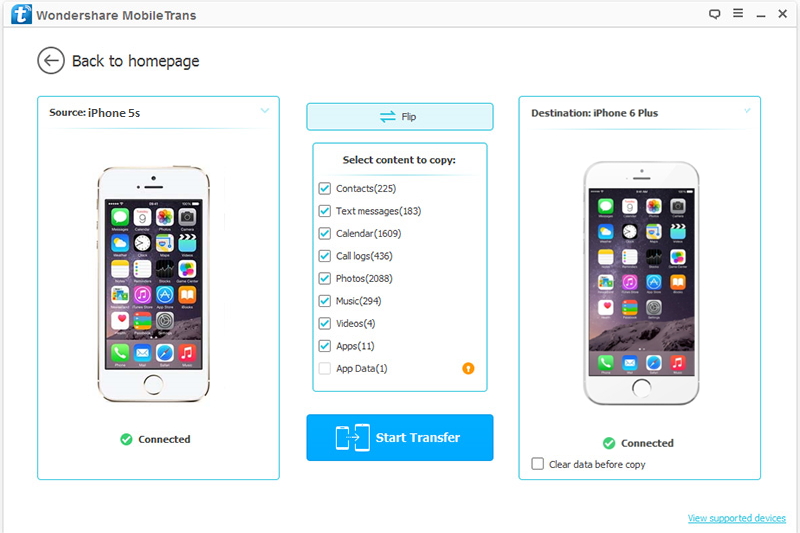
In additional,if you have buy a new Samsung Galaxy A8,and you use Samsung Galaxy phone or iPhone before,please read this use guide about Transfer Data from iPhone to Android; Transfer Data from Samsung to Galaxy S6/S7.
Recover Deleted Photos,Pictures from Samsung Galaxy A8/A9/A7/A5
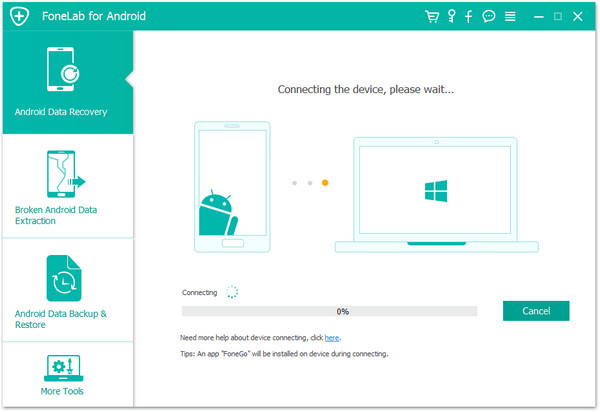
Step 1.Launch Samsung Galaxy Data Recovery and Connect A8 to PC
After downloading, install and run it on your computer. Use your USB data cord to connect up your Samsung Phone and computer.

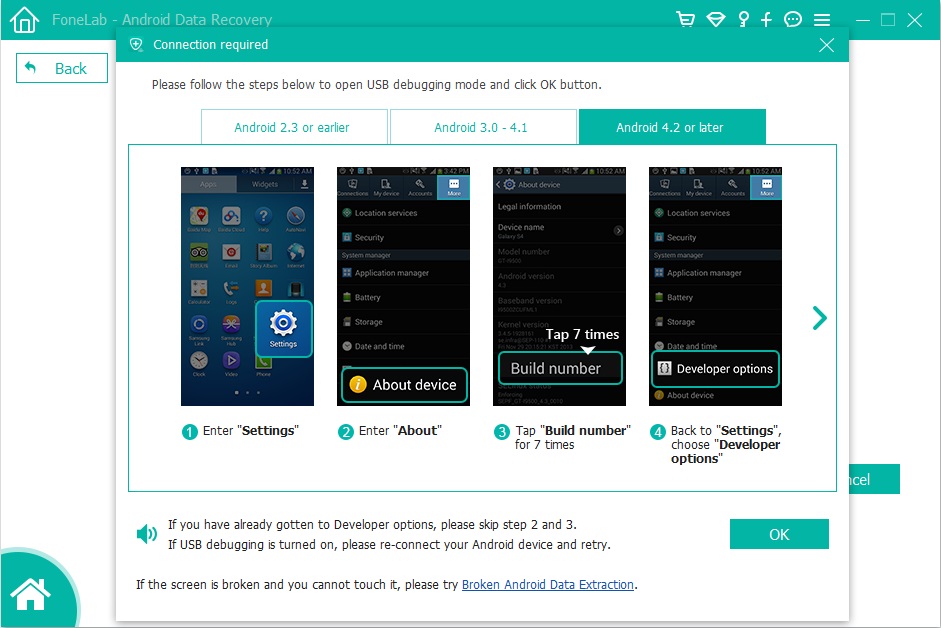
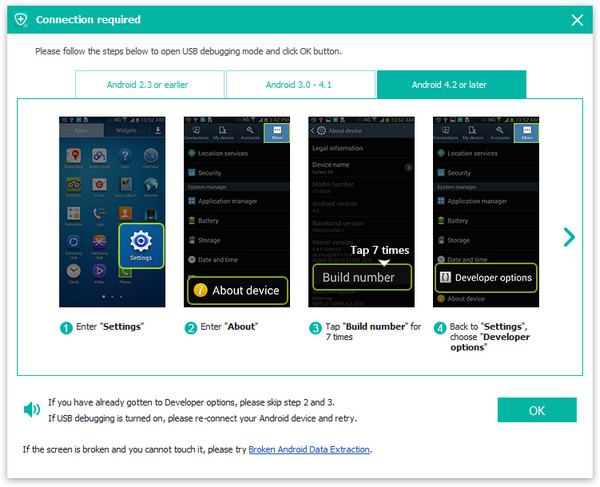
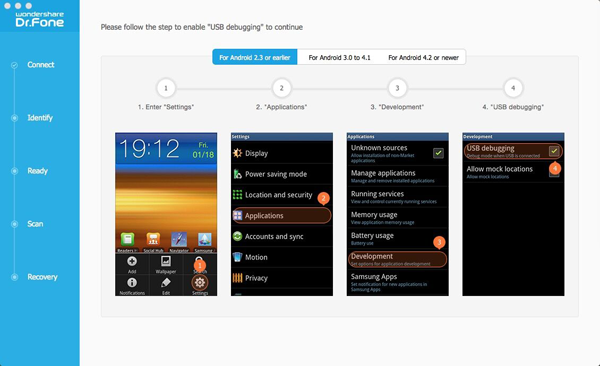
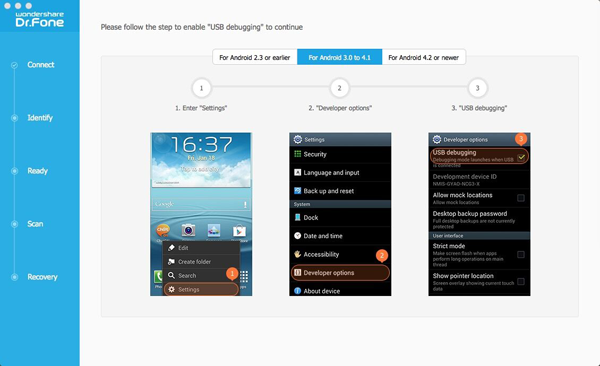
Step 2.Enable USB Debugging on Samsung Galaxy A8
Samsung data recovery tool will also prompt you to enable USB debugging before you can use it to recover Contacts from your Samsung Galaxy A8 Phones. Different Android versions may differ in the appearance or settings of this option. Below screenshot shows different methods to enable USB debugging for Android 2.3 or earlier, Android 3.0 to 4.1, Android 4.2 or newer versions.

Tips:For Galaxy S7 or S7 edge,please click “OK” on the phone and go to next step.

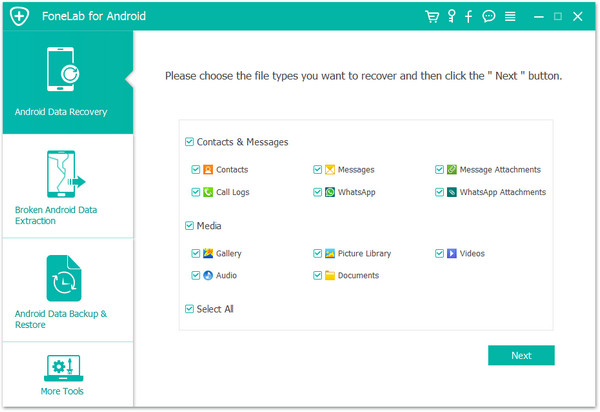
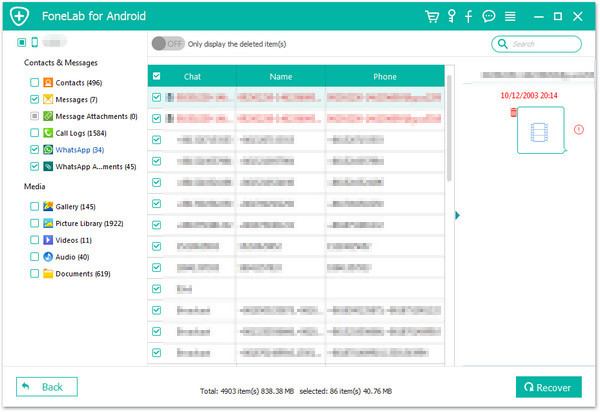
Step 3.Select Files to Scan by Program
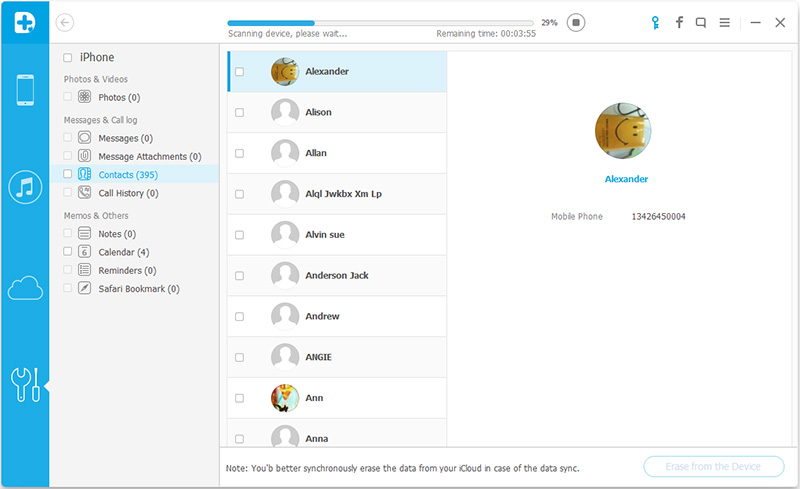
If done, you need to select the type of files including contacts, text messages, photos, videos, and more. Then you can choose “Contacts” and tap “Next“.

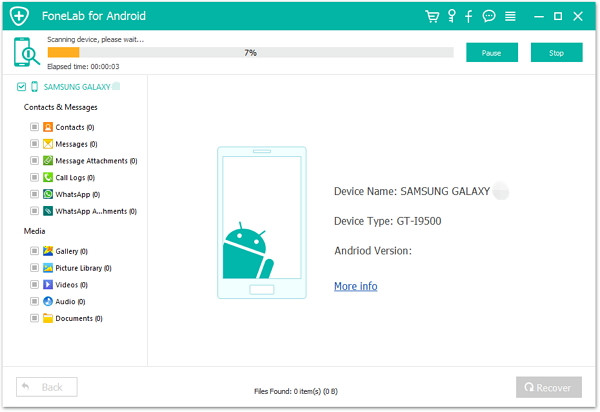
You’ll get a window as follow on your device after your device is detected by the program.Tap “Allow” to enable the program to scan your Samsung for deleted data.

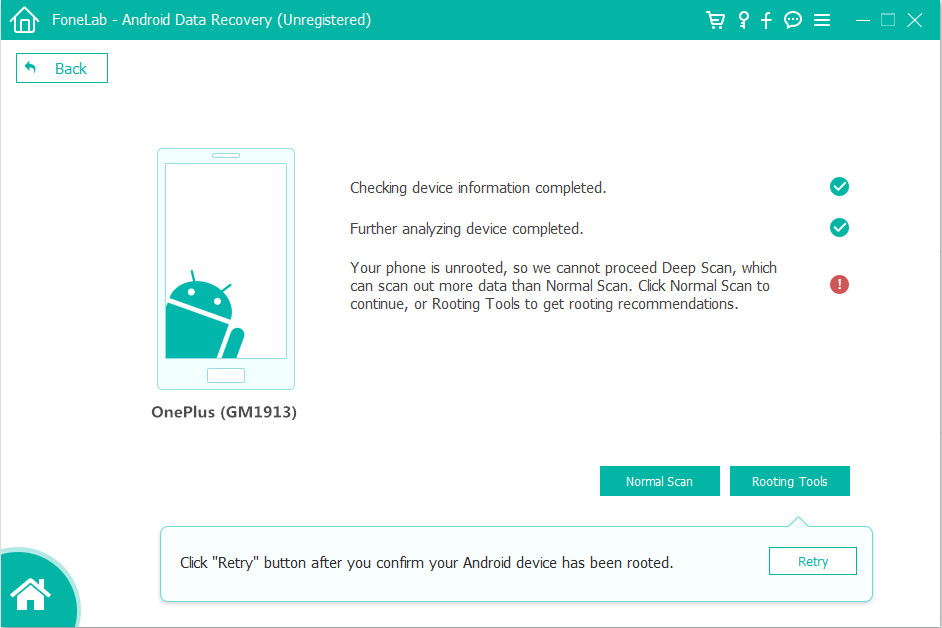
Now the program will begin to analyze data on your Samsung:

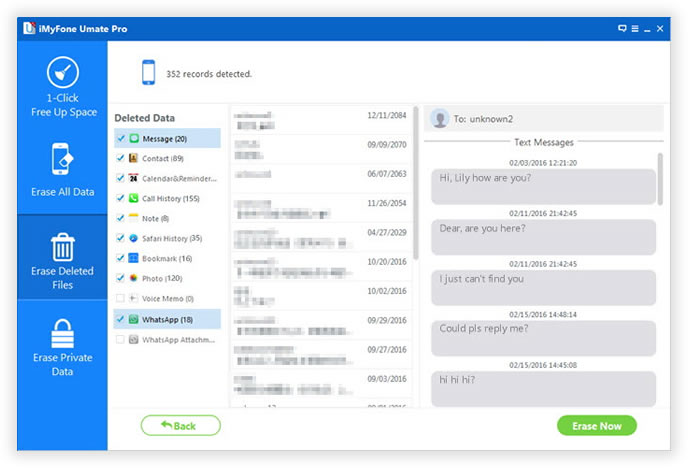
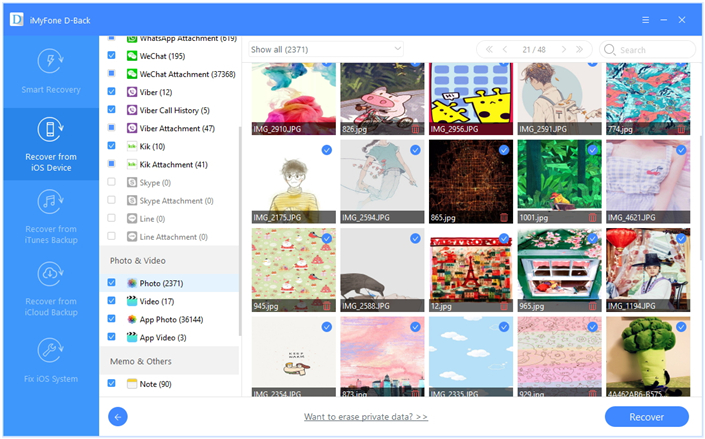
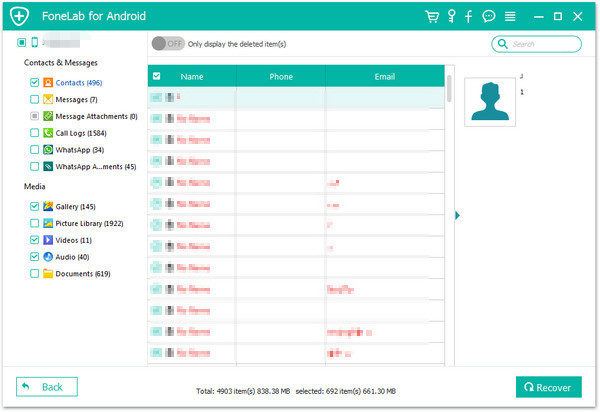
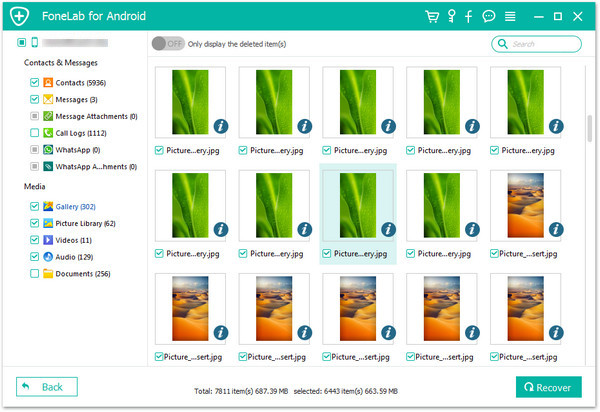
Step 4.Preview and Selectively Recover Deleted Pictures from Galaxy A8
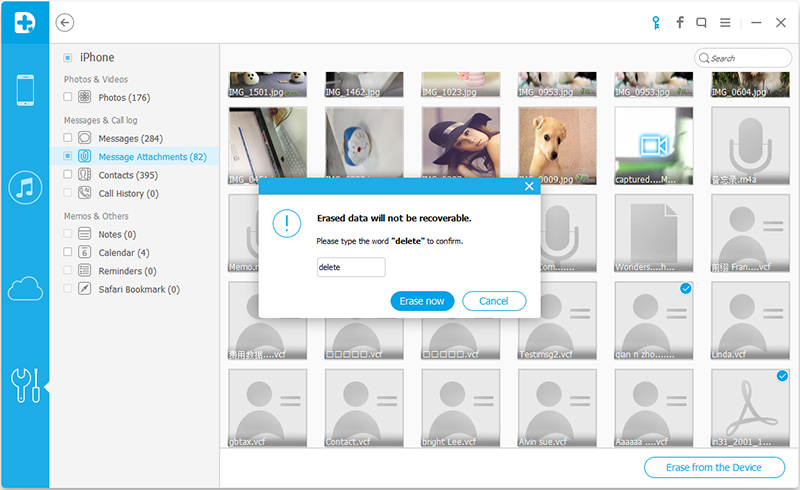
If the scanning is finished, all the scanning result will being display in detail. You are allowed to preview them one by one. After preview, you can recover lost contacts, messages, whatsapp, gallery, videos, audio and documents from Samsung smartphone. In additional,you can mark those you need and click “Recover” to save them on your computer in CSV, vCard or HTML format.

Well done! The Android Data recovery is truly very easy to get lost data back from Samsung devices ,You can also follow the above guide step by step to get back other lost files such as office documents, videos, music, emails, etc. under Windows 2000/2003/XP/Vista/2008/Windows 7/8/9/10 and MacBook easily.
Tips
1. Try not to use the Samsung Galaxy A9 / A8 / A7 / A5 after data loss, especially not for message sending and receiving, photo shooting, video recording, or any other operation that may generate large amounts of data. The new data may overwrite the missing data, making the files corrupt and can not be recovered forever.
2. In order for Samsung Data Recovery to recognize your Galaxy A9 / A8 / A7 / A5 phone, you must turn on USB debugging and connect it to your computer. This method is different for Galaxy phones running different Android OS version. Learn more about How to Enable USB Debugging on Samsung.
3. Regularly use Phone Transfer to back up your Samsung Galaxy phone. Some data may be corrupted, and then you can restore them. It is necessary to form a good habit.
Read More:
How to Restore Deleted Data on Samsung Galaxy S6/S7/S5/S4