By Selena KomezUpdated on November 08, 2018
As we all know iTunes wont let users drag music to flash drive,if you want to play Apple Music in the car through USB stick,you need to put Apple music on flash drive for car audio,this guide will show you an efficient methods to copy iTunes playlist and Apple Music songs to USB stick, SD card, flash drive or an external hard drive.
With an Apple Music membership, you get access to a whole world of music – any of the 30 million songs.However,you can only access Apple Music on these devices:
iOS Devices with iOS 8.4 or later
iTunes for Mac or Windows 12.2 or later
Android phones and tablets with Android 4.3 (Jelly Bean) or later
Even though you have downloaded Apple Music songs your iOS device or computer, you can’t copy them to your USB stick, SD card, flash drive or an external hard drive for listening outdoor without Apple Music app,for example: Play Apple Music and iTunes Playlist in a Car without iPhone connecting to car via Bluetooth
Actually,Apple company not allow users share, copy and play Apple Music on non-Apple devices,because Apple Music songs are DRM protected M4P file. If you want to enjoy Apple Music on MP3 players or other a device which is not in above list, you need an Apple Music converter to remove DRM and convert Apple Music M4P songs to MP3 first.
Apple Music Converter also is an iTunes M4P to MP3 Converter, iTunes DRM Removal, Apple Music DRM Unlocker,it allows you to easily not only can help you remove DRM protected from Apple Music songs and iTunes M4P files,but also allows you convert Apple Music M4P songs to MP3 at 16X speed on your Mac or Windows. What’s more, you don’t need to download the Apple Music songs to convert them since Apple Music Converter automatically syncs with iTunes Library and Playlists.After get the Apple Music songs in MP3 format,you can copy the converted Apple Music songs to USB flash drive for playing in the car.Let’s show you the easy guide to remove DRM from Apple Music and copy converted Apple Music songs to USB stick for playing in other media players.


Step 1.Add Apple Music Songs to iTunes Library on your PC/Mac
You can find the entire Apple Music category in iTunes sorted by artists, albums, playlists and songs. What you need to do is to select the songs that you prefer and add them to your iTunes library.
1)In iTunes, find the song, album, or playlist that you want to add in the New or For You tabs, or search within Apple Music.
2)Click the More Options icon to the right of the song or album name.
3)Click Add to My Music.
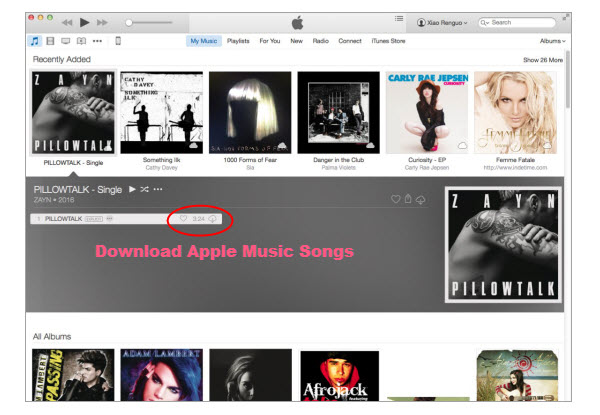
After that, check the song under My Music tab and click the cloud icon to download for playing offline.
Step 2.Download and Run Apple Music Converter on PC or Mac
The Apple Music Converter has both windows and Mac version. Download the right version and install it to your Windows PC or Mac.

Step 3.Select Apple Music songs you Want
Apple Music Converter loads all your iTunes Apple Music files automatically. Select and add the songs you would like to convert and transfer to USB flash drive to the Apple Music Converter.

Step 4.Choose MP3 as output format, and set profile and folder
Apple Music Converter converts Apple Music M4P to MP3 at 16x playback speed and supports multiple output formats: MP3, M4A, AC3, AAC, AIFF, AU, FLAC, M4R and more.
You can also customize output songs bitrate and sample rate as you like. Metadata information including Title, Artist, Album, Genre and Artwork will be preserved to output MP3/M4A songs. You can also customize them. Click Options button to customize output song name format, which can contain Title, Artist, Album, TrackID and DiskID.
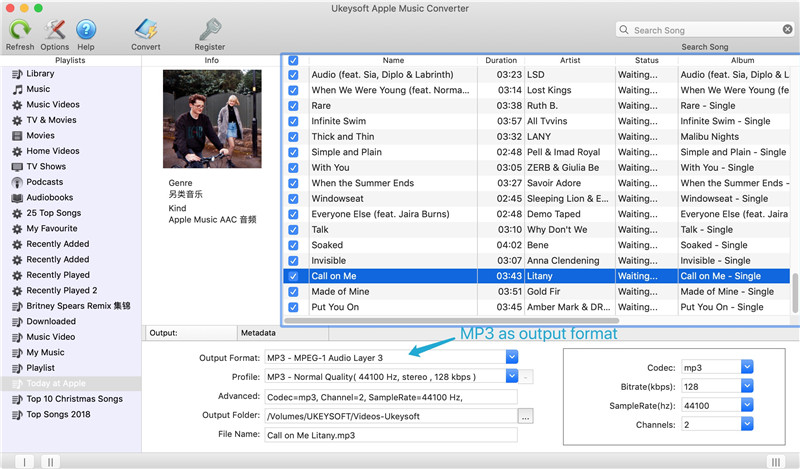
Choose MP3 as output format so that you can copy and transfer Apple Music to USB flash drive easily. You can also set the “USB flash drive” as output folder.
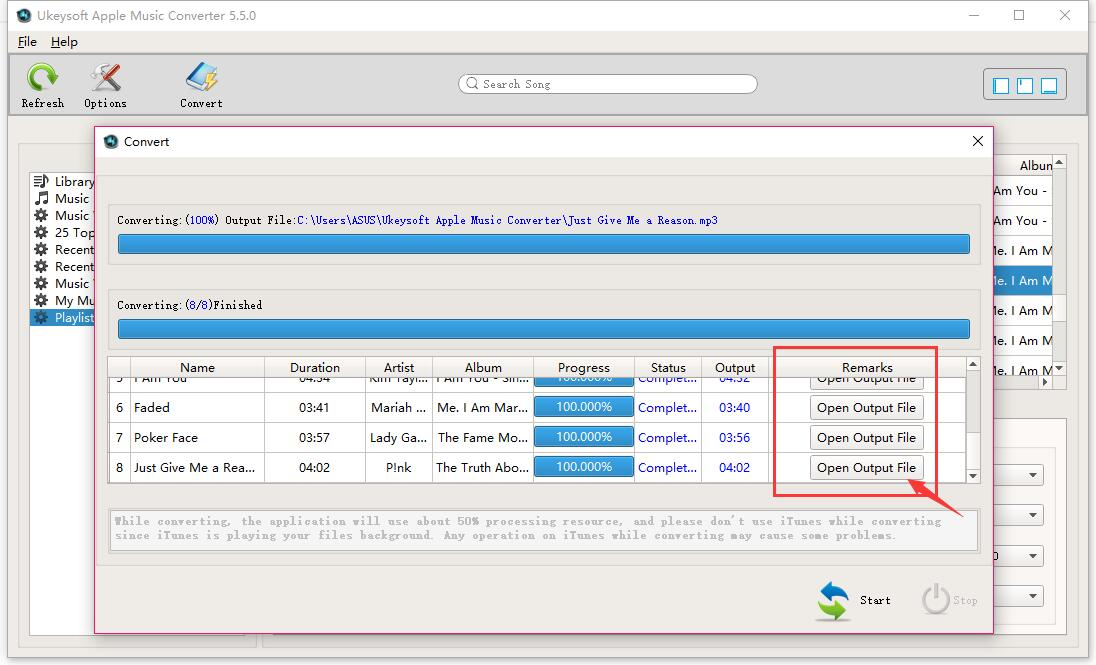
Step 5.Start Convert Apple Music to MP3 and Save onto the USB Stick
Click “Start Convert” button to remove DRM from selected Apple Music songs,and convert DRM protected Apple Music files to mp3 with the Apple Music Converter.After that,you will get DRM-free Apple Music songs in MP3 format in the USB Stick.
Tips:You can also use this Apple Music Converter to remove DRM from Apple Music and save the converted songs, playlist onto the computer,then move the converted Apple Music songs and playlist to the usb flash drive on a mac or PC.
That’s it. You can find the converted Apple Music songs in the destination folder. These MP3 songs are DRM-free and can be transferred to USB stick, SD card, memory card, MP3 player by plugging the USB device into your computer.Just download this Apple Music Converter and convert/put Apple Music to USB flash drive with ease.
Useful Tips: Movies purchased or rented from iTunes Store are also DRM-protected. If you want to remove DRM from your purchased or rented iTunes movies to play them anywhere you want, try this iTunes M4V to MP4 converter.
How to Play Apple Music on iPod Nano and iPod Shuffle
How to Set Apple Music Tracks as iPhone Ringtone
How to Play Apple Music on MP3 Player
How to Stream Apple Music on Samsung Galaxy
How to Convert iTunes M4V Videos, Movies to MP4
Prompt: you need to log in before you can comment.
No account yet. Please click here to register.
 (No Ratings Yet)


No comment yet. Say something...