By Selena KomezUpdated on November 09, 2018
Apple Music is pretty much the whole reason the HomePod exists. If you’re buying Apple’s HomePod, you likely have a vested interest in Apple Music. After all, it’s basically what HomePod was made for, and being able to play all of that goodness right on a compact speaker that fills your room with awesomeness is not a bad primary, baked-in feature to have. However, the question is how to play Apple Music on HomePod?
As we know, we can’t play Apple Music on HomePod directly, since Apple Music is DRM protected, it just allow to play Apple Music online under the subscription. HomePod is a powerful speaker that sounds amazing and adapts to wherever it’s playing. It’s the ultimate music authority, bringing together Apple Music and Siri to learn your taste in music. If you want to play Apple Music on a HomePod, you should convert Apple Music to common MP3 local music files, save it on Mac, or transfer it to an iPhone, then play the music on HomePod after connecting device to it via Wi-Fi or AirPlay. To do this, you should remove DRM protected from Apple Music first.
Apple Music Converter is specially designed to remove the DRM encryption from Apple Music and convert Apple Music songs to MP3 or other formats(M4A, AC3, AIFF, AU, FLAC, M4R, MKA. ). Then help you play the converted Apple Music songs on HomePod after connecting device to it via Wi-Fi or AirPlay. It can preserve the original quality in output files after conversion. Also, it can offer up to 16x speed for you, the process is efficiently. In addition, you can offline play back the converted local Apple Music files on any compatible media players, for example, iPhone/iPod, Android device, PSP/PS4, MP3 player, Xbox one.


Step 1. Import M4P Apple Music Music

Before you get started, please make sure you have add the Apple Music on iTunes first. After running Apple Music Converter on the computer, iTunes will run automatically. You can click the “Add Files” button from the bottom left of the software to browse and import the files from iTunes media library.
Step 2. Setting Output Format as MP3
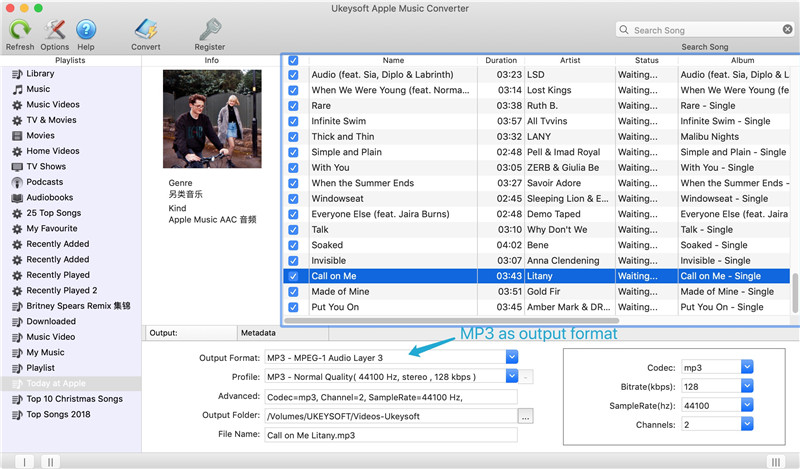
For converting Apple Music to local files for playing on HonePod, you should select the output format as “MP3“. Besides, you can also setting the conversion speed and other parameter of the converted music files.
Step 3. Start Apple Music Conversion
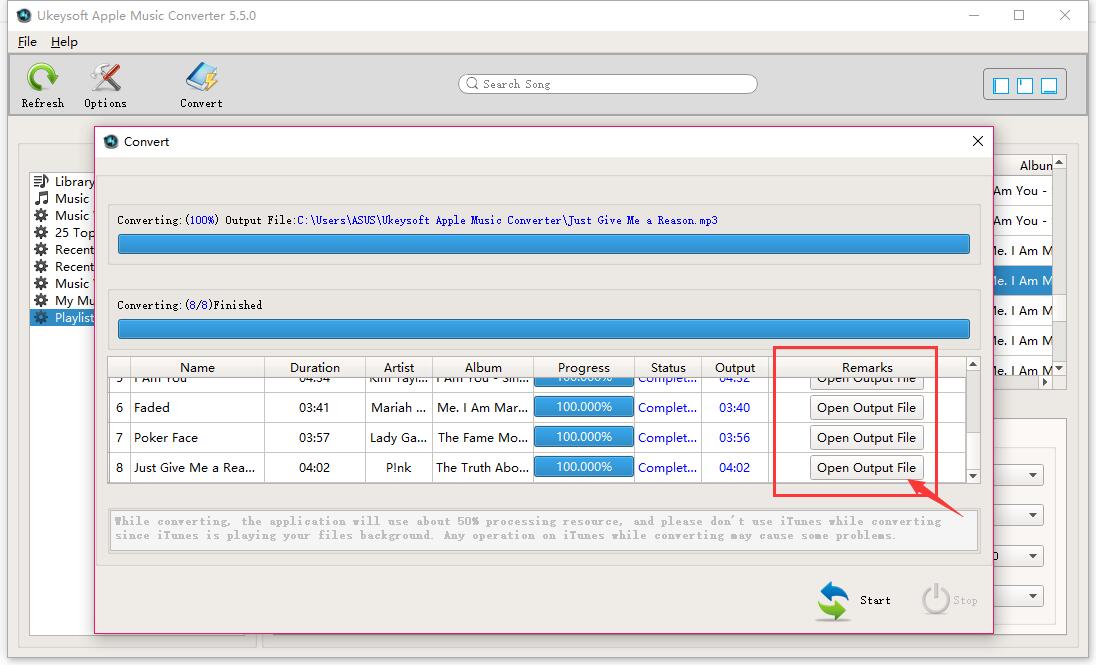
When all settings are ready, just simply click the “Start Convert” button to start the Apple Music conversion. All the selected files will be converted to MP3 files after converting.
Step 4. Connect Device to HomePod and Play Music
Once the conversion is completes, you can save the output music files on computer, or transfer the files to iPhone, then offline playing the music after connecting computer/iPhone with HomePod via Wi-Fi or AirPlay.
How to Remove DRM Lock from Apple Music Streams
How to Convert Apple Music to MP3 Files
How to Play Apple Music on iPhone for Free
How to Play Apple Music on Android Device without limits
How to Save Apple Music Songs to SD Card
How to Set Apple Music as Ringtone for Any Phones
Prompt: you need to log in before you can comment.
No account yet. Please click here to register.
 (No Ratings Yet)


No comment yet. Say something...