Summary: When you accidentally delete pictures,videos on Samung Galaxy S7,don’t worry,we will teach you two easy steps to scan and retrieve deleted photos,videos from Samsung Galaxy S7/S7 Edge,you need to connect your Samsung phone to computer,and then use a Android Photo Recovery to scan your Samsung phone for lost files.
Take Better Photos with Samsung Galaxy S7 Camera
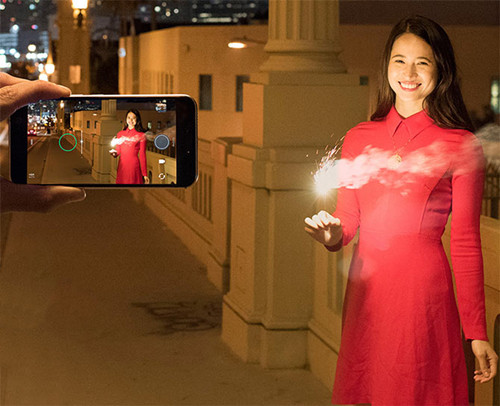
Are you one of numerous users of Samsung smart phone? Why is it so hot? One of the reasons may be that Samsung has one of the finest cameras, which can produce sharp photos.Never miss a shot-and make sure it’s good and bright. The Galaxy S7 is the first smartphone with dual-pixel technology, so it captures better photos in low-light environments and focuses faster than the blink of an eye. And with Quick Camera, all you need to do is double-tap the home button and start shooting.Samsung Galaxy S7 comes with multi-functionalities, including virtual shot, animated GIF, tracking auto-focus, beauty face mode, surround shot, and many others. All these features combine to help you shoot more beautiful photos by Samsung Galaxy S7,S7 Edge.
* How to Transfer Photos from iPhone to Samsung Galaxy
* How to Transfer Photos from Samsung to Computer
Photos Lost or Formatted on Samsung Galaxy S7
But what if you carelessly deleted or formatted the precious pictures you take on your Samsung Galaxy S7?We can find lots of question as “Is it possible to recover deleted pictures from my Samsung Galaxy S7?” “Can I recover a deleted photo on my Galaxy S7 Edge?” on the Internet.That’s the original intention why we create this useguide,you may read it throughly and you will get knowledge about recovering deleted photos from Samsung Galaxy S7 even though it not be useful for you right now but for later days in case.
Retrieve Lost Photos from Galaxy S7/S7 Edge
Android Photo Recovery is my recommendation and would be your best choice.It’s really a nice recovery program for users to recover lost photos from Samsung Galaxy S7/S7 Edge directly, besides,lost videos,contacts, messages, etc,. files can be retrieved.Various Samsung mobile phones, such as Samsung Galaxy S7/S7 Edge/ S6/ S6 Edge/ S5/S8/Note 7/Note 5 are applicable with this Android Data Recovery program.Furthermore,Android Data Recovery enpower to retrieve files from most of Android phones and tablet,insist of HTC,LG,Huiwei,Xiaomi,Motorola,Lenovo,and so farth.Free download the trial version of Android Data Recovery software below, and install it on your computer.


Part 1:How to Recover Deleted Photos on Galaxy S7/S7 Edge
The Android Data Recovery can help users recover various file types from Samsung Galaxy S7/S7 Edge, including WhatsApp,Messages & Contacts & Photos & Videos & Audio & Document.If you want to directly restore lost pictures,videos from Samsung S7,please connect your GS7 with computer and directly scan,recover your Samsung lost files;If your Samsung phone was broken,you can use another Broken Android Photo Recovery program to recover deleted files from all kinds of damaged Samsung devices including broken/dead/locked/blank Samsung phone or Samsung with broken screen, etc.

First of all,please free download the Android Photo Recovery(Windows/Mac) and install it on your computer.
Step 1.Connect Your Samsung Galaxy S7 Edge to Computer
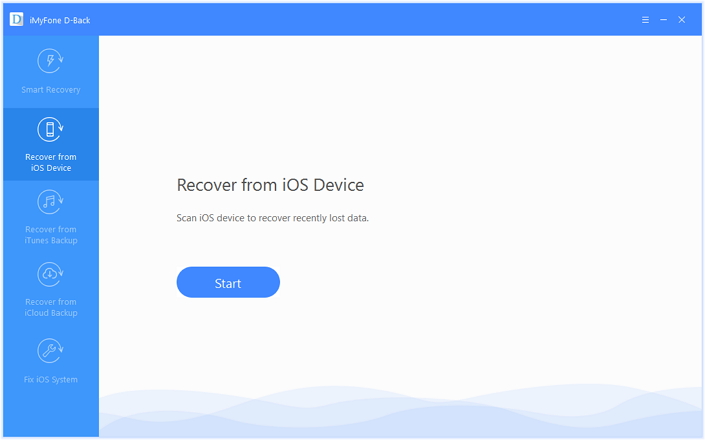
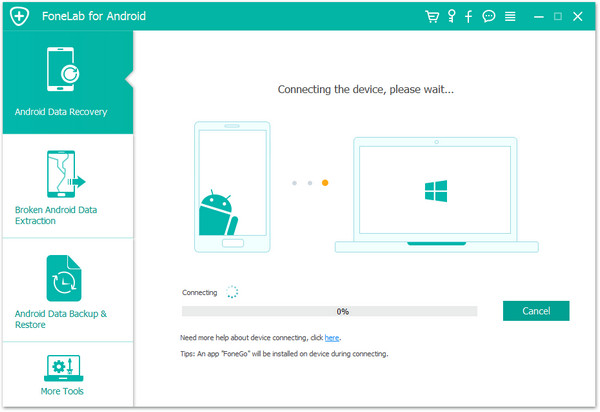
After you installing and running the Android Data Recovery software on the computer, you will be able to see the main window below. Then please connect your Galaxy S7/S7 to computer via an USB.
Step 2.Enable USB debugging on Devices
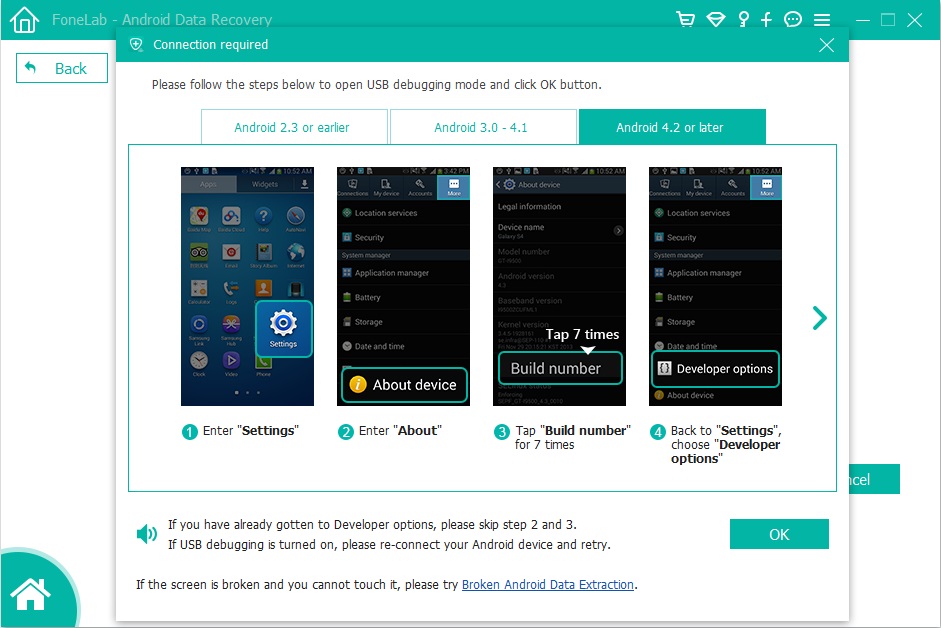
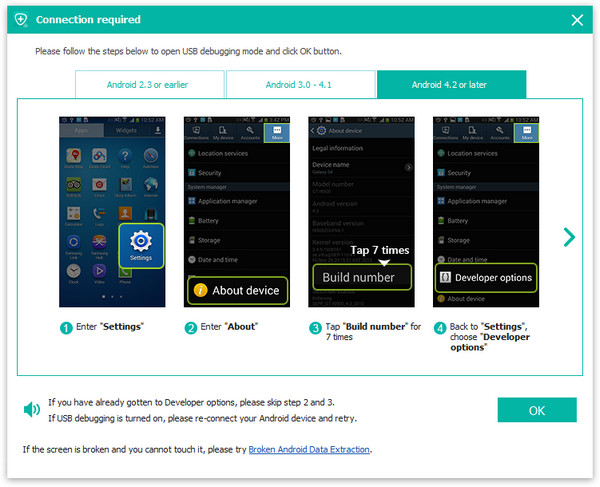
If your Samsung phone isn’t detected by the program, you need to enable USB debugging on your phone. Check what Android OS is your Samsung and then choose the right way to open USB debugging follow below steps:(For Samsung S7 device,please skip this step and scan the device)
1) For Android 5.0 or newer: Tap “Settings” > “About Phone” to tap “Build number” seven times for “You are now a developer!” signal. Then, move to “Settings” > “Developer options” to turn on “USB debugging”
2) For Android 4.2 or newer: Enter “Settings” > Click “About Phone” > Tap “Build number” for several times until getting a note “You are under developer mode” > Back to “Settings” > Click “Developer options” > Check “USB debugging”
3) For Android 3.0 to 4.1: Enter “Settings” > Click “Developer options” > Check “USB debugging”
4) For Android 2.3 or earlier: Enter “Settings” > Click “Applications” > Click “Development” > Check “USB debugging”
Tips:For Galaxy S7 or S7 edge,please click “OK” on the phone and go to next steps.

Step 3.Select “Gallery” you want to Restore from Samsung S7
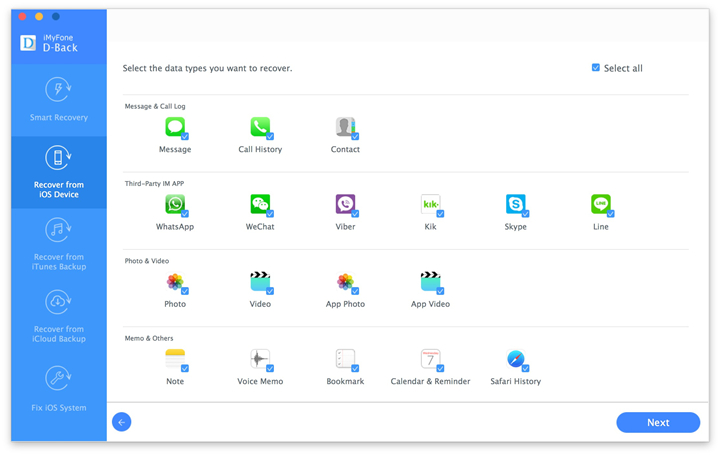
After enabling USB debugging, connect your Samsung Galaxy S7 to the computer via USB cable, you’ll see this window,different types of files can be chose to be scan here.If you lost almost all types of Samsung data, you can tick “Select all” to have all your Galaxy data scanned.Here,you should select “Gallery” that is to be scanned and enter next step.

Step 4.Allow to Scan and Analyze Data on Samsung
You’ll get a window as follow on your device after your device is detected by the program.Tap “Allow” to enable the program to scan your Galaxy S7/S7 Edge for deleted photos.

Note:Before starting,please make sure that your phone battery is more than 20% charged.
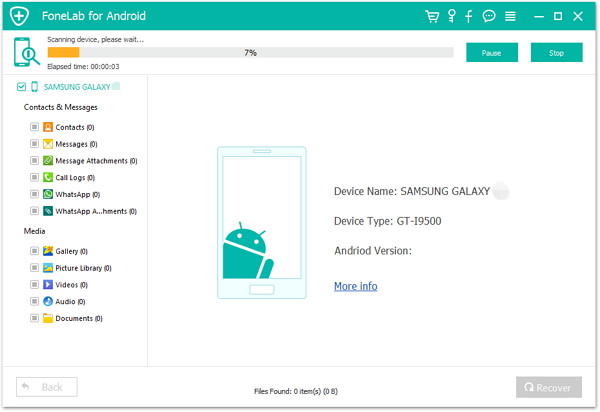
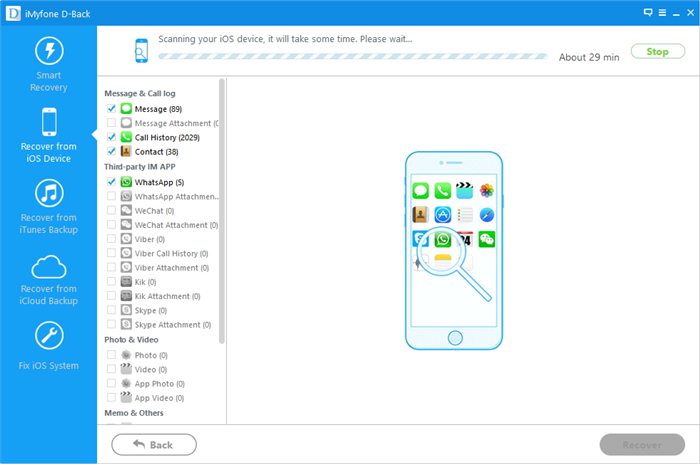
Step 5.Start to Scan Samsung Galaxy S7 for Lost Photos
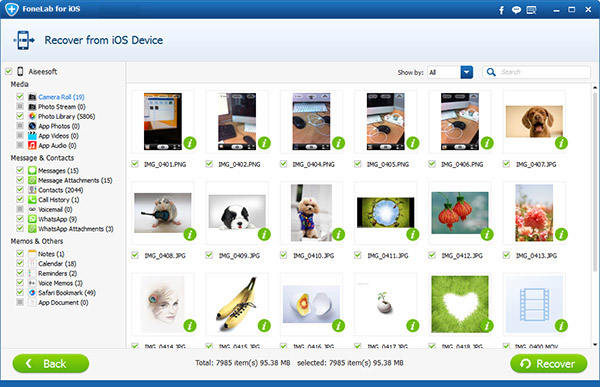
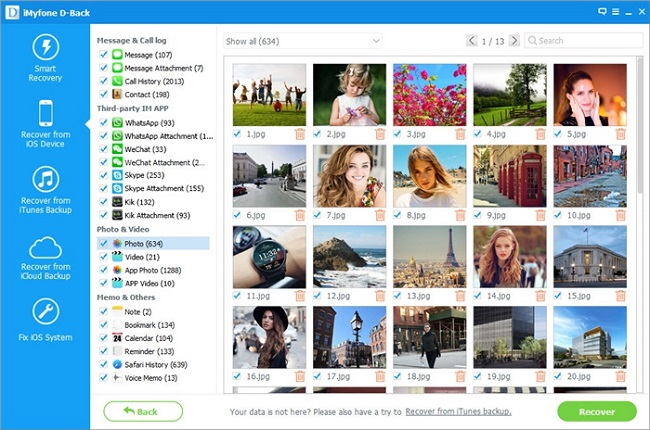
The scanning process will take some time due to your request. After everything is done, you will see a list of deleted files, including your gallery, appear on the software screen as below,preview them one by one before get missing photos back.

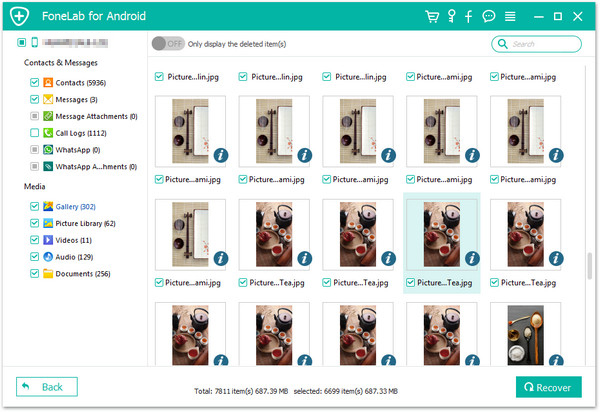
Step 6.Preview and Retrieve Lost Photos from Galaxy S7(Edge)
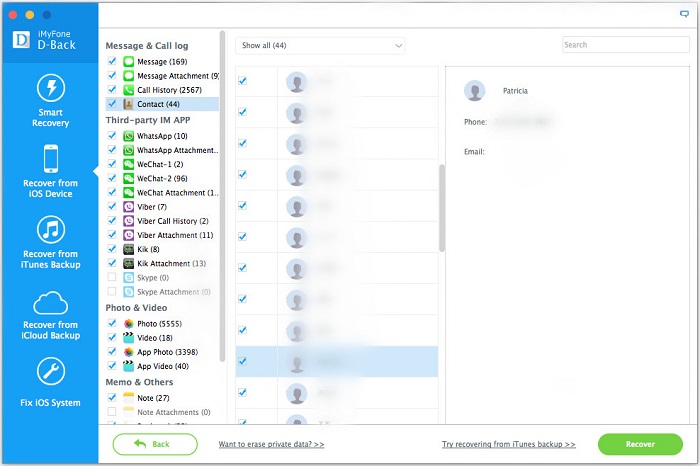
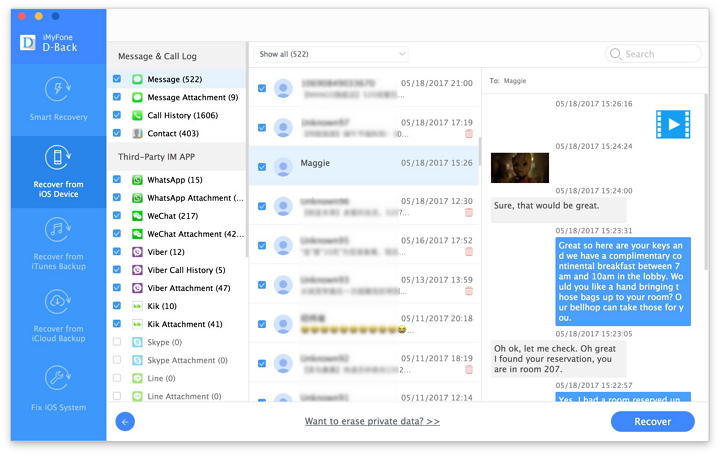
After finishing the scanning process, a list of recoverable files that the lost photos have been found from your Samsung will be shown.In addition,there will be a preview window of files where you can preview(contacts, SMS and Gallery,etc)from Samsung.Mark those you want and click “Recover“. You can selectively the lost photos and restore them to your computer.

Photos are the best means to cherish good old days. Many Samsung Galaxy users said they have taken a lot of photos in their daily life and store them on the Samsung devices. If you accidentally deleted some pictures from Samsung galaxy,or formatted the media storage,don’t panic,just get help of the Android Data Recovery.Only a coffee time,you will get samsung missing files back satisfactorily.
Tips to Increase the Success Rate of Recovering Photos from Samsung Phone
For some device, the Android Data Recovery needs to get privilege to scan data of your Android. Rooting means gaining root access to your device. When you take your phone out of the box, while there are plenty of settings you can tweak, you can only alter what the manufacturer allows you to. By gaining root access you can modify the device’s software on the very deepest level. So if FonePaw is not able to get the privilege, it can’t scan lost data on your Android.
Acquiring root access essentially grants you elevated permissions. With root access, you are able to access and modify files that would normally be inaccessible, such as files stored on the /data and /system partitions. Having root access also allows you to run an entirely different class of third-party applications and apply deep, system-level modifications.
And rooting in a correct way will not bring any viruses. Please use the way that we have provide to root your Android without data loss..
Part 2:How to Retrieve Deleted Photos from Samsung SD Card
This article may be also a lifesaver for those readers who have managed to accidentally delete photos or other files from Samsung SD card.It is actually not a big deal,it’s worth noting that while the focus of this program-how to recover data from Samsung SD card,The Android Toolkit – Android Photo Recovery will do a great job of recovering lost photos from Samsung SD card/hard drive/external drive/thumb drive etc,.
Step 1.Run Android SD Card Recovery on Computer
Install and run Android Photos Recovery on your computer,choose mode “Android SD Card Data Recovery“,then connect your Samsung SD card via your Android device or a card reader.
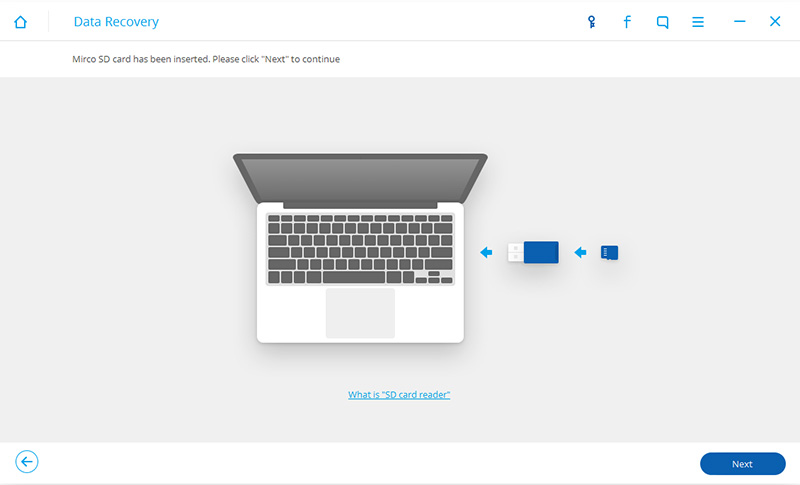
Step 2.Plug Samsung SD Card Reader on the Computer
When your SD card is detected by program,select your SD card and click “Next” to continue.
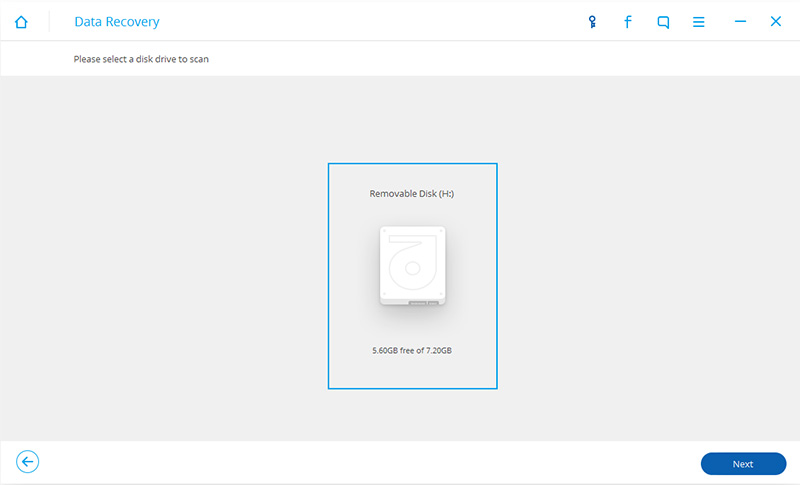
Step 3.Scan Samsung SD Card for Media Files
Before scanning,select the modes to scan,one is “Standard Mode”,the other is “Advanced Mode”.Suggest you choose “Standard Mode” first,if you can’t find what you want,then you can try the “Advance Mode”.To save time,you can choose to scan for only deleted files.
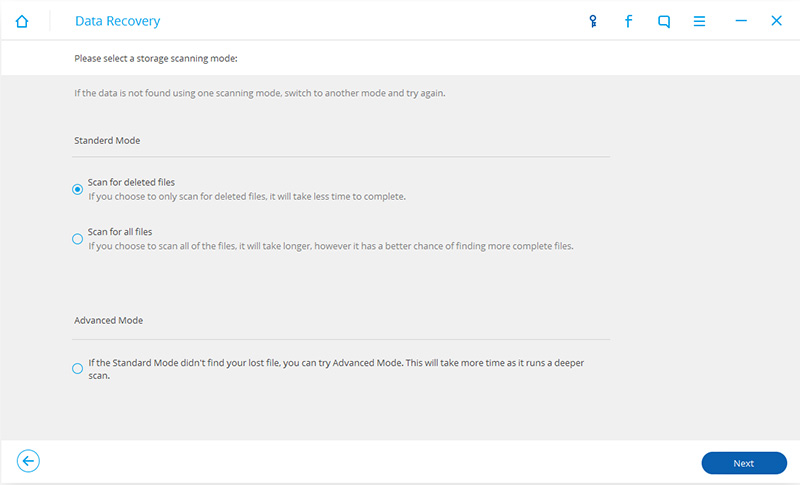
After choosing the scan mode,click “Next” to begin scanning your Samsung SD card.

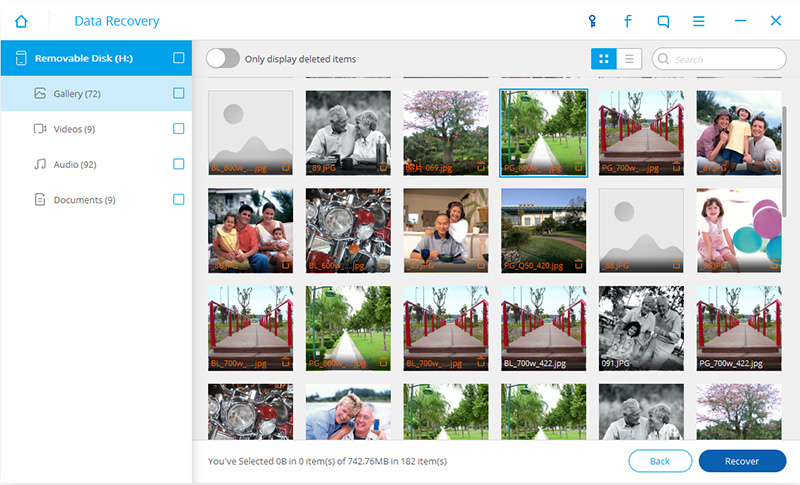
Step 4.Preview and Retrieve Lost Photos from Samsung SD Card
When the scanning process is completed,all results will be displayed in categories.Selectively check or un-check the files you want and then click “Recover” to start the data recovery process.
Download the Android Toolkit and have a try!
Read More:
How to Recover Deleted Data from Samsung Galaxy S7/S7 Edge
How to Recover Deleted Text Messages from Samsung Galaxy S7/S7 Edge
How to Recover Deleted Contacts from Samsung Galaxy S7/S7 Edge
Transfer Photos from Android to Samsung Galaxy S6/S7
Transfer Photos from iPhone to Samsung Galaxy S7
Transfer WhatsApp Chat History from iPhone to Samsung Galaxy S7/S6/Note 7