Category Archives: Fix iOS

How to Remove Screen Time Passcode from iPhone/iPad without Passcode

Summary
It’s easy to forget the Screen Time passcode you set on your or your child’s device, especially if it hasn’t been used for a while. When that happens, you won’t be able to change settings or turn Screen Time off. In this article, we’ll show you how to remove Screen Time on your iPhone or iPad without passcode.

You might have enabled Screen Time and set a passcode on your iPhone or your child’s device to manage app usage, set time limits, or block certain content. But over time, it’s easy to forget that Screen Time passcode, especially if you don’t use it often. Once forgotten, you won’t be able to turn off Screen Time or change any of its settings, which can be frustrating.

The good news is that there are ways to remove or reset the Screen Time passcode, even if you don’t remember it. In this article, we’ll walk you through step-by-step solutions to help you remove Screen Time on your iPhone or iPad without passcode. Whether you’re a parent managing a child’s device or just trying to regain control of your own, this guide will make the process simple and stress-free.

CONTENTS

Part 1. What is Screen Time on iPhone/iPad

Screen Time on iPhone and iPad is a useful feature that helps you monitor and manage how you or your child use the device. It provides weekly reports and lets you set limits on app usage, screen time, and content access. Here are four main ways Screen Time can help:

  • See weekly activity reports with insights into how much time you spend on your device.
  • Set daily time limits for specific app categories and schedule downtime to take breaks from the screen.
  • Control settings and privacy options, including app downloads and purchases.
  • Manage your child’s device remotely using a Screen Time passcode, so you can set limits and block content as needed.

With Screen Time, you can better understand and improve your digital habits. If you’re using it for your child, it’s a great way to control how long they use the device, what apps they access, and when they should take a break—like setting downtime during bedtime or homework hours.

Part 2. How to Remove Screen Time Without Passcode

Whether you know the Apple ID password or not, there are three different ways to remove Screen Time without passcode. We will show you the detailed operations in the following paragraphs.

Method 1. Remove Screen Time without Passcode with iOS Unlocker [Best]

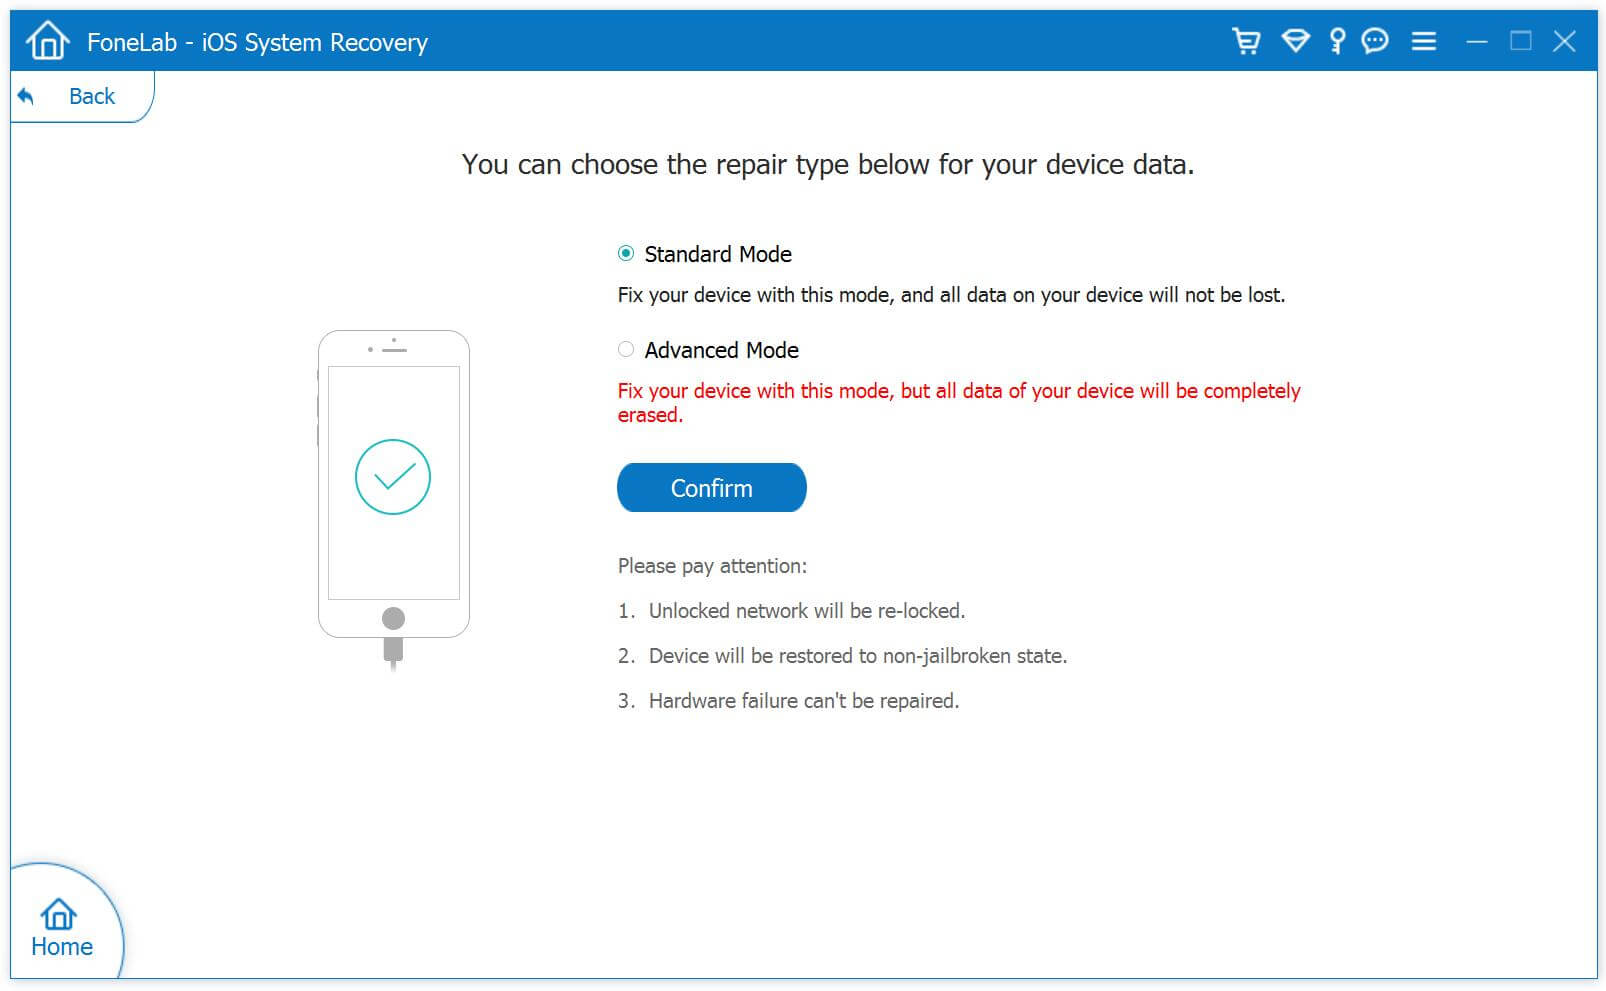
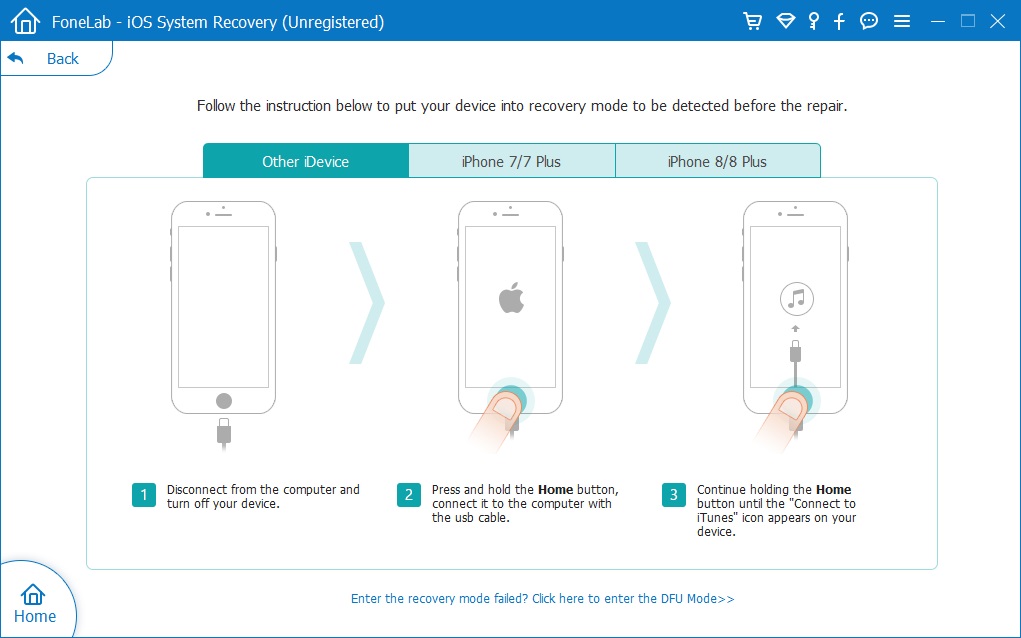
If you get a second-hand iPhone/iPad with Screen Time enabled or you are the child who wants to get rid of Screen Time set by parents, you can use the third-party application – iOS Unlocker. It not only helps to unlock iPhone without a password but also works to turn off Screen Time without passcode and Apple ID. iOS Unlocker is the right and handy tool for you. iOS Unlocker can help you remove the Screen Time Passcode set on your iPhone/iPad. Then you can easily turn it off. Within several steps, you can disable Screen Time on your iPhone and iPad without knowing the password.

Key features of iOS Unlocker

  • Remove Apple ID and wipe 4/6-digit password, Face ID, and Touch ID.
  • Remove Apple ID if you forgot Apple ID or password.
  • Recover and remove Screen Time passcode without data loss.
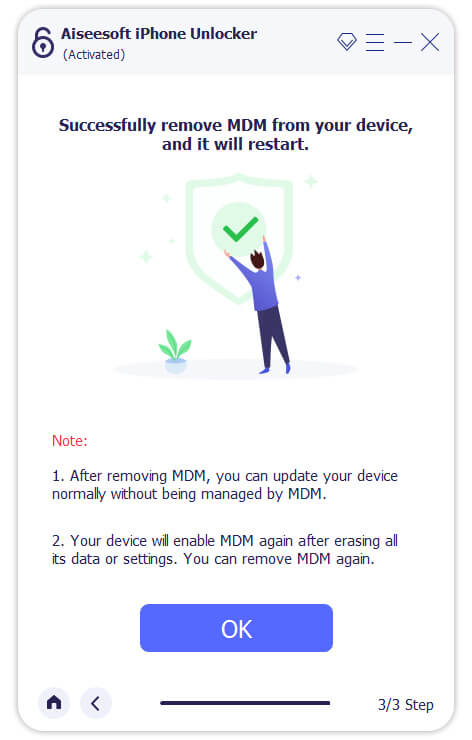
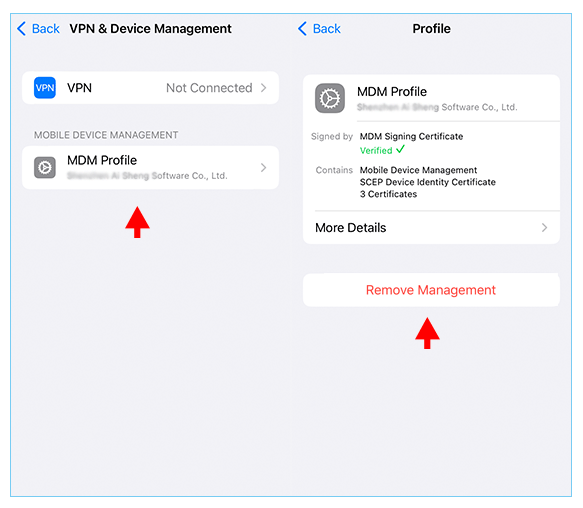
  • Remove MDM (Mobile Device Management) from iPhone/iPad quickly.
  • Remove iTunes backup encryption settings from iPhone/iPad with one click.

d_win d_mac
d_win d_mac

Steps to Remove Screen Time without Passcode with iOS Unlocker

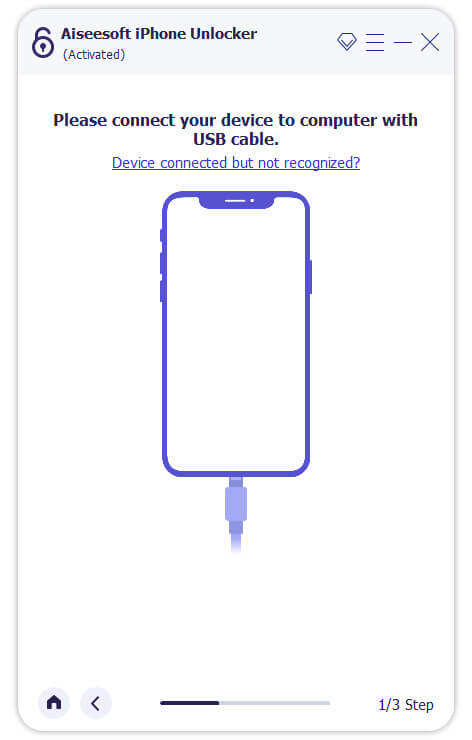
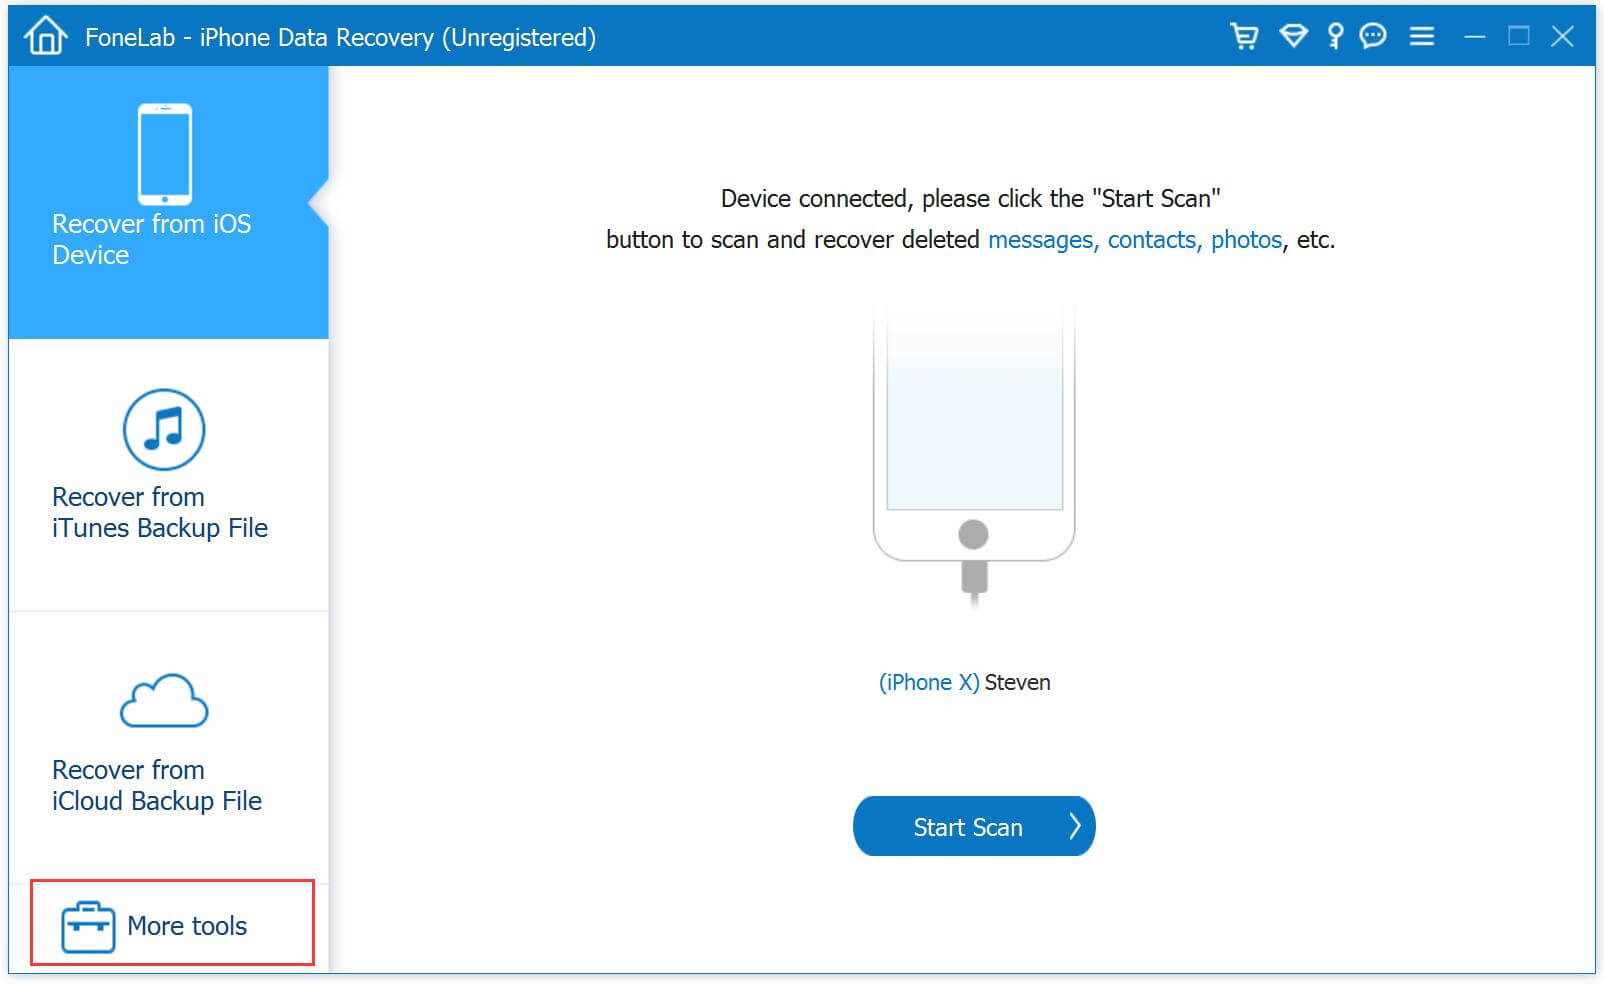
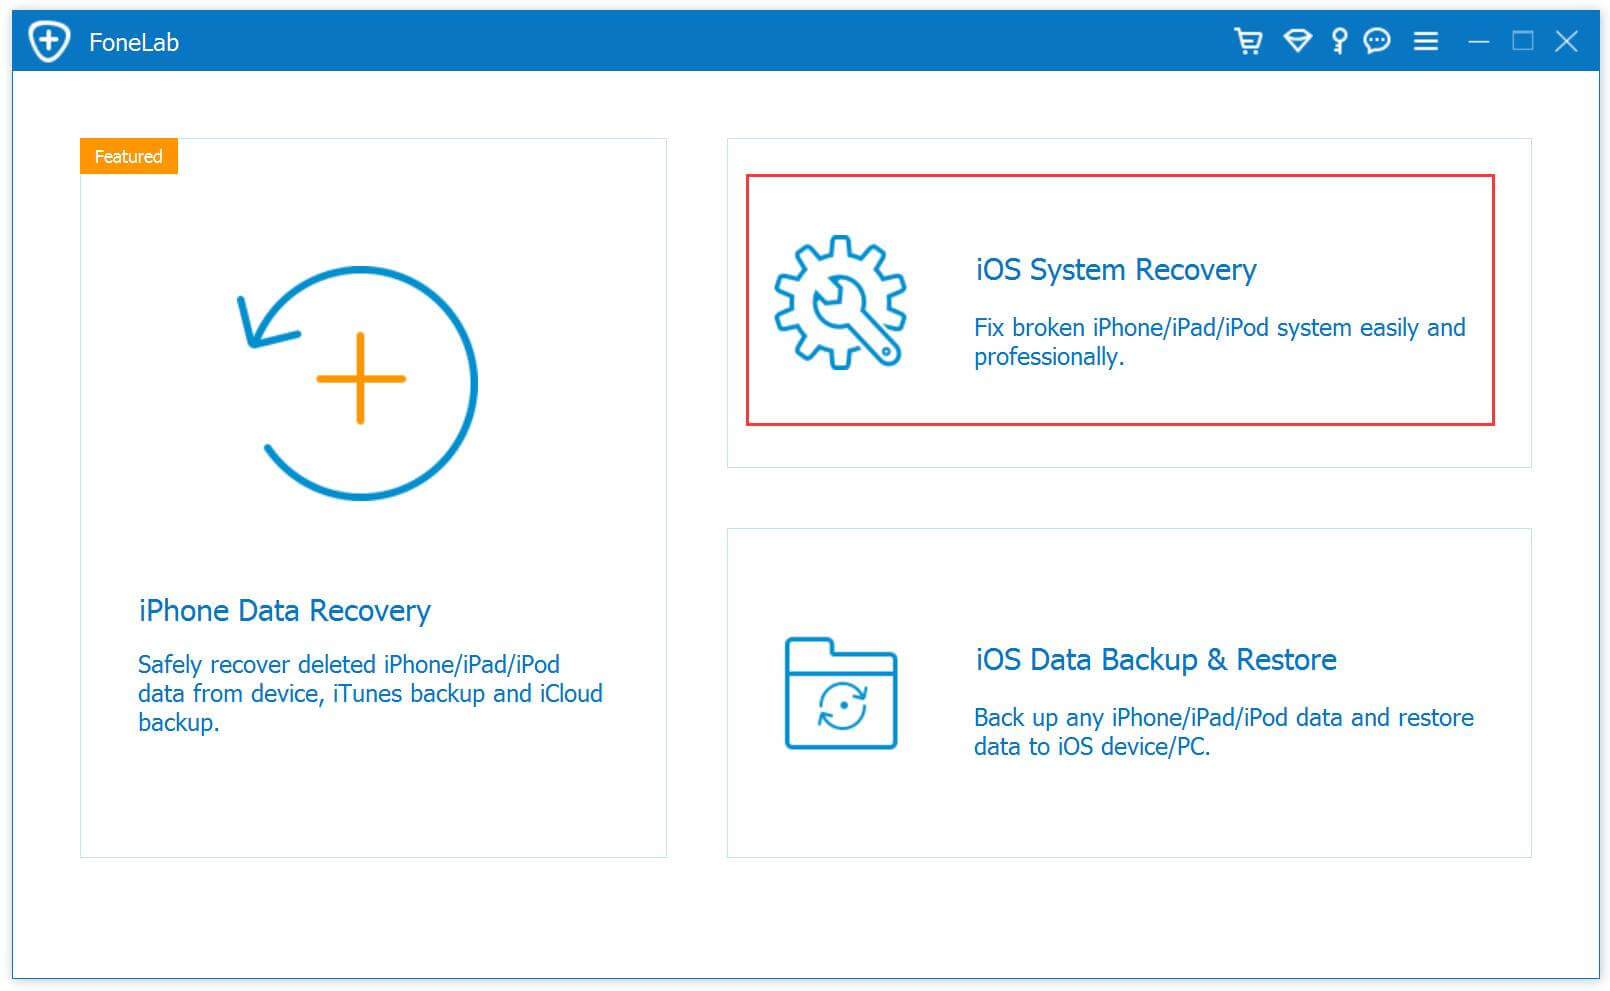
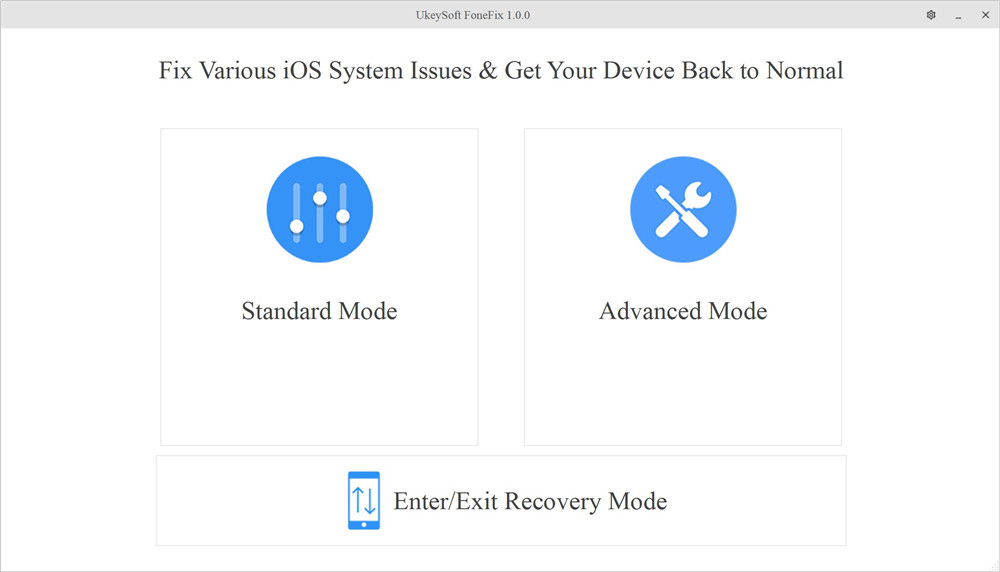
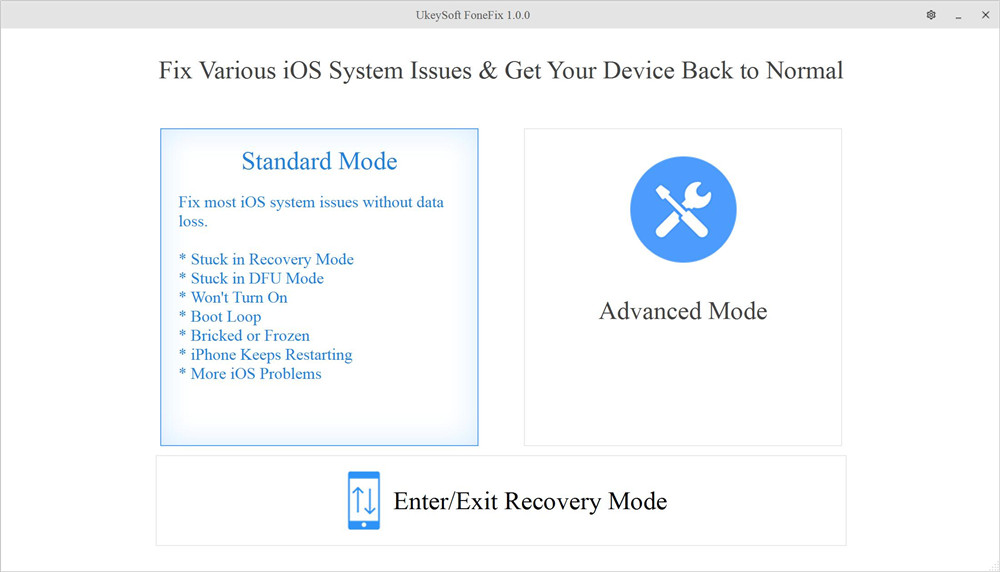
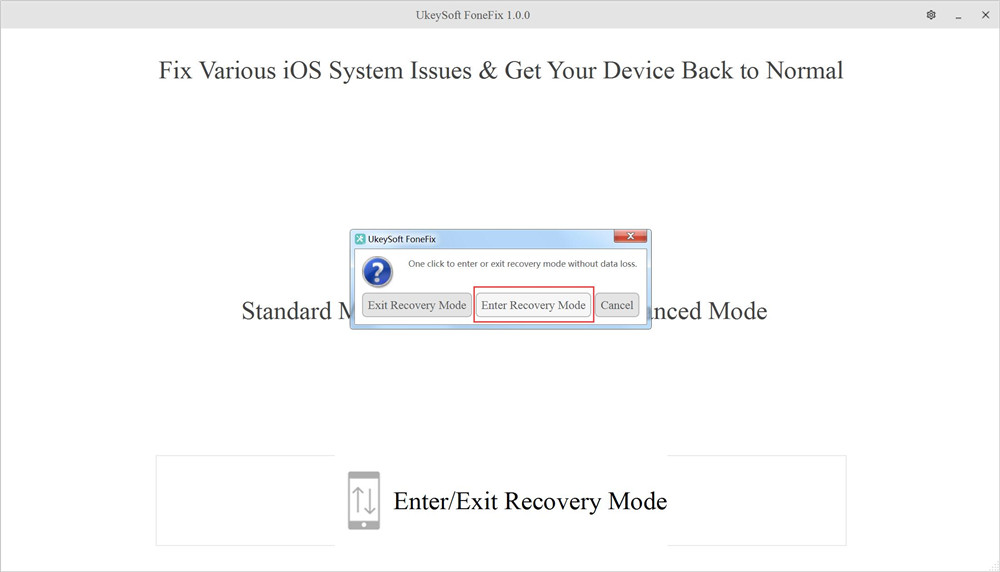
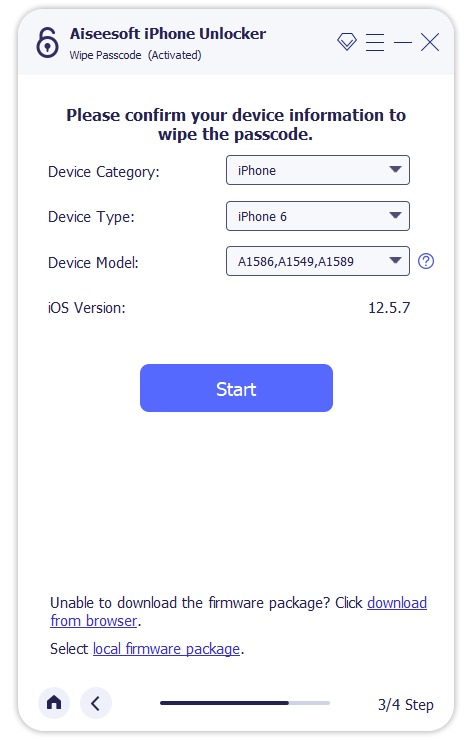
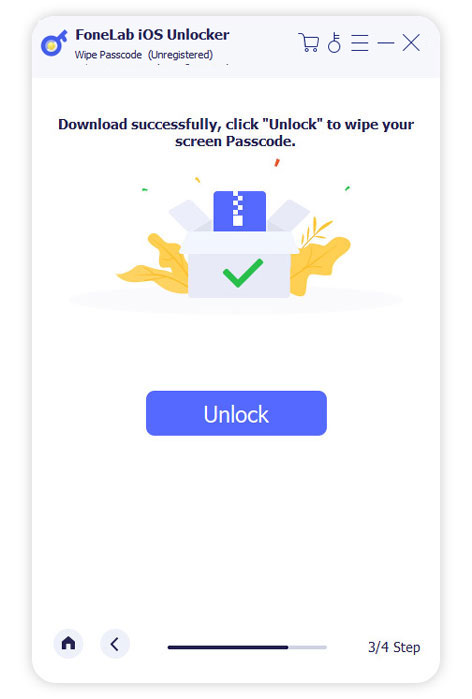
Step 1. Launch iOS Unlocker
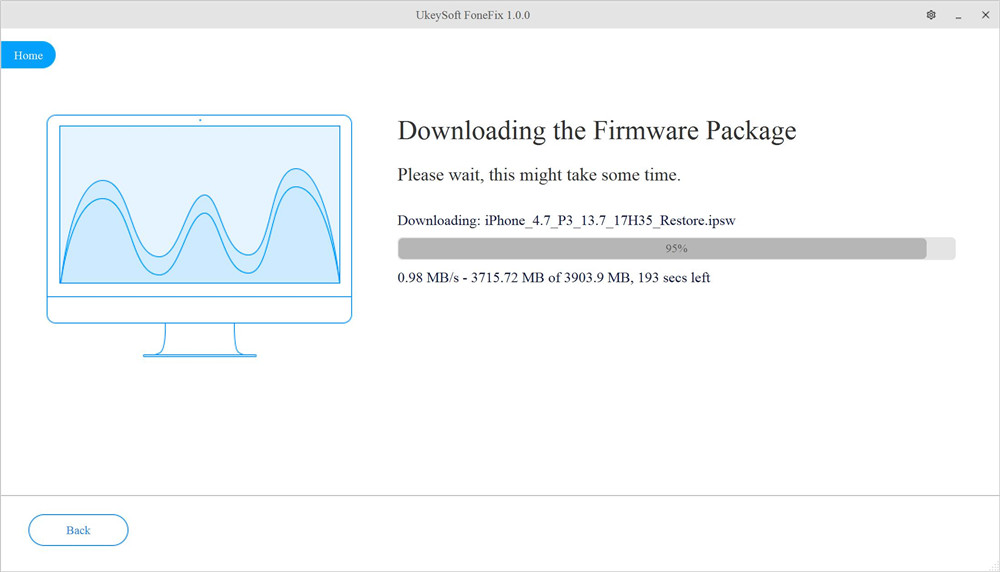
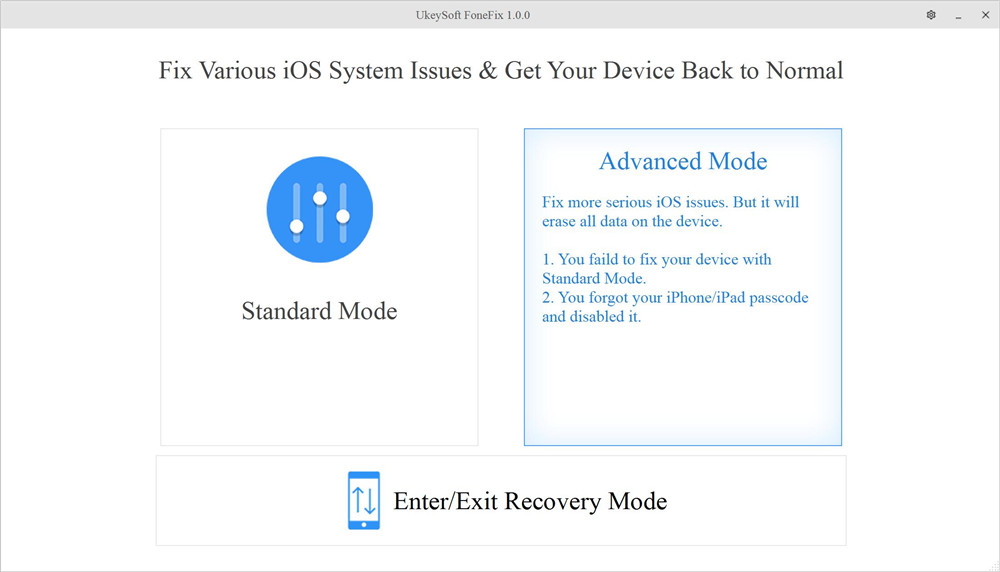
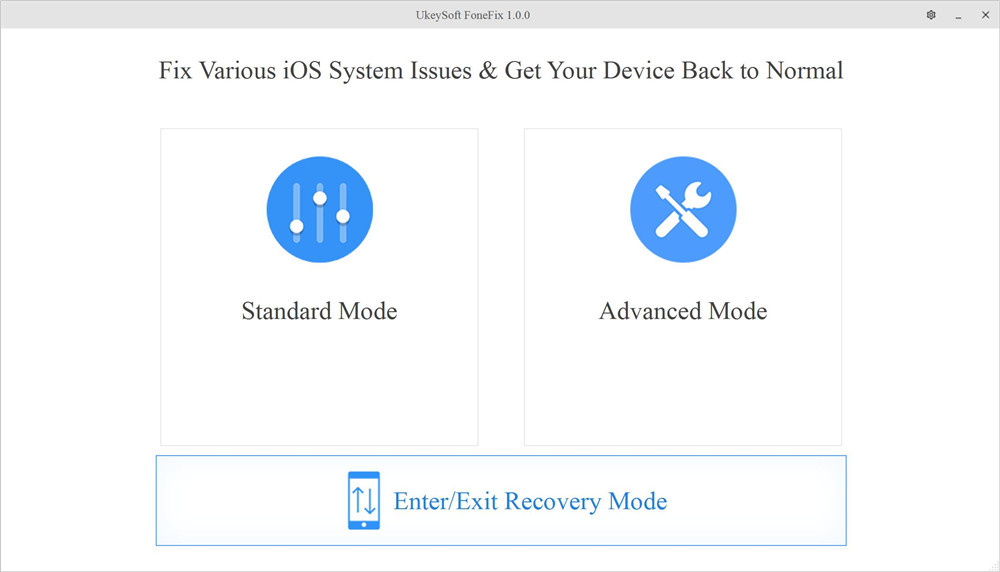
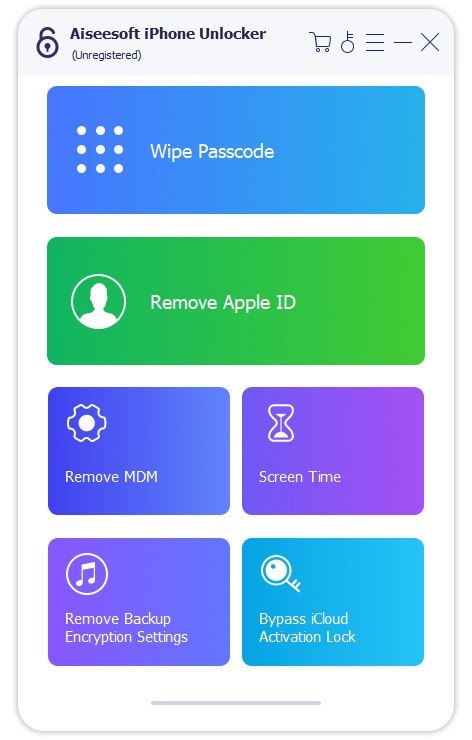
Open iOS Unlocker on your computer and select the “Screen Time” mode from the main interface.

ios unlocker main interface

Step 2. Connect Your iPhone or iPad
Use a USB cable to connect your iOS device to the computer. Make sure your device is recognized by the program.

Step 3. Start Removing the Screen Time Passcode
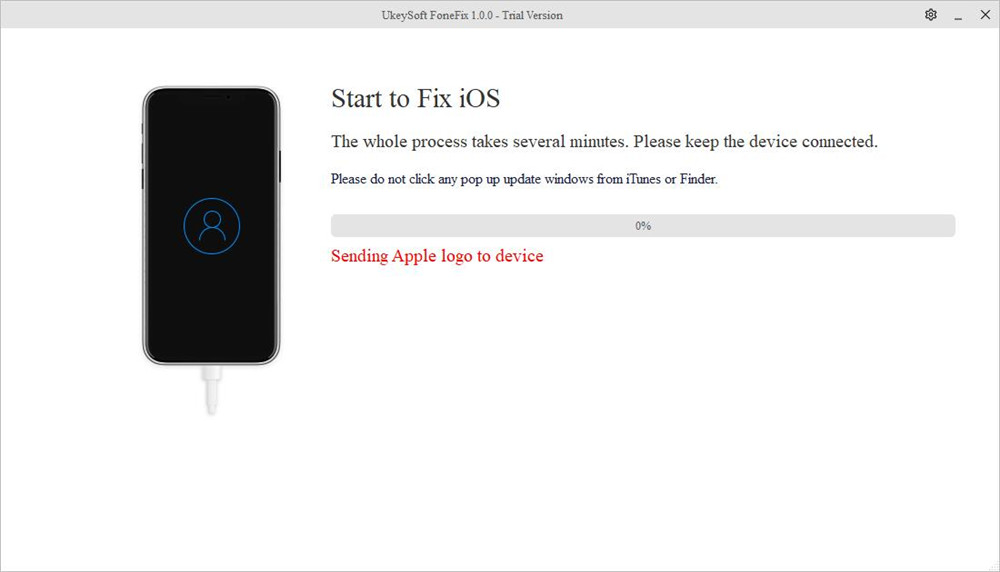
Click the “Start” button to begin the removal process.

start remove screen time

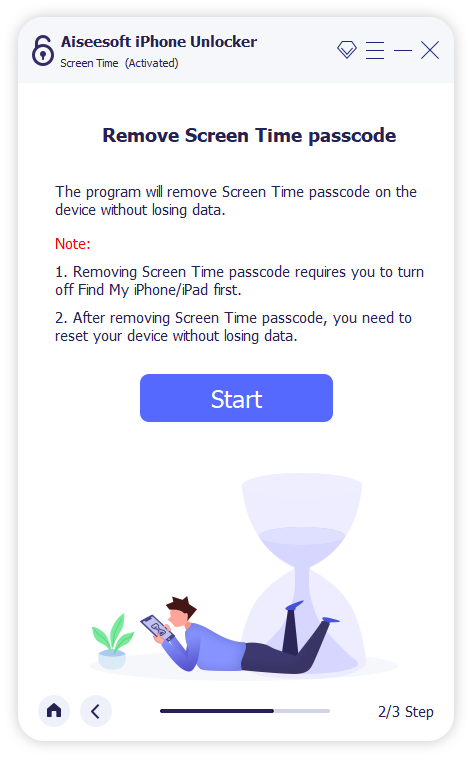
Scenario 1. For iOS 12 or Later (with Find My iPhone Off)
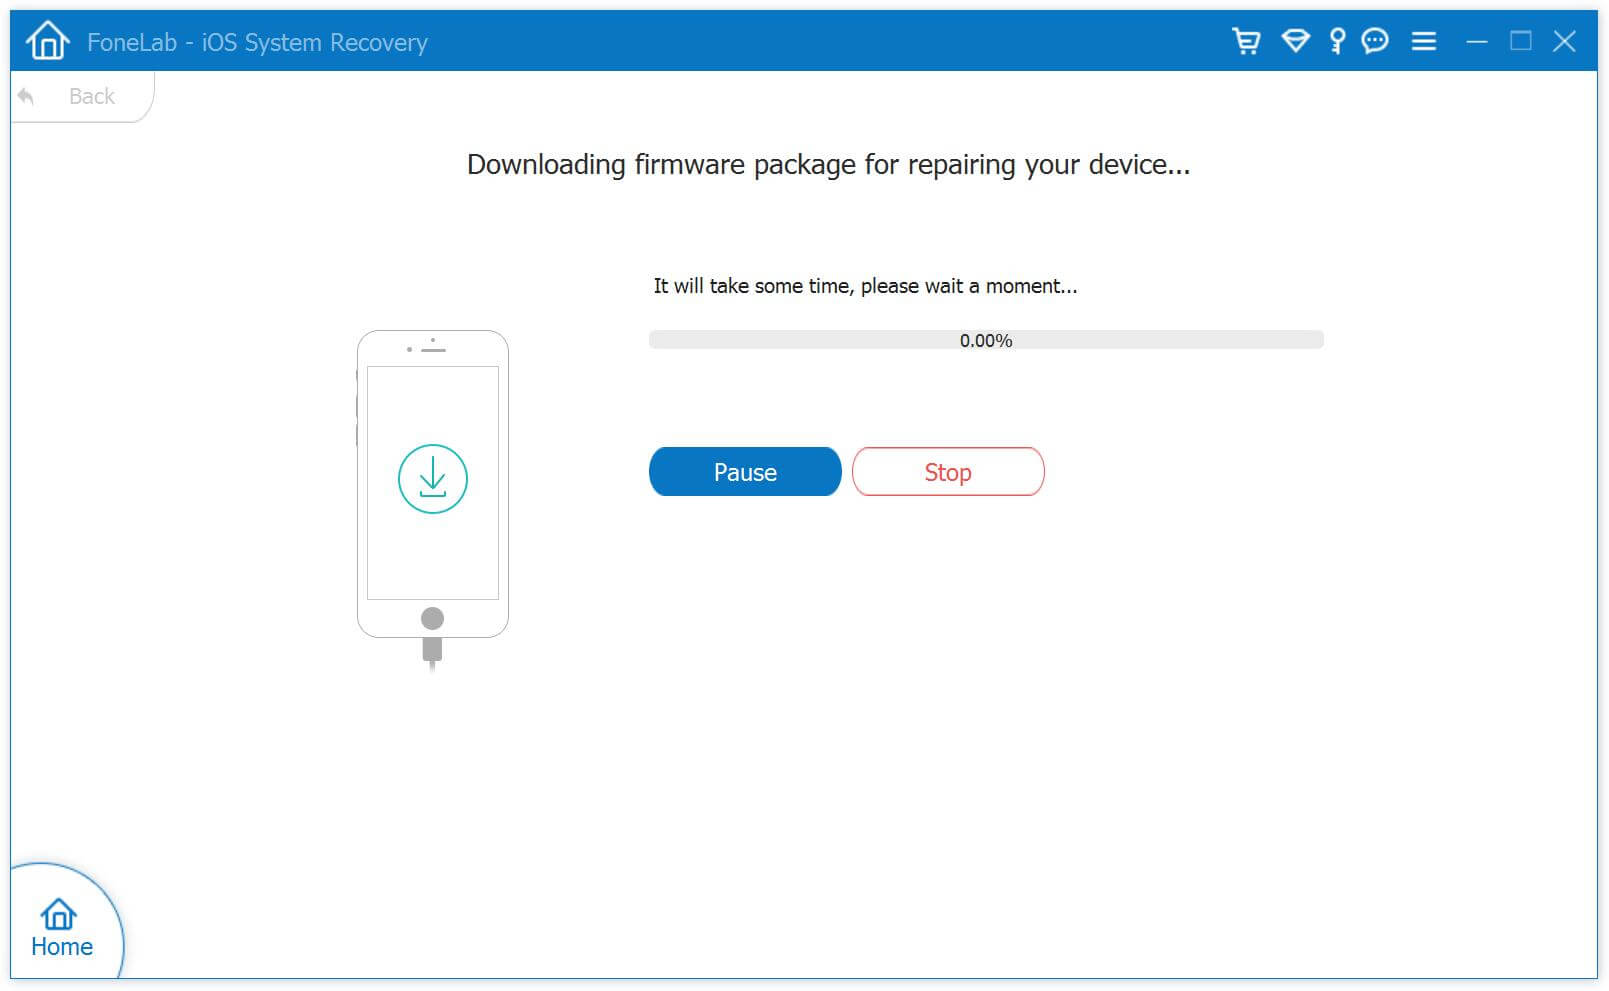
If your device is running iOS 12 or newer and Find My iPhone is turned off, the program will automatically start removing the Screen Time passcode. Wait a few moments while the software unlocks the device.

Once done, follow the on-screen instructions to re-set up your device to ensure the Screen Time passcode is completely removed.

remove screen time passcode ios 12 or later

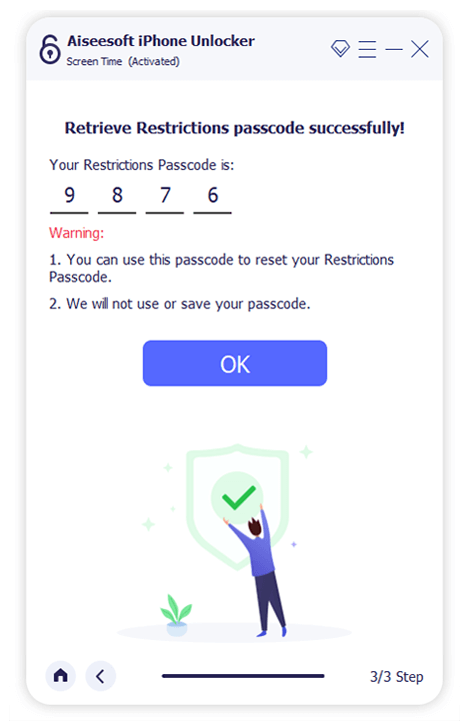
Scenario 2. For iOS 11 or Earlier
If your device is running iOS 11 or earlier and your iTunes backup is not encrypted, the program can retrieve the Restrictions passcode directly.

If your iTunes backup is encrypted, you’ll need to enter the encryption password to proceed. The process will take just a few seconds. Once the Restrictions passcode is recovered, you can reset it as needed.

turn off screen time passcode iphone

Method 2. Remove Screen using ” Erase All Content and Settings”

Using the “Erase All Content and Settings” option is one way to remove Screen Time restrictions, especially if they were set by a parent. This method works only if you know the Apple ID and password currently signed in on the device, but not the passcode used to set up Screen Time.

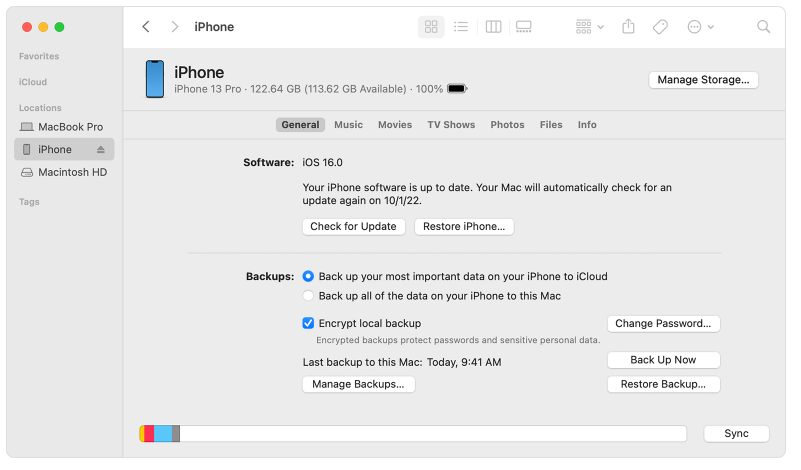
Important: This process will erase everything from your iPhone, including photos, videos, and apps. To avoid losing data, make sure to back up your iPhone first. You can refer to a guide on how to back up your iPhone without using iTunes.

Here’s how to erase all content and remove Screen Time:

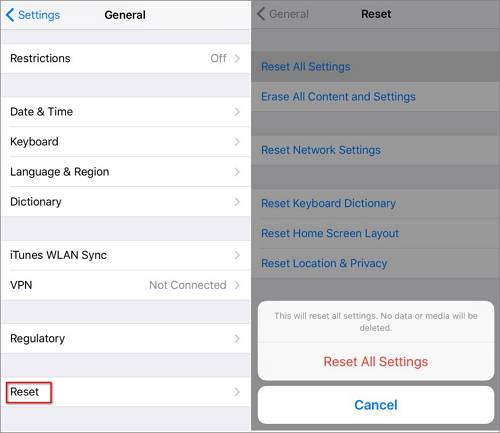
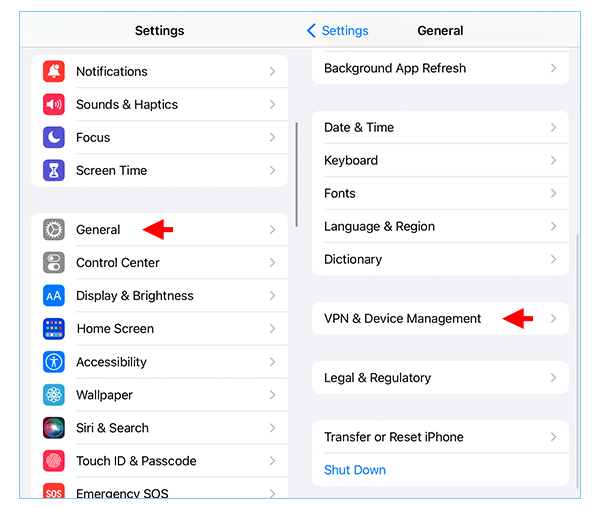
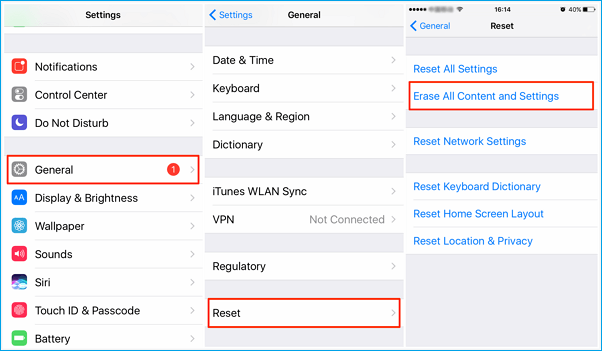
Step 1. Open your iPhone and go to Settings > General > Transfer or Reset iPhone.

Step 2. Tap Erase All Content and Settings, then choose Erase Now.

Step 3. Confirm by tapping Erase iPhone. Enter your Apple ID and password if prompted, and tap Erase again.

Once the reset is complete, Screen Time will be turned off, and your iPhone will be restored to its factory settings. You can then follow the on-screen instructions to set it up as new.

erase an iphone

Method 3. Remove Screen Time by Resetting Screen Time Passcode

When setting up a Screen Time passcode on your or your child’s iPhone or iPad, you’re asked to enter an Apple ID and password. This step helps you recover or reset the passcode if you ever forget it. If you completed this step, you can easily remove the Screen Time passcode using your Apple ID.

Follow these steps to reset and remove the Screen Time passcode:

Step 1. Open the Settings app and tap Screen Time.

Step 2. Scroll down and select Change Screen Time Passcode, then choose Turn Off Screen Time Passcode.

Step 3. When prompted, tap Forgot Passcode? Then enter your Apple ID and password to verify.

Step 4. After the passcode is removed, scroll to the bottom and tap Turn Off Screen Time to fully disable the feature.

reset screen time passcode

Conclusion

These are three effective methods to turn off Screen Time on your iPhone if you’ve forgotten the passcode. If you still remember your Apple ID and password, you can simply reset or remove the Screen Time passcode through your device settings. However, if you don’t have access to the Apple ID credentials, you can use a third-party tool like iOS Unlocker to remove the Screen Time passcode without erasing any data. This offers a quick and secure solution when other methods aren’t available.

d_win d_mac
d_win d_mac

Remove Screen Time without Passcode

How to Remove iTunes Backup Encryption without Password

Summary
Are you trying to remove iTunes backup encryption but forgot the password? Don’t worry—you’re not alone. Many users set a backup password and later forget it, especially since iTunes doesn’t ask for it every time. In this guide, we’ll walk you through a few effective and easy ways to turn off or remove iTunes backup encryption, even if you no longer remember the password.

After you set a password to encrypt your iPhone backup in iTunes, all future backups will be encrypted automatically. Over time, it’s easy to forget that password. Unfortunately, there’s no way to reset it. So, how can you turn off iTunes backup encryption or remove the backup password? This guide will show you how to remove iTunes backup encryption without password. Keep reading to find out how.

CONTENTS

Part 1. Why Is Your iPhone Backup Encrypted with a Password?

When you check the ‘Encrypt local backup’ option while backing up your iPhone using iTunes or Finder, your backup will be protected with a password. Encrypted backups include extra sensitive data, like saved passwords, Health data, Wi-Fi settings, call history, and browsing history, which isn’t saved in regular backups.

Once you set an encryption password, all future backups for that device will be encrypted automatically. If you ever want to restore your iPhone from an encrypted backup, you’ll need to enter the password. In short, encrypting your iPhone backup helps you save more personal data and adds extra security to your backup.

Part 2. How to Remove iTunes Backup Encryption without Password [Hot]

The encrypted backup password is essential, without it, you won’t be able to restore your iPhone from an encrypted backup. But since it’s rarely used and future backups are encrypted automatically without needing to re-enter the password, it’s easy to forget if you didn’t write it down.

Unlike other passwords, there’s no ‘Forgot Password’ option to reset it. So, what can you do if you’ve forgotten it? In this part, we’ll show you two ways to remove the iTunes backup encryption password from your iPhone. After that, you’ll be able to back up your iPhone without encryption.

Method 1. Remove iTunes Backup Encryption without Password using FoneLab iOS Unlocker

FoneLab iOS Unlocker is a trusted tool for unlocking iPhones without a password and removing iTunes backup encryption. Once your iPhone is connected to a PC via USB, you can easily remove the backup password in just a few simple steps—without any risk of data loss. Beyond removing encryption, FoneLab iOS Unlocker includes a range of helpful features to solve common iOS issues. It can unlock a locked iPhone without a passcode, bypass Activation Lock, and even disable Screen Time when you’ve forgotten the password. Check out its full list of features below.

Key Features of FoneLab iOS Unlocker

  • Unlock your iPhone, supporting 4/6-digit password, Touch ID, and Face ID
  • Erase all data and settings
  • Remove Apple ID without a password
  • Disable Screen Time on iPhone and iPad
  • Remove MDM from iPhone
  • Remove the encrypted backup password from iPhone

Guide: How to Remove iTunes Backup Encryption without Password

Step 1. Download and Install FoneLab iOS Unlocker
Begin by downloading and installing FoneLab iOS Unlocker on your computer. Click the Download button below to get started.

d_win d_mac
d_win d_mac

Step 2. Select “Remove iTunes Backup Password”
Launch the program and choose the “Remove iTunes Backup Password” option. Connect your iPhone or iPad to your computer using a USB cable. When prompted on your device, tap “Trust” and enter your screen passcode.

choose remove itune backup password

Step 3. Erase All Content and Settings
If Find My iPhone is turned on, go to Settings > General > Transfer or Reset iPhone > Erase All Content and Settings. If not, you can simply click the Start button in the software.

click start button

Step 4. Remove the iTunes Backup Password
The software will now begin removing the iTunes backup password from your device.

removing itunes password

Step 5. Restart Your Device
Once the process is complete, click OK to restart your iPhone or iPad.

restarting device

Method 2. Turn off iTunes Backup Encryption with the Option “Reset All Settings”

If your iPhone is running iOS 11 or later, there’s a simple way to turn off iTunes backup encryption by resetting all settings on your device. This method removes the backup encryption password without deleting your data. However, keep in mind that it will reset some settings, such as display brightness, wallpaper, and Home Screen layout.

Follow these steps:

Step 1. On your iPhone, go to Settings > General > Transfer or Reset iPhone > Reset.

Step 2. Tap Reset All Settings, enter your device passcode, and confirm.

reset all settings

Once done, the iTunes backup encryption will be turned off. This method only works on iOS 11 or later. If you’re using iOS 10 or earlier, you’ll need to try another solution.

Part 3. How to Turn Off iTunes Backup Encryption with Password

If you no longer want to encrypt your iPhone backups, you can easily turn off the encryption setting in iTunes. Just follow the steps below:

Step 1. Connect your iPhone to your computer and launch iTunes. Click the phone icon to access your device.

Step 2. In the ‘Backups’ section, uncheck the ‘Encrypt local backup’ option and enter your encryption password.

encrypt backup in itunes

That’s it! You’ve now disabled backup encryption for your iPhone in iTunes.

Conclusion

In this article, we’ve put together 3 effective methods to turn off iTunes backup encryption, making it easy for you to create unencrypted backups on your PC. One of the recommended tools is FoneLab iOS Unlocker, which can help you remove the backup password without losing any data if you’ve forgotten it.

Remove iTunes Backups Password

How to Remove MDM from iPhone/iPad Without Password

Summary
There are several reasons why you may need to remove MDM lock from iPhone/iPad. Check out this post! This guide covers three proven methods to bypass MDM lock with/without password, including DFU mode, professional MDM Lock Removal tool, and iOS Settings Reset.

MDM (Mobile Device Management) is used by organizations to control company-owned iPhones and iPads. There are several times you need to remove DRM profiles. For example, you purchased a second-hand iPhone or iPad with MDM still enabled. The MDM profile was misconfigured or remained after a factory reset. Or, you left a company but still have a device enrolled in MDM. Or, you forgot the MDM password can can’t access the features, etc.

Whatever the reason, if you’re stuck with an MDM profile you can’t bypass, you’ve come to the right place. This guide will show you how to remove MDM from iPhone/iPad with/without password in three effective methods, by using DFU Mode, a powerful MDM Lock Removal tool, and iOS Settings Reset. Let’s explore!

What Is MDM on iPhone/iPad?

MDM (Mobile Device Management) is a security protocol used by businesses, schools, and institutions to remotely manage Apple devices (including iPhones, iPads). It allows administrators to control app installations, enforce security policies, restrict device functions, and even remotely lock or wipe data with ease.

However, like the situations we mentioned above, if you’re stuck with an MDM profile you can’t bypass, you need to completely remove MDM from iPad/ iPhone. Now, explore the three methods to learn how to bypass MDM lock on your iPhone or iPad, even without password.

Method 1. Remove MDM from iPhone/iPad through DFU Mode

DFU allows you to completely restore or downgrade iOS without loading the current operating system. Unlike standard Recovery Mode, DFU mode bypasses the bootloader, making it a powerful troubleshooting tool. Using it, you can remove MDM from iPhone, iCloud lock or passcode, fix various iOS issues, or even downgrade iOS version.

Note: The DFU mode performs a full factory reset, it will wipe all apps and data on your device. You’d better backup your device before getting started.

Step 1. Backup Your Data (Optional)
Connect your iPhone/iPad to your computer using USB cable, and use iTunes or Finder to create a backup.

Step 2. Install the Latest Version of iTunes
Download and install the latest version of iTunes on your computer, then launch iTunes.

Step 3. Put Your Device in DFU Mode
Enter DFU Mode on your iPhone.

iPhone 8 & Later:

Press Volume Up → Volume Down → Hold Side Button (10 sec).

Release the Side Button but keep holding Volume Down (5 sec).

iPhone 7/7 Plus:

Hold Side + Volume Down (10 sec).

Release Side Button but keep holding Volume Down (5 sec).

iPhone 6s & Earlier:

Hold Home + Power (10 sec).

Release Power Button but keep holding Home (5 sec).

enter DFU Mode on your iPhone

Step 4. Restore the Device
Open iTunes (Windows/macOS Mojave) or Finder (macOS Catalina and later). iTunes/Finder will detect a device in recovery mode. When prompted, click “Restore“.

restore iPhone on iTunes

iTunes will erase MDM, and download the latest firmware and reinstall iOS.

Step 5. Reactivate and Check for MDM
After restoring, skip MDM enrollment during setup.

Note: This method does not guarantee complete MDM removal if your device is supervised via Apple School Manager or Apple Business Manager. If it doesn’t work, you can ask help from a professional MDM removal. Keeping reading to learn more effective methods to unlock MDM lock.

✅ Pros:

  • Works without MDM password.
  • Removes all restrictions.

❌ Cons:

  • Erases all data (full reset required).
  • Works with the latest version of iTunes/Finder.

Method 2. Remove MDM from iPhone/iPad Without Password

If DFU mode doesn’t work or you want a guaranteed solution, a dedicated MDM Lock Removal Tool like iOS Unlocker is highly recommended. This powerful software is designed specifically to remove MDM from iPhone/iPad without password in just a few clicks. It supports all iOS devices & iOS/iPadOS versions, from iPhone 6 to iPhone 16, iPad (A16, 2025), and the lasted iOS 26/18 or iPad OS. It can also be used to remove iPhone screen passcode, Apple ID, iCloud Activation Lock, etc.

Key Features of iOS Unlocker:

  • Remove MDM from iPhone/iPad without password
  • Remove Apple ID & Screen Passcode from iPhone/iPad
  • Fast and secure – no jailbreak required
  • Retains complete access to full functionality after removal
  • Remove iTunes Backup Password and erase the forgotten password
  • Works with supervised and non-supervised devices
  • Supports iOS 7 – iOS 26/18, including iPhone 17 and iPads

Whether your device is stuck on the MDM Remote Management screen or restricted from accessing basic features, the iOS Unlocker can bypass MDM lock quickly and safely. Here’s how it works:

Step 1. Download and Install iOS Unlocker
First, download and install the iOS Unlocker on your Windows or Mac. You can click the Download button below.

d_win d_mac
d_win d_mac

Step 2. Choose Remove MDM Mode
Fire up the iOS Unlocker, and select “Remove MDM” function in the main interface.

select Remove MDM mode

Step 3. Connect Your iPhone/iPad
Connect your iOS device to your computer via a USB cable. Tap “Trust” on your iOS device.

connect iPhone to computer

Step 4. Begin MDM Bypass Process
When connected successfully, click “Start” button to initiate the MDM removal bypass.

remove iphone MDM without password

Step 5. Remove MDM from iPhone Successfully
If Find My iPhone is already disabled on your iOS device, removing the MDM is straightforward, no password is required. Within minutes, MDM will be removed from your iOS device, and your device will restart with full access.

remove MDM successfully

Note: If Find My iPhone is enabled on your iOS, you need to turn off Find My iPhone first, follow below instructions to disable it, then you can continue use the iOS Unlocker to erase MDM.

turn off find my iphone

✅ Pros:

  • Easy to use, safe.
  • Remove iPhone MDM without password.
  • No data loss (if MDM doesn’t enforce a wipe).
  • Works on bypassed iCloud devices.
  • Remove screen passcode, Apple ID, etc.

❌ Cons:

  • Requires a paid license.

Method 3. Remove MDM from from iPhone/iPad Without Computer

If you don’t have access to a computer, you might still be able to remove MDM from iPhone or iPad without computer, but only if you know the correct MDM username and password. This method works directly on the device, but access MDM credentials are required.

Step 1. Open your iPhone/iPad, go to “Settings” > “General” > “VPN & Device Management“.

iPhone Device Management

Step 2. Locate the “MDM Profile“.

Step 3. Then tap “Remove Management“.

remove Remove Management on iPhone

Step 4. Enter the MDM password or admin credentials.

Step 5. Wait a few seconds for the MDM profile to be removed.

✅ Pros:

  • No computer needed.
  • Keeps all data intact.

❌ Cons:

  • Requires the MDM password.

Conclusion

In short, more iPhones and iPads are being managed remotely using Mobile Device Management (MDM). After reading this guide, have you got the method to remove iPhone MDM when you don’t have the correct MDM password? Whether you need to remove MDM from iPhone/iPhone without password or you’re trying to bypass MDM lock after a factory reset, these methods and iOS Unlocker tool can help you regain full access. Give it a try right now!

d_win d_mac
d_win d_mac

Remove iPhone Passcode

iPhone 14/13/12/11 Won’t Turn on or Is Frozen [Fix Now!]

Summary
iPhone 14/13/12/11 won’t turn on or is frozen? What to do if iPhone 14 won’t turn on? Here we have prepared some tricks for you to fix iPhone 14/13/12/11 won’t turn on or is frozen. You can fix a frozen or unresponsive iPhone via hard reset, or using an iOS system repair tool, no any data loss!

Apple released iPhone 14 series on September, 2022, including iPhone 14, iPhone 14 Plus, iPhone 14 Pro, iPhone 14 Pro Max. Compared to iPhone 13, 12, 11, the iPhone 14 series have more excellent battery life, faster low-light performance and higher-quality photos and more. But there are a lot of questions about the brand-new iPhone 14 series, such as iPhone 14 is frozen and won’t turn on. Today, we are not going to compare the differences among iPhone 14, 13, 12, 11, but we will focus on how to fix iPhone 14/13/12/11 won’t turn on or is frozen problems. You will get some tricks here to fix iPhone 14, 13, 12, 11 not turning on issue, and fix a frozen iPhone 14, 13, 12, 11 at all.

Way 1. Hard Reset iPhone to Fix iPhone 14/13/12/11 Won’t Turn on or Is Frozen

If your iPhone is frozen and won’t turn on, you can do a force restart or hard reset to wake it up. Follow the simple steps below:

On an iPhone 14/13/12/11/XR/XS/X/8/SE 2nd gen/SE 3rd gen:
Press and quickly release the volume up button.
Press and quickly release the volume down button.
Press and hold the side button until the Apple logo appears.

On an iPhone 7 or iPhone 7 Plus:
Hold the Sleep/Wake button and the Volume down button at the same time.
Release both buttons until the Apple logo appears on the screen.

On an iPhone 6, 6s, 6s Plus, SE 1st gen:
Press and hold the Home button and the Sleep/Wake button.
When the Apple logo appears, release both buttons.

hard reset iphone

Way 2. Fix iPhone 11/12/13/14 Won’t Turn On or Is Frozen via iOS System Recovery (No Data Loss)

Another safe and impressive method is to use a third-party iOS system recovery tool. With a third-party iOS system recovery software, you can repair most iOS system issues. Here we highly recommend the U.Fone iOS System Recovery.

U.Fone iOS System Recovery is sophisticated yet professional program that can help to fix many minor software-related issues, including frozen iPhone, iPhone won’t turn on / off, iPhone keep restarting, or iPhone stuck in recovery mode, DFU mode, Apple logo, black/white/blue screen, etc.

It has a simple and user-friendly interface. You can use it to fix iPhone 14/13/12/11 won’t turn on or is frozen issues without any data loss. Besides that, it also enables you to upgrade or downgrade your iPhone without jailbreak.

Here are the specific steps to fix iPhone 14, 13, 12, 11 won’t turn on or is frozen with U.Fone – iOS System Recovery.

Step 1. Download and Install Program
Click the Download button below to get the program for computer. Once downloaded, install and start the program.

d_win d_mac

Step 2. Go to iOS System Recovery
On the main screen, click “More tools” in the left, and you’ll now get access to 3 functions.

iOS System Recovery tool

Click “iOS System Recovery” function.

select iOS System Recovery

As you can see, it can fix 50+ iOS system issues. Here choose “iOS Mode issues” and click “Start” button.

select iOS Mode issues option

Step 3. Connect iPhone 14/13/12/11 to Computer
Next, connect your iPhone 14/13/12/11 to computer using an Apple USB cable. It will detect your device and show you 2 repair types.

select Standard Mode

To fix iPhone is frozen and won’t turn on issue without data loss, you need to choose “Standard Mode”.

Step 4. Optimize iOS System (Optional)
As the picture shown below, it will detect and analyze your iOS device. In this step, you are able to optimize iOS System. You can click “Optimize” to update your iPhone, or just skip this step.

Optimize iOS System

Step 5. Enter Recovery Mode
Then follow the on-screen instructions to put your iPhone 14/13/12/11 into recovery mode manually.

enter recovery mode

Step 6. Download Firmware Package
It will then display the firmware package on the screen, select the one to match your iPhone.

select Firmware package

Click “Download” button to download the matched firmware package corresponding to your iPhone.

Download Firmware package

Step 7. Fix a Frozen iPhone or iPhone Won’t Turn On
At last, click “Repair” button to repair iPhone 14/13/12/11 back to normal.

fix iphone 14 won't turn on

When finished, you can open your iPhone and enjoy all iOS features with ease.

The Bottom Line

Here are 2 effective ways to help you wake up your iPhone 14 won’t turn on or is frozen. You can do a hard reset or use an iOS system repair tool to fix a frozen or unresponsive iPhone 14, 13, 12, 11. Pick the one you like!

d_win d_mac

iPhone 14/13/12/11 Won’t Turn on or Frozen

How to Fix iOS 16 iPhone to Normal without Data Loss

Summary
iPhone get into abnormal state after upgrading to iOS 16? Read this post then you will get the best method to fix iPhone which run on iOS 16 to normal without data loss.

My iPhone 13 stuck at restart loop after I upgraded it to iOS 16. What happen on it? Any ways to fix this device to normal? By the way, I haven’t backed up recently. How to return it to normal without data loss? Thanks so mush!

It is no doubt that the hottest topics are mostly about the newly released iOS 16. Recently Apple released iOS 16.4 and iPadOS 16.4, two updates that come after several weeks of beta testing. iOS 16.4 add a long list of new features, ranging from updated emoji characters to web push notifications on the iOS device. Lots of iOS users want to get their device on iOS 16, they can’t wait to upgrade their device to iOS 16. Lots of iOS users want to upgrade their device to the newest iOS 16. However it likely have many bugs that frustrate the users. Some iPhone user complain a variety of performance issues with iOS 16. The current list of iOS 16 performance issues includes UI lag, freezes, lock ups, and random reboots. These are extremely common, particularly on older iPhone models. This post aims to show you some simple tips and the best solution to fix iOS 16 iPhone to normal. Hope it will do a great help for you.

Part 1. Simple Tips to Fix iOS 16 iPhone to Normal

If you get some issues on your iOS 16 device, and you don’t have time to get in touch with Apple support, here are some simple tips may help you fix iOS 16 performance issues you’ve meet on your device.

1.Restart Your Phone
If you start noticing iPhone stuck or another performance issues after installing the latest version of iOS 16, try restarting your iPhone. Power it down, leave it off for a minute, and then turn it on. This has solved many issues for iPhone user in the past.

2.Clean Up the Storage of Your iPhone
If you’ve used your iPhone for some years you might have a ton of clutter taking up space on its internal storage. Deleting unnecessary files could help speed up your iPhone. This is especially true if you’re almost out of storage.

3.Stop Using Background App Refresh
iOS background app Refresh feature refreshes apps in the background to show you the latest data when you open it. It also makes your phone work in the background. So, if you don’t need this, you might want to shut the feature off. It may help to fix iOS stuck issue on device.

4.Downgrade iOS System
If it is not work for fixing abnormal state issues on iPhone with iOS 16, you can try downgrading device to the previous iOS version.

Part 2. Fix iOS 16 iPhone to Normal without Data Loss (Best Solution)

Well, if you try these tips above in the last part and it is not work perfectly, you can turn to this best solution. Thanks to U.Fone iOS System Recovery, you are able to fix iOS 16 iPhone to normal without data loss. With the advanced technology design, this tool provides a faster and reliable way with users. Only some easy steps, you can get your iPhone back to normal state as usual. What case can this tool help to fix? It supports to effortlessly repair 150+ iOS system issues at home like restart loop, stuck at white Apple logo, stuck on recovery mode, etc,. What’s more, this powerful tool is compatible with all iOS versions and devices including iOS 16 and iPhone 14 models.

d_win d_mac

How to Fix iPhone to Normal without Losing Data

Step 1. Install U.Fone iOS System Recovery
Download, install and run the U.Fone iOS System Recovery on PC/Mac computer, click the “More tools” function in its main interface. Then, connect your iPhone to the computer via an USB cable.

connect iPhone to computer

After that, a new window will pop up, offer three options for your chosen. To fix iPhone to normal without data loss, tap “iOS System Recovery” option.

select iOS System Recovery

Then click “iOS Mode issues”, the program enable to fix 50+ issues, like stuck on headphones mode, stuck on recovery mode, stuck on DFU mode, etc,. Select one depend on your case. Then, hit the “Start” button to go on.

select iOS Mode issues

Step 2. Select Fix Mode for iPhone
You then will get into a new window, like the screenshot below. Please select “Standard Mode” to fix your iPhone without data loss, then click “Confirm” to go on.

iPhone fixing mode

Tips: You are suggested to choose advanced mode only if the standard mode fails. (It may lead to data loss on device).

Step 3. Detect Your iPhone
The program will detect and analyze your iPhone and shows its information.

detect iphone

Step 4. Select Firmware Package
In this step, select a suitable firmware package for your iPhone, the program provides the latest iOS version for iPhone.

select Firmware

Step 5. Download Firmware Package for Fixing iPhone
It will detect the model of your iPhone and displays available iOS system versions automatically. Select a version and click on “Next” button. It will start downloading Firmware package for repairing your iPhone. Please don’t interrupt the connection of your device during the download processing.

Download Firmware

Step 6. Fix iPhone to Normal without Data Loss
When the Firmware package downloading completes, click the “Repair” button. The program will begin to fix iOS system to normal without data loss, please keep connecting your iPhone with the computer until the fixing task finishes.

fix iphone without data loss

Well done, now your iPhone has restart automatically, and it has back to normal state without data loss.

d_win d_mac

The Bottom Line

After reading this post, we hope you have fix your iPhone successfully. Of all solutions mentioned above, get help of U.Fone iOS System Recovery is the most effective solution to fix iOS 16 iPhone problems. Almost all iPhone issues can be solve by using this program. Though it can fix iOS issues without data loss on iOS device, don’t forget to back up your device frequently. That’s all about our guide. If you have any questions about this topic, welcome to share it with us.

Fix iOS 16 iPhone without Data Loss

[Fixed] iOS 16 Downgrade Stuck on Recovery/DFU Mode/Apple Logo

Summary
Read this post some solutions to fix iOS 16 downgrade stuck on recovery mode, stuck on DFU mode, stuck at Apple logo screen; then you will get your iOS device to normal state.

I downgraded my iPhone 13 from iOS 16 to iOS 15 but failed. It stuck at Apple logo screen. Now I can’t do anything on my device. Any solutions to get it out of this abnormal state? Urgent!

Apple comes up with updates in the existing system software frequently. It is easy to upgrade your device to the newest iOS system, like iOS 16. However, you may feel it is not perfect of the newest iOS system, you don’t like the features that come with the updates. If you are not satisfied with the current iOS system, you can downgrade iOS to the old version, like iOS 15. It is very easy to downgrade from iOS 16 to iOS 15 or older iOS versions. However, the downgrade process may fail due to system or hardware issues. After that, you may put your device into some abnormal states. For example, stuck on recovery mode, stuck on DFU Mode, stuck at Apple logo screen, etc,. All in all, people get various kinds of issues like iPhone stuck issues after iOS downgrading. If you are one of those users who are facing iOS 16 downgrade stuck issues, here are some solutions that might help.

Part 1. Tips to Fix iOS Device Stuck after iOS 16 Downgrade

Here are some tips to fix iOS device stuck after iOS 16 downgrade, be available for all iOS stuck issues, like stuck on recovery mode, stuck on DFU mode, stuck at Apple logo screen. Try the solutions given below if something wrong with the iOS 16 downgrade procedure and it will resolve possibly.

A. Force Restart iPhone
Force restarting your iPhone/iPad is the first thing you should try. It won’t respond to several commands as the downgrade is stuck. Whether it is stuck in recovery mode, Apple logo, or DFU mode, you can force restart the device.

B. Exit Recovery Mode Stuck Manually
Once your device enter the recovery mode, you can exit it manually but many people don’t know this.

Step 1. Firstly, open iTunes on the computer and connect your iPhone to it.

Step 2. When you see the Apple logo screen, press and hold the sleep button on the device. Please don’t release the buttons and the “Connect to iTunes” icon will appear on the screen soon.

Step 3. Then the device will boot up, wait and you will see the lock screen.

C. Manually Exit DFU Mode
With the iOS 16 downgrade stuck issue happen, the same manual exit method can be tried also.

D. iTunes Restore
If you try these tips above but it doesn’t work, just try iTunes restore solution. But this solution will erase all of your data. So before you processing iTunes restore, we recommend you taking a backup.

restore itunes

Part 2. Final Solution to Fix iOS Device Stuck after iOS 16 Downgrade

If you have these tips which we mention in pat 1 but it doesn’t work, the final solution is offered for you. It will provide the best solution with you, help to fix all abnormal issues appear after iOS 16 downgrade. If you got yourself into a disaster after downgrade your iPhone, then you should know about this U.Fone iOS System Recovery. With the help of this software, you can solve all kinds of iOS 16 downgrade and other iOS issues. This software is specially designed to fix any iOS system issues without data loss. It can be used to fix iOS 16 downgrade stuck on recovery/DFU mode/apple logo without iTunes. After that, you will get your device back to normal state. It is compatible with most iOS devices and iOS system, including iPhone 14/13/12, iOS 16/15/14/13.

d_win d_mac

How to Fix iOS Device Stuck after iOS 16 Downgrade

Step 1. Run U.Fone iOS System Recovery and Connect Device to Computer
Download, install and run the U.Fone iOS System Recovery on the computer, click the “More tools” function at the bottom left of the main interface. Then, connect your iOS device with the computer via an USB cable. Here we take iPhone as an example.

connect iPhone to computer

A new window will pop up, offer three options for your chosen. To fix iPhone to normal state, choose the “iOS System Recovery” option to proceed.

select iOS System Recovery

The software will pop up a new window, then click “iOS Mode issues”, you can see the software can fix 50+ issues, like stuck on headphones mode, stuck on recovery mode, stuck on DFU mode, etc,. Then, hit the “Start” button at the lower right corner to go on.

select iOS Mode issues option

Step 2. Select Fix Mode for iDevice
You then will get into a new window, like the screenshot below. Please select “Standard Mode” or “Advanced Mode” to fix your iPhone, then click “Confirm” to go on.

“Standard Mode” – Fix iPhone with this mode, all data on your device will not be lost.
“Advanced Mode” – Fix iPhone with this mode, it will erase all data on your device.

You are suggested to choose advanced mode only if the standard mode fails.

iPhone fixing mode

Step 3. Detect iPhone
The software will detect and analyze your iPhone and shows all information of the device.

detect iphone

Step 4. Select Firmware Package
The software automatically detects the model type of your iPhone and displays available iOS system versions. Select a version and click on “Next” button.

select Firmware

Step 5. Download Firmware Package for Fixing iPhone
It will start downloading Firmware package for repairing your iPhone.

Download Firmware

Step 6. Fix iPhone to Normal State
After the Firmware package downloading completed, click the “Repair” button at the lower right corner. The software will begin to fix iOS system to normal, please keep connecting your iPhone with the computer until the fixing task end.

fix ios 16 stuck issue

Done, your iPhone will restart automatically and it will back to normal state without any problems.

d_win d_mac

Final Words

That are some solutions that you can try if you ever face issues like iOS 16 downgrade get stuck problems on your device. If you want a 100% reliable solution, then using U.Fone iOS System Recovery is the best option for you. It can return your device to normal state efficiently without data loss!

Fix iOS 16 iPhone Stuck issues

How to Fix iPhone 14/13/12/11 Stuck in Recovery Mode

Summary
There can be several reasons your iPhone is stuck on recovery mode. In this guide, we will show you how to get out of iPhone 14, 13, 12, 11 stuck on recovery mode. You can even fix iPhone 14/13/12/11stuck on recovery mode without data loss.

Q1: “iPhone 13 Stuck in Recovery Mode, How to Get Out of It?”

Q2: “How to Fix iPhone 14 Stuck in Recovery Mode?”

The iPhone 14 series get you 5G support, more storage, a better main camera, larger batter life and more attractive features. Have you upgraded to the iPhone 14, iPhone 14 Plus, iPhone 14 Pro, iPhone 14 Pro Max? Or are you using an iPhone 13, iPhone 12 or even iPhone 11? No matter which iPhone model you use, you can upgrade to the latest iOS 16 and enjoy new iOS features.

However, some Apple users reported that iPhone stuck in recovery mode after iOS 16 upgrade or restore. There can be several reasons your iPhone is stuck in recovery mode. The most common reason is a software corruption update during updating. If you’re facing the issue of iPhone 14/13/12/11 stuck in recovery mode, you come to the right place. Here we are going to teach you several solutions to fix iPhone 14/13/12/11 stuck in recovery mode.

Solution 1. Fix iPhone 14/13/12/11 Stuck in Recovery Mode Without Data Loss

Looking for a way to fix iPhone stuck on recovery mode without data loss? Here you can ask help from a third-party iOS system recovery software, such as U.Fone iOS System Recovery. It is capable of fixing 30+ iOS system issues, including recovery mode, DFU mode, black screen, white screen, Apple logo, boot loop, frozen iPhone, and more.

With it, you can easily and effortlessly fix all iOS/iPadOS/tvOS problems at home. In addition, it enables you to get your iOS back to normal with standard mode or advanced mode. Only in a few clicks, you can get out of iPhone 14/13/12/11 stuck on recovery mode, no data loss.

Here are some awesome features of U.Fone iOS System Recovery:

  • Fix iPhone stuck in Recovery Mode without data loss.
  • Fix various iOS system issues on iOS 16/15/14/13/13.
  • Fix iOS/iPadOS/tvOS system problems back to normal.
  • Downgrade iOS to old version without Jailbreak, keep your data.
  • Fix iOS issues like recovery mode, DFU mode, Apple logo, black screen, etc.
  • Recover data from iOS device, iTunes or iCould backup files.

d_win d_mac

How to Fix iPhone 14/13/12/11 Stuck in Recovery Mode?

Step 1. Open U.Fone iOS System Recovery
Download the U.Fone iOS System Recovery software from your computer. Install and start it. Click “More tools” in the left side, and connect your iPhone 14/13/12/11 to computer.

connect iPhone to computer

Step 2. Select “iOS System Recovery” Mode
From the options in the main window, select “iOS System Recovery” mode to fix iPhone stuck in recovery mode issue.

select iOS System Recovery

After that, you will see different issues in the screen. Please choose “iOS Mode issues” and click “Start”.

select iOS Mode issues option

Step 3. Select Standard Mode
You can repair iPhone stuck in recovery mode with Standard Mode or Advanced Mode. To keep your data, simple tick “Standard Mode” and tap “Confirm” to continue.

iPhone fixing mode

As your iPhone is stuck in recovery mode, so you don’t need to put it in DFU/recovery mode manually.

Step 4. Download Firmware Package
Before performing the system repair, you need select the matched firmware package for your iPhone 14/13/12/11.

select Firmware Package

After selection, click “Next” button to download the firmware package for iPhone.

Download Firmware

Step 5. Fix iPhone 14/13/12/11 Stuck in Recovery Mode
After the firmware package is downloaded successfully, press on “Repair” button to exit recovery mode on iPhone 14/13/12/11.

fix iphone 14 stuck in recovery mode

Wait a few minutes until it complete. After fixing iPhone 14, 13, 12, 11 stuck in recovery mode, your iPhone will restart automatically. And you can disconnect your iPhone from the computer and use it as usual.

Solution 2. Fix iPhone 14/13/12/11 Stuck in Recovery Mode With iTunes (Data Loss)

Don’t want to use a third-party tool? You may also get out of iPhone 14 stuck on restore mode with iTunes. iTunes can help you resolve many minor software-related issues, including recovery mode. But this method will erase all data and settings on your iPhone 14/13/12/11. You’d better make a backup in advance. Now try fixing it with the following steps.

Step 1. Open the latest version of iTunes on your computer.

Step 2. Use a USB cable to connect your iPhone 14/13/12/11 with computer.

Step 3. iTunes will detect your iPhone, and then pop up a window asking you to restore your iPhone.

fix iphone 14 stuck in recovery mode via itunes

Step 4. Click “Restore” button and confirm your action.

Step 5. Wait for the restore process to complete. Afterwards, your iPhone will restart and return to factory state.

If you want to fix iPhone 11, 12, 13, 14 stuck on recovery mode with no data loss, the best way is to use U.Fone iOS System Recovery. Have a try right now!

d_win d_mac

Fix iPhone 14/13/12/11 Stuck in Recovery Mode

How to Fix iOS 16 iPhone Stuck in Recovery Mode

Summary
iOS 16 iPhone stuck on recovery mode? How do you get out of iOS 16 stuck on recovery mode? Don’t worry. Here, we will list the most common reasons why iPhone stuck on recovery mode, and guide you how to fix iPhone stuck on recovery mode after iOS 16 upgrade or restore, no data loss.

For better user experience, Apple adds new features in its every iOS edition. The new iOS 16 features will help you make the most of your iPhone. Have you updated your iPhone to the lasted iOS 16 version? The latest version of iOS and iPadOS is 16.4. However, some people faced that iPhone stuck in recovery mode after iOS 16 upgrade or restore issue. Don’t worry, this is not a new thing that iOS 16 stuck iPhone in recovery mode. This post is written to help you fix iOS 16 iPhone stuck on recovery mode. Check it out!

Part 1. Why iPhone Stuck on Recovery Mode on iOS 16?

Some people are confused that why iPhone stuck on recovery mode after iOS 16 update or restore. To be honest, there are two main reasons for iPhone stuck in recovery mode: namely hardware issues and software corruption.

1) Hardware issue like water-damaged iPhone.

2) Software reasons of iOS 16 iPhone stuck in recovery mode include:

  • A failed jailbreak on your iPhone.
  • You activated the recovery mode accidentally.
  • A bugged software might’ve been installed on your iPhone.
  • An unsuccessful backup restore might be affecting the iOS.
  • Some old iPhone models don’t support iOS 16 version.

Next, let’s see how to fix iOS 16 iPhone stuck on recovery mode.

Part 2. Exit iOS 16 Stuck on Recovery Mode via Hard Reset

Force restarting iOS device is the easiest way to fix common iOS system issues, including an iPhone stuck in recovery mode. You can try to hard reset your device to fix iOS 16 iPhone stuck on recovery mode. iOS 16 is only compatible with iPhone 8 or above (iPhone SE 2nd, 3rd included).

For iPhone 8/X/XR/XS/11/12/13/14/SE 2nd/SE 3rd:

Press and quickly release the Volume Up button.
Press and quickly release the Volume Down button.
Press and hold the Power button on the right side until the Apple logo appears on the screen.

hard reset iphone 13

For iPhone 7, iPhone 7 Plus:

Quickly Press and Hold Volume up Button and Power button until you see the Apple logo on the screen.

hard reboot iphone 7

For iPhone 6/6s/6S Plus:

Quickly Press and Hold on the Home button and Power button until you see the Apple logo on the screen.

force reboot iphone 6

Part 3. Fix iOS 16 iPhone Stuck in Recovery Mode via iOS System Recovery (100% Work)

Another risk-free method to fix iOS 16 iPhone stuck on recovery mode is using a third-party iOS system recovery tool. U.Fone iOS System Recovery is a safe, reliable yet professional iOS system recovery software for iPhone/iPad/iPod Touch. It is able to fix various iOS system issues like stuck on recovery mode, headphones mode, DFU mode, black/blue/white screen, Apple logo, iPhone boot loop, iPhone keeps restarting, etc. With it, users can easily and quickly fix the iOS 16/15/14 stuck on the recovery mode issue.

Main Features:

  • Fix various iOS system issues without data loss.
  • Fix iOS system to normal on iPhone/iPad/iPod Touch.
  • Fix 30+ iOS system issues like Apple Logo, DFU/Recovery Mode, black screen, etc.
  • Repair iOS systems in 2 modes: Standard Mode, Advanced Mode.
  • Easily downgrade or update the iOS system without effort.
  • Supports all iOS devices, the latest iOS 16 and iPhone 14 series included.

d_win d_mac

How to fix iOS 16 iPhone Stuck on Recovery Mode?

Here is the detailed steps to fix iPhone stuck on recovery mode after iOS 16 upgrade.

Step 1. Launch U.Fone iOS System Recovery
Download U.Fone iOS System Recovery and install it on your Mac or Windows PC. Click the “More tools” in the left panel. Then connect your iOS 16 device to computer via USB cable.

connect iPhone to computer

Step 2. Select iOS System Recovery Function
It will turn to a new page with 3 options, including iPhone Data Recovery, iOS System Recovery, iOS Data Backup & Restore. Here please select “iOS System Recovery” function.

select iOS System Recovery

In the next window, it will list different device/screen/iOS/iTunes issues. Click “iOS Mode issues” and you will see “Stuck on recovery mode” included. Click the “Start” button to go on.

select iOS Mode issues option

Step 3. Choose Standard Mode
There are 2 modes that you can use to resolve stuck issues. To fix iOS 16 iPhone stuck on recovery mode without data loss, please choose select “Standard Repair”.

iPhone fixing mode

Step 4. Download Firmware Package
As your iOS device is stuck in recovery mode, U.Fone will detect and analyze your device automatically. For other iOS systems issues, you need to put your iOS device into DFU/Recovery Mode. So in this step, you just need to follow the onscreen instructions to download a suitable firmware, and click “Next” button.

Download Firmware

Then it will start downloading the firmware package, just wait patiently.

Step 5. Fix iOS 16 iPhone Stuck in Recovery Mode
After that, hit on “Repair” button to repair your iPhone system to normal. Keep connecting your iOS device with computer during the repairing process.

fix ios 16 stuck in recovery mode

Once finished, your iOS 16 device will restart automatically, and return to normal. Now you can use your iOS device and enjoy the iOS features as usual.

d_win d_mac

Fix iOS 16 iPhone Stuck in Recovery Mode

UkeySoft FoneFix Review Pros, Cons, Features & Alternatives

Summary
This review introduces features, pros and cons of UkeySoft FoneFix iOS system recovery software, and its alternatives, helping you fix various iOS/iPadOS/tvOS system issues and get your iDevice back to normal.

What is UkeySoft FoneFix?

If you are an Apple user, when you use iOS devices such as iPad and iPhone, you may encounter many challenges, such as the iPhone stuck verifying update while upgrading iOS system, iPhone stuck in recovery mode or DFU mode, iPhone keeps restarting, iPad bricked, white Apple logo, disabled screen, blue screen, white screen, etc. UkeySoft FoneFix gives a hand to fix various iOS issues and get your iDevice back to normal. It comes with three modes: Standard Mode, Advanced Mode and Enter/Exit Recovery Mode.

Ukeysoft Fonefix

Standard Mode helps to solve the common iOS/iPadOS/tvOS issues mentioned above without any data loss, as as well as frozen iPhone, iPhone won’t turn on, etc. If this mode does not work, the Advanced Mode will come in handy. Advanced Mode can easily restore your iPhone or iPad to factory settings without iTunes or password, but it will erase all data and files on the iPhone. In addition, it enables you to enter and exit recovery mode by one click. Next we will present a tutorial on these modes of operation in the text.

Is UkeySoft FoneFix Safe?

UkeySoft Inc. is a software development company, and its products enjoy a good reputation on major websites. Its developers promise that the software is 100% safe and reliable. After testing, it was found that FoneFix has no malware, adware or viruses. According to the survey, its users are satisfied with the security of this program. Therefore, no need to worry about data leakage on iPhone or iPad when using this software to fix iOS system issues. In the Standard Mode, your iPhone data will not be deleted, but Advanced Mode may do that.

Main Features of UkeySoft FoneFix:

  • Easy to use, all-in-one tool, no technique required.
  • Fix various common and serious iOS problems.
  • Get your iOS/iPadOS/tvOS back to normal with 2 modes.
  • Repair iOS problems without data loss in a few clicks.
  • Enter or exit recovery mode on iDevice by one click.
  • Downgrade your iOS to the previous without jailbreak.
  • Get your iDevice out of recovery mode, Apple logo, black screen, etc.
  • Runs smoothly on both Windows and Mac system.
  • Compatible with all iOS devices and versions including iOS 14 and iPhone 12.

Is UkeySoft FoneFix Free?

No, this is a paid software, but the price is very reasonable. Its free version allows you to use for basic work, such as downloading the firmware package. Better yet, you can quickly enter and exit the recovery mode by one-click, this function is free! However, if you want to use the Standard Mode and Advanced Mode to restore you device to normal, you need to purchase its full version. Personal license for one PC/Mac is $49.95, and Family License for up to 5 PC/Mac is $79.95. After purchasing, you will get its lifetime free upgrade and support.

How Can UkeySoft FoneFix Help You?

After knowing something information about UkeySoft FoneFix iOS System Recovery, you may want to know how it can help you fix iOS system issues to normal. For example, get iPhone out of DFU Mode, fix iPhone stuck in Recovery Mode, fix iPhone stuck on verifying update, etc. You can use 3 modes to fix iPhone stuck on tecovery mode/Apple logo/boot loop, etc.

1. Standard Mode

As mentioned above, the standard mode solves most of the issues on iOS devices. Let us use it to fix iPhone stuck in DFU mode, Apple logo, etc. step by step.

Step 1. Download and install the software on the computer desktop, then launch it. Connect your iPhone or iPad or iPod touch to the computer via Apple USB cable. And then select “Standard Mode” option.

select standard mode

Step 2. Follow the instructions on the screen to put your iPhone into recovery mode and click the “Next” button.

enter recovery mode

Step 3. Next, the program will automatically detect your device, click “Download” to download the firmware package for your device.

download firmware package

Step 4. After that, click “Start” to repair your iPhone to normal and wait for the process to complete.

fix ios system to normal

2. Advanced Mode

When the Standard Mode cannot fix your iPhone problem, the Advanced Mode will come in handy. The process is the same as the above Standard Mode, but in step 1 above, please select “Advanced Mode”. Using Advanced Mode to repair the device may cause data loss, so it is best to back up your data before using this mode.

select advanced mode

3.Enter or Exit Recovery Mode

When the home button or other buttons of your device are broken, UkeySoft FoneFix’s one-click enter or exit recovery mode function allows you to quickly enter or exit the recovery mode on iPhone/iPad/iPod touch/Apple TV! It is worth mentioning that you can use this feature for free!

How to Enter Recovery Mode:

Step 1. Install and launch UkeySoft FoneFix on your computer. Select Enter/Exit Recovery Mode on the home screen of UkeySoft.

select enter or exit recovery mode

Step 2. Connect your iPhone or iPad to computer, click Enter Recovery Mode option. After a few minutes, when you see iTunes logo on the screen of your device, it means your device enter Recovery Mode successfully.

enter recovery mode

How to Exit Recovery Mode:

Step 1. Launch UkeySoft FoneFix and select Enter/Exit Recovery Mode on the Home page.

select enter or exit recovery mode

Step 2. Connect your iPhone to the computer via USB cable, and click the Exit Recovery Mode button. After the process is complete, your device will restart and return to its normal state.

exit recovery mode

Where to Download UkeySoft FoneFix?

You can go to the official page of UkeySoft FoneFix and download the app. You are free to try its free version to know if it meets your requirements before purchasing it.

Pros:

  • User-friendly interface, easy to use, reliable.
  • Fix various iOS system issues without data loss.
  • Enter and exit recovery mode totally free.
  • Restore iOS / iPadOS / tvOS to normal at home.
  • Advanced Mode can unlock disabled iPhone without passcode/iTunes.
  • Support the latest iOS 14 and iPhone 12.
  • Works perfectly on Windows and Mac and all iOS device.

Cons:

  • Not free, features are limited in free trial version.
  • The Advanced Mode will erase all iOS data.
  • It takes some time to load the firmware.

Why We Recommend UkeySoft FoneFix iOS System Recovery?

When reading this article, you might think that I am just writing about the advantages and attractive aspects of this software. Furthermore, you will undoubtedly find that there are many iOS system rrecovery tools on the market. Actually, the UkeySoft FoneFix evaluation is conducted after extensive testing of all the most basic functions and operating specifications. We hope UkeySoft FoneFix can help you easily solve all kinds of iOS errors and meet your needs. The following are the factors we tested FoneFix:

1. Compatibility
An excellent iOS system recovery tool should have wide compatibility. UkeySoft FoneFix is ideal for compatibility with all iOS/iPadOS/tvOS devices and all iOS versions. It is fully compatible with Windows and MacOS systems, including Windows XP, 7, 8, 8.1, 10 and macOS 10.15 / 10.14/ 10.13 / 10.12 / 10.11/ 10.10 and older.

2.Easy to use
An excellent application also includes user-friendliness. Simple steps, no technical requirements, any user can use, these are the characteristics of popular iOS system recovery tools. In order to simplify the work for customers, UkeySoft FoneFix has designed a simple user interface so that users can successfully handle the tool.

3. Cost
Everyone wants a free and safe iOS system recovery tool, but in fact all tools are paid. Many free tools will insert advertisements and even carry viruses. Although it costs $49.95 to enjoy all the features of FoneFix, in my opinion, this tool can bring you a great functions. In addition, the price of the dr.fone repair tool listed below is $69.95. In contrast, UkeySoft FoneFix is more worth trying!

4. Support
This UkeySoft FoneFix review will be incomplete if I do not speak on the support before you purchase it. With the paid version(Personal License/ Family License), you can enjoy lifetime free upgrade and support.

Alternatives to UkeySoft FoneFix

Everyone has different requirements for iOS system recovery tools. If you think UkeySoft FoneFix is not your ideal tool, you can try to learn about its alternatives. The following article will list some different iOS system recovery software designed to help you repair Apple devices and get your device back to normal.

1. U.Fone iOS System Recovery

You can also rely on U.Fone iOS System Recovery software to repair your iPhone/iPad/iPod touch/Apple TV system error. It is known for its simple operation, high efficiency and complete compatibility. With using it, you can fix all kinds of iOS abnormal issues, like iPhone stuck in the Recovery Mode, iPhone stuck at black screen; bring your iPhone back to normal state with only 10 minutes. In addition, U.Fone iOS System Recovery has been designed so it won’t affect any of the existing data on your device.

d_win d_mac
d_win d_mac

restore iPhone system to normal

Pros:

  • Repair your iOS system issues at home
  • Fix iPhone/iPad frozen in recovery mode, white Apple logo, black screen, looping on start, etc.
  • 100% workable, no data loss.
  • Support the latest iOS 14 version and iOS device.

Cons:

  • Not free.
  • Cannot enter or exit recovery mode with one click.
  • Takes up a relatively large space.

2. Dr.Fone – System Repair

Dr.Fone – System Repair is also a professional iOS repair tool, which claims to be able to repair most iOS device to a normal state and save your data safely. It is suitable for all models of iPhone, iPad and iPod touch, and is widely compatible with various iOS versions. If your iPhone fails to respond, displays a white Apple logo, restarts endlessly, etc., you can use Dr. fone to fix your device system issues.

d_win d_mac

ios-system-recovery-01

Pros:

  • Rescue the iOS system in various situations.
  • Protect your data safe during the repair process.
  • Available on all iPhone / iPad / iPod touch.

Cons:

  • Expensive, $59.95 for one year, Lifetime License is $69.95, Business License is $399.00.
  • Cannot enter or exit recovery mode for free.
  • The Advanced Mode will erase all iOS data.

3. Tenorshare ReiBoot

Tenorshare ReiBoot is a well-designed iOS repair tool that helps you repair various iOS system problems with no data loss. Like UkeySoft FoneFix, it can also repair frozen screens, white/black screens, Apple logos, iPhone in recovery mode, etc. Similarly, Tenorshare ReiBoot also comes with one-click enter/exit recovery mode. In addition, it can also let you factory reset your iPhone/iPad/iPod touch without iTunes.

Pros:

  • Free enter/exit recovery mode in one click.
  • Keep your data while rescuing iOS system.
  • Compatible with all iOS device and iOS version.

Cons:

  • Not free, $39.95 for one year, while Lifetime License is $49.95.
  • The Advanced Mode will erase all data on the iOS device.
  • Not very stable, the program may sometimes crash.

Conclusion
I hope this UkeySoft FoneFix review can help you solve various iOS system issues. Everyone has different problems with iOS, and their selection criteria for system recovery tools depends on their price, functions, advantages or disadvantages, etc. In my opinion, UkeySoft FoneFix is worth a try, it lets you get rid of various iOS/iPadOS/tvOS system issues, such as iPhone stuck on verifying update problem, DFU mode, recovery mode, Apple logo, blue screen, frozen iPhone, headphone mode, Apple TV Issues, etc. If you follow the guide carefully, you can easily get your iPhone back to normal! It’s 100% safe!

Top 5 iPhone and iPad Lock Screen Removal Review

Summary
If you need to remove passcode from locked/disabled iPhone and iPad, the article reviews best 5 iPhone lock screen removal tool for Windows & Mac to unlock iPhone/ iPad without passcode.

There are many reasons why you might need to remove the passcode from your iPhone. Maybe you forgot the passcode after not using your old device for a long time, or you bought a second-hand iPhone that’s locked. Sometimes the screen is broken and you can’t enter the passcode, or the device is stuck in recovery mode, DFU mode, or shows the message “iPhone is disabled, connect to iTunes.” No matter the situation, an iPhone unlocker tool can help you unlock your iPhone or iPad. In this article, we’ll introduce top 5 iPhone lock screen removal tools, along with their pros and cons, to help you find the best option for your needs.

best iphone unlocker

CONTENTS

Top 1. FoneLab iOS Unlocker [Best]

FoneLab iOS Unlocker is a great option if you’re looking for a free tool to unlock your iPhone. Whether you’ve forgotten your passcode or your device is locked, FoneLab can help. It supports removing different types of iPhone passcodes, including 4-digit codes, 6-digit codes, Face ID, and Touch ID. No matter which method your iPhone uses, you can regain access in just a few minutes and it offers a high success rate up to 99%.

But that’s not all. FoneLab iOS Unlocker can also remove the Apple ID and iCloud account linked to your device even if you don’t know the password. This is especially useful if you bought a second-hand iPhone or can’t remember your login details. Once the lock is removed, you’ll be able to fully use your iPhone again. Just sign in with a new Apple ID, download apps, and enjoy all features without restrictions.

Main Features of FoneLab iOS Unlocker

  • Unlock your iPhone or iPad even if you don’t remember the passcode
  • Bypass locked screens, including Touch ID and Face ID on iPad
  • Remove Apple ID without needing the password
  • Disable Screen Time or Restrictions passcodes
  • Get rid of MDM (Mobile Device Management) profiles from your iPhone or iPad
  • Recover access to iTunes backups by removing forgotten passwords
  • Works with all iPhone, iPad, and iPod touch models

Guide: How to Remove Screen Passcode with FoneLab

Step 1. Download and Install FoneLab iOS Unlocker
Start by downloading and installing FoneLab iOS Unlocker on your computer. Just click the Download button below to get started.

d_win d_mac
d_win d_mac

Step 2. Select “Wipe Passcode” Mode
Connect your iPhone or iPad to the computer, then choose the Wipe Passcode option from the main screen.

select wipe passcode mode

Step 3. Confirm Your Device Info
Check and confirm your device details, then click Start to begin downloading the necessary firmware.

confirm your device

Step 4. Remove the Screen Passcode
Once the firmware is ready, click Unlock to start removing the passcode. To confirm, enter 0000 when prompted.

start to remove passcode

Pros:

  • Easily remove the passcode from iPhone, iPad, or iPod touch
  • Supports all types of locks: 4-digit, 6-digit, Touch ID, and Face ID
  • Unlock a locked or disabled iPhone without using iTunes
  • Works even if your iPhone has a broken or black screen
  • Remove Apple ID from any activated iOS device without losing data
  • Safe, clean, and beginner-friendly tool
  • Compatible with Windows (XP, 7, Vista, 8, 10, 11) and macOS (10.13 and above)
  • Fully supports all iPhone, iPad, and iPod touch models

Cons:

  • Some features require upgrading to the paid version.

Top 2. iMyFone LockWiper

iMyFone LockWiper is another excellent iPhone unlocking tool, available for both Windows and Mac. It can unlock screen passcodes on iPhones and iPads, and also remove Apple ID without needing the password. In addition, it helps recover the Screen Time passcode, making it easy to bypass any restrictions. You can download the software for free on your Windows or Mac computer and use it to unlock your device with ease.

iMyFone iPhone unlocker

Pros:

  • Unlock iPhone or iPad even if it’s locked, disabled, or has a broken screen
  • Bypass Screen Time or Restrictions passcodes without losing data
  • Remove Apple ID without needing the password
  • Regain access to your device if you’ve forgotten the passcode

Cons:

  • Not a free tool
  • Erases all data when removing the screen passcode
  • Downloading the firmware package may take a while
  • Can’t remove Apple ID if you can’t access the device’s settings

Top 3. Dr.Fone – Unlock (iOS)

Dr.Fone – Unlock (iOS) is part of the Dr.Fone toolkit and offers powerful unlocking features for both iOS and Android devices. It can remove screen passcodes from iPhones and iPads, as well as unlock Android devices from brands like Samsung, LG, Huawei, Xiaomi, Lenovo, Motorola, and OnePlus. If you’ve forgotten your iPhone or iPad passcode, this tool helps you unlock it quickly. It can also remove Apple ID and iCloud activation lock without causing data loss.

However, keep in mind that the software package is quite large, so downloading and installing it may take some time. That’s because Dr.Fone is an all-in-one mobile solution offering data recovery, phone transfers, backups, system repair, data erasure, and more. It supports almost all iOS and Android devices.

Dr.Fone iPhone unlocker

Pros:

  • Helps unlock your iPhone if you’ve forgotten the screen passcode
  • Removes various types of locks like pattern, PIN, password, and fingerprint
  • Quickly restores access to disabled or locked iOS devices
  • Supports all models of iPhone, iPad, and iPod touch
  • Fully compatible with iOS 13 and earlier versions
  • Can unlock some Samsung and LG phones without losing data
  • Cons:

    • The software is large and takes up a lot of storage space
    • Runs slower compared to other similar tools
    • Relatively expensive compared to other options

    Top 4. Tenorshare 4uKey

    Tenorshare 4uKey is a straightforward iPhone unlock tool designed with two main features: removing the lock screen passcode and unlocking Apple ID. It supports all types of passcodes, including 4-digit, 6-digit, custom numeric codes, alphanumeric codes, as well as Touch ID and Face ID.

    You can download 4uKey on a Windows PC and use it to unlock your iPhone. However, please note that this process will erase all data from your device.

    Tenorshare iPhone unlocker

    Pros:

    • Remove passcodes from disabled iPhones and iPads
    • Delete Apple ID from activated iOS devices
    • Unlock iPhone or iPad without using iTunes or iCloud
    • Fully compatible with the latest iOS and iPadOS 13.5

    Cons:

    • No free version available
    • Only supports Windows systems
    • Firmware package download may be restricted in some regions
    • Erases all data after removing the Apple ID

    Top 5. iSunshare iPhone Passcode Genius

    iSunshare iPhone Passcode Genius is an iPhone unlocking tool with an interface similar to iMyFone LockWiper. While the name might be a bit hard to remember, it can be helpful if you’ve forgotten your screen passcode or if Face ID/Touch ID is not working.

    The software offers three main features: removing the lock screen passcode, removing Apple ID, and bypassing the Screen Time passcode. In testing, the unlocking process was a bit slow, and it’s important to note that it doesn’t support iOS 11.4 or later if Find My iPhone is enabled.

    iSunshare iPhone unlocker

    Pros:

    • Includes three core features in one tool
    • Can remove screen passcodes and restriction codes from iPhone
    • Allows Apple ID removal if Find My iPhone is turned off
    • Bypasses Screen Time passcode without data loss
    • Runs smoothly during use

    Cons:

    • Not available for free
    • Only compatible with Windows
    • Some steps can be a bit complicated to follow
      FoneLab iOS Unlocker iMyFone LockWiper Dr.Fone – Unlock (iOS) Tenorshare 4uKey iSunshare iPhone Passcode Genius
    Security Utmost level Standard Standard Standard Medium
    Ease of Use 3 steps 3 steps 4 steps 4 steps 5 steps
    Recommendation ***** *** *** ** ***
    Technical Support Yes Yes Yes Yes Yes

    FAQs About Unlock iPhone Software

    Q1. Is It Possible to Unlock An iPhone Passcode?
    Yes, it is. If you enter the wrong passcode too many times, your iPhone will show a message like “iPhone disabled, connect to iTunes.” In such cases, you can use professional iPhone unlock tools to regain access. In this article, we’ve listed 5 top iPhone unlocking tools, including FoneLab iOS Unlocker, iMyFone LockWiper, Dr.Fone – Unlock (iOS), Tenorshare 4uKey, and iSunshare iPhone Passcode Genius. These tools are known for their high success rates in unlocking iPhones.

    Q2. Is It Legal to Unlock An iPhone on Your Own?
    Yes, unlocking your iPhone by yourself is legal, as long as the device is fully paid off and you own it outright.

    Conclusion

    That wraps up our review of the top 5 iPhone unlock tools. As mentioned, each software has its own strengths and limitations. Overall, FoneLab iOS Unlocker stands out as the most recommended option thanks to its user-friendly design, strong performance, and ability to bypass different types of iPhone locks safely. If you ever find yourself locked out of your iPhone, this tool is definitely worth trying.