By Selena KomezUpdated on April 28, 2018
Summary: The new iPhone model always catch people’s attention, especially those who can’t wait to upgrade their device to the latest one. In this post we walk you through the absolutely easy and efficient way to backup everything from that old iPhone and then restoring backed up to the brand-new iPhone X.
“I bought a new iPhone X for upgrading, the thing bother me is that I try to sync the data from my old iPhone with iTunes and then restoring it to the new device, the previous data saved in iTunes will be removed. Is there an other way to backup and restore iOS data without overwriting? Any suggestions?”
iPhone X now is the most attractive product of iOS device, it comes with many new technologies and features like super Retina display, TrueDepth camera, Face ID (facial recognition), Animoji, wireless charging and more. It is awesome to upgrade to new iPhone X from iPhone 5/5S/6/6S/7. When you get the shiny iPhone X model, you’ll need to move all data from the old iPhone to the new iPhone X. Whether you’re using iOS 11 Automatic Setup feature, iCloud backup, iTunes backup or a USB cable, you should backup the old device first, then restoring backed up to iPhone X. It seems so complicated and time-costing. What’s worse, these backup ways not allow to perform backing up for selecting files, besides, your old data will be overwritten by new data. Here we will show you a better way that is safer and quicker to backup and restore contents for iOS device.
U.Fone iOS ToolKit – iOS Data Backup & Restore tool is the ideal tool for backup & restore iOS data safely and efficiently, including photos, messages, contacts, WhatsApp messages, call history, notes, calendar, app data, etc,. With using this tool, you can backup data from old iPhone, restore backed up to iPhone X or other iOS device. It will not overwrite your previous data, allows to select files instead of the whole device, allows to preview before backing up or restoring. More importantly, U.Fone iOS ToolKit provides you a complete solution to manage your device with the features with iOS Data Recovery, fix iOS system under any abnormal situations. It is compatible with iPhone 5/5S/6/SS/7/8/X, iPad Pro/Air and iPod Touch.


Step 1. Run U.Fone iOS ToolKit – iOS Data Backup & Restore tool
Once the downloading is successful, install and run U.Fone iOS ToolKit – iOS Data Backup & Restore tool on your computer.
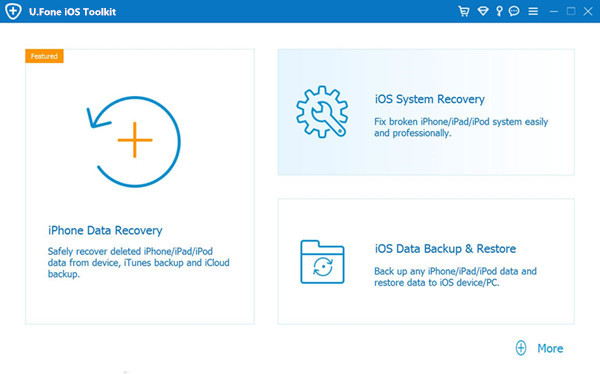
Choose “iOS Data Backup & Restore” feature in the interface of program. Then locate on “iOS Data Backup“.
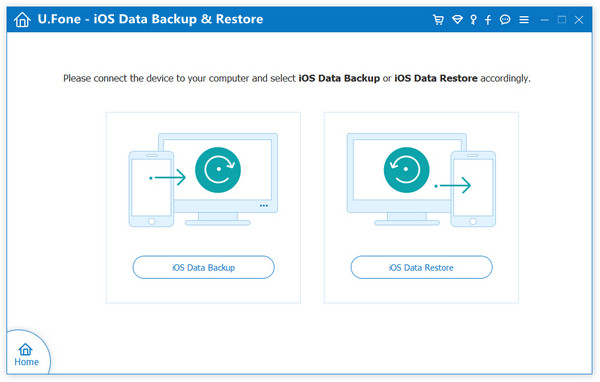
Step 2. Connect Old iPhone to Computer
Please connect your old iPhone to PC or Mac. There are two backup modes on the screen: Standard backup and Encrypted backup. Tick “Standard backup” then click “Start” button to enter the process.

Note: With Encrypted backup, you will need to enter the password you created when you want to restore the backup.
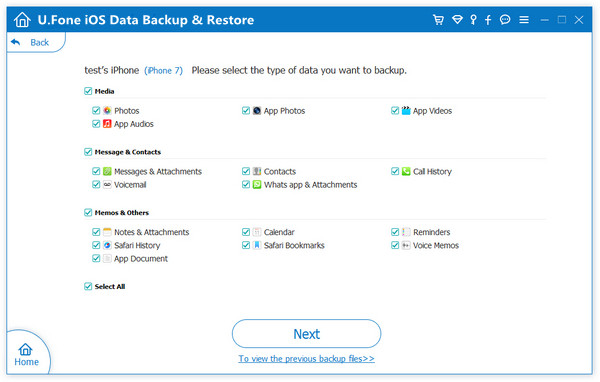
Step 3. Choose Data to Backup
You can see the various data types are supported, you can select the data you want or check all depend on your needs. Then click “Next” to start backing up your iPhone data.
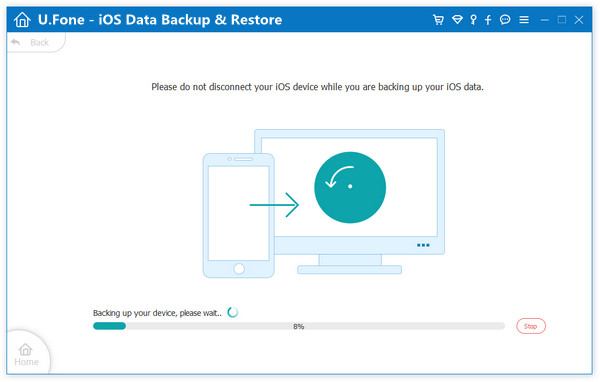
Step 4. Backup iPhone
Now the software is backing up your data, please be patient.
Once the backup is completed, you can easily view the backup specific information, including backup time, backup size, device name and so on.
Once you have a backup with iOS Toolkit, you can optionally restore data from the backup data to iPhone/iPad/iPod or to Windows or Mac PC depend on your need.
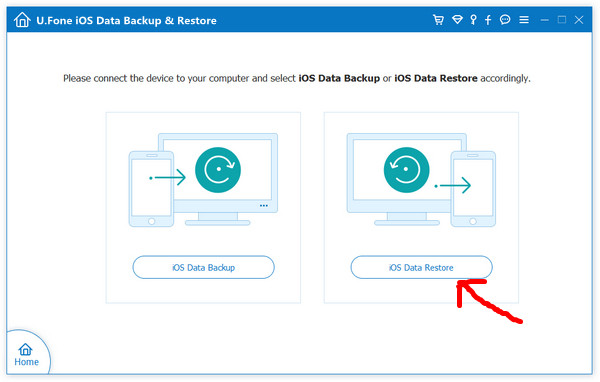
Step 1. Run U.Fone iOS ToolKit – iOS Data Backup & Restore tool
Run the U.Fone iOS ToolKit – iOS Data Backup & Restore tool on computer, select “iOS Data Restore” on the screen under “iOS Data Backup & Restore” option.
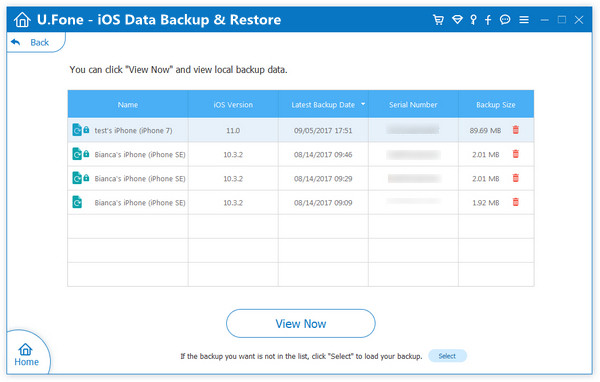
Step 2. Select a Backup
All backups will be displayed on the page. Select a backup you want to restore.
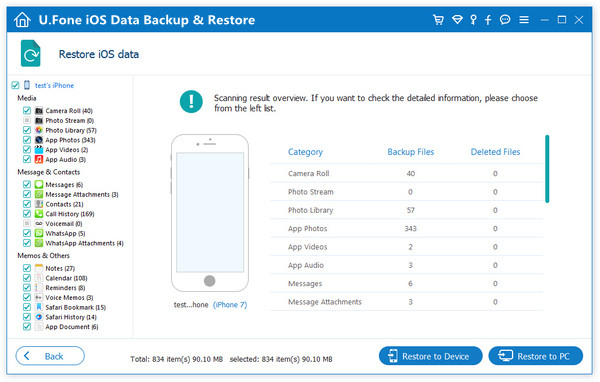
Step 3. Select Data to Restore to iPhone X
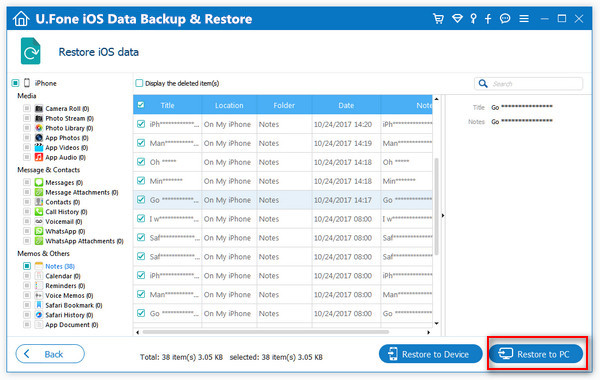
You are allowed to view the detailed backup data. Choose items that you want to restore, such as contacts, messages, photos, videos and more.
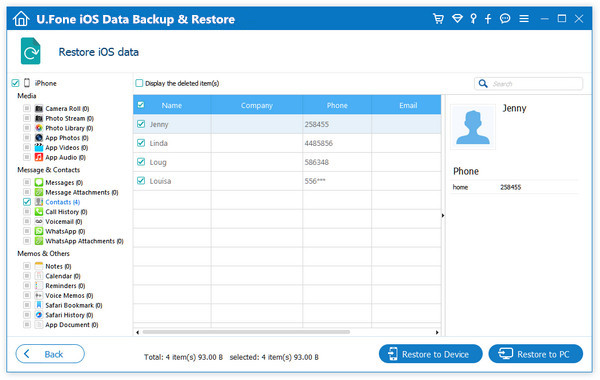
Choose Contacts from Backup
Choose Photos from Backup
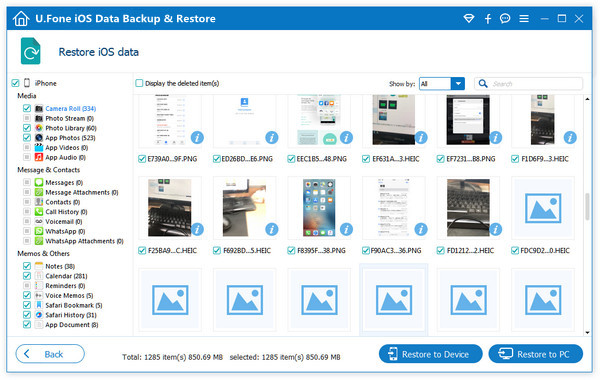
After selecting data, choose to tap on “Restore to Device” or “Restore to PC” option. In this case, you should select the previous one.Connect your iPhone X to the computer, it will be detected soon.
Click “Restore” and go on.
Step 4. Start Restoring Files from Backup
Then it will begin the restoring job on iPhone X. After the data is completed, click “OK” to complete the process. You could check the restored files on your iPhone X.
Transfer Photos between iPhone X and Windows 10/8/7 without iTunes
How to Recover Deleted Data from iPhone X
How to Transfer Android Data to iPhone X
How to Transfer iPhone Files to iPhone X
How to Backup & Restore iPhone X on the Computer Safely
How to Transfer Videos/Music/Photos to iPhone X
How to Manage Files for iPhone X on the Computer
Prompt: you need to log in before you can comment.
No account yet. Please click here to register.
 (No Ratings Yet)


No comment yet. Say something...