[Summary]:Want to manage Contacts, messages and other media files on Google Pixel?Follow this tutorial to manage, transfer backup & restore contacts and SMS on Google Pixel/XL/Pixel 2/2 XL.Just 1-click to sync, transfer, backup & restore contacts,text messages and music,photos,videos and more from PC/Mac to Google Pixel phone.
You may want to read:
* How to transfer contacts from Android phone to Google Pixel
* How to transfer contacts from iPhone to Google Pixel
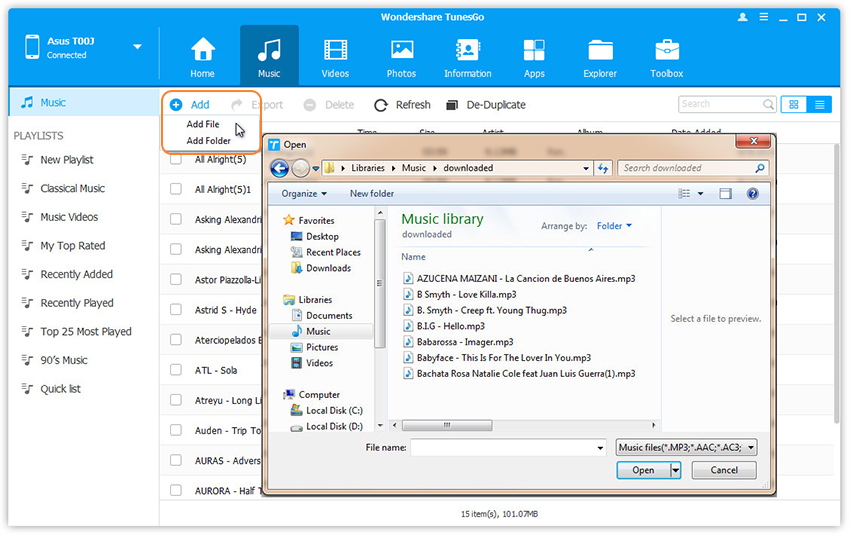
* How to transfer/import muisc to Google Pixel
“I want to sent the SMS to the client on the computer for my job,but I can’t find the best way to perform it.How?”-Ada
“I wanna create a new group to sent group SMS to my clients on Thanksgiving Day.But how to create the group in contacts on my computer?Is there any simple ways?Thanks a lot.PS:My phone is Android Google Pixel phone.”-Ceci
A part of Android users are confuse when it comes the problems that managing their devices on the Windows computer.Too many Android user ask the question that how to manage their device on the computer,how to remove Android contacts on computer,how to create group contacts on computer,how to transfer music/videos on Android,how to transfer media files between iOS device and Android device,etc,.If you are one of them,you have came to the right place.This article is going to give you the best answer to solve your Android manage problems in detail.
How to Manage Google Pixel on Computer
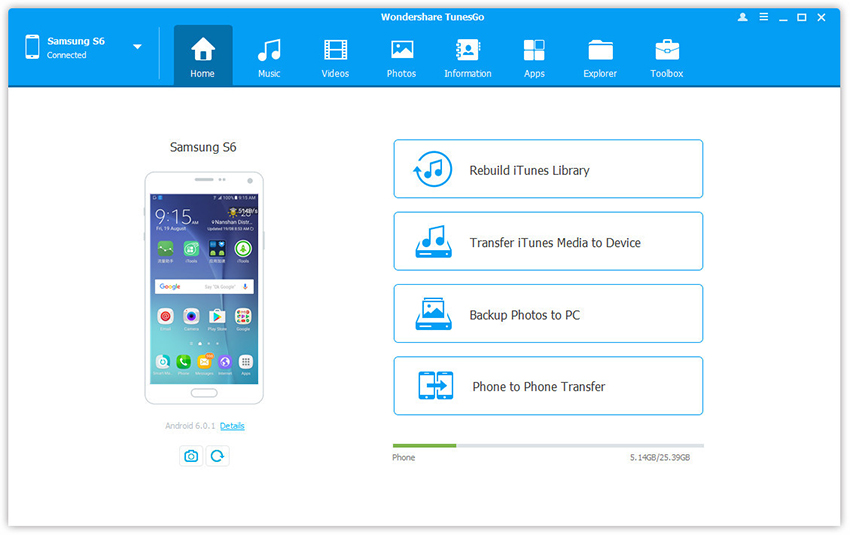
Google Pixel Manager is a helpful phone management tool that enables you to manage & transfer data for Google Pixel phone,such as videos, music, SMS, photos, contacts, audios, documents and more.With Google Pixel Manager,manage files for Google Pixel can be a piece of cake.With help of Google Pixel Manager,you are allow to transfer files between iTunes and Google Pixel,transfer files between computer and Google Pixel,transfer files between iOS/Android device and Google Pixel,manage Google Pixel contacts & messages on computer.The program is compatible with all Android devices including Google Pixel,Google Nexus,Samsung,Motorola,HTC,LG,and so on.
See More Features of Google Pixel Manager:
-Backup Google Pixel music, photos, videos, contacts, SMS etc. to computer and restore them easily.
-Manage, export&import Google Pixel Contacts and SMS, deduplicate Contacts, reply SMS on computer.
-One click to root Google Pixel.
-Phone to Phone Transfer – Transfer music, photos, videos, contacts, SMS between mobile devices (both Android and iPhone are supported).
-App Manager : Install, uninstall, import or backup Apps in batch. Gif Maker – Create Gif from photos, motion photos, videos.
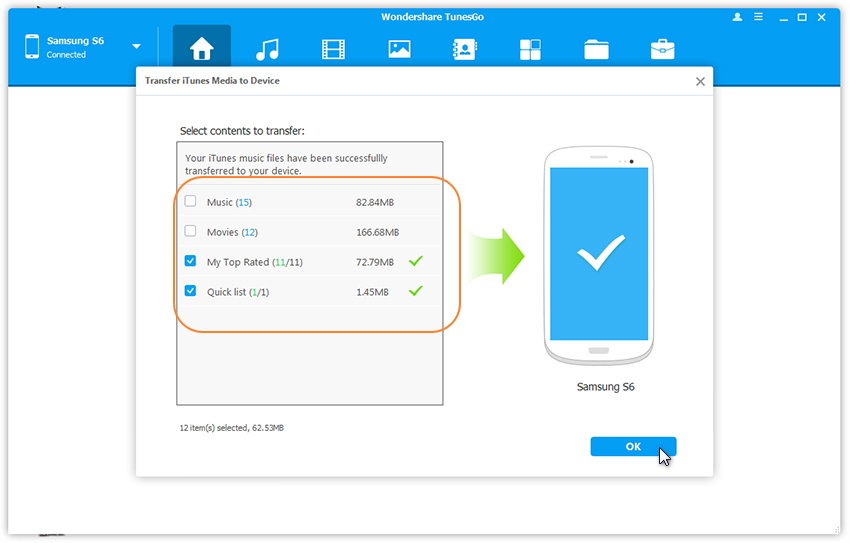
-iTunes Manager – Sync iTunes Music to Android or transfer music from Google Pixel to iTunes
-Fully compatible with 3000+ Android devices (Android 8.0 or lower):Google Pixel, Google Nexus,Samsung, LG, HTC, Huawei, Motorola, Sony etc,.


Part 1:How to Manage Google Pixel Contacts on Computer
Google Pixel Manager makes it extremely easy to add and edit contacts, group contacts, merge duplicate contacts and delete useless contacts in batches.Google Pixel Manager also allows you to manage contacts on your Phone, SIM card, iCloud, Exchange, Yahoo! and other accounts. In the following part, we would like to show you the detailed tutorial.
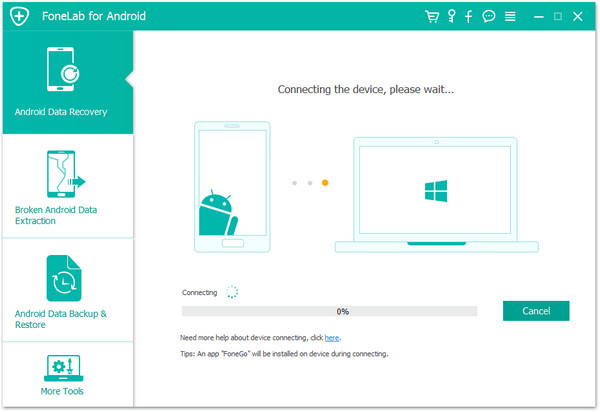
Launch Google Pixel Manager and connect your Google Pixel to PC.
Manage Contact Groups
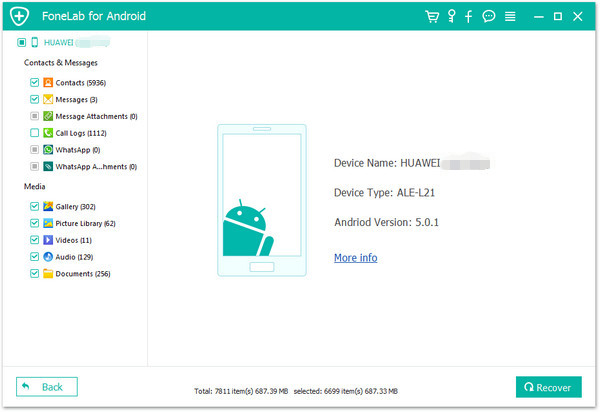
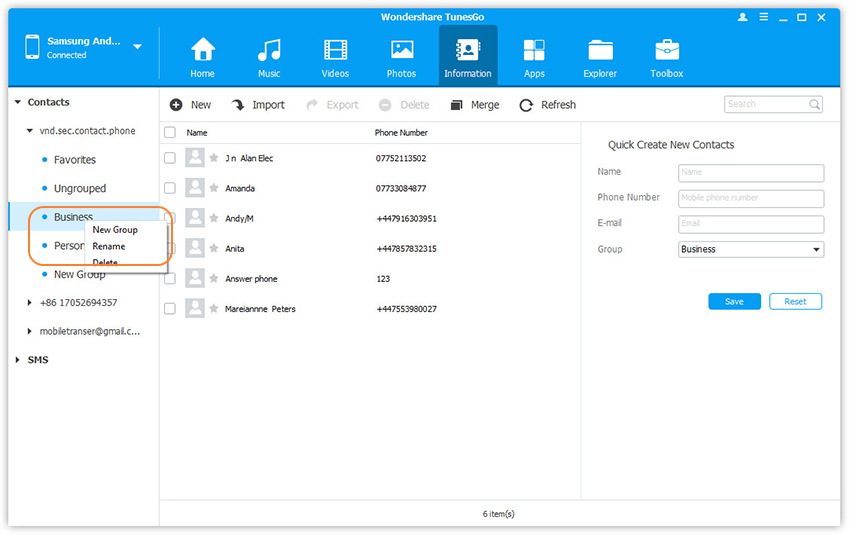
Step 1. Click Information tab. In the contact management window, select and expand account from which you want to add and edit contacts, including your phone Contacts, SIM Contacts and Google Contacts.
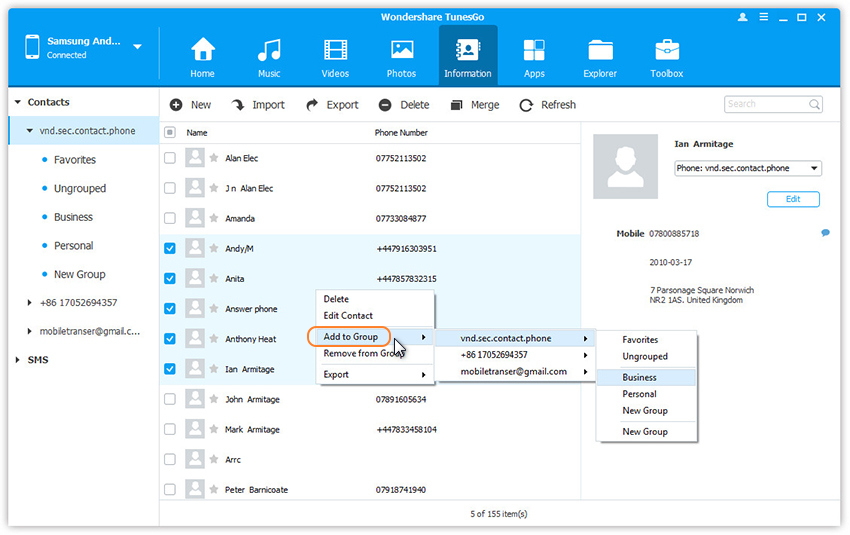
Step 2. Right-click the contact groups on the left panel.
You can select to create New Group, Rename Group, or Delete Group.
Step 3. Right-click on selected contacts, you can add contacts to specified group.
Merge Duplicates
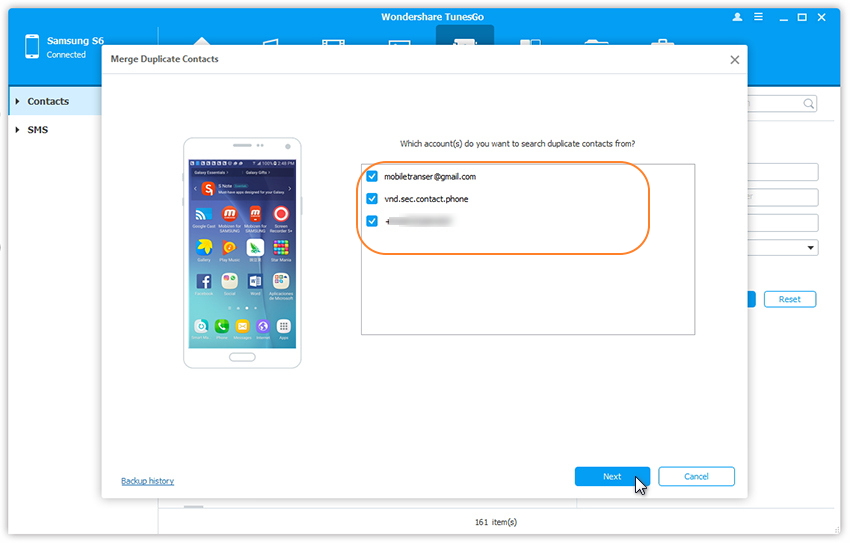
Step 1. Click Information tab. In the contact management window, click Merge.

Step 2. Select account(s) from which you want to search duplicate contacts, including your phone Contacts, SIM Contacts and Google Contacts.
Step 3. All duplicate contacts that have the same name, phone number or email will appear for your review.
Step 4. Select a match type to find duplicate contacts.
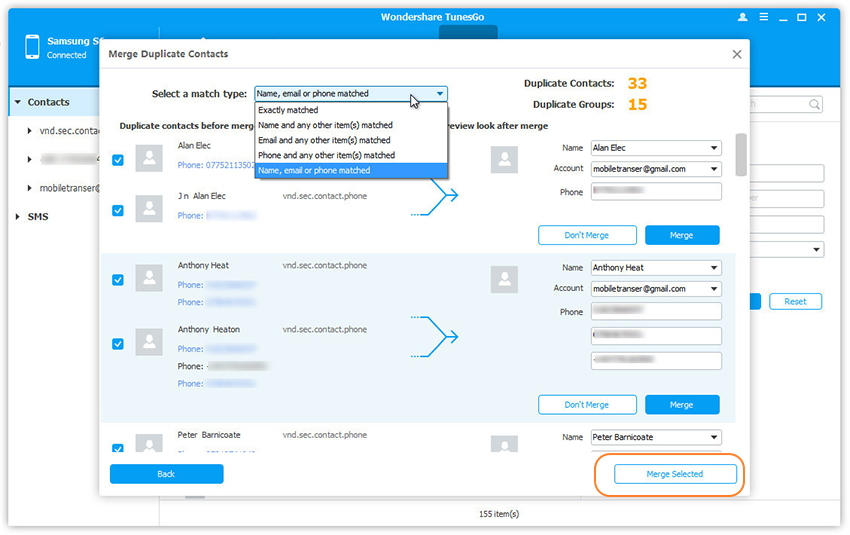
Step 5. Click Merge Selected to merge all the contacts or Merge selected contacts one by one.
How to Add & Edit Contacts
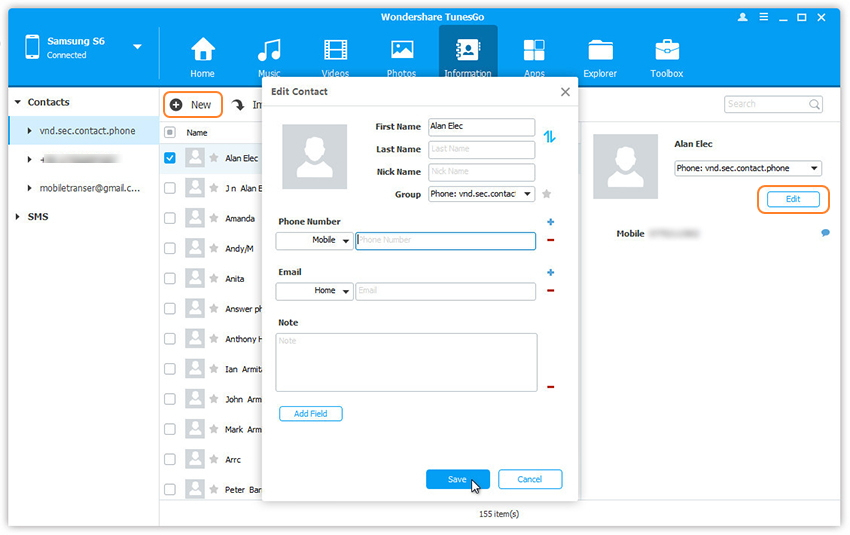
Step 1. Click Information tab. In the contact management window, select account and group from which you want to add and edit contacts, including your Phone Contacts, SIM Contacts and Google Contacts.
Step 2. Click New to open the Add to contact window. As you can see, you can edit name, email, phone number, website, address, middle name, etc. You can also search and Edit selected contacts.
Delete Contacts in Batches
Step 1. Click Information tab. In the contact management window, select group from which you want to delete unwanted contacts, including your Phone Contacts, SIM Contacts and Google Contacts.
Step 2. Tick Contacts you want to delete and click Delete.
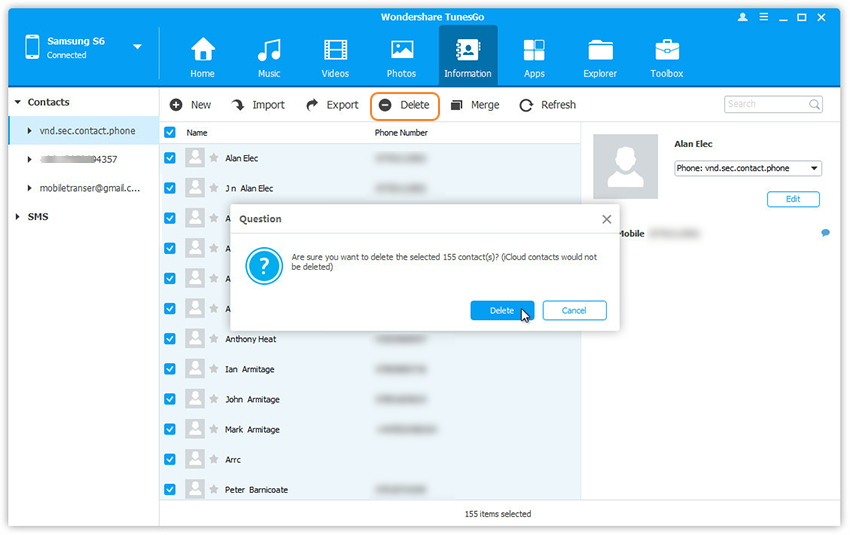
Step 3. In the pop-up dialog, click Yes.
Part 2:How to Manage Google Pixel Messages on Computer
Google Pixel Manager works like a desktop SMS assistant, helping to manage all SMS on your Google Pixel phone from computer. With it, you can save SMS and transfer to computer, send and receive SMS on computer, and mark unread SMS as read.
Launch Google Pixel Manager and connect your Google Pixel to PC.
Delete Messages in Batches
Step 1. Click Information tab, then select SMS on the left panel. All messages will be shown on the right.
Step 2. Tick Messages you want to delete and click Delete.
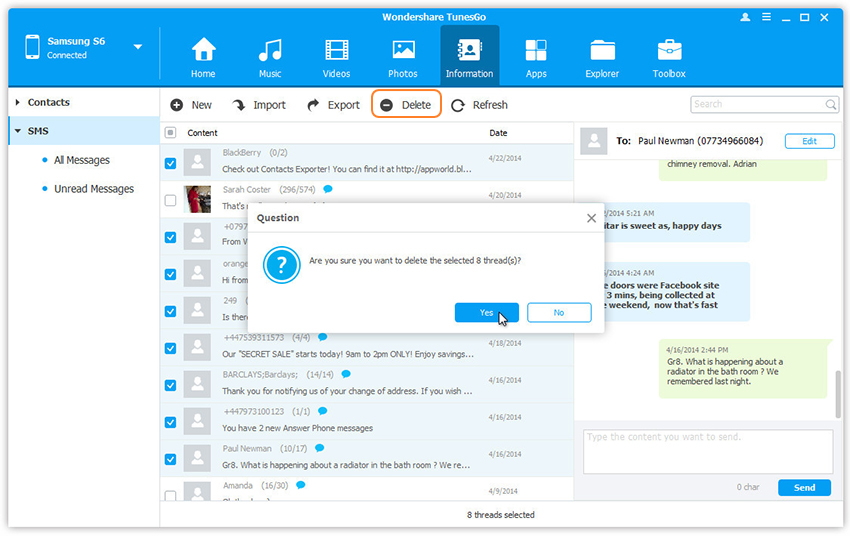
Step 3. In the pop-up dialog, click Yes.
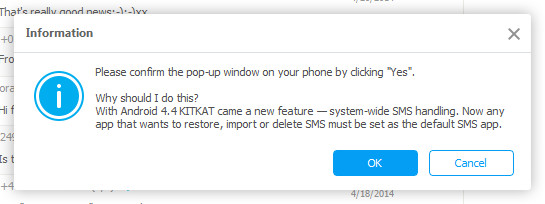
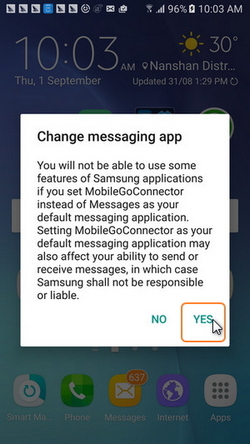
Note: The program may ask you to set MobileGoConnect as your default messaging application, as shown below. Tap on Yes on your device first, and then confirm it on your PC.
Send Messages via PC
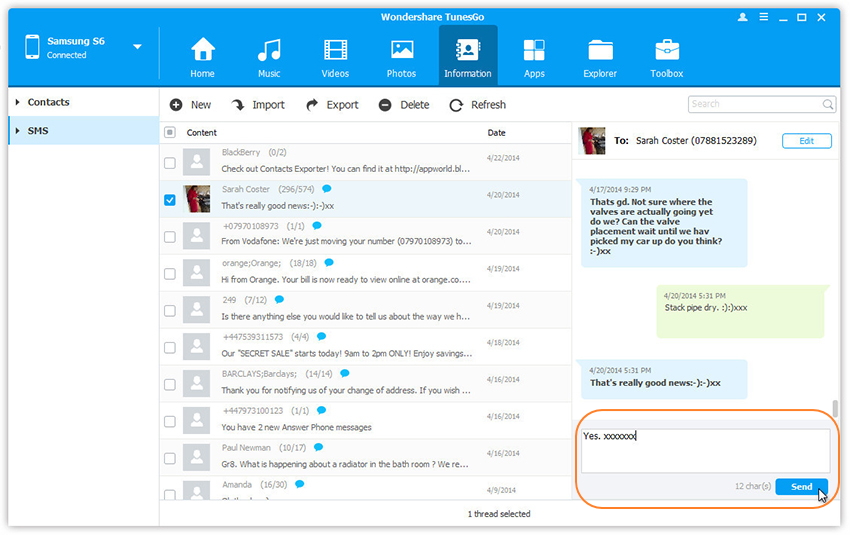
Step 1. Click Information tab, then select SMS on the left panel. All messages will be shown on the right.
Step 2. Search and read selected messages. You can simply type the content and click Send to send messages via Google Pixel Manager on the computer.
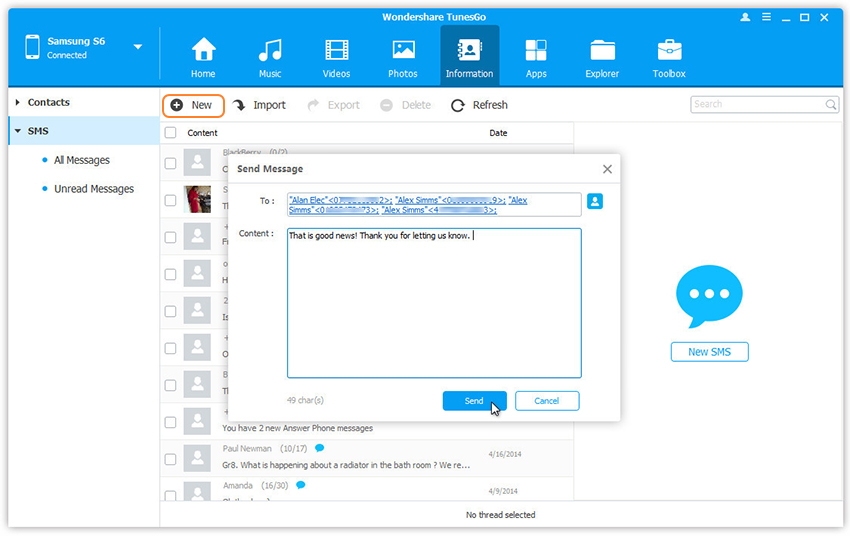
Or you can click New SMS on the right column to create and send a new message to multiple recipients.
Related Article:
How to Transfer Photos to Google Pixel
How to Transfer WhatsApp Messages from iPhone to Google Pixel
How to Transfer Music and Videos to Google Pixel
How to Transfer Music between iTunes Library and Google Pixel
How to Transfer Music from Computer to Pixel Phone
Manage Google Pixel on PC/Mac