[Summary]: Want to play iTunes music includs Apple Music songs on Google Pixel phone? Here we will teach you how to sync music and playlist from iTunes library to Google Pixel 3A/3/2/1(XL); how to transfer music from Pixel phone to iTunes Library; and how to transfer Apple music to Google Pixel, so you can offline playing Apple Music on Pixel phone after you cancel the subscription.
Most people have a myriad of music collection with iTunes,but struggle with the idea of moving it all to mobile device such as the Google Pixel phone.If you’re a newly Google Pixel phone owner and love listening music,then you might be trying to figure out simple ways to transfer music from iTunes to the shiny new Google Pixel smartphone.We’re going to discuss outline the options available way to get Apple Music and iTunes Music on Google Pixel.If you want to do it manually with the possible solutions,you can read this whole tutorial and follow the steps to complete the transfer task on your own.
![]()
* How to Transfer Android File to Pixel
* How to Manage Google Pixel on Computer
Transfer Music from iTunes Library/iOS Device/Android Device to Google Pixel
Android & iOS Manager and iTunes to Android Transfer,both are your best choice to transfer music(songs,playlists) between iTunes library and Google Pixel phone,it also work well for transferring music between iOS device/Android device and Google Pixel phone.What’s more,this program support to transfer music between computer and Android device,freely manage Android music playlists,delete music on Android.Various of Android devices are compatible with Android Manager,for example Google Pixel,Google Nexus,Samsung,Motorola,HTC,LG,Sony,ZTE,etc,.


- Part 1:Export iTunes Library Music to Google Pixel Phone
- Part 2:Transfer Music from Google Pixel Phone to iTunes Library
- Part 3:Transfer Music between iOS Device,Android Device and Google Pixel Phone
- Part 4:Transfer Music between iOS Device and Google Pixel Phone via Quick Switch Adapter
- Part 5: How to Sync Apple Music to Google Pixel
Part 1:Export iTunes Library Music to Google Pixel Phone
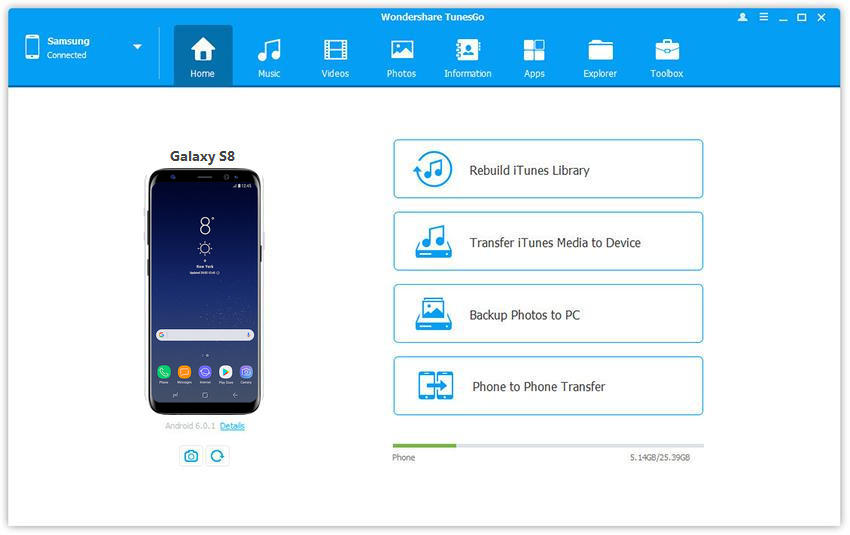
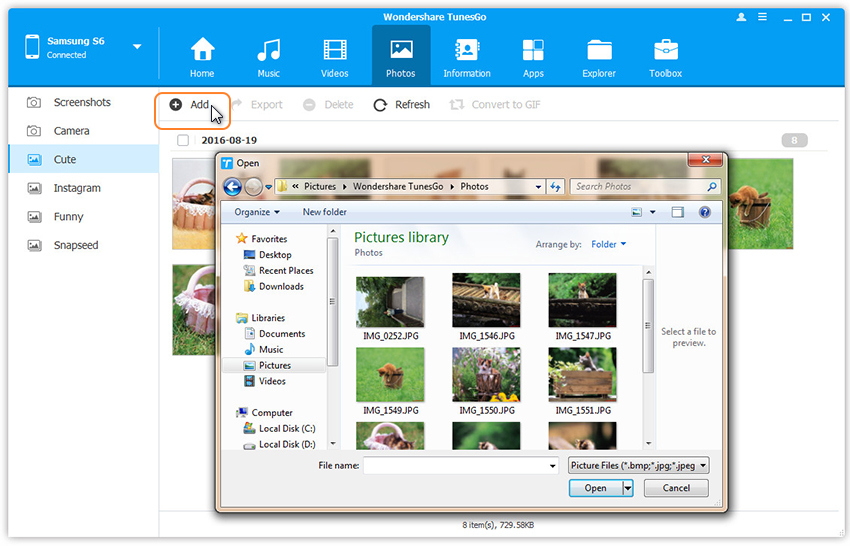
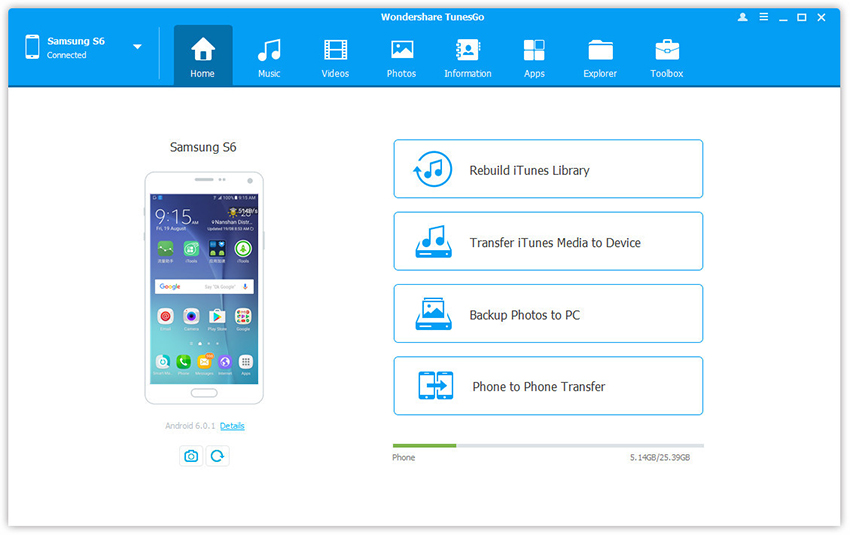
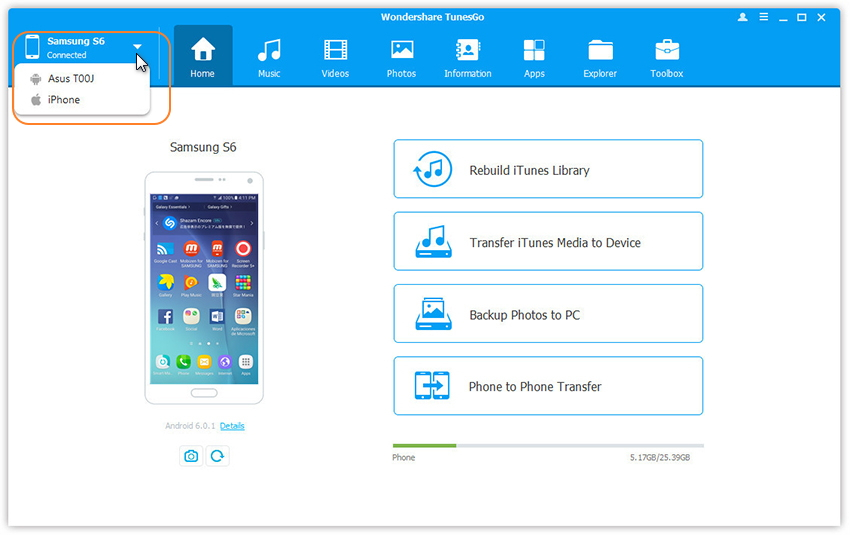
Launch Android Manager and connect your Google Pixel phone to computer.Your Android device will be detected and displayed in the primary window very soon.
Step 1.Simply click Transfer iTunes Media to Device on the main interface.Or find the Transfer iTunes to Device option under Toolbox > Transfer Tools section.
![]()
Step 2.Check options and start to copy media from iTunes to Google Pixel.All the iTunes files will be scanned and will be shown under different categories like music, movies, podcasts and others.By default,all the file types will be selected but to transfer only the music files,you can uncheck the others.Click Transfer to start transferring.
![]()
![]()
Part 2:Transfer Music from Google Pixel Phone to iTunes Library
Launch Android Manager and connect your Google Pixel phone to computer.Your Android device will be detected and displayed in the primary window very soon.
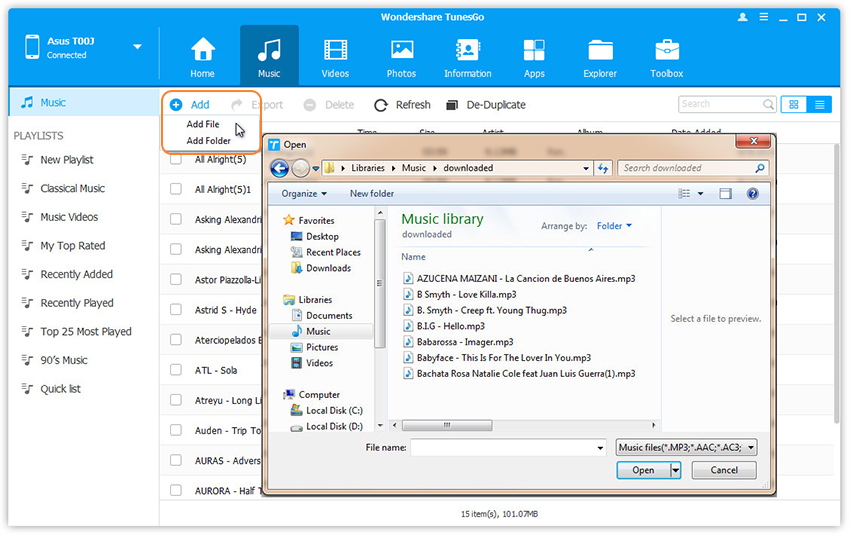
Step 1.Select Music tab.
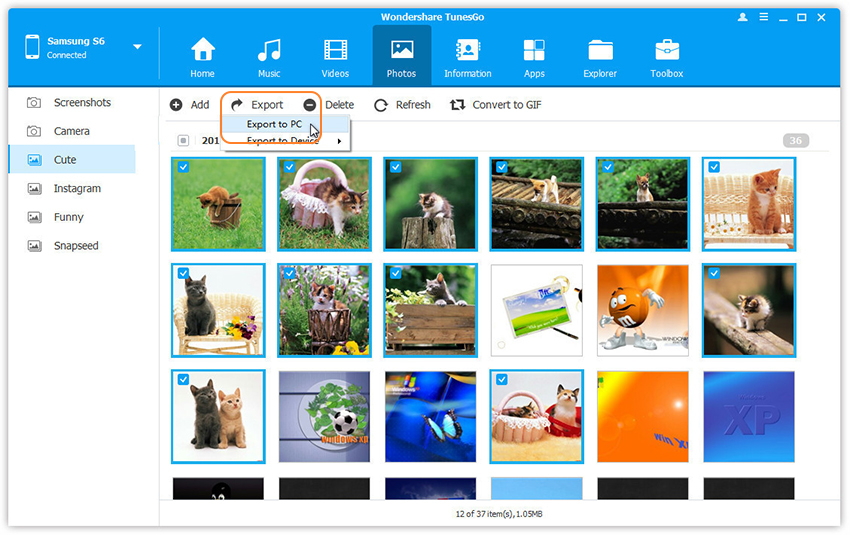
Step 2.Once your media loads,choose your wanted songs and click Export > Export to iTunes.
![]()
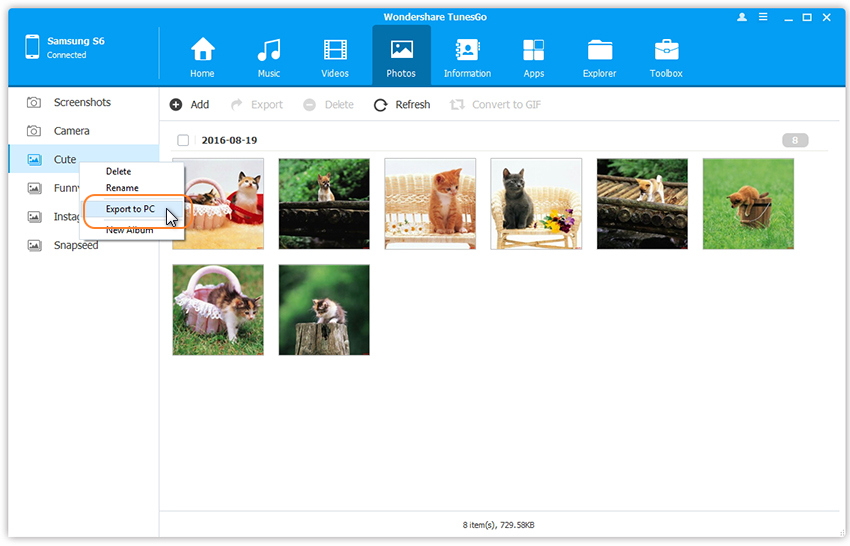
You can also transfer the whole music playlist from Google Pixel to iTunes Library in one click.
![]()
Part 3:Transfer Music between iOS Device,Android Device and Google Pixel Phone
Step 1.Launch Android Transfer and connect both iOS device or Android device and Google Pixel phone to PC.
Step 2.Select the source device from which you want to transfer music files.
Step 3.Click Music tab.
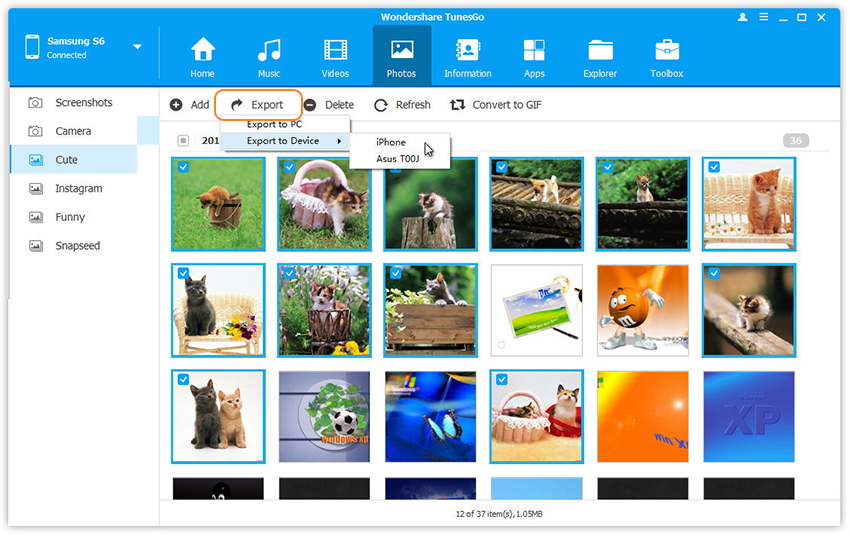
Step 4.Choose your wanted songs and click Export.Select another device from the list.For example,you can transfer music from Pixel phone to iPhone by selecting Export > Export to iPhone directly.
![]()
You can also transfer the whole music playlist from Pixel phone to other devices in one click.
![]()
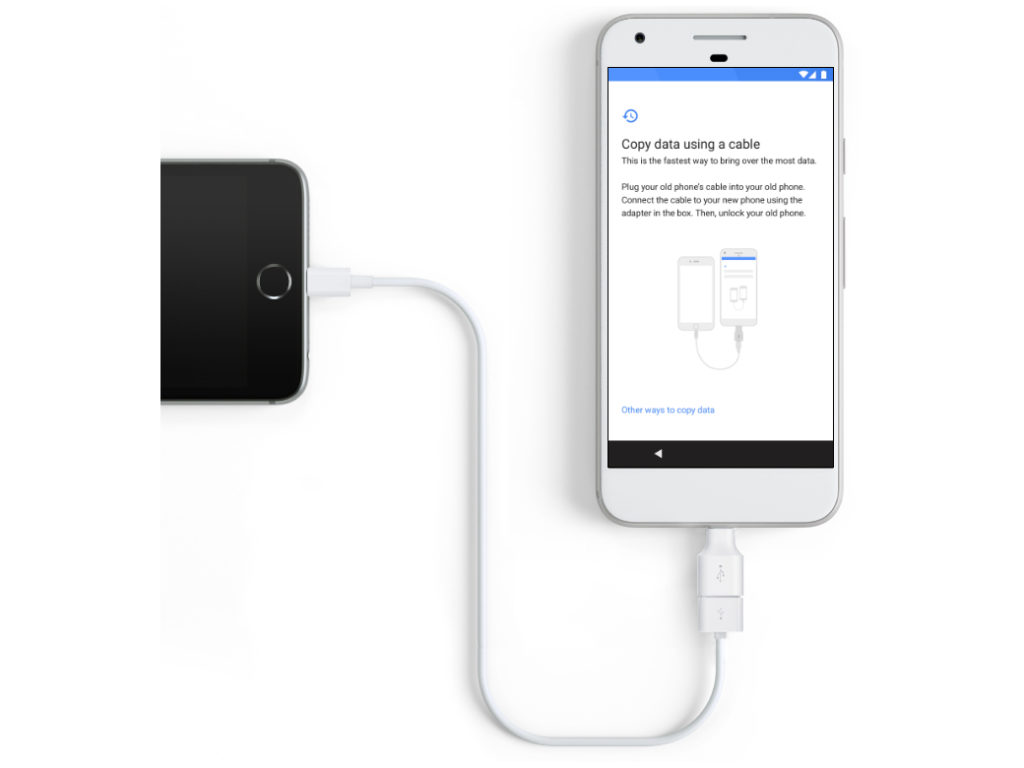
Part 4.Transfer Music between iOS Device and Google Pixel via Quick Switch Adapter
Step 1.Connect your old iPhone to your new Pixel with the Quick Switch Adapter.
Turn off iMessage before you remove the SIM on your old iOS device by going to “Settings,” tap “Messages” and set iMessage to off. Then, go to back to “Settings,” tap “FaceTime” and set FaceTime to off.
Note:If you have already removed the SIM, you can request that Apple deregister your phone number with iMessage.
Step 2.Sign in to your Google Account.
If you don’t already have one, you’ll be asked to create one.
Step 3.Transfer data from iPhone to Google Pixel
Once you’ve signed in to your Google Account, choose what you want to move, like your apps, contacts, calendar events, photos, videos, music, SMS messages, iMessages and more.Then the data transfer task will complete soon.
Done.
Supported devices include:
-iPhone or iPad running iOS 8 and up
Part 5: How to Sync Apple Music to Google Pixel
We can purchased and downloaded Apple music for playing on iTunes or iOS devices,when you have got a new Google Pixel phone,how you can play Apple music on Google Pixel/XL after canceling the subscription service even though you have downloaded them?As we all know that the Apple Music protected by DRM encryption with M4P formate,in order to playing iTunes M4P playlist on Google Pixel,you must to remove DRM from Apple Music songs and convert to DRM-free MP3 for Android Google Pixel phone.
Apple Music Converter – iTunes M4P to MP3 Converter is a useful Apple Music Removal and Converter,which could helps you remove Apple music with DRM protection and convert them to plain formats like MP3, AAC, WAV, or FLAC. for free playing on any media players like Google Pixel, Samsung Galaxy, MP3 Players, Car Players, iPod, Huawei, iPhone, etc.
Let’s teach you how to remove DRM protection from Apple Music songs/iTunes music and convert them to MP3 for playing on Google Pixel/XL.
Step 1.Run Apple Music Converter and Choose Apple Music tracks
First of all,please download, install and launch Apple Music Converter for Windows or Mac on your computer.iTunes will be opened automatically,then select the Apple music songs you want to convert to MP3 and transfer to Google Pixel phone.

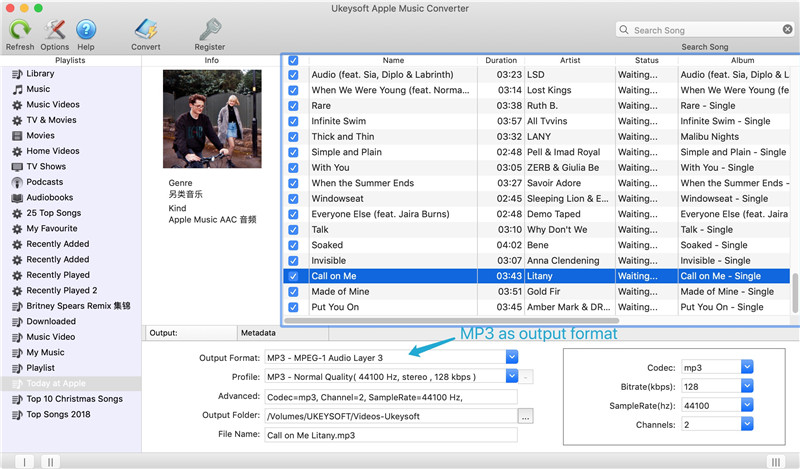
Step 2.Select MP3 as Output Format
As we all know that the Google Pixel phone supports playing MP3 audiao format,so you need to convert Apple music to MP3.In the bottom of “Output Settings“,please select MP3 as output format.
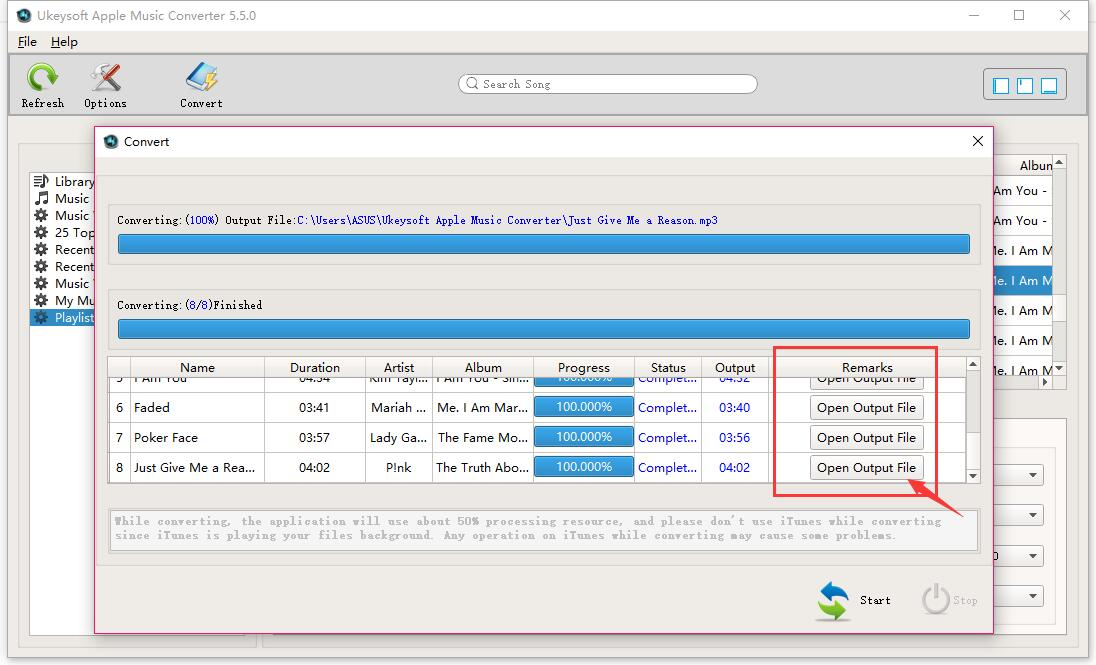
Step 3.Convert Apple Music to MP3 for Google Pixel
Finally, just click “Convert” button to start convert Apple Music from M4P to MP3,during the conversion process,the program will remove the DRM encryption as well.After it done,you can play all converted Apple Music in MP3 formate on any music players with more freedom and convenience,even you have canceled the Apple Muisc subscription service.
Step 6.Transfer Converted Apple Music to Google Pixel
Now all the converted Apple Music converted and saved on the computer as DRM-free MP3,in this step,you need to import converted Apple Music in MP3 to Google Pixel phone.
1.Connect Google Pixel to your computer via a USB cable.
2. Using iOS Android Manager or Android Transfer to transfer the converted Apple Music tracks from your computer to Google Pixel phone directly.
Learn More: How to Transfer Music from Computer to Google Pixel
Related Article:
How to Transfer iPhone Data to Google Pixel Phone
How to Backup & Restore Data on Google Pixel Phone
How to Restore Deleted Data on Google Pixel Phone
How to Transfer Music from Computer to iPhone
How to Transfer Music from Android to iPhone/iPad/iPod