News about Recalling Samsung Galaxy Note 7
Samsung has finally revealed details about its Galaxy Note7 safety recall.As previously reported, all customers are entitled to a replacement, repair or refund. Yes, this includes eBay purchases, postpaid mobile plans and grey market imports.
In the unlikely event that you missed the news, Samsung Galaxy Note7 smartphones have been bursting into flames in an alarming fashion when customers attempt to charge them.So far, there have been less than one hundred reported incidents out of more than one million units sold. Nevertheless, the company has deemed the issue serious enough to prompt a worldwide product recall.

The issue is caused by the Note7’s new 3500mAh battery; specifically an unintended meeting of the battery cells’ terminals which can potentially cause the device to explode. Needless to say, customers have been advised to immediately stop using their phones.
Backup Data on Samsung Galaxy Note 7 before Recalling
After the Note 7 burning accident happened,most of Note 7 users ate attend to recall their device to Samsung company.However,before recalling Note 7 you should do backup job on it to protect your personal data and avoid to leak the privacy to anyone.
Android Data Backup & Restore Tool is your No.1 ideal helper to safely backup everything on Samsung Galaxy Note 7 before recalling,contacts,photos,videos,audios,messages,notes,calendars,application data(WhatsApp,Viber,Line,Kik),call logs are included.What’s more,this useful program allow to restore data on Android device from backup,you can restore all backup files stored on computer to your Samsung or other Android phone.Almost all models of Samsung are applicable to Android Data Backup & Restore Tool.Except Samsung,other Android device are supported too,such as HTC,Motorola,Lenovo,Huawei,Xiaomi,LG,Sony,ZTE.


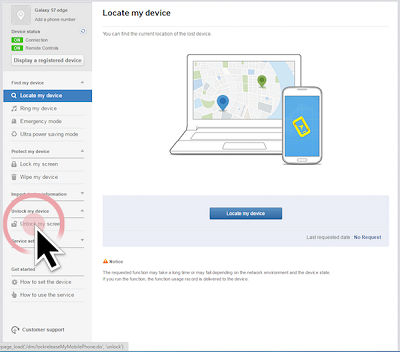
Part 1:Backup Samsung Galaxy Note 7 before Recalling with Samsung Cloud
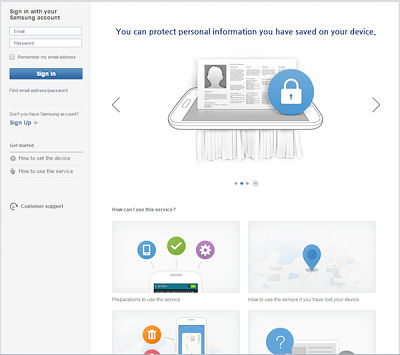
With the Samsung Note 7,Samsung introduced the Samsung Cloud to you as a way to backup your phone.Auto backup happens every 24 hours, but for it to take place your Note 7 needs to charging with the screen off for 10 minutes.However, you can also do a manual backup with Samsung Cloud prior to returning your Note 7.
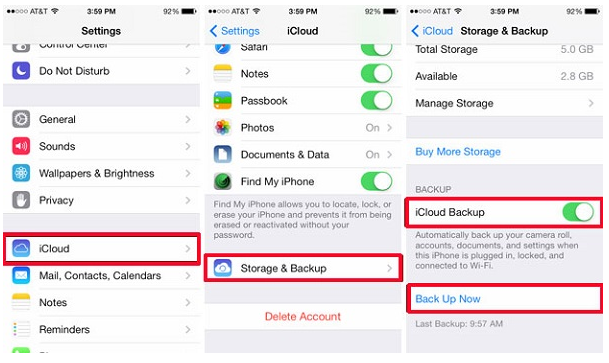
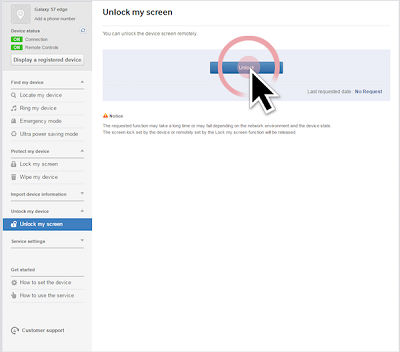
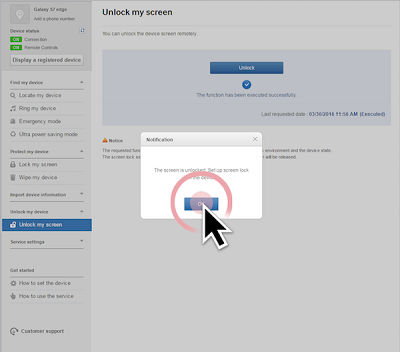
Open the Settings on your Note 7 > Cloud and accounts > Samsung Cloud > Back up my data > tap the Back up now button at the bottom of the screen.
Samsung Cloud provides a comprehensive backup of your Note 7 device.In addition to your Samsung account’s Contacts and Calendar, Samsung Cloud will also backup keyboard data, gallery,notes, and internet bookmarks etc. Using Samsung Cloud will also backup your phone logs, clock settings, apps, home screen layout including widgets and wallpapers, messages, music, device settings, including ringtones, and documents.
Part 2:Backup Samsung Galaxy Note 7 before Recalling with Google Account
Open the Settings on your Note 7 > Cloud and accounts > Accounts > Google. Ensure sync is enabled for your contacts, calendar, etc,.
In the Settings again > tap Cloud and accounts > Backup and reset. Under the Google account section, ensure Back up my data is enabled.
Part 3:Backup Samsung Galaxy Note 7 before Recalling with Android Backup & Restore
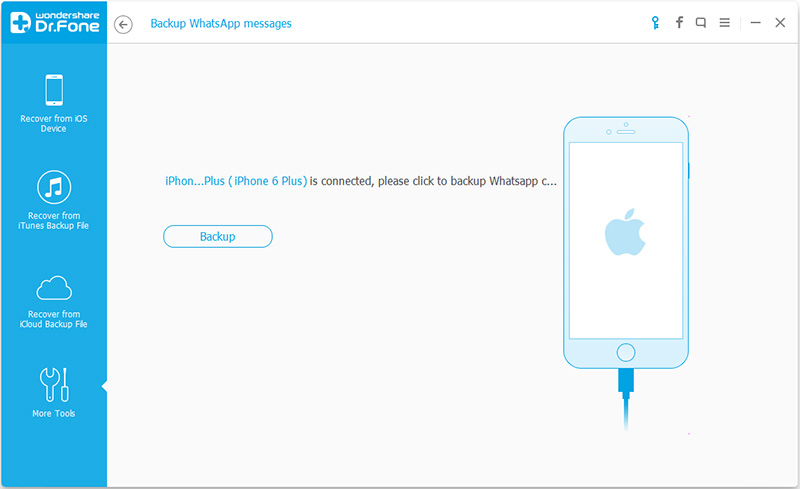
Step 1.Connect Note 7 to Computer and Run Program
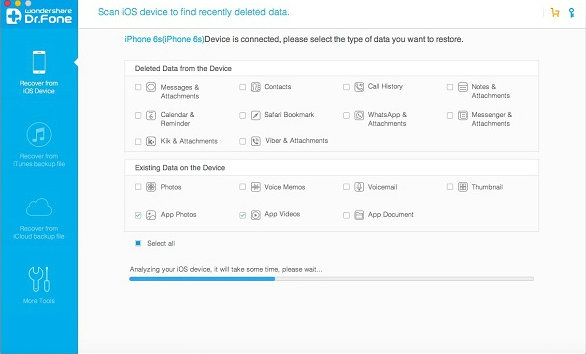
Launch Android Data Backup & Restore Tool and from the “More Tools” section,select “Android Data Backup & Restore” option.Then connect the Samsung to your computer using USB cables.The program will detect the device soon.

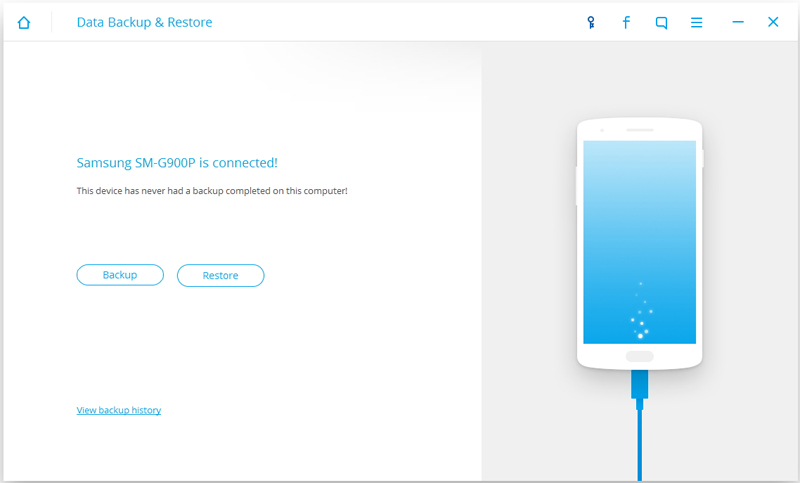
Note:If you have other Android management program on your computer,make sure none of them is running.
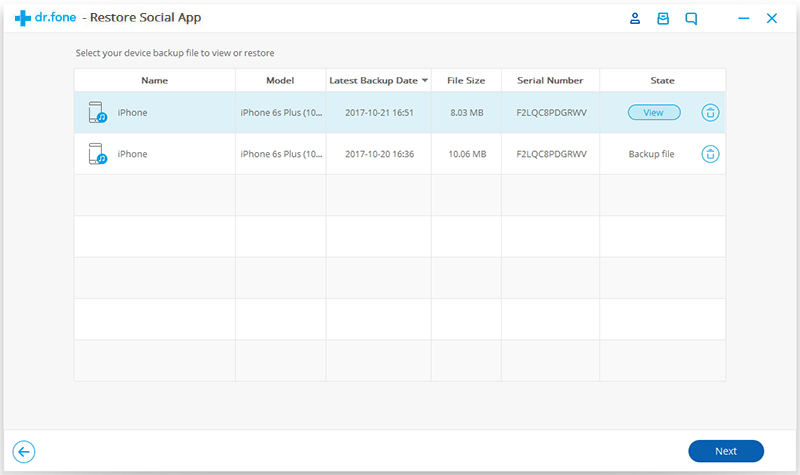
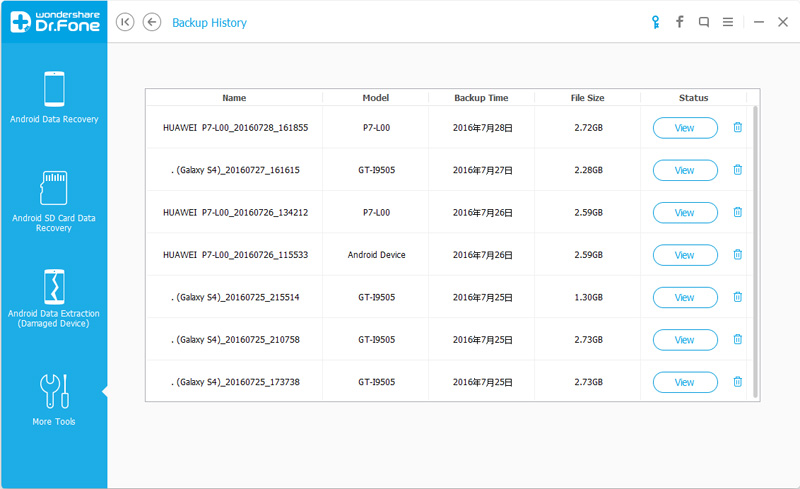
Tips:If you have used this program to back up your device previous,you are allow to view your past backup by clicking on “View backup history”.
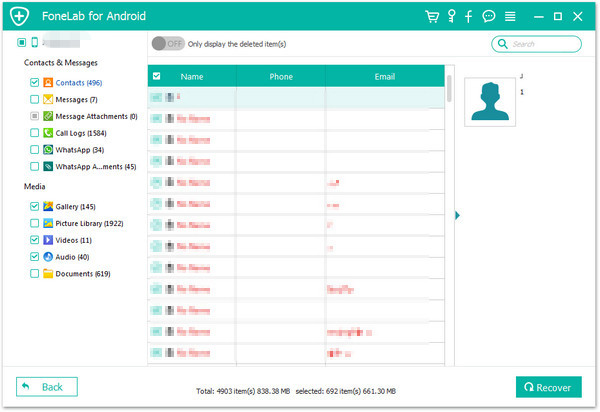
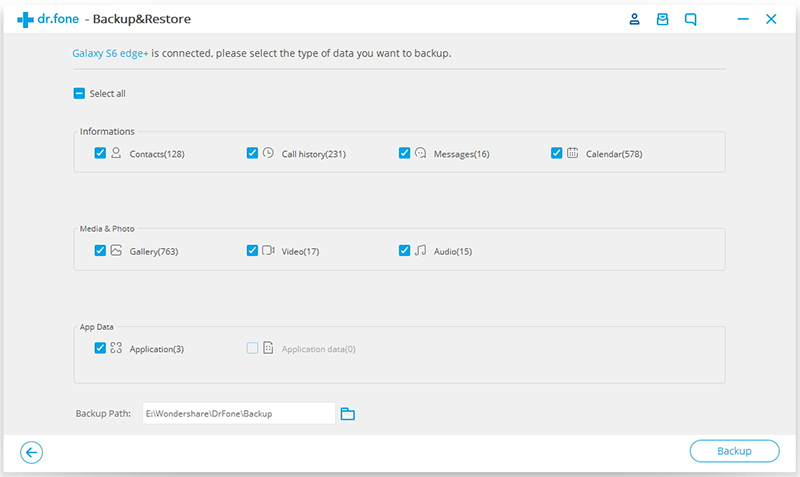
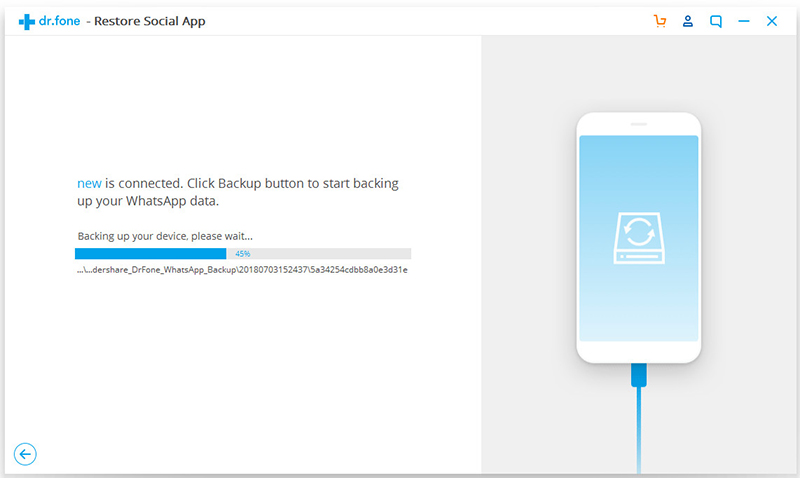
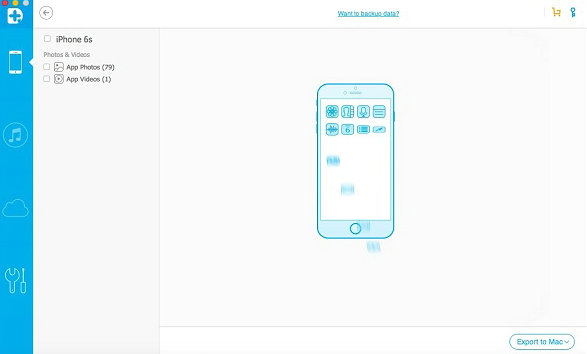
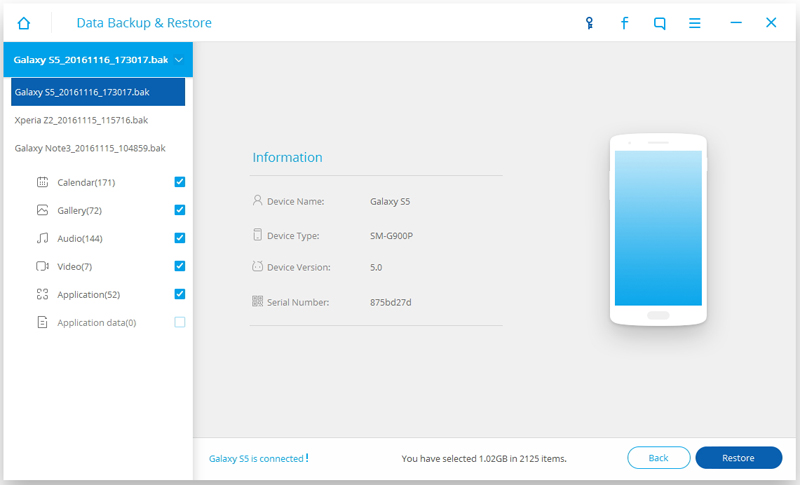
Step 2. Select File Types to Backup
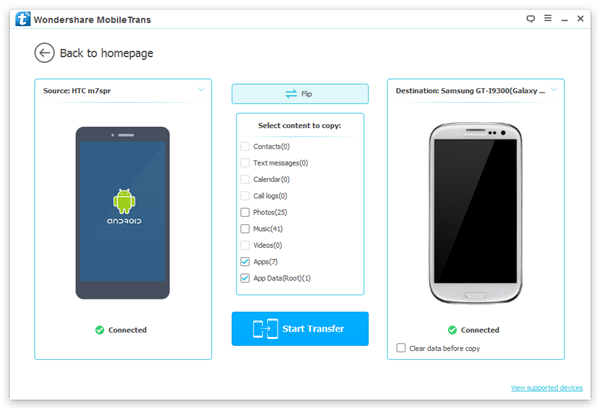
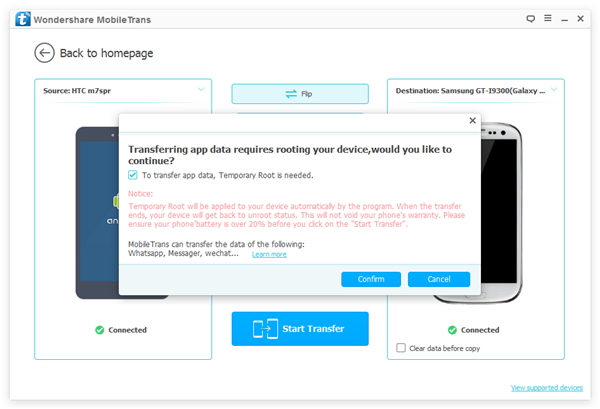
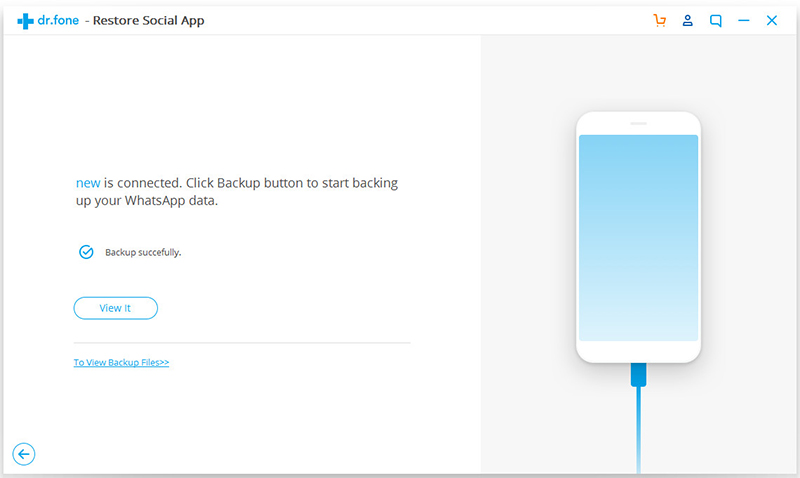
Once program has detected your device,click on “Backup” to select the data you want to backup(include in the past backup).Android Data Backup & Restore Tool can be used to back up 9 different file types including messages, call history, calendar, gallery, audio, video, applications and application data.Please note that to backup app data requires your Android device to be rooted.
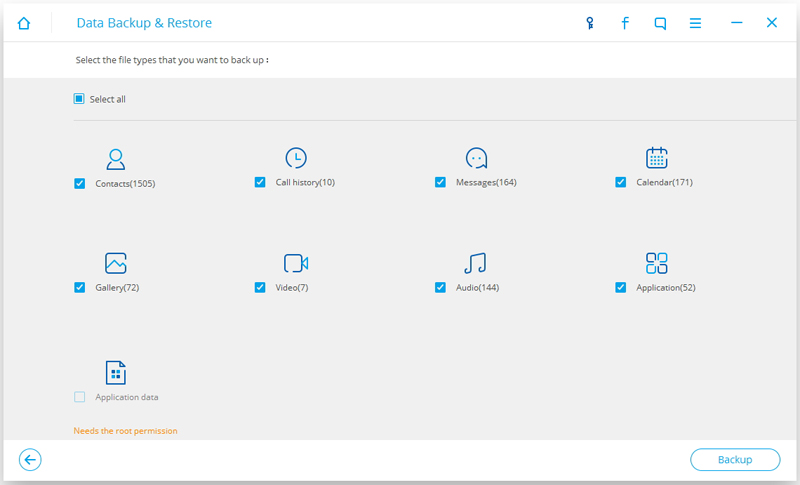
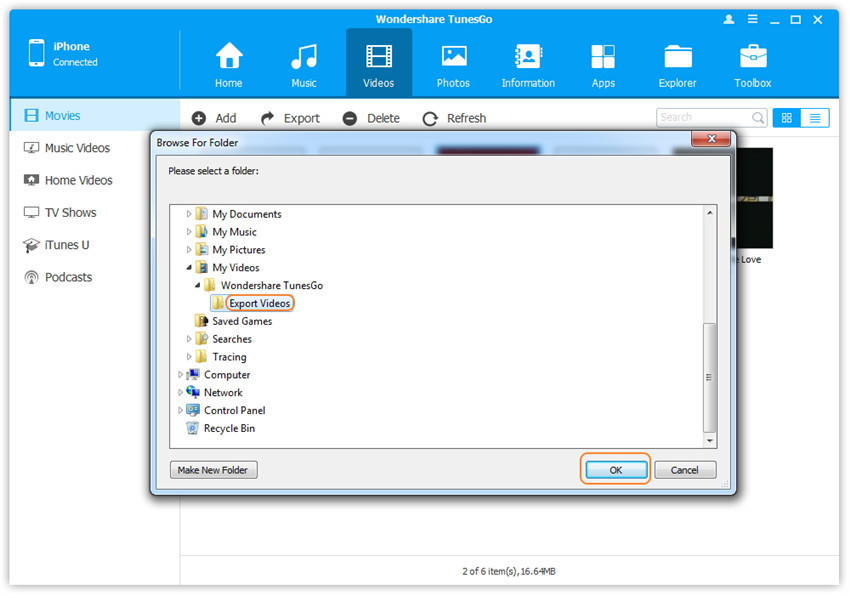
After you have selected the file which you want to backup,click the button “Backup” to start the process.The entire process will take no more than a few minutes.
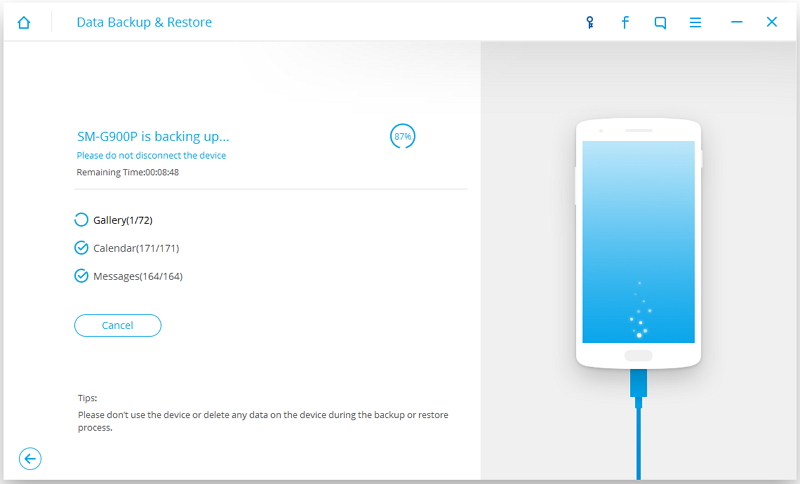
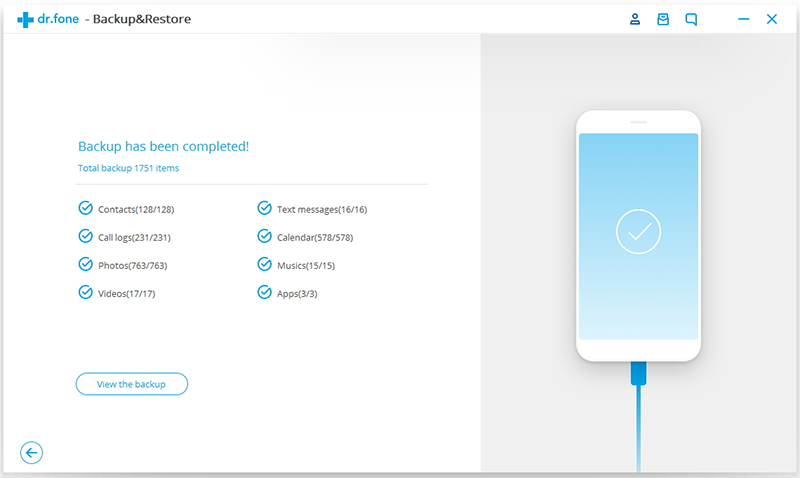
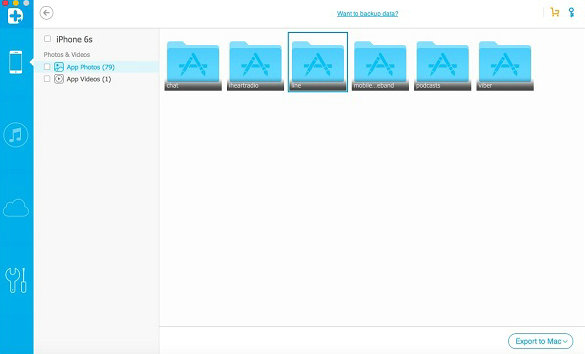
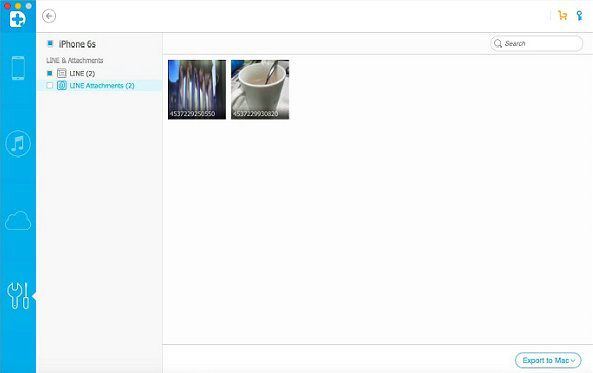
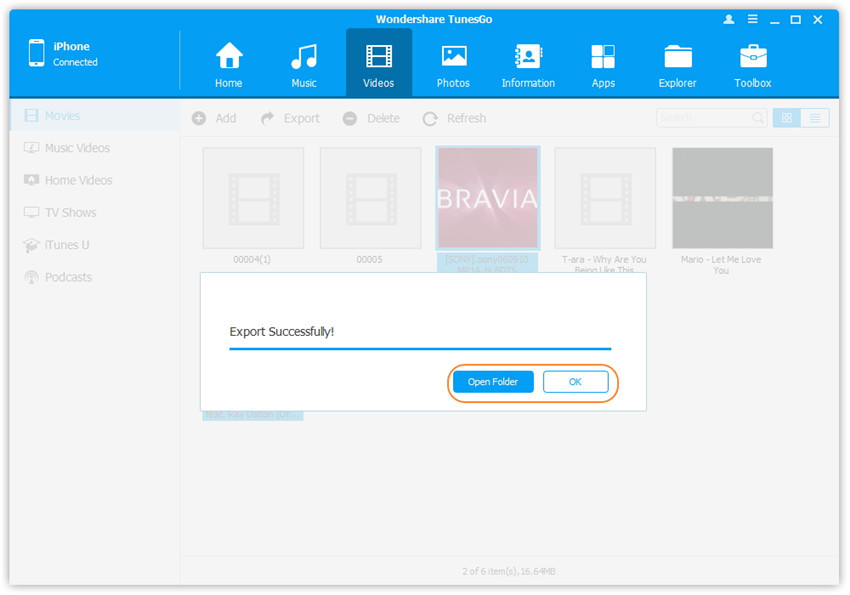
When the backup is complete,you can click on “View the backup” on the lower left corner of the window to see the details of the backup file.
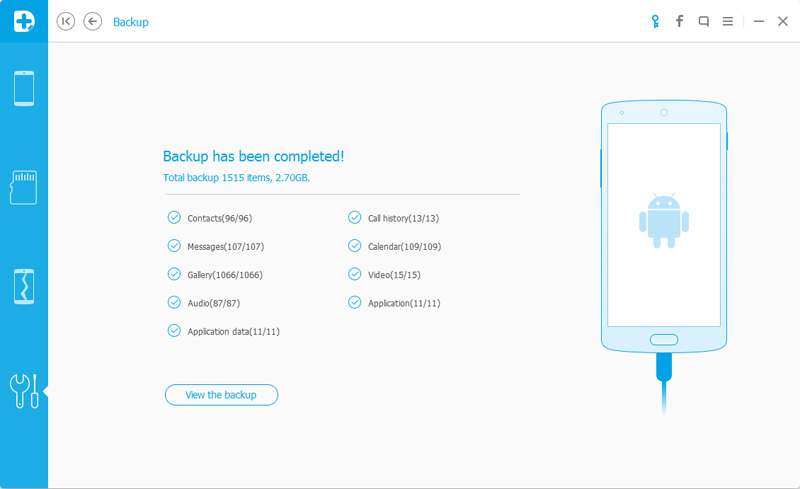
Now you can view your backup file by clicking on “View”.
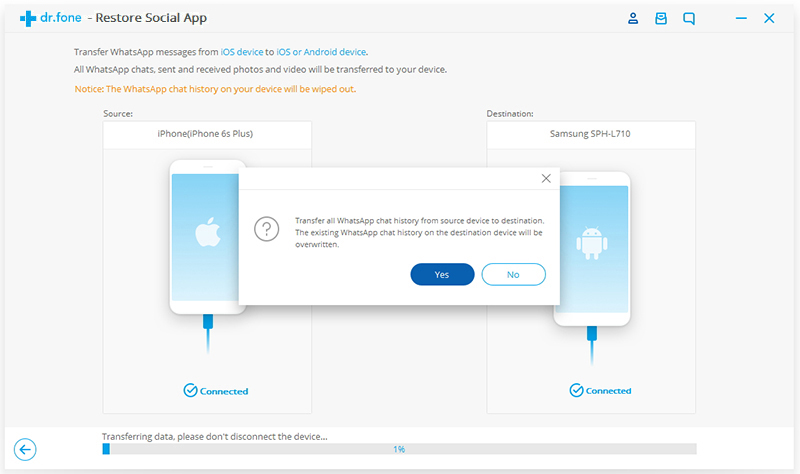
Part 4:Restore Backup Data to Another Android Device
Step 1.Connect Android Device to Computer and Run Program
Launch Android Data Backup & Restore Tool and from the “More Tools” section,select “Android Data Backup & Restore” option.Then connect the Android device to your computer using USB cables.The program will detect the device soon.
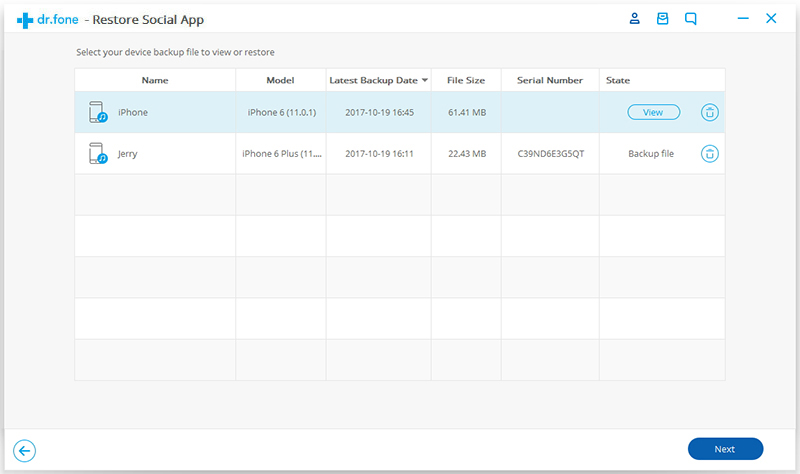
Click on “Restore” and choose from the older backup file on your computer. These backups can either be of this Android device or any other device.
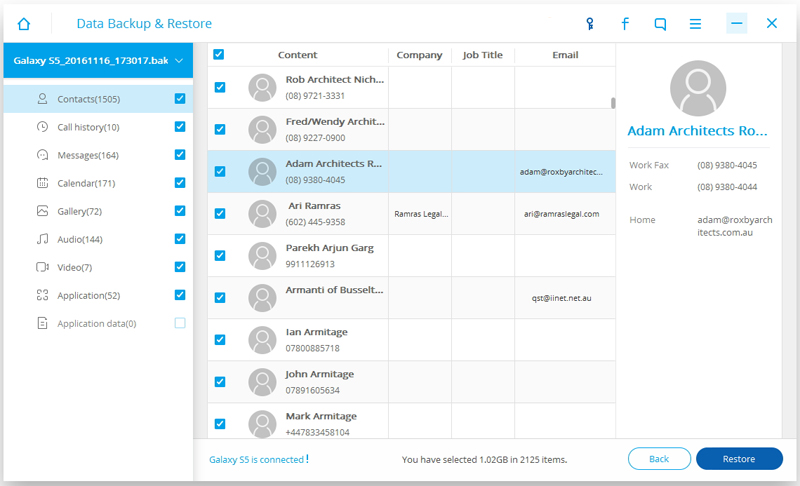
Step 2.Select Backup Data to Restore on Android
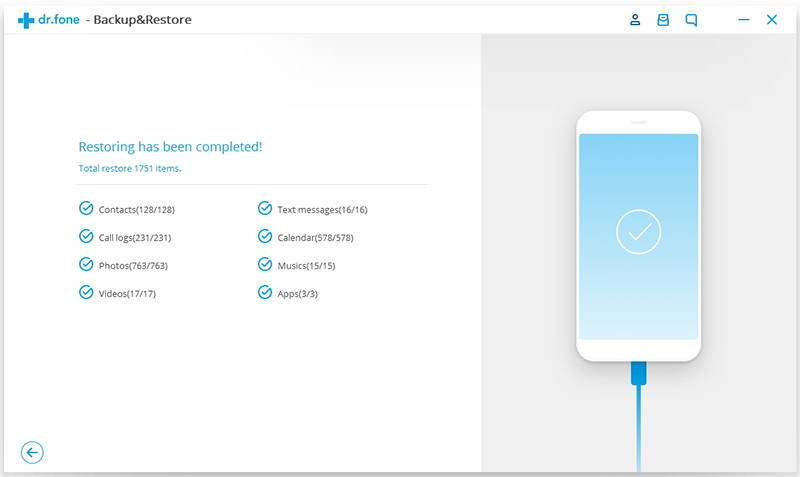
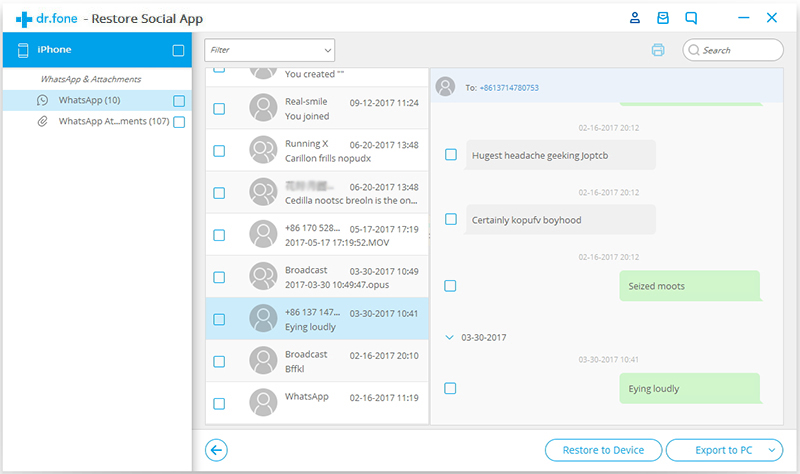
You are allow to selected the data you want to restore.Select the different file types on the left and then select the files you want.Click on “Restore” to start.
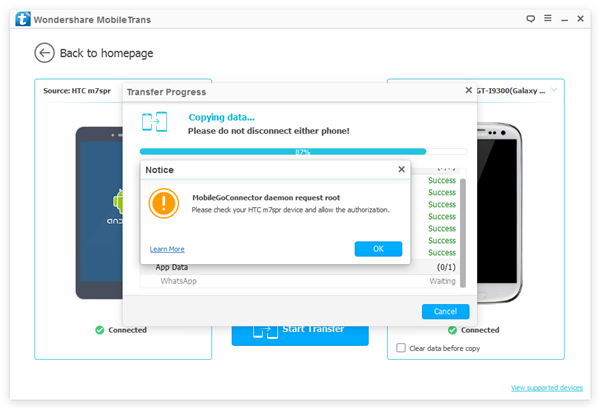
On restoring process,Android Data Backup & Restore Tool will require authorization during the restore process.Allow authorization and then click “OK” to continue.
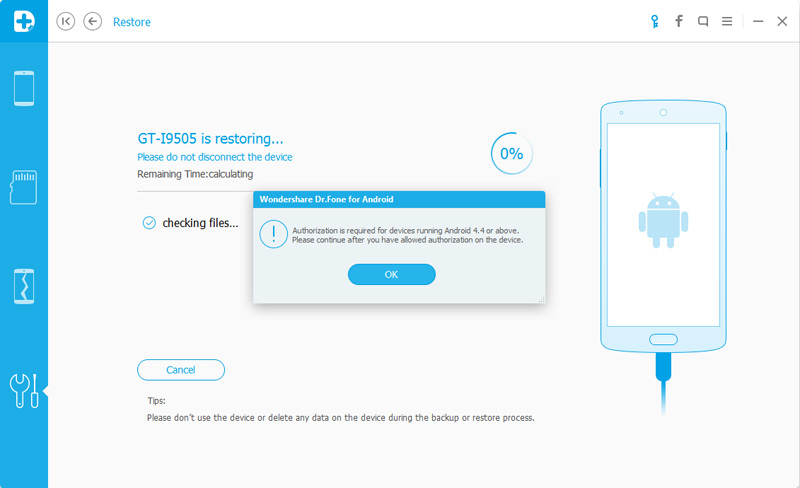
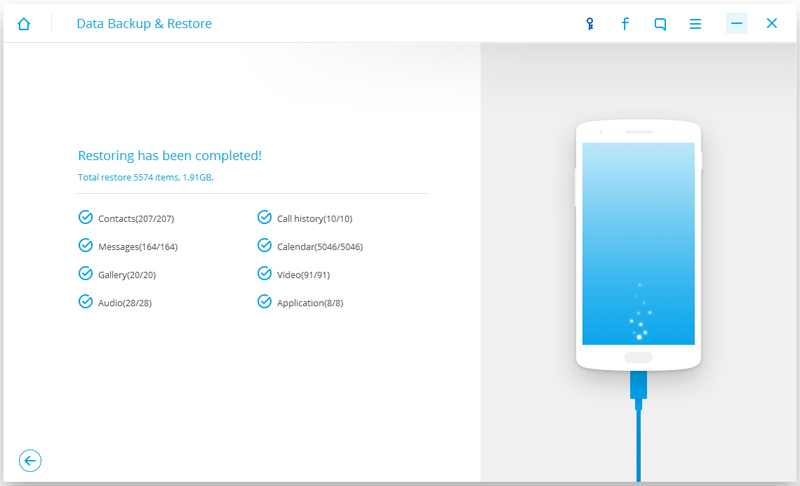
The whole process should last only a few minutes,Android Data Backup & Restore Tool will prompt you that the restore process has been completed along with a detailed account of which types of data have been successfully restored and which ones have not.
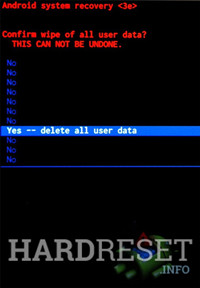
Part 5:Factory Reset on Samsung Galaxy Note 7 to Erase Data before Recalling
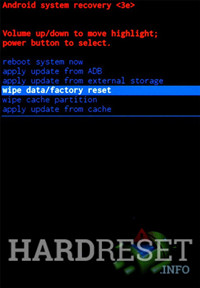
To delete all of your files data and settings from your Samsung Galaxy Note before returning, from the Home screen, touch Apps > Settings > Backup and reset > Factory data reset.
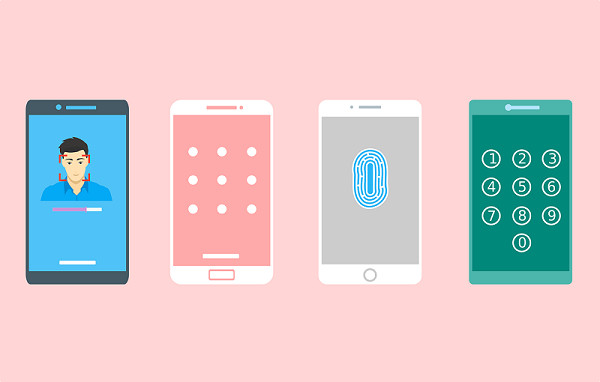
Read the information provided, and then touch Reset device. If you have a security lock set up on the device, you will be prompted to enter the lock information before proceeding. Touch Delete all to delete all information and downloaded applications.
The factory reset process may takes you a few minutes while your Samsung data and settings are all removed.However,I have to remind you that do the factory reset on Samsung is just simply delete data and settings on device instead of permanently erasing data on it.To wipe data from your Samsung device without restoring,you should get help of Android Data Eraser.Please keep on reading.
Part 6:Permanently Erase Data on Samsung Galaxy Note 7 before Recalling
When you finished backed up Samsung Galaxy Note 7 to computer,the next you should do is to permanently erase all data and settings on Samsung Galaxy Note 7 before recalling.As we know,only do factory resetting on device can’t remove data completely from device,the deleted data can be restored by some professional data recovery.To wipe all data from your Samsung surely,here we strongly recommend for you this trustworthy data removal tool-Android Data Eraser,which help to erase existing data,wipe off everything on Android Samsung phone:erase all deleted data from Samsung Galaxy Note 7without recovery,including contacts,messages,photos, videos, call logs, Apps and other private data.It supports all Android devices ever created,such as Samsung, Sony, HTC,LG,Motorola,ZTE, Huawei and so on.
Step 1.Run the Android Data Eraser on Computer and Connect Note 7 with it
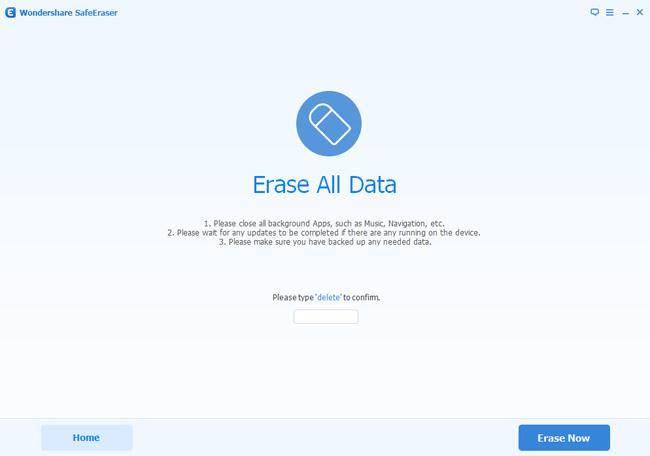
Step 2.Click “Erase All Data” Option
Step 3.Begin to Erase All Data from Samsung Galaxy Note 7
Step 4.Factory Reset on Your Note 7
Detail tutorial:How to Permanently Remove Data on Samsung Galaxy Note 7 before Recalling
Related Article:
How to Backup and Restore Samsung Galaxy Note 7
How to Backup and Restore Contacts on Samsung Galaxy Note 7
How to Backup and Restore Android on Computer
How to Backup Android Phone or Tablet Data to Computer