“Help!My videos stored on my iPhone camera roll were disappear after iOS 10 date.What’s going on?It was confused me a lot indeed.How can I restore the lost media file from my iOS 10 iPhone?Please answer me as quick as possible.Thanks a lot!”Tina Ho
As the iOS 10 version was officially released around the world,many Apple users can’t wait to update their device system to the latest iOS 10 since to experience a variety of enhancements and refinements of it,including a smarter Siri, battery life improvements, split-view multitasking for iPad, media support in Notes app, and more. After updating device to iOS 10,some users reported that the some of the photos and videos in Camera Roll are missing.If you’re an iPhone/iPad user who have encountered the same situation that lost media files on iOS device due to iOS 10 update,this post is good for you.
Get Back Deleted Photos,Videos, Muisc from iPhone with iOS 10 Update
iOS 10 Data Recovery is an all-round recovery program customized for iDevice users to recover deleted media files from iPhone after iOS 10 update,also works well for iPad and iPod touch.It empowers you to restore deleted photos,videos,audio,songs and more media files on iOS 10 device,In addition,this powerful support to recover iOS device deleted contacts, messages,notes,call logs,apps data(WhatsApp/Viber/Kik).Suppose that you’re still looking for the functional and reliable recovery software to get back your lost data, this iOS 10 Data Recovery program meets your special attention.Compatible iOS device with program including iPhone 7,iPhone SE,iPhone 6S/6,iPhone 5S/5C/5,iPad Air,iPad Pro,iPad Mini,iPad 4/3/2,etc,.


Part 1:Directly Recover Deleted Photos,Videos from iPhone after Updating to iOS 10
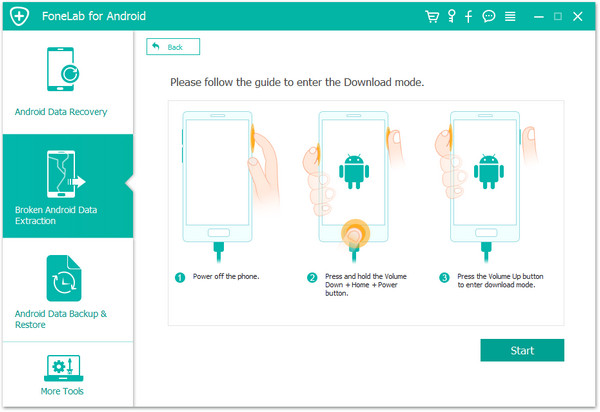
Step 1.Connect iPhone with Computer
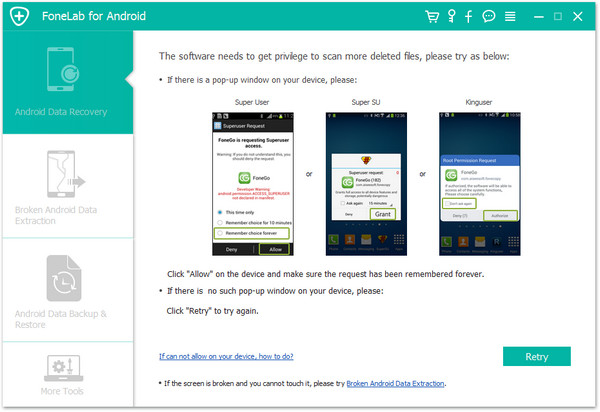
Launch iOS 10 Data Recovery on your computer.Use the USB cable that comes with your iOS device to connect your iPhone to computer.By default,iOS 10 Data Recovery will detect your iPhone automatically and show you the window for “Recover from iOS Device”.
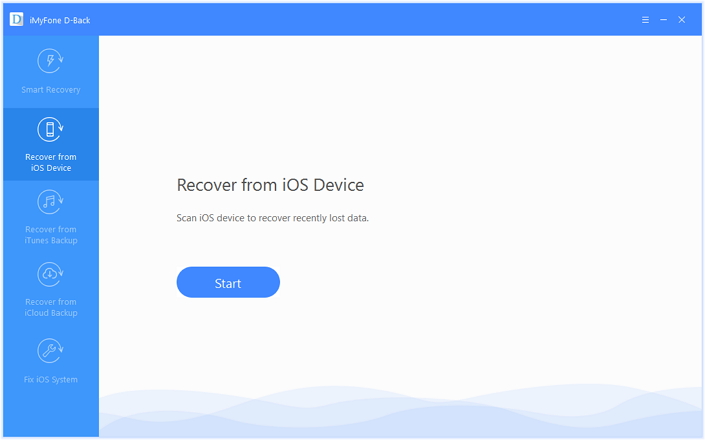
Tips:Before running iOS 10 Data Recovery,you’re supposed to download the latest version of iTunes.To avoid the automatically sync,don’t launch iTunes when running iOS 10 Data Recovery.I suggest you disable the automatical syncing in iTunes beforehand: launch iTunes > Preferences > Devices, check “Prevent iPods, iPhones, and iPads from syncing automatically”.
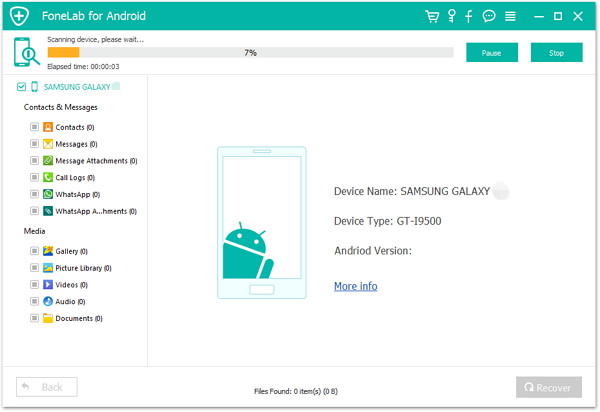
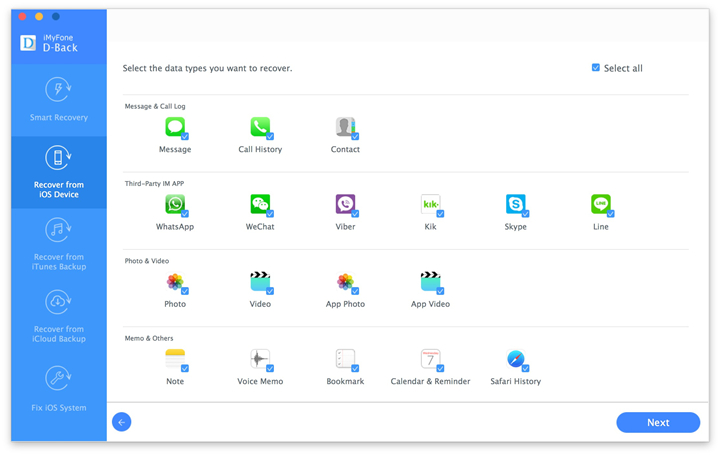
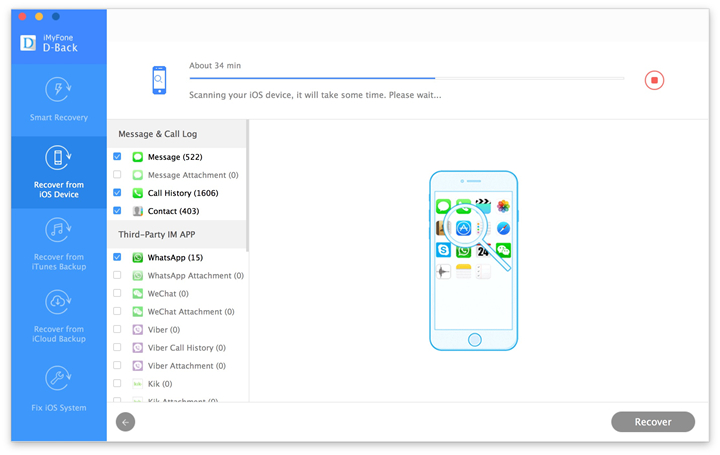
Step 2.Scan iPhone for Deleted Data on it
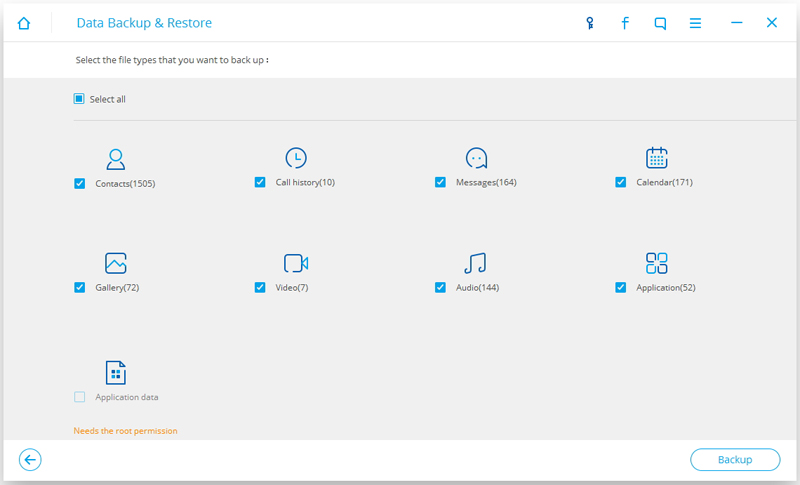
Click the media file to scan.Then simply click the “Start Scan” button to let this program scan your iPhone to scan for deleted data.The scanning process may last a few minutes.During the scanning process,if you see that the data you’re looking for is there,then you can click the “Pause” button to stop the process.
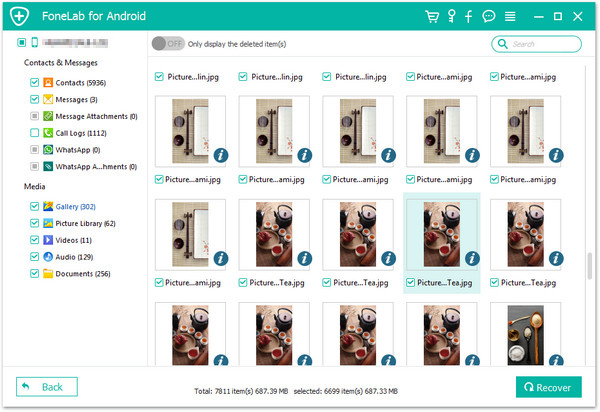
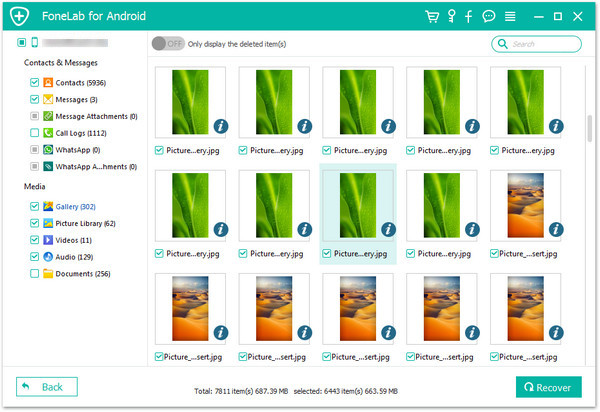
Step 3.Preview the Scanned Data
The scan will take you some time.Once it’s completed,you can see a scan result generated by the program.Data both lost and existing on your device are displayed in categories. To filter out the deleted data on your iPhone, you can swipe the option “Only display the deleted items” to ON.By clicking the file type in the left side, you can preview the found data.And you can see there is a search box on the top right of the window.You can search for a specific file by typing a keyword in the search box.
Step 4.Recover Deleted Media File from iPhone
When you find the data you need,just check and mark in front of the box to select them.After that,click the “Recover” button at the bottom right of the window.By default, the recovered data will be saved to your computer.(As for text messages, iMessage, contacts, or notes, when you click Recover, a pop-up will ask you to “Recover to Computer” or “Recover to Device”.)
Part 2:Restore iPhone Deleted Photos,Videos from iTunes after Upgrading to iOS 10
Step 1.Choose Recovery Mode
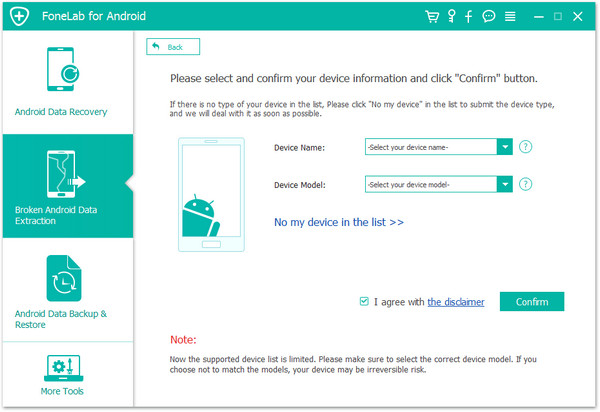
Launch iOS 10 Data Recovery and click “Recover from iTunes Backup File” mode.After that,the program will detect all iTunes backup files on this computer and display them in the window.You can confirm which one is the one you need according to the date it has been created.
Step 2.Scan Data from iTunes Backup File
Choose the iTunes backup file that contains the data you want to recover and click “Start Scan”.It will take a few minutes to extract all data from the iTunes backup file.Please be patient.

Step 3.Preview and Restore Deleted Media File from iTunes Backup
After a few seconds,all data in the backup file will be extracted and displayed in categories.You are allow to preview them one by one before recovery.Then you can selectively mark and recover those you want by pressing the “Recover” button at the bottom.

Tips:you can see there is a search box in the result window,you can type in the name of a file to search desire data for it.
Part 3:Recover Deleted Media File on iPhone after iOS 10 Update via iCloud Backups
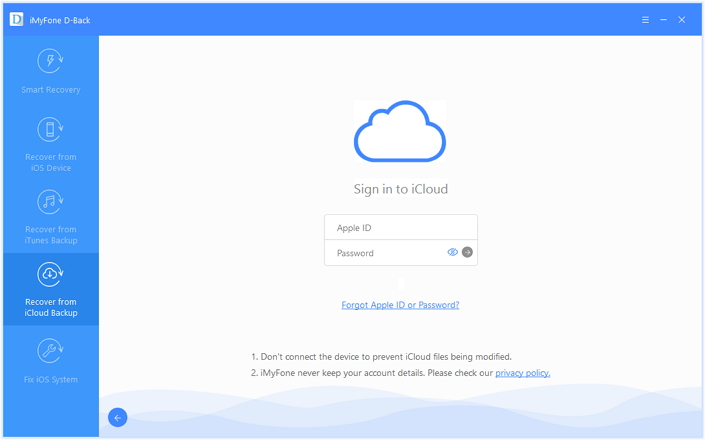
Step 1.Choose Recovery Mode
After running iOS 10 Data Recovery,choose the recovery mode of “Recover from iCloud Backup Files” in the main page of program.Then you’ll see the window below.Enter your iCloud account and password to login.iOS 10 Data Recovery promise to protect your privacy seriously.
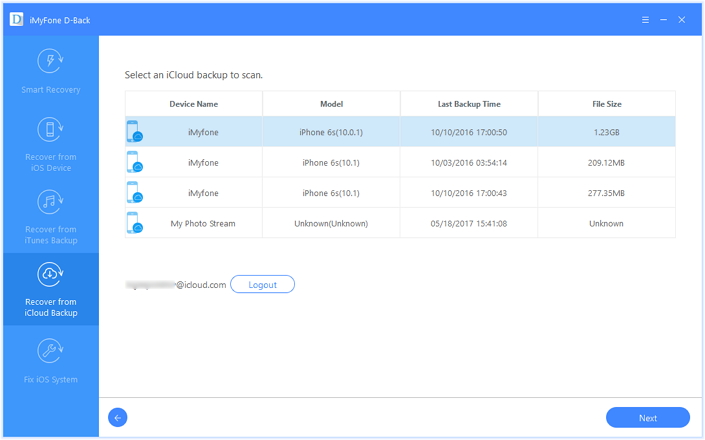
Step 2.Download iCloud Backup File
When you logged into iCloud,the program will find all iCloud backup files in your account.Choose the one where you’re going to recover data and click on the “Download” button.
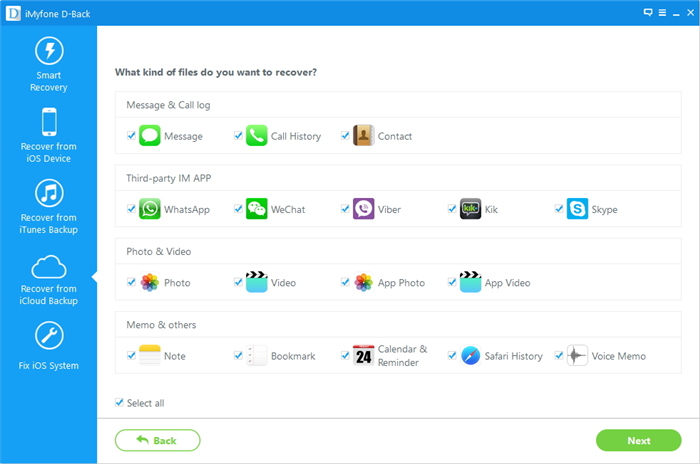
And then in the pop-up page,you should choose the type of files you would like to download.It will reduce the time of downloading the iCloud backup file.After that, you can scan the iCloud content now.Click on the “Scan” button to begin.It will take you a little time to scan.
Step 3.Preview and Restore Deleted Media File from iCloud Backup File
The scan will be complete in a few minutes.Once it stops,you are allow to preview almost all data in your iCloud backup file,like contacts, messages, photos, and more.Check them one by one and tick the item you want.Then click on the “Recover to Computer” or “Recover to device” button to save them on your computer or your iPhone with one click.

Related Article:
2 Ways to Recover Deleted Photos from iPhone and iPad
How to Restore iPhone Photos after iOS 10 Update
3 Ways to Recover Lost Photos from iPhone after iOS 9/iOS 10 Update
How to Recover iPhone/iPad Data after iOS 10 Update
How to Restore Lost Photos from iPhone after iOS 10 Jailbreak
How to Safely Backup iPhone/iPad before iOS 10 Update