[Summary]If you’re still learning how to manage Samsung Galaxy Note 8 data on Computer, then this post must be a lot helpful for. Continue reading below if you think you must and I hope you’d learn from this.
“I have got a new Samsung Galaxy Note 8 and I wonder how to manage my Galaxy Note 8 on computer at once. Is it possible to manage my data stored on Samsung Galaxy Note 8 directly?By the way, I just need the simple ways.”-Adia
Galaxy Note 8 as Samsung’s latest handset by the end of 2017, with its excellent full-view screen, the first dual-OIS dual camera, enhanced S Pen, smarter artificial intelligence platform Bixby and many other black technology have got a new round of mobile industry nomination, and brought a lot of thinking to the mobile phone industry.Have got the new Samsung Galaxy Note 8,you may need an useful data manage tool to manage music, videos, photos, contacts, SMS on your Samsung device.
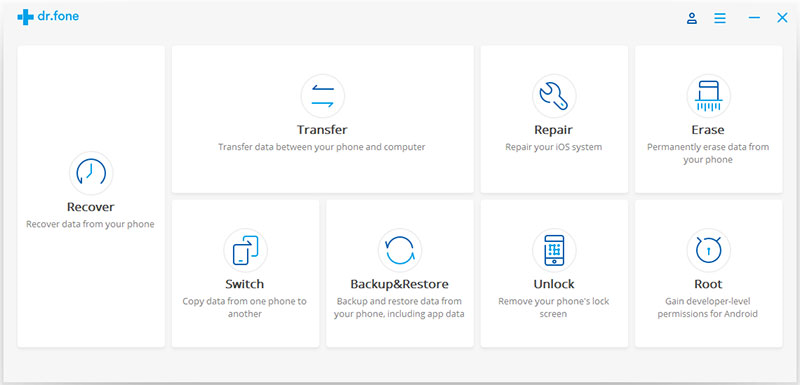
Manage Samsung Galaxy Note 8 on Computer Freely
Android Manager as an excellent tool to transfer&manage Samsung Galaxy Note 8 on computer safely,including videos,music,photos,contacts,SMS,apps.It’s a powerful program that you can transfer files between Samsung Galaxy Note 8 and computer, transfer files between Samsung Galaxy Note 8 and iTunes, or switch data files between Galaxy Note 8 and iOS/Android devices. Android Manager compatible with almost all models of Andorid devices, such as Samsung (Galaxy Note 9/Note 8/Note 5/Note 4/Note 3, S9/S8/S7/S6/S5/S4, A9/A8/A7), Google(Pixel,Nexus), Huawei(Mate 9/P9) , Motorola, HTC, LG, Xiaomi, Lenovo, ZTE, Sony,etc,.
Secure trial version of the Android Manager(Windows/Mac version) for you to download.


Part 1:Manage Samsung Galaxy Note 8 Videos on Computer
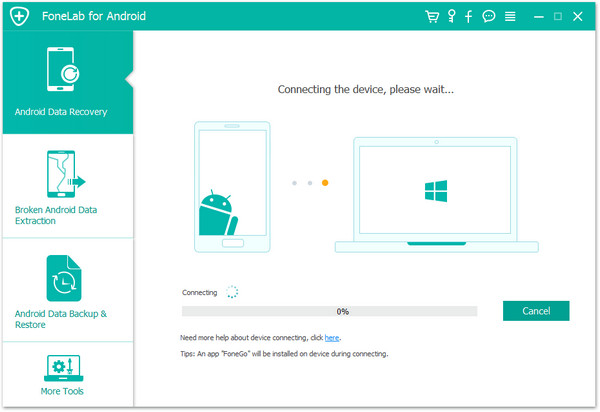
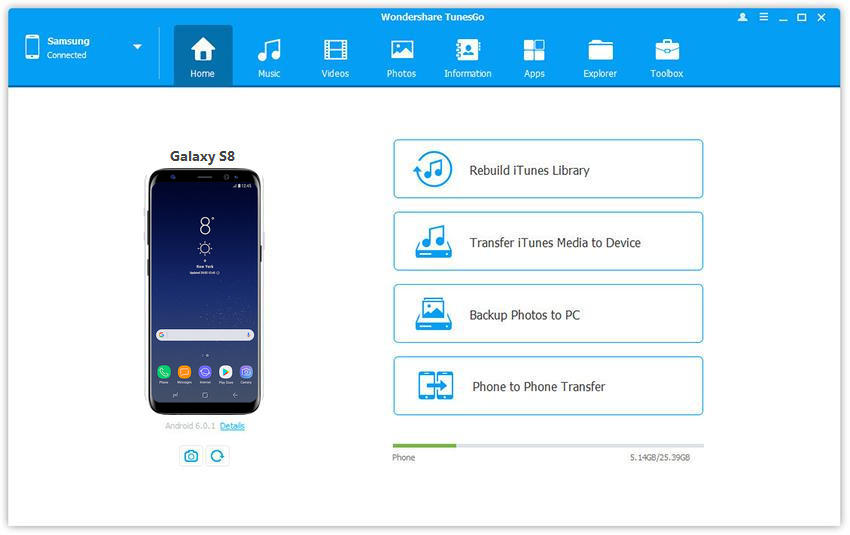
Launch Android Manager and connect your Samsung Galaxy Note 8 to the computer.Your device will be detected and displayed in the primary window.
Step 1.Select Video File to Transfer
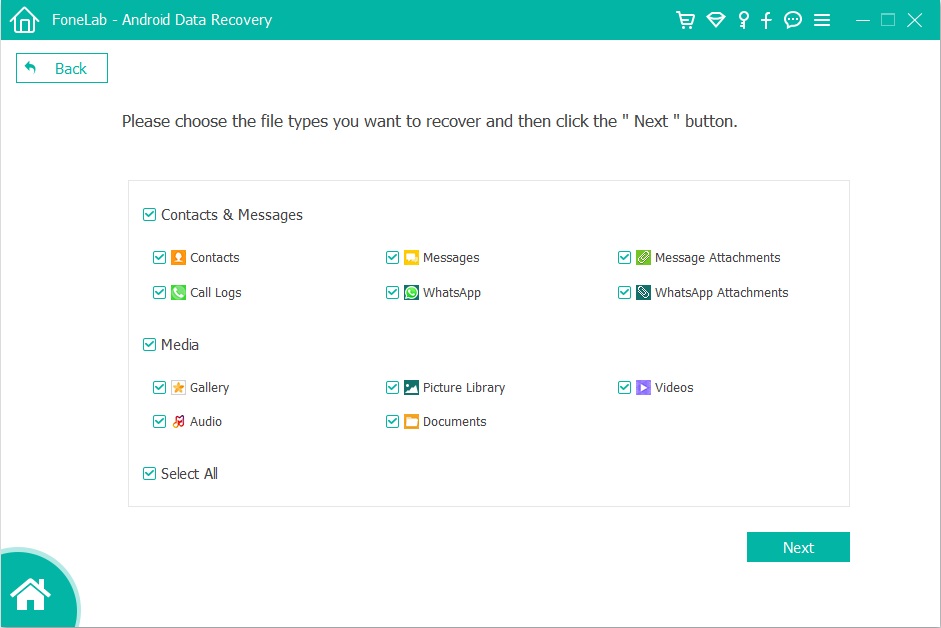
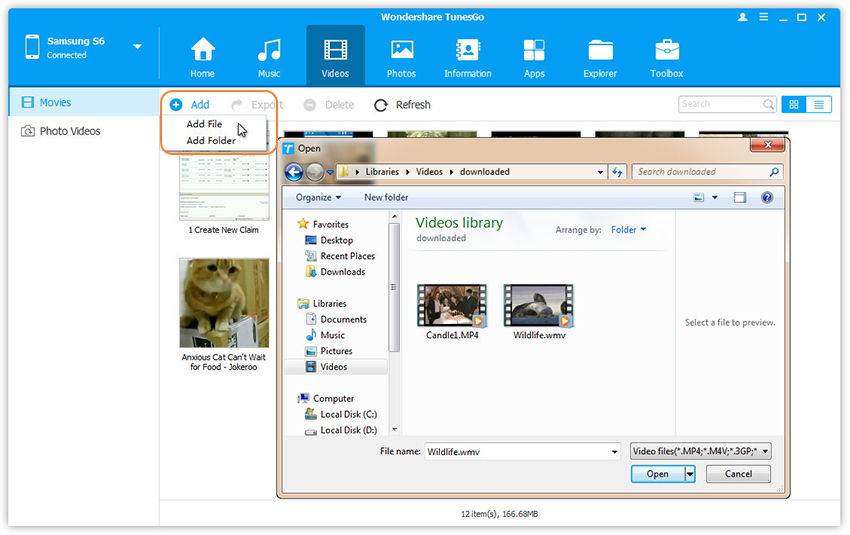
Choose Videos on the top tab .Once your media loads,click Add > Add File or Add Folder.
Step 2.Sync Movies from Computer to Samsung Galaxy Note 8
Now you can select videos to import from your computer on the pop-up file browser window.All videos imported can be watched with the built-in player.You can simply Drag and Drop videos from computer to your Samsung.
Part 2:Manage Samsung Galaxy Note 8 Music on Computer
Launch Android Manager and connect your Galaxy Note 8 to computer.Your device will be detected and displayed in the primary window.
Step 1.Select Music File to Transfer
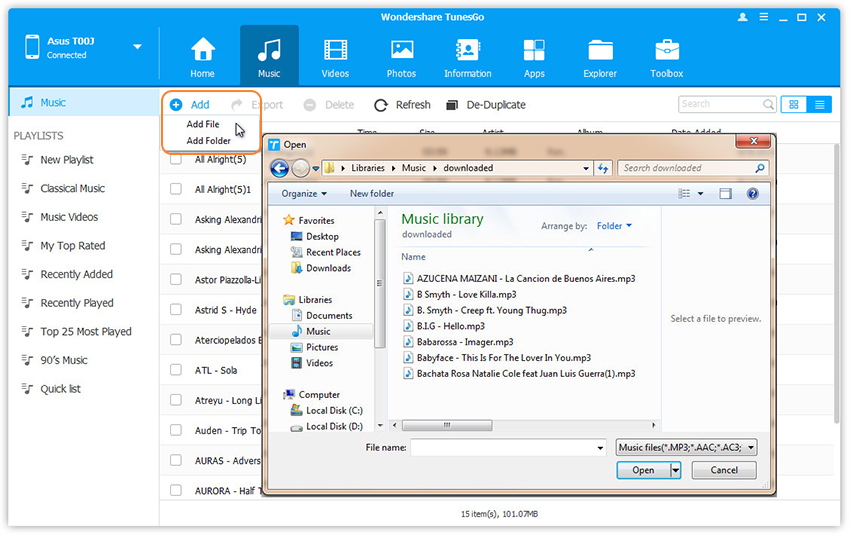
Select Music tab.Once your media loads, click Add > Add File or Add Folder.
Step 2.Sync Songs from Samsung Galaxy Note 8 to Computer
This brings up your file browser window, then you can select songs to export from your Galaxy Note 8.And you can also create a new playlist by right clicking Music to save the imported songs.You can simply Drag and Drop music files from computer to your Samsung.
Part 3:Manage Samsung Galaxy Note 8 Contacts on Computer
Android Manager can perfectly deal with add and edit contacts, group contacts, merge duplicate contacts and delete useless contacts in batches.You can also manage contacts on your Phone, SIM card, iCloud, Exchange, Yahoo! and other accounts.Here we will show you the easiest measures to manage Samsung Galaxy Note 8.
Firstly,Launch Android Manager and connect your Samsung Galaxy Note 8 to the computer.
Manage Contact Groups
Step 1. Click Information tab.
You should select and expand account from which you want to add and edit contacts on the interface, including your phone Contacts, SIM Contacts and Google Contacts.
Step 2. Right-click the contact groups on the left panel.
You can select to create New Group, Rename Group, or Delete Group.
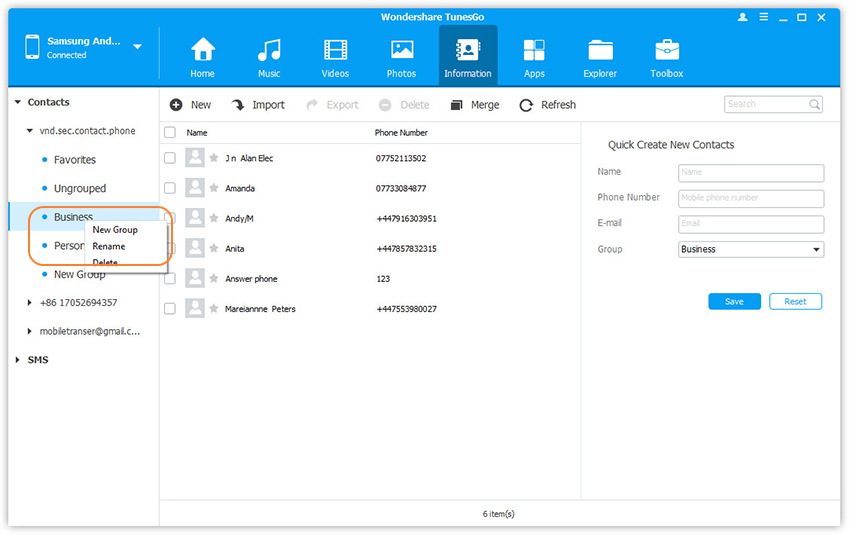
Step 3. Right-click on selected contacts, you can add contacts to specified group.
Merge Duplicates
Step 1. Click Information tab.
Just click information on the top tab and enter to the contact management window, click Merge.

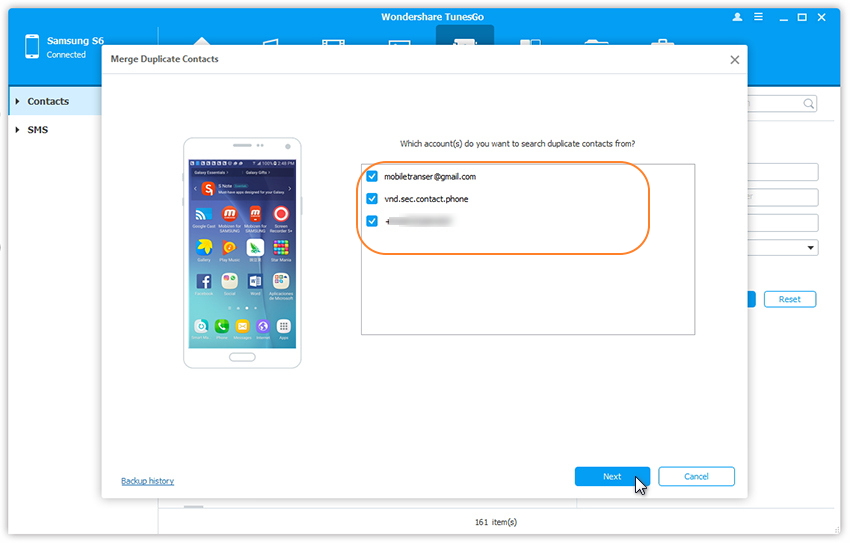
Step 2. Choose Contacts Files
Select account(s) from which you want to search duplicate contacts, including your phone Contacts, SIM Contacts and Google Contacts.
Step 3. Check Duplicate Contacts
All duplicate contacts with the same name, phone number or email will appear for your review, then you can check them.
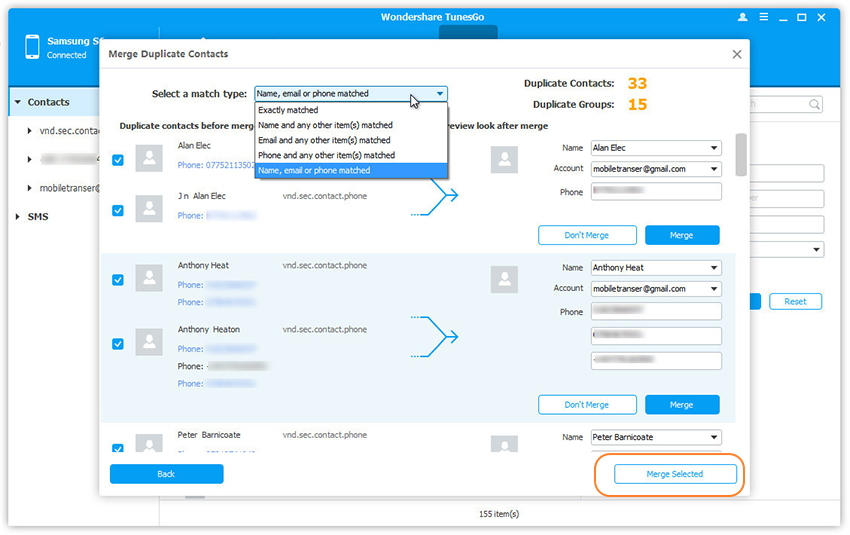
Step 4. Select a match type
Choose a match type to find duplicate contacts.
Step 5. Click Merge Selected
Click Merge Selected to merge all the contacts or Merge selected contacts one by one.
How to Add & Edit Contacts
Step 1. Click Information tab
In the contact management window, select account and group from which you want to add and edit contacts, including your Phone Contacts, SIM Contacts and Google Contacts.
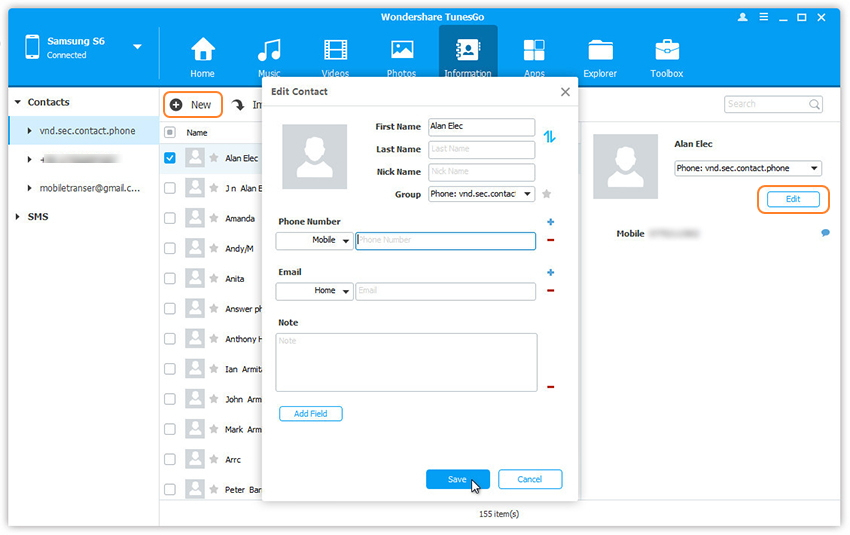
Step 2. Click New to open the Add to contact window
As you can see, you are allowed edit name, email, phone number, website, address, middle name, etc. By the Android Manage program.What’s more, you can also search and Edit selected contacts.
Delete Contacts in Batches
Step 1. Click Information tab.
In the contact management window, select group from which you want to delete unwanted contacts, including your Phone Contacts, SIM Contacts and Google Contacts.
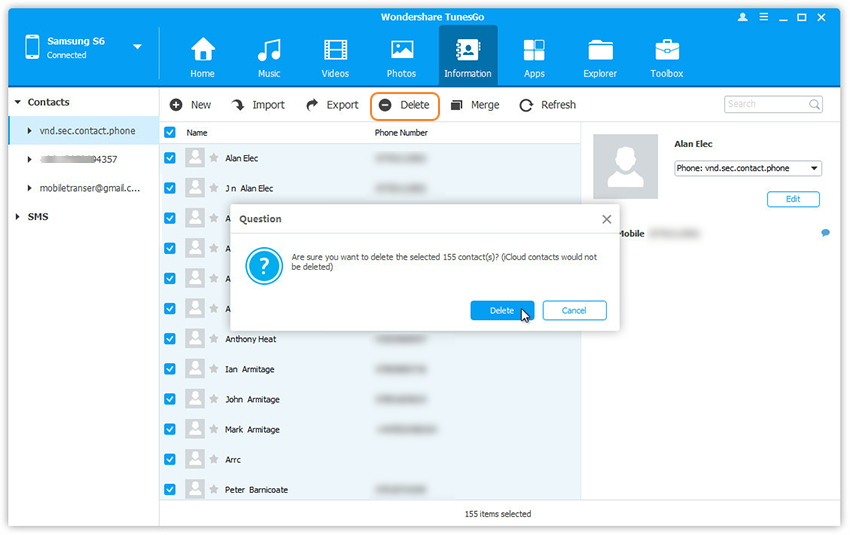
Step 2. Tick Contacts
All contacts you want to delete can just click Delete to clean them up .Then choose Yes to finish the process.
Part 4:Manage Samsung Galaxy Note 8 SMS on Computer
With the Android Manager,manage all SMS of your Samsung device on computer becomes easier. You could save SMS and transfer to computer, send and receive SMS on computer, and mark unread SMS as read.
Firstly,launch Android Manager and connect your device to computer.
Delete Messages in Batches
Step 1. Click Information tab
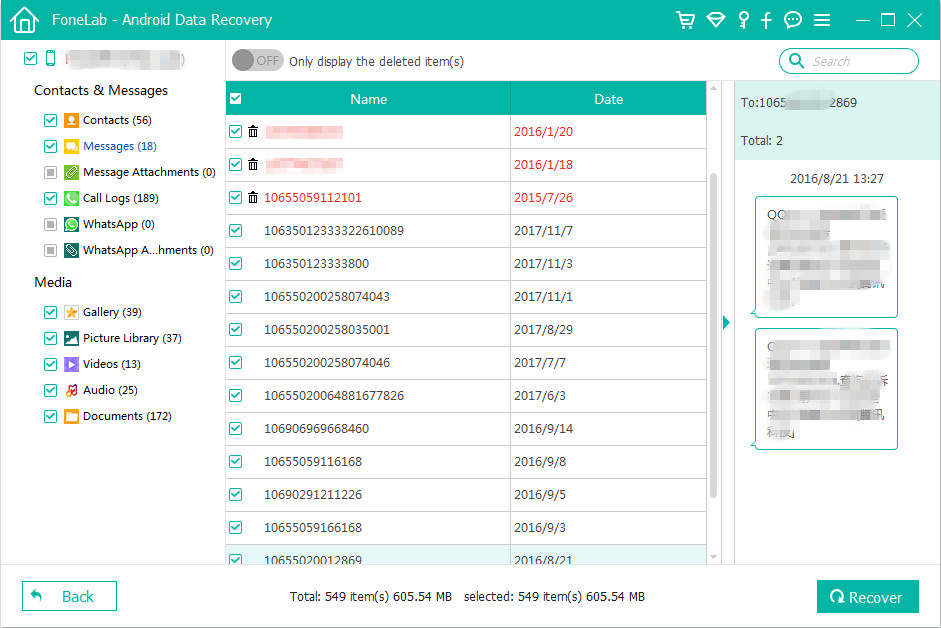
Click Information on the top tab and then select SMS on the left panel. All messages will be shown on the right.
Step 2. Tick Messages
All messages you want to delete can just click Delete to clean them up .Then choose Yes to finish the process.
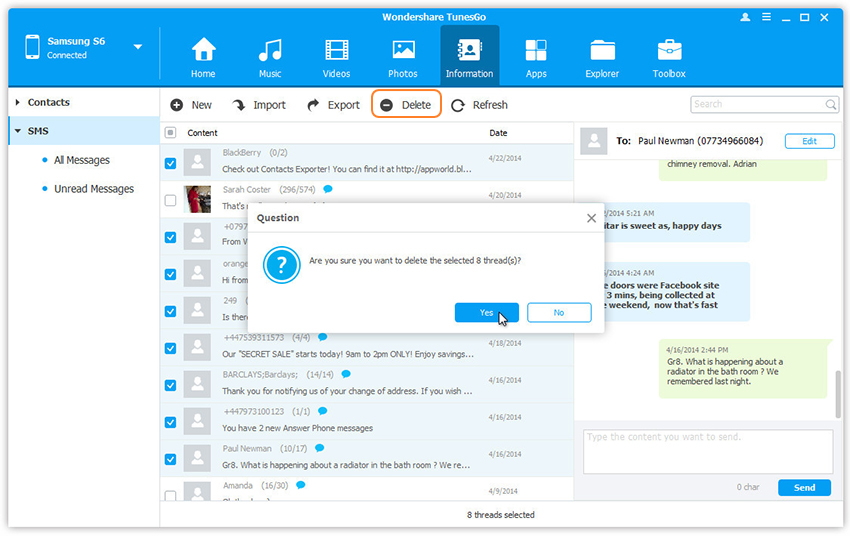
Step 3. Confirm the Process
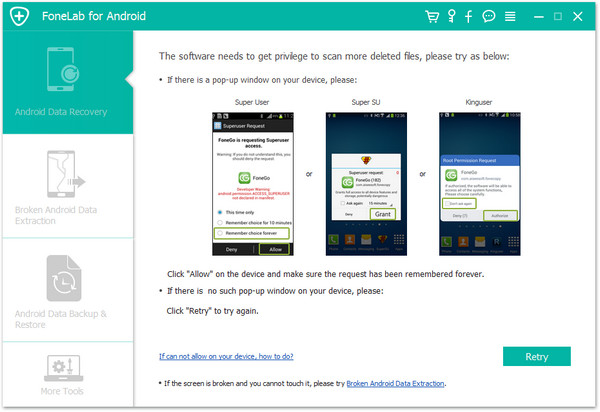
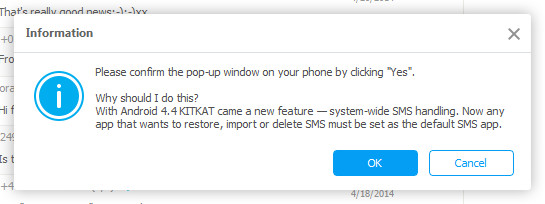
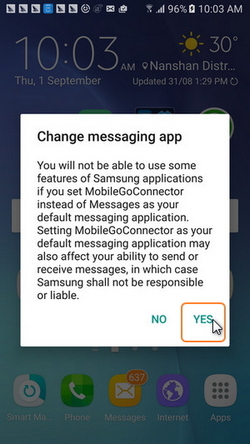
Note: The program may ask you to set MobileGoConnect as your default messaging application, as shown below. Tap on Yes on your device first, and then confirm it on your computer.
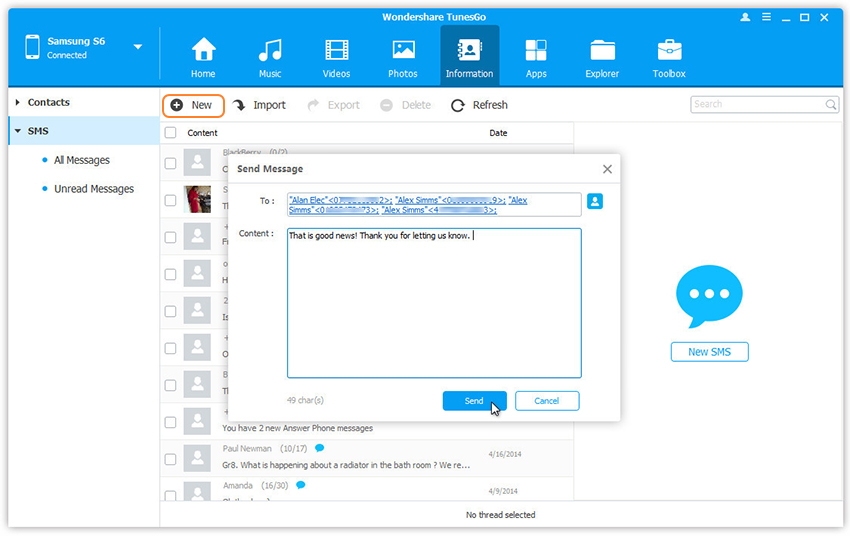
Send Messages via PC
Step 1. Click Information tab
Click Information on the top tab and then select SMS on the left panel. All messages will be shown on the right.
Step 2. Search and Read selected messages.
You can simply type the content and click Send to send messages via Android Manager on the computer.
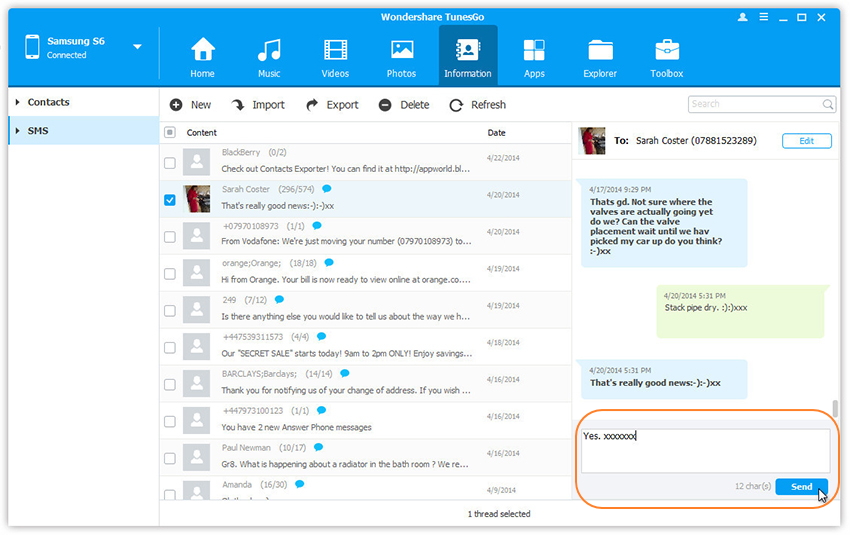
Note:Or you can click New SMS on the right column to create and send a new message to multiple recipients.
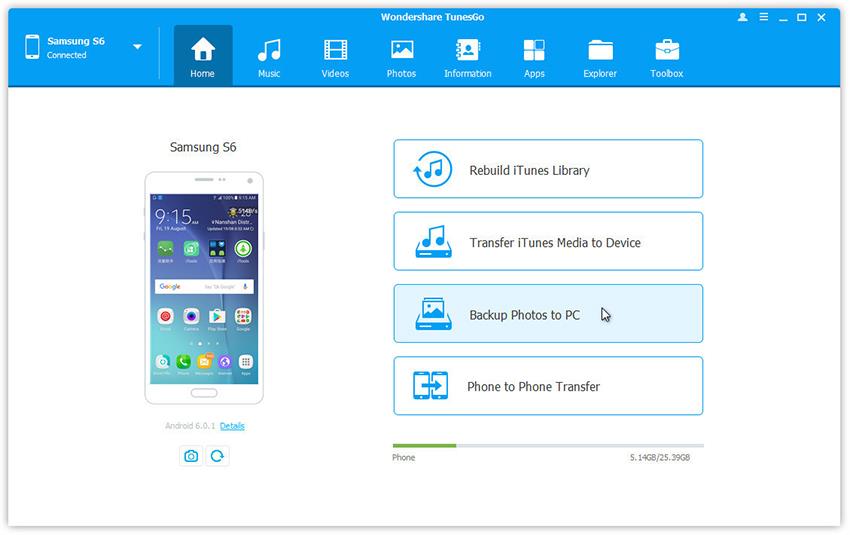
Part 5:Manage Samsung Galaxy Note 8 Photos on Computer
Launch Android Manage and connect your Samsung Galaxy Note 8 to PC.
Step 1.Select Transfer Option
Click Backup Photos to PC on the interface.
Step 2. Backup Photos from Samsung to Computer
This brings up your file browser window. Select a save path to store the photos from your Galaxy Note 8 to computer.Then click Yes to complete the process.

More Samsung Tutorials You May be Interested In:
How to Recover Deleted Data from Samsung Galaxy Note 8
How to Recover Deleted Photos from Samsung Galaxy Note 8
How to Transfer Data from iPhone to Samsung Galaxy Note 8
How to Switch Everything from Samsung to Galaxy Note 8
How to Transfer Music to Samsung Galaxy Note 8
How to Transfer Videos to Samsung Galaxy Note 8
How to Stream Apple Music to Samsung Galaxy Note 8