All posts by DHZ

How to Convert Apple Music to MP3 for Samsung Galaxy Note 8

A good news for Samsung fans: Samsung released the latest mobile phone – Galaxy Note 8 on September 15 in US and UK, while on September 22 in Australia. Samsung Galaxy Note 8 has improved its battery performance since the battery problems occurred in Galaxy Note 7. What’s more, the successful launch of Galaxy S8 makes the new Galaxy Note 8 more attractive and expecting.

convert apple music to samsung galaxy note 8

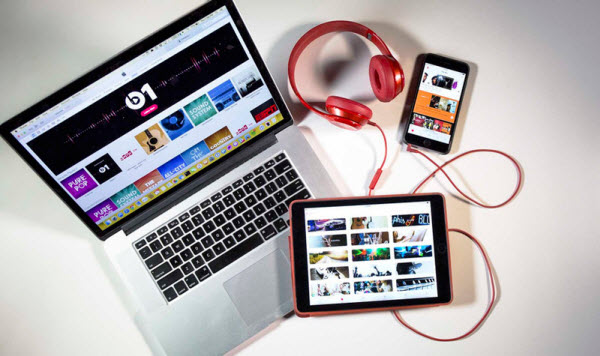
Most of iPhone users are considering to switch their iPhone to Galaxy Note 8. However, to those Apple music users, it would be a pity that can’t be able to listen the Apple music on their new Samsung device because the Apple music come as Apple Music AAC audio file which mains that Apple music file is DRM-protected and you can’t play the subscribed Apple music on other mobile device including Samsung Galaxy Note 8 and other MP3 player, PSP, Xbox 360 even other non-Apple devices. Is there a helpful way to play the Apple music on Galaxy Note 8 phone with another format that compatible with Samsung? Here an amazing program called Apple Music Converter comes for you.

Convert Apple Music for Playing on Samsung Galaxy Note 8

To remove DRM from Apple music songs and play Apple music on Samsung Galaxy Note 8, you need a professional program to assist you. UkeySoft Apple Music Converter could be really a good choice. This program is easy to convert Apple Music to MP3 files up to 16X speed. The output Apple music with the quality losslessly. You are free to transfer the converted Apple music to your Samsung Galaxy Note 8 and make them also playable on device for free without time limitation. After the conversion, you can transfer and enjoy Apple music on any MP3 audio player devices as you like, including iPod, PSP, Zune, MP3 player, mobile phones.

d_win d_mac

Know More Features of Apple Music Converter:
-Remove DRM from Apple music Streams with original data legally.
-Convert Apple music from M4P format to DRM-free MP3, M4A, etc,.
-Remove the limitation and keep Apple Music as offline local songs.
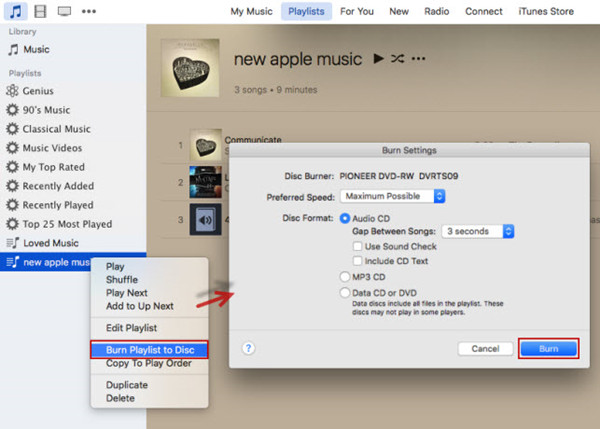
-Convert and burn Apple Music to CDs.
-Playing Apple Music on any Windows/Mac computer and any media player devices such as iPod, iPhone, iPad, PSP, Zune, MP3 player, mobile phones, etc,.
-Convert audiobooks to M4A files.

How to Play Apple Music on Samsung Galaxy Note 8

Step 1. Run Apple Music Converter on the Computer
To begin with, run Apple Music Converter on the computer, iTunes will be run automatically at the same time.

apple music converter home page

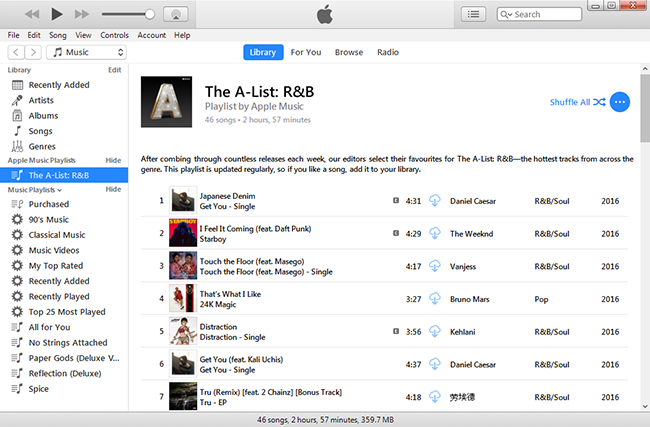
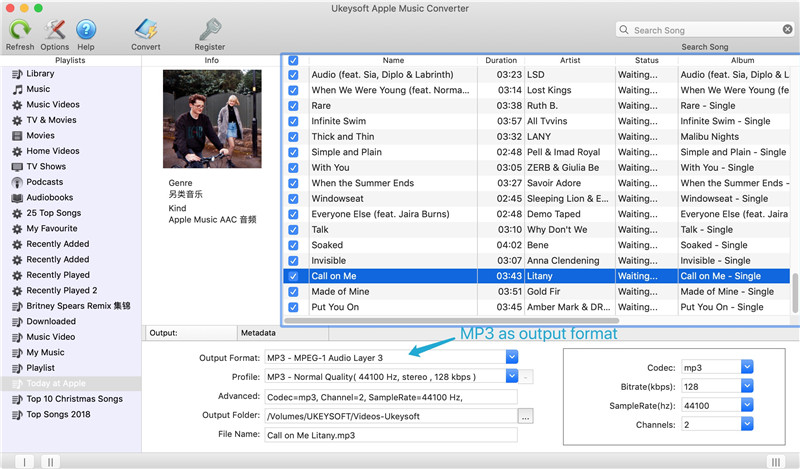
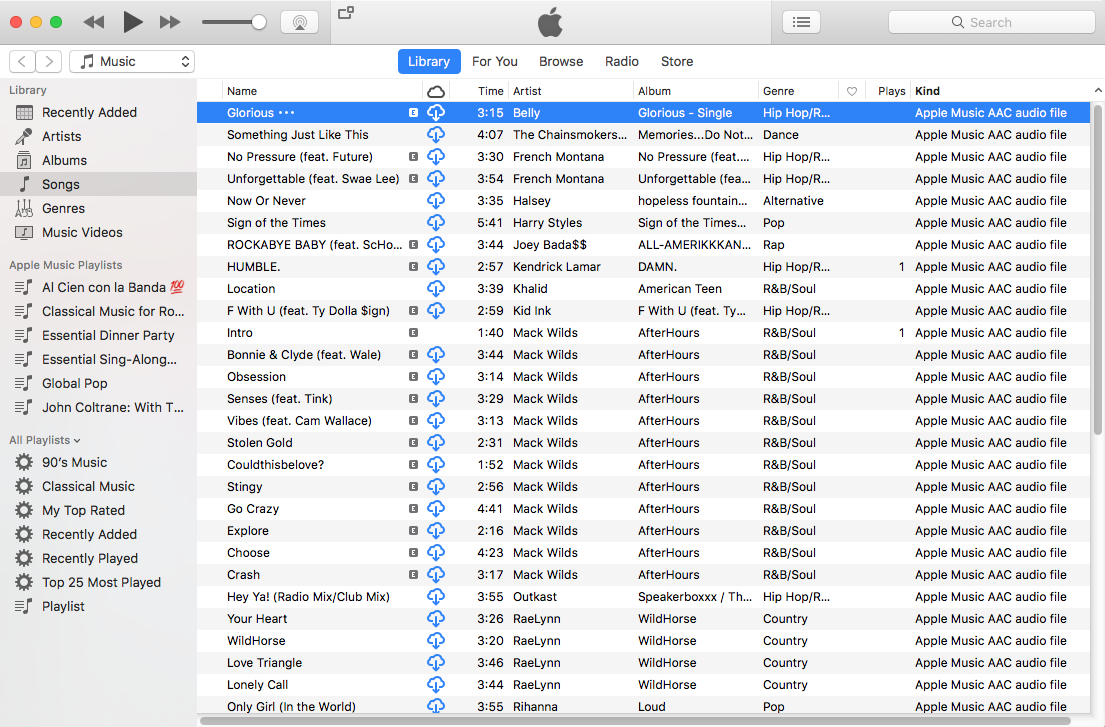
Step 2. Select the Apple Music to Convert
The program will load all the iTunes music and playlists you have added to iTunes library in the interface of program, including iTunes songs, movies, TV shows, audiobooks, etc,. Select the music to convert.

select Apple music to convert

Note: You can search the music name in the seachbox if needing.

Step 3. Setting the Conversion Data of the Converted Apple Music
A window will pop up for prompting to make the settings, to set the data of the converted Apple music.

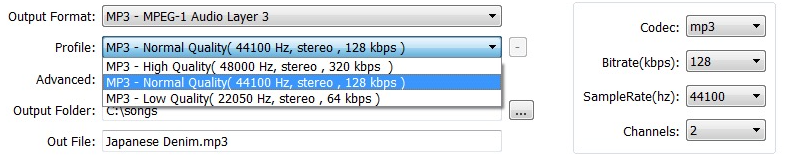
Setting the Output Profile of Output Apple Music:

select output profile

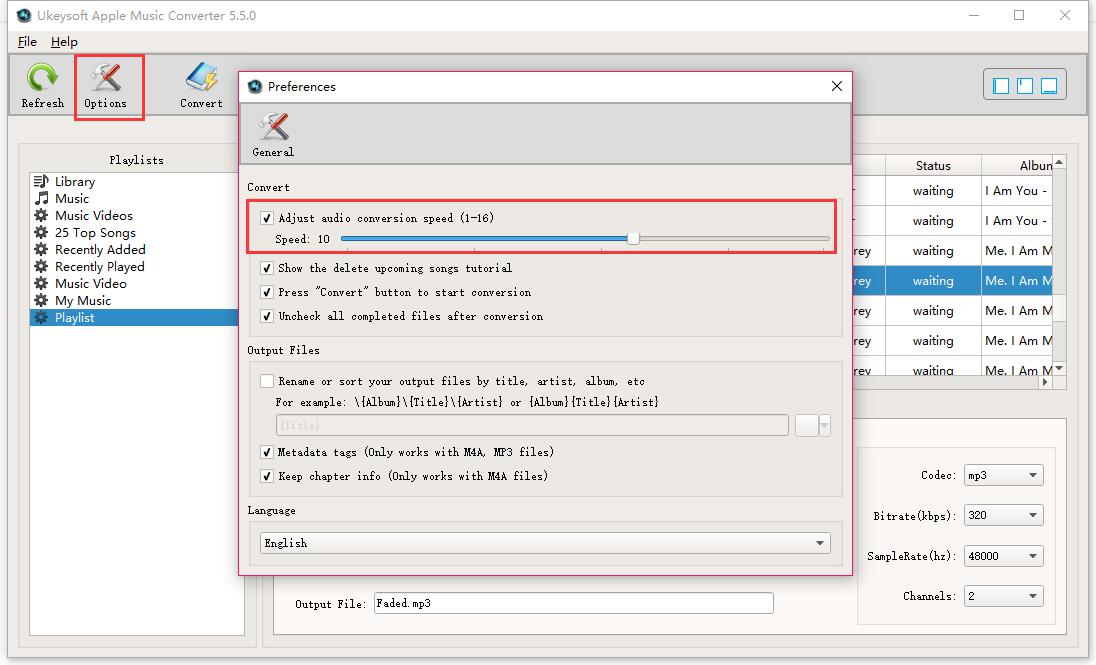
Setting the Conversion Speed of Output Apple Music:

select conversion speed

Step 4.Convert Apple Music to MP3 for Samsung Galaxy Note 8
Click “Start Convert” to convert M4P Apple music to free MP3 files with lossless quality.

convert Apple music for Samsung

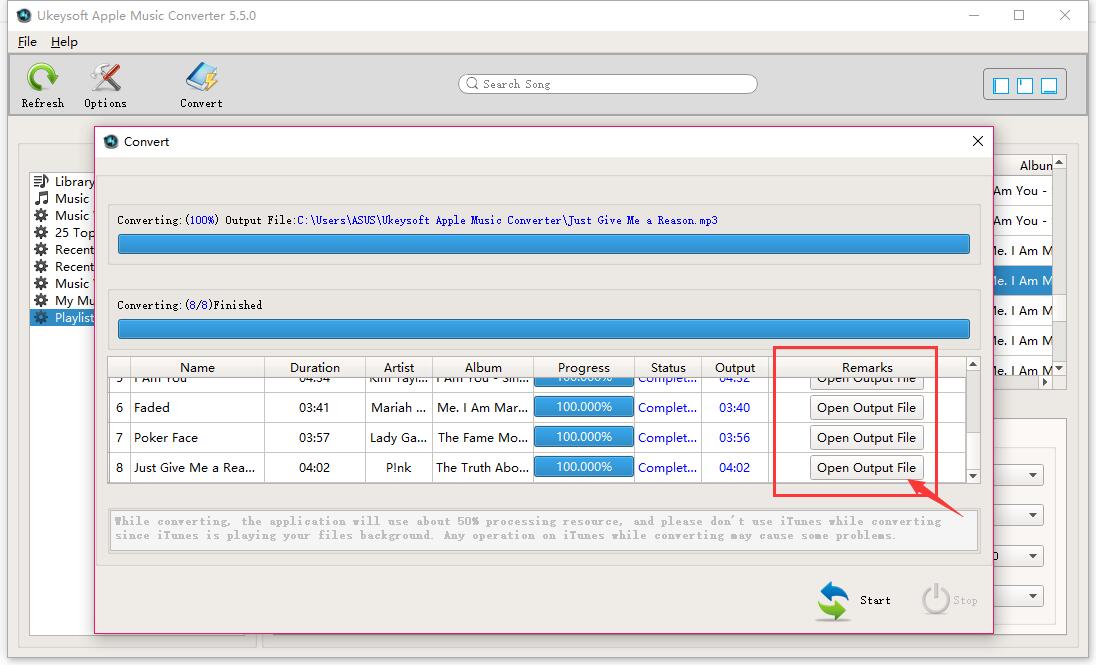
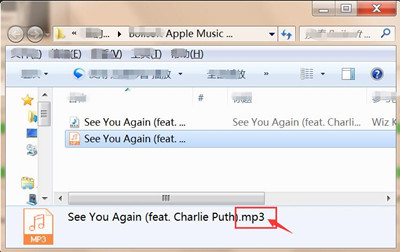
When the conversion is finished, you can check the converted MP3 music files on the computer by clicking “Open Output File”.

check the converted Apple music

Get the Apple Music Converter and try to stream Apple Music onto your Samsung Galaxy phone.

d_win d_mac

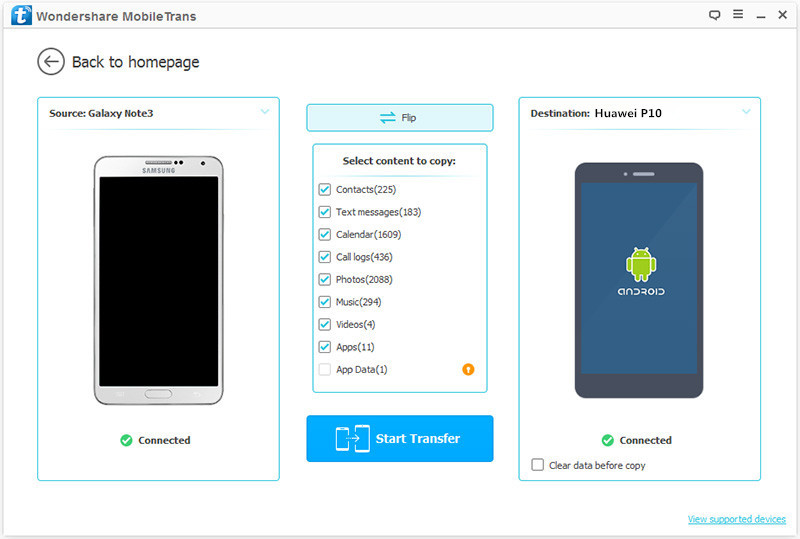
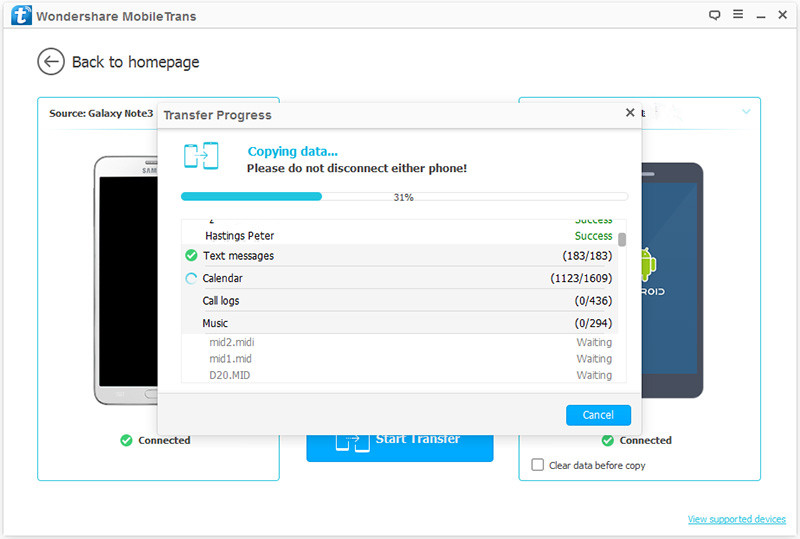
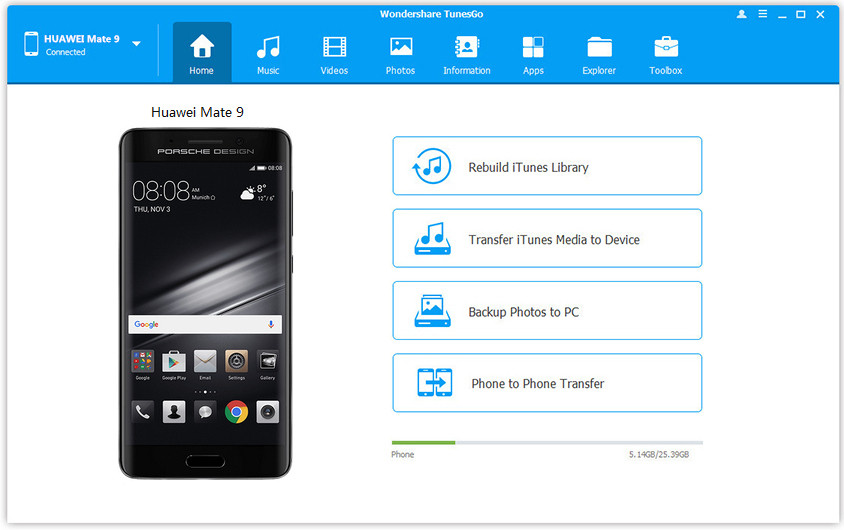
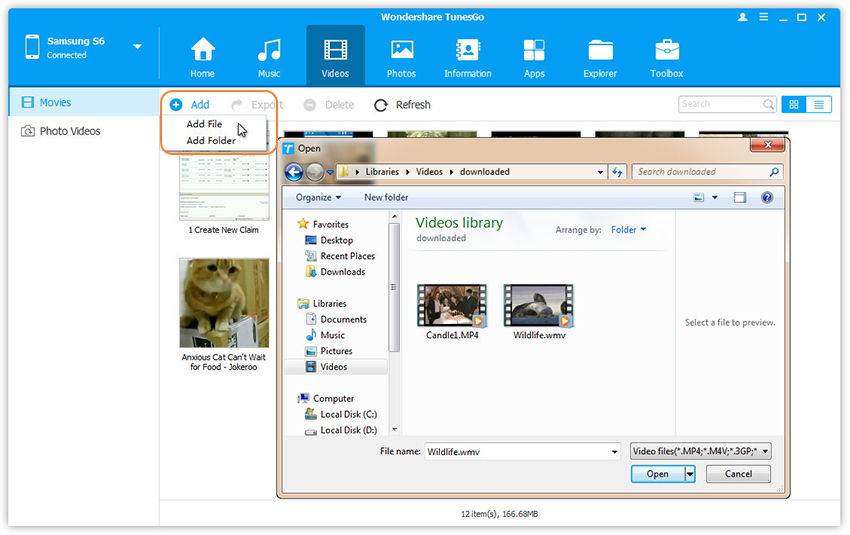
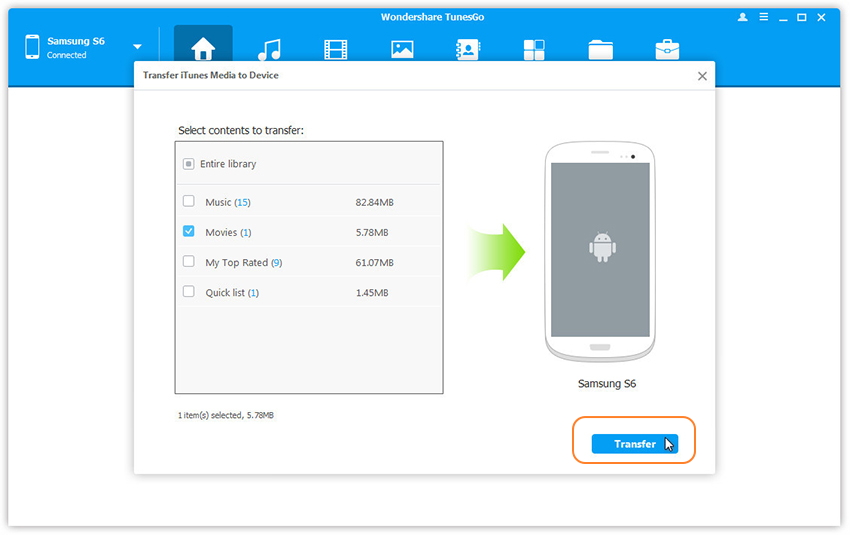
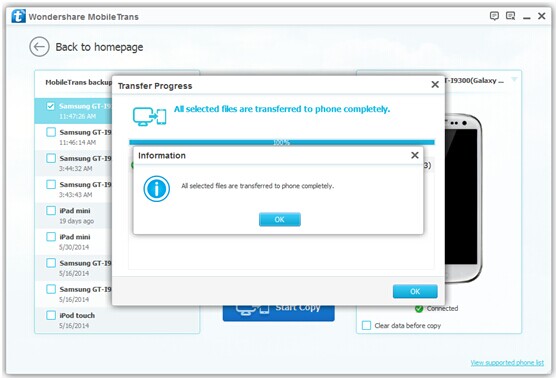
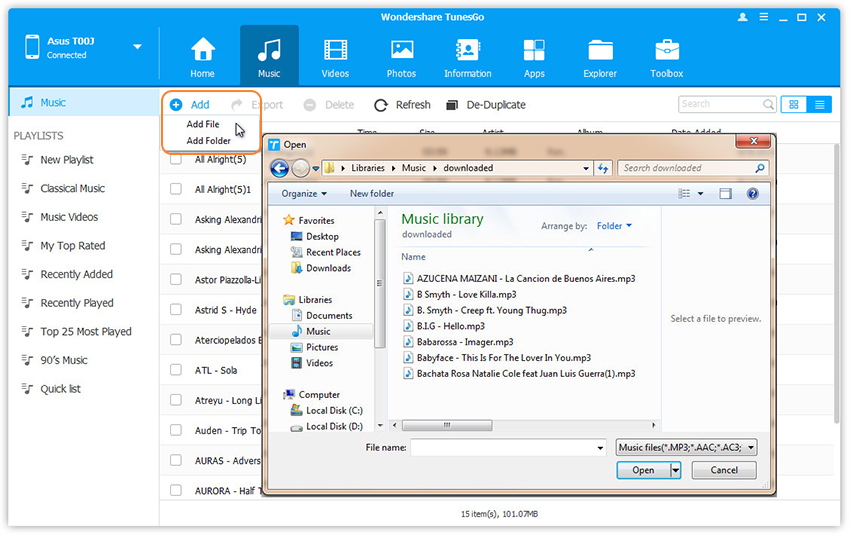
Step 5. Import the Converted Music from Computer to Samsung Galaxy Note 8
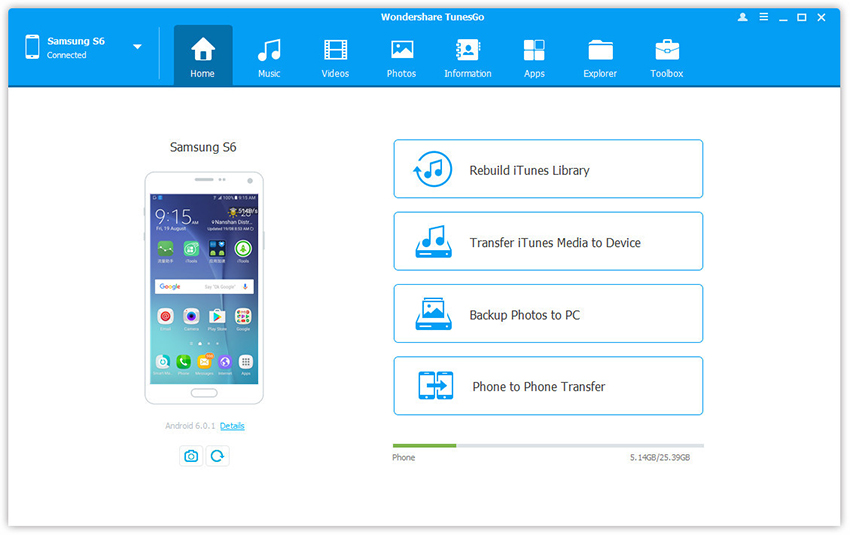
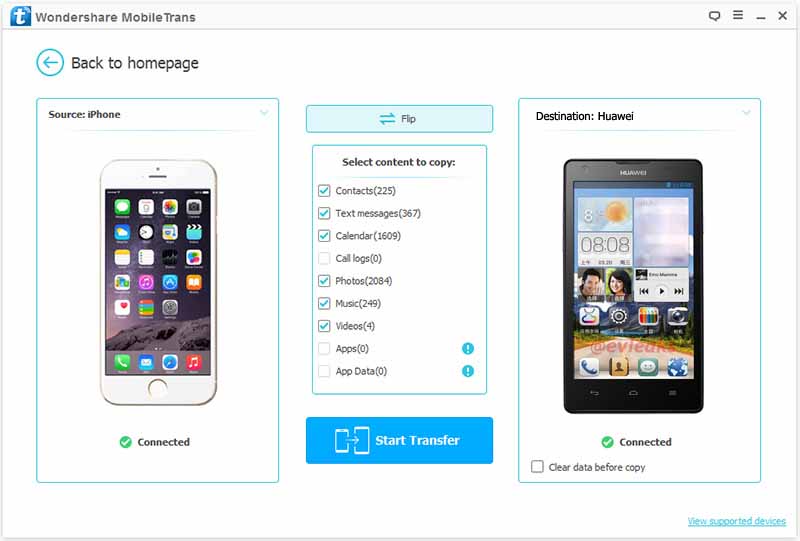
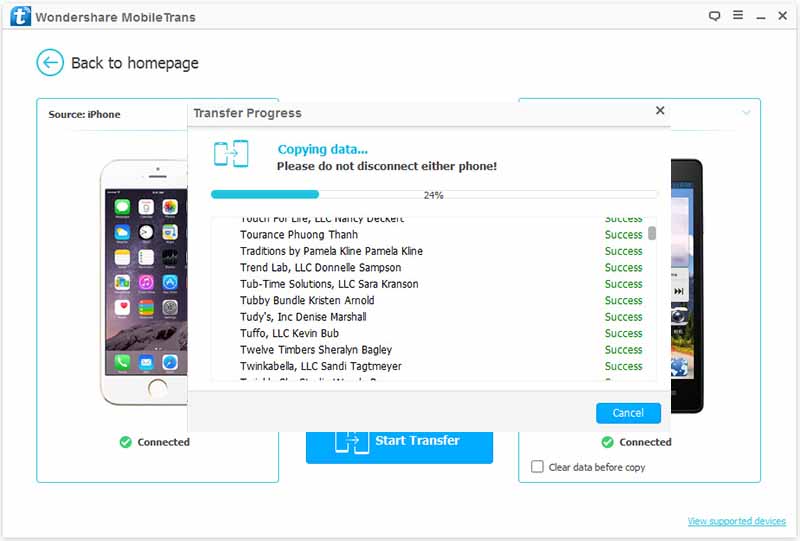
To listen the converted Apple music on Samsung Galaxy Note 8, you should transfer the music from computer to Samsung via Android Manager. It is a wonderful data manage tool to transfer & manage files for Android device.

transfer music from pc to Galaxy Note 8

You can check: How to Transfer Music from Computer to Samsung Galaxy Note 8

Now you can listen the Apple music on Samsung Galaxy Note 8 offline without time limitation.

Free Download Android Manager to import music to your Galaxy Note 8:

d_win d_mac

Video Guide on how to remove DRM from Apple Music?

More Galaxy Note 8 Guides you can Check

How to Play iTunes Music on Samsung Galaxy Note 8 for Free

How to Stream Apple Music on Samsung Galaxy Note 8

How to Record Apple Music M4P Streams as MP3

How to Stream DRM-free Apple Music to Samsung Galaxy

How to Play Apple Music M4P on Android

How to Sync iTunes Movies to Samsung Galaxy Note 8

How to Backup and Restore Samsung Galaxy Note 8

How to Manage Samsung Galaxy on the Computer

How to Transfer Contacts from Android to Huawei Mate 10

Summary: Can’t figure out how to transfer contacts from Android to Huawei Mate 10 without one by one? Just take a glance in this tutorial, the follow passages will guide you sync contacts or other data between Android and Huawei phone step by step.

With the success of Huawei Mate 9 in last year, Huawei Company released a new powerful model called Mate 10, which is the improved product of Mate 9, and it become the hottest one among Huawei phones.If you used to be one of the Android users and has upgraded to the new Huawei Mate 10, the first thing you’d like to sync must be the contacts list, it contain the phone numbers, home address, E-mail address and more privacy information. Are you one of them who are looking for an easy way to copy the contacts from Android to Huawei Mate 10? This tutorial is aims to import contacts from Android to Huawei Mate 10 with only three easy steps.

Import Contacts from Android to Huawei Mate 10

Phone Transfer is good at transferring data between two phones for almost all popular mobile phones which are based on Android, iOS operating system. In another word, it supports transfer contacts from Android to Huawei Mate 10. Not only contacts, but also text messages, photos, videos, call logs, calendars, music, apps can be transferred. Phone Transfer provides other three modes for managing mobile phone: backup phone data to the computer, restore backup data to phone on the computer, wipe phone data before selling. Supports all Android models, including Huawei(Mate 10/9), Samsung(Galaxy S7/S6/S5), LG, Motorola, OnePlus, Lenovo, HTC, ZTE, Xiaomi, Google Pixel, etc,.

d_win d_mac

How to Transfer Android Contacts to Huawei Mate 10

Step 1.Install and Run Phone Transfer on the Computer
Firstly, please install and run Phone Transfer on the computer.Then a primary window of this program will pop up.

Step 2.Select the Transfer Mode
Please select “Phone to Phone Transfer” mode to transfer contacts from Android to Huawei Mate 10.

phone transfer home page

Step 3.Connect Devices to the Computer
Then connect both your Android and the Huawei to the computer with two USB cables.Once connected,the Android will be shown as “Source” on the left while the Huawei will be displayed as “Destination” on the right.If you need to switch the position of them, click the “Flip” button.

connect devices to the computer

Step 4.Select Contacts File and Transfer
Unclick the files you don’t need to transfer since some items be ticked by default except the “Contacts” file.

In the last step, click “Start Transfer” to begin the data transferring process.You can check the percentage of the transfer process from the progress bar.Once the data from Android to Huawei transfer process is complete,just click “OK” to end it.

import Android contacts to Huawei

d_win d_mac

More Guides about Huawei Mate 10 you may be Like:

How to Transfer Android Photos to Huawei Mate 10

How to Transfer Android Data to Huawei Mate 10

How to Transfer iPhone Data to Huawei Mate 10

How to Transfer Samsung Data to Huawei Mate 10

How to Recover Deleted Data from Huawei Mate 10

How to Import Music/Videos to Huawei Mate 10

How to Transfer iTunes Music to Huawei Mate 10

How to Backup and Restore Huawei Mate 10 

How to Manage Huawei Mate 9/Mate 10 on Computer

How to Transfer Android Photos to Huawei Mate 10

I like to take photos with mobile device than using the digital camera. I saved a larger number of photos on my Android phone. How to sync all the photos to my new Huawei Mate 10 phone with one click? Is it possible? Thanks.”

The next hot topic of smartphones is the major new models called Huawei Mate 10. The newly debuted phone from Chinese manufacturer Huawei has a lot of the same features and design traits as we’ve come to expect from the brand, but this new focus on AI is the major selling point.

All of us like to take photos to keep the wonderful moment. The camera function of mobile phone is become more and more excellent, most of people prefer to use mobile phone to take photos than the digital camera. So it’s not surprise that you saved a mount of photos on the mobile device. When you switch to a new Android device, what is the essential data you must sync to it from your old one? For me, the photos. If you are in a hurry to get way to transfer the photos from Android to the new phone, for example, Huawei Mate 10, Phone Transfer provides a convenient way to you, help to sync Android photos with Huawei Mate 10.

Import Android Photos to Huawei Mate 10

As a matter of fact, a program called Phone Transfer is what you need. It is a versatile tool,to backup/restore, delete, transfer data for mobile phone. You can use this software to transfer data between two mobile phones, including contacts, text messages, photos, videos, music, calendars, call logs, apps. With this program, you can import photos from Android to Huawei Mate 10 with one click. The process is simple and quick. All mobile phones are applicable to Phone Transfer, such as, Huawei(Mate 10/9), Samsung(Galaxy S7/S6/S5), LG, HTC, ZTE, Xiaomi, Google Pixel, Motorola, OnePlus, Lenovo, etc,.

d_win d_mac

How to Sync Android Photos with Huawei Mate 10

Step 1.Run Phone Transfer on the Computer
Run Phone Transfer on the computer.Then a primary window of this tool will pop up.

Step 2.Select the Transfer Mode
In this case, please select “Phone to Phone Transfer” mode to transfer photos from Android to Huawei Mate 10.

phone transfer home page

Step 3.Connect Two Android to the Computer
Then connect both your Android and the Huawei to the computer with two USB cables.Once connected,the Android will be shown as “Source” while the Huawei will be displayed as “Destination”.If you need to switch the places of them, you can click the “Flip” button.

connect devices to the computer

Step 4.Mark Photos File and Start to Transfer
Unclick the files you don’t need to sync since some items be ticked by default except the “Photos” file.

Finally, click “Start Transfer” to begin the data transferring process.A dialog will show up.You can check the percentage of the transfer process from the progress bar.Once the data from Android to Huawei transfer process is done,just click “OK” to end it.

import Android photos to Huawei

d_win d_mac

More Guides about Huawei Mate 10 you may be Like:

How to Transfer Android Data to Huawei Mate 10

How to Transfer iPhone Data to Huawei Mate 10

How to Transfer Samsung Data to Huawei Mate 10

How to Recover Deleted Data from Huawei Mate 10

How to Import Music/Videos to Huawei Mate 10

How to Transfer iTunes Music to Huawei Mate 10

How to Backup and Restore Huawei Mate 10 

How to Manage Huawei Mate 9/Mate 10 on Computer

2 Ways to Burn Apple Music to CD

[Summary]: Don’t know how to burn Apple Music songs to CD?What you need to do is converting Apple Music to MP3 at first,and then import the DRM-free Apple Music songs in MP3 format to iTunes Playlist,after that,using iTunes to burn the iTunes playlist to CDs for playing or Car or at Home for free forever,even your Apple Music subscription is expired.

I have purchased hundreds of songs on Apple Music store in iTunes,I want to listen to my favorite Apple Music songs on my Car CD player,because my Apple Music subscription is expired and I need to burn Apple Music to CD,I know how to burn iTunes music to CD,but there is no burn option in iTunes for burning the streaming Apple Music songs to CD.Any way to burn the Apple Music songs or playlists I streamed then save to offline onto CD or flash drive etc?

Answer: Anything you download from Apple Music’s streaming catalog is DRM-protected.
The iTunes program allows you burn iTunes music to CD,but there is no burn option in iTunes for burning the streaming Apple Music songs to CD,because the Apple Music is protected with DRM encryption in M4P format,when you have canceled the subscription from Apple Music,all Apple Music you streamed can not be played,Apple company not allow you burn Apple Music and iTunes rented or purchased videos to CDs or DVDs,since iTunes downloaded videos and Apple Music downloaded tracks are DRM protected.Don’t worry,next we will teach you how to burn Apple Music songs to CDs for enjoying.

There are two easiest way to accomplish burning Apple Music to CD effectively.

Way 1. Convert Apple Music to MP3 and Add to iTunes for Burning to CD(Buy Once Enjoy Forever)

In this part,we will teach you the most Money-Saving Way to burn Apple Music to CD,Next is the thing you required to burn Apple Music tracks to CDs:

*Computer – Your Mac or Windows computer must have a disc drive that can burn discs.
*Apple Music Subscription – Add music or playlist you want from Apple Music to iTunes.
*An Apple Music to CD Converter – Helps users remove DRM from Apple Music and convert them to MP3, FLAC, AC3, etc.
*iTunes – Used for burning converted Apple Music songs to CDs.
*A blank CD disk

This Apple Music to CD ConverterApple Music Converter,which can help you remove DRM from Apple Music tracks,and convert Apple Music tracks to plain MP3, WAV, FLAC or AAC with lossless quality. After removing DRM from Apple Music tracks and save them on computer as MP3 or other DRM-free audio format,and then you can burn the converted Apple Music songs to CD now!

d_win d_mac

Tips:During the converting process,it will keeps the original sound quality of your Apple Music tracks. All ID3 tags will be saved, too.

Apple Music Converter Key Features:

-Remove DRM from Apple Music songs in a legal way;
-Convert iTunes Music and Apple Music DRM-ed M4P songs to DRM-free MP3, WAV, FLAC or AAC formats so as to play Apple Music to presently unsupported devices and music player;
-Converts M4B, AA, AAX audiobooks to plain MP3 for playback on any device;
-Save money to enjoy your favorite Apple music for forever;
-Keep Apple Music forever even after unsubsciption;
-Super fast speed with 100% lossless quality.

Steps to Remove DRM from Apple Music Downloaded Tracks and Burn them to CD

Step 1:Launch Apple Music Converter on PC/Mac and Add Songs
Download and launch Apple Music Converter & DRM Removal on PC or Mac.

d_win d_mac

At this time,it will automatically load your iTunes library,all songs, albums and playlists will also appear on the interface.

launch apple music converter

Step 2:Select Apple Music Songs or Playlist
Click the playlist in left side and then choose those Apple Music songs you want to remove DRM from and click Add. You can add as many music videos as you like.. You can choose a whole playlist too.

select Apple music or playlist

Step 3:Choose Output Format
After adding music, all your added files will list in the main interface. Click the setting button to choose MP3 as output format and setting the output path. Also, you are allowed to choose conversion speed and output quality. Maxinum 20X conversion speed and high bitrates as 320 kbps are available to choose.

Removing DRM Apple Music

Step 4:Removing DRM and Converting Apple Music to DRM-free MP3
The last step,just click the “CONVERT” button to start conversion. After conversion, you can get the DRM-free Apple Music songs in MP3 format,enjoy them anywhere you want!

Burn Converted Apple Music to CD

After conversion, click below folder icon to quickly locate your DRM-free MP3 musics.If you want to burn the converted Apple Music songs to CD,please keep reading.

d_win d_mac

Step 5:Burn Converted Apple Music to CD
1. Open iTunes, choose File > Add File to Library… to import the converted DRM-free Apple Music files to iTunes library.
2. Then create a new playlist (click on File > New > Playlist), name it and drag these converted Apple Music songs to this playlist.

import music to itunes

3. Insert a blank CD disc, waiting until the disc is recognized.
4. Check the newly created playlist, right click the option “Burn Playlist to Disc”.
Tips:At this time,a new window will pop-out which allows you to choose the preferred speed, disk format for CD burning
5. Hit “Burn” to start the process of copying all the Apple Music files to CD.

burn apple music to cd with iTunes 12

Way 2. Purchase Apple Music Songs and Burn Them to CD

Also,you can buy the songs from iTunes Store,but this method will cost you more money.So we recommend you follow the first way to remove DRM from Apple music and burn them to CD.

As we all know,that Apple allows users to burn a CD from music that they have purchased.Let’s show you how to Buy Your favorite Songs from Apple Music?

1. Find the song or album in question you want to buy in iTunes Store.
2. Tap the “More (•••)” button next to the song or album.
3. Tap “Show in iTunes Store”.
4. Tap “Buy” button to buy the song.

buy apple music and burn to cd

Then,you can follow the above guide to burn the purchased Apple music to CD with iTunes.

Useful Tips: Movies purchased or rented from iTunes Store are also DRM-protected. If you want to remove DRM from your purchased or rented iTunes movies to play them anywhere you want, or burn iTunes Movies to DVD,try this iTunes Video to DVD Converter – iTunes M4V Converter for Mac and iTunes M4V Converter for Windows.

Related Articles

Download Apple Music and Playlist for offline listening

How to Convert iTunes Music to MP3

How to Convert iTunes M4V Movies to MP4 Easily on Mac

How to Sync iTunes Movies to Samsung Galaxy Note 8

How to Watch iTunes Movies on Samsung Galaxy S8

How to Import Videos to Huawei P10

I have record some videos using my Android phone and backed up to the computer,now I need to sync the videos with my new Huawei P10 phone from the backed up. I can’t figure out how to make it. Can somebody tell me some ways to complete it step by step?

As the entertainment of life becomes more and more abundant, videos become a necessary stuff of daily life. people record their wonderful moment by taking a video. People like to watch the videos that download from the iTunes or Internet. People like to share the videos with others. People watch videos via mobile device anywhere anytime. Getting a new Huawei P10 phone and be wondering how to sync the videos from computer/iTunes or other devices to the new device effortlessly? Just read this post to easily complete the data sync job.

Sync Videos with Huawei P10 – Android Manager

Android Manager can be a good choice for you. It has the ability to help you transfer and manage files for all Android models, like videos, music, photos, contacts, SMS, apps. It provides you the easy steps to transfer videos to Huawei P10, not only transferring videos between computer and Huawei P10, but also transferring videos between iTunes and Huawei P10, transferring videos between mobile device and Huawei P10. All Android models are applicable to the Android Manager, such as, Huawei(P10/P9, Mate 10/9), Samsung(Galaxy S7/S6/S5, Note 5/4/3), Lenovo, HTC, ZTE, Xiaomi,LG, Motorola, OnePlus, etc,.

d_win d_mac

Part 1: How to Transfer Videos from Computer to Huawei P10

First of all,please run Android Manager on the computer and connect Huawei P10 to computer. Your Android device will be detected and displayed in the primary window of program.

android manager home page

Step 1.Select Videos to Transfer
Select “Videos” tab. Once your media loads, then click Add > Add File or Add Folder.

select videos to transfer

Step 2.Transfer Videos from Computer to Huawei P10
This brings up your file browser window, from which you can select videos that you want to import device from your computer. All videos you imported before can be watched with the built-in player.

Note: You can also simply drag and drop videos from computer to Huawei phone.

d_win d_mac

Part 2: How to Transfer iTunes Videos to Huawei P10

To begin with, please run Android Manager on the computer and connect Huawei P10 to computer. Your Android device will be detected and displayed in the primary window of program.

android manager home page

Step 1.Select the Transfer Mode
Simply click “Transfer iTunes Media to Device” on the main interface of program.Or find the “Transfer iTunes to Device” option under Toolbox > Transfer Tools section.

select videos file to transfer

Step 2.Transfer Videos from iTunes to Huawei Mate 10
Check options and start to copy videos from iTunes to Huawei. All the iTunes files will be scanned and will be shown under different categories like music, movies and others. By default, all the file types will be selected but to transfer only the videos file, you can uncheck the others. Click “Transfer” to start transferring.

transfer videos file to transfer

d_win d_mac

Related Articles:

How to Transfer iTunes Music to Huawei P10

How to Transfer Data from Huawei to Huawei P10

How to Transfer Data from Samsung to Huawei P10

How to Transfer Data from iPhone to Huawei P10

How to Recover Lost Data from Huawei P10

How to Backup and Restore Data on Huawei P10

How to Backup & Restore Huawei Mate 10/Mate 10 Pro

Summery:It seems a frequent thing that happen in daily life that we lose data on our mobile device due to variety of circumstances, like accidentally deletion, device damaged, device system update, factory reset restore. Regularly backup can save you from a disaster. Here is a practical tutorial shows you the solutions to backup & restore Huawei Mate 10/Mate 10 Pro.

huawei mate 10

Most of Android device doesn’t offer a native backup service for users, so it’s easy to make Android users ignore the necessity of backup data. Actually, it is very important for all Android users to backup Android frequently in case losing data by accident. You never know when things will go wrong and I think that you must don’t want to lose any of your stuff when data loss event occur. Gratefully, there are so many Android data backup tool can help to backup & restore Huawei Mate 10 with a safe & efficient solution. We will describe the process of backup and restore Huawei Mate 10 in the follow 2 parts.

Part 1: Backup & Restore Huawei Mate 10 with Phone Transfer

The first way here we suggest you to have a try, to backup & restore Huawei Mate 10 is using Phone Transfer. Thanks to this wonderful program, you can backup & restore Huawei Mate 10 on the computer safely, the types of files supported are contacts, text messages, photos, videos, call logs, music, calendars, apps. Phone Transfer enables to backup data from Huawei Mate 10 to the computer efficiently, restore backup data to Huawei Mate 10 on the computer completely. Most of Android models are compatible with Phone Transfer, including Huawei(Mate 10/9, P10/P9), Samsung(Galaxy S7/S6/S5, Note 5/4/3), Lenovo, HTC, LG, Motorola, OnePlus, ZTE, Xiaomi,etc,.

d_win d_mac

How to Backup Huawei Mate 10 on the Computer

Step 1.Run Phone Transfer and Connect Device
First of all,run the Phone Transfer on the computer.Connect Huawei Mate 10 to the computer via USB cables.The device will be quickly detected and shown in the primary window of program.

phone transfer home page

Step 2.Select Files to Backup on the Computer
Select the “Back Up Your Phone” mode in the primary window of program.It will show you the backup window. By default,all contents you can backup are clicked, contacts, text messages, photos, videos, call logs, music, calendars, apps are included. You can unclick the ones you don’t want.

select files to backup

Step 3.Backup Data from Huawei Mate 10 to the Computer
Make sure the selected files are the ones you’re going to backup.Then,click “Start Copy“.The files transfer begins.Please not to disconnect device until the backup process is end.

backup data from huawei to computer

d_win d_mac

How to Restore Huawei Mate 10 on the Computer

Step 1.Run Phone Transfer and Connect Device
First of all,run the Phone Transfer on the computer.Connect Huawei Mate 10 to the computer via USB cables.The device will be quickly detected and shown in the primary window of program.

phone transfer home page

Step 2.Select Files to Restore on the Computer
Click “Restore from Backups” in the primary window of program.All backups you have made with this program will be listed on the left panel, just select your previous backup file from it,click the files you want to restore to Huawei Mate 10.

select files to restore

Step 3.Restore Backup Files to Huawei Mate 10 on the Computer
Press “Start Copy” button,then all of your selected files will be restored to Huawei Mate 10 completely.

restore backup data to Huawei

Part 2: Backup & Restore Huawei Mate 10 with Android Manager

Another method to backup & restore Huawei Mate 10 safely is using Android Manager. This program is design for managing file for Android on the computer, including music, videos, photos, contacts, SMS, apps. To sum up, Android Manager helps to transfer data between Android and computer, transfer data between Android and iTunes, transfer data between Android and mobile Android/iOS device. Android Manager works well for almost all models of Android phones, Huawei(Mate 10/9, P10/P9), Samsung(Galaxy S7/S6/S5, Note 5/4/3), Lenovo, HTC, LG, Motorola, OnePlus, ZTE, Xiaomi,etc, are included.

Free download Android Manager:

d_win d_mac

How to Manage Huawei Mate on the Computer

manage Huawei on the computer

More Guides about Huawei Mate 10 you can Check:

How to Backup & Restore Huawei Phone

How to Import Music/Videos to Huawei Mate 10

How to Recover Deleted Data from Huawei Mate 10

How to Transfer Samsung Data to Huawei Mate 10

How to Transfer iPhone Data to Huawei Mate 10

How to Transfer Android Data to Huawei Mate 10

How to Manage Huawei Mate 9/Mate 10 on the Computer

How to Download Apple Music and Playlist for offline listening

[Summary]:Want to save Apple Music songs, albums & playlists for offline listening on Apple devices or non-Apple devices such as MP3 Player, Car player, Android devices likes Samsung Galaxy S8/S7/S6/Note 8/Note 5, HUAWEI, Google Pixel/ Nexus, HTC, Sony and other devices?This article will teach you a easy way to make Apple Music songs available offline,even you have cancel the subscription service,you can also export/convert iTunes M4P music to computer as MP3 format for offline Listening on any mobile phone.

listen apple music offline

Like Spotify and some other streaming music services, an important feature of Apple Music is protected with DRM encryption.In order to downloading Apple Music for offline listening,you need to remove DRM from Apple Music and convert M4P to MP3,and then transfer the converted Apple Music songs to any mobile phone, iPod/iPhone or MP3 Players for offline playback without DRM limitation.

What you need is a Apple Music Converter,which is designed to remove DRM protection from Apple Music songs and play them anywhere offline you want,it enables Apple Music users easily convert Apple Music songs to MP3, M4A, etc. on your Mac/Windows without downloading them.What’s more,this Apple Music Converter also is a iTunes M4P music to MP3 converter and iTunes Audiobooks to M4A/MP3 converter,it could helps you convert iTunes Music songs(M4P) and Audiobooks (M4B/AA/AAX) to M4A, MP3,after complete remove DRM and convert Apple Music/iTunes Music/Audiobooks to MP3, M4A,you can enjoy converted Apple music offline on any devices include MP3 players, car player, PSP, Xbox 360, iPhone, iPad, iPod, Android mobile phones like Samsung, Google Pixel, Motorola, LG and HTC mobile phones or Mac/PC without iTunes. Isn’t it a good idea to convert Apple music to MP3 and play them anywhere you want?

d_win d_mac

Steps to Convert Apple Music songs to MP3 on Mac/Windows

This tutorial will show you a way to easily convert iTunes Music/Apple Music to MP3, M4A, etc. on your Mac/Windows without downloading them.After that,you can also burn Apple Music to CD.

Step 1. Add Apple Music and Playlist to iTunes Library
Just add Apple Music songs, albums or playlists you want from Apple Music catalog to your iTunes Library.

Add Apple Music and Playlist to iTunes Library

Step 2.Run Apple Music Converter or PC or Mac
First of all,please download and run the Apple music on your PC or Mac.After running the program, the program will automatically load your iTunes library.All songs, albums and playlists you added to iTunes Library will also appear on Apple Music Converter interface.

launch apple music converter

Step 3. Select Apple Music songs you want to Convert
If you added Apple Music songs or albums to iTunes Library, click “Music” on the left column, sort all songs by Type and check songs marked as Apple Music AAC audio file. If you added Apple Music playlists to iTunes, click the playlists on the left column and check the songs on the right side. You can also quickly find songs you need with the search feature on the top right corner. On the right side of the interface, you can sort all songs by Name, Artist, Album, Type, just like in iTunes.

select Apple music or playlist

Step 4. Select MP3 as Output Format
Apple Music Converter supports convert DRM protected Apple Music songs to popular audio format like MP3, AC3, AIFF, FLAC, MKA, etc.To convert Apple Music and iTunes music to MP3,just tapping purple setting button at the bottom of the menu section, you can choose “MP3” as output format and adjust some basic settings.

Select Output Format - MP3

Tips: Here you can also set the converting speed up to 10X (Mac version can reach up to 20X speed) and adjust the output quality up to 320 Kbps. Besides, the output path is also available to be changed as you need.

Step 5. Begin Converting Apple Music to Plain MP3
Finally,just click “Convert” button to start convert all of your added Apple Music song to DRM-free MP3.

convert Apple Music to Plain MP3

After conversion finished, you can click “Open Output File” to find the converted MP3 files.

find the converted Apple Music in MP3 for listening offline

Free download the Apple Music Converter for Windows or Mac and have a try!

d_win d_mac

Now, you have success download Apple Music and Playlist and make Apple Music songs available offline on any devices.You can transfer all of the well-converted Apple Music files from the computer to iPod, iPhone, Zune, PSP,Android devices and any other MP3 players for enjoying.
You may want to know:
How to transfer music from computer to iPhone/iPad/iPod

How to transfer music from computer to Android

Useful Tips: Movies and TV shows purchased from iTunes Store are also DRM-protected. If you want to remove DRM from iTunes movies and TV shows and convert them to MP4, try this iTunes Video DRM removal software – iTunes M4V Converter for Windows and iTunes M4V Video/Movies Converter for Mac.

Related Articles

How to Remove DRM from Apple Music

How to Convert iTunes M4V Videos to MP4

Play iTunes movies on Samsung Galaxy S8

Transfer Music from iTunes to iPhone

Transfer iTunes Music to Samsung Galaxy S8/S7/S6

How to Transfer iTunes Movies to Huawei Mate 10/Mate 10 Pro

Can anybody help me to sync the movies with my new Huawei Mate 10 phone? I want to watch the iTunes videos on my Android while I am travelling. Any advice will be welcomed.

Huawei company released a newest model called Mate 10 recently, which is build with new functions and it attractive a lot of Android fans, there are so many Android users turn their eye on the new model. Most of us like to play the media files on our mobile device, to enjoy the entertainment anywhere anytime conveniently. When you attempt to transfer iTunes movies to Huawei Mate 10, you will find that it is possible to sync the movies from iTunes with Huawei Android in normal. Is there an easy way to import the iTunes movies to the Huawei Mate 10 without hassle? This post contain a perfect solution, help to transfer/sync iTunes movies to Huawei Mate 10 with only a few clicks.

Sync iTunes Movies with Huawei Mate 10

Android Manager empower you to sync iTunes movies with Huawei Mate 10. As its name, it is such a powerful data manager for Android. With this software,you can transfer and backup videos, photos, music, contacts, SMS, apps on your Android devices. What’s more, Android Manager help to transfer files between Android and iTunes/computer/Android/iOS device freely. Importantly,it can fully compatible with all Android devices including Huawei, Google Pixel, Sony, Lenovo, Samsung, Motorola, OnePlus, HTC, etc,.The part below shows you the step-by-step guide.

d_win d_mac

How to Transfer iTunes Movies to Huawei Mate 10

Launch Android Manager and connect your Huawei Mate 10 to the computer.Your Android phone will be detected and displayed in the primary window of program.

Step 1.Select the Transfer Mode
Simply click “Transfer iTunes Media to Device” on the main interface of program.Or find the “Transfer iTunes to Device” option under Toolbox > Transfer Tools section.

android manager mian page

Step 2.Transfer iTunes Movies to Huawei Mate 10
Check options and start to transfer movies from iTunes to Huawei.All the iTunes files will be scanned and will be shown under different categories like music, movies, and others. By default, all the file types will be selected but to transfer only the movies file, you can uncheck the others. Click “Transfer” to begin transferring.

transfer itunes movies to huawei mate 10

d_win d_mac

Related Articles:

How to Transfer iTunes Music to Huawei Mate 10

How to Import Music/Videos to Huawei Mate 10

How to Recover Deleted Data from Huawei Mate 10

How to Transfer Samsung Data to Huawei Mate 10

How to Transfer iPhone Data to Huawei Mate 10

How to Transfer Android Data to Huawei Mate 10

How to Backup and Restore Huawei Phone

How to Manage Huawei Mate 9/Mate 10 on Computer

Transfer Android Data to Huawei Mate 10/Huawei Mate RS Porsche Design

I decide to switch to the Huawei Mate 10 for upgrading. How to switch the contacts, photos, SMS files from my old Android to the new one? I need to sync all data to my new Huawei. Please send me the good ideas. Thanks.”

There’s a new mobile in town – and an intelligent one at that. Huawei Consumer Business Group (CBG) announced the official Middle East and Africa roll-out of its new flagships, the Huawei Mate 10, Mate 10 Pro and special-edition Porsche Design Mate 10, promising that these devices go “beyond smart” with the introduction of the world’s first artificial intelligence-powered system-on-chip. Shenzhen-headquartered Huawei – which is among the world’s top three smartphone vendors – flaunted the new devices, which aims to challenge Apple and Samsung not just in AI but in every area possible.

To transfer Android data to Huawei Mate 10 or Huawei Mate RS Porsche Design to replace your old Android phone like Samsung, HTC, Lenovo, Motorola, ZTE, OnePlus. How to transfer the data between the two devices directly? How to import data from Android to the new Huawei with easy steps? If you transfer only some photos, or transfer some files selectively, you could sync the data from old phone to the computer then transfer to the new phone. However, what to do if you need to transfer a mount of files or you just want to transfer the files more efficiently with one click? Fortunately, we get a good transfer tool, you can do it with Phone Transfer. Here’s a good solution about how to transfer data from Android to Huawei Mate 10/Huawei Mate RS Porsche Design.

Sync Android Data with Huawei Mate 10/Huawei Mate RS Porsche Design

Phone Transfer is a smart software that can make that transfer task much easier. With this software you can: get your stuff from one phone to another without hassle. Back up and restore the data on your phone, wipe data on device before selling it. Phone Transfer works with iPhone, Android and Symbian phones. That’s right, if you’d like to move data from Android to Huawei Mate 10/Huawei Mate RS Porsche Design, you can use Phone Transfer to complete the job simply. The transferable types of data including contacts, SMS, photos, videos, call logs, music, calendars, apps. Most of Android models are compatible with Phone Transfer, such as, Huawei (Mate 10/9, P10/P9), Samsung (Galaxy S7/S6/S5, Note 5/4/3), HTC, Motorola, LG, Lenovo, OnePlus, etc,

d_win d_mac

Import Data from Android to Huawei Mate 10/Huawei Mate RS Porsche Design

Step 1.Run Phone Transfer on the Computer
Install and launch Phone Transfer on the computer.Then a primary window of this tool will pop up.

Step 2.Select the Transfer Mode
Phone Transfer not only can transfer data from phone to phone,but also can backup and restore data on mobile device easily.In this case, please select “Phone to Phone Transfer” mode to sync data from old Android to new Huawei Mate 10 or Huawei Mate RS Porsche Design phone.

phone transer home page

Step 3.Connect Two Android to the Computer
Then connect both your old Android and the new Huawei to the computer via two USB cables.Once connected,the old Android will be shown as “Source” while the new Huawei will be displayed as “Destination”.If you want to switch the places of them, you are allowed to click the “Flip” button.

connect devices to the computer

Step 4.Mark Data and Start to Transfer
Before you start the data transferring,don’t forget to uncheck the marks of data you don’t need to sync since some items be ticked by default.

When everything is ready,click “Start Transfer” to begin the data transferring process.As you see,a dialog will show up.From the progress bar,you can check the percentage of the transfer process.Once the data from Android to Huawei transfer process is end,just click “OK” to end it.

import Android data to Huawei

d_win d_mac

More Guides about Huawei Mate 10 you may be Like:

How to Transfer iPhone Data to Huawei Mate 10

How to Transfer Samsung Data to Huawei Mate 10

How to Recover Deleted Data from Huawei Mate 10

How to Import Music/Videos to Huawei Mate 10

How to Transfer iTunes Music to Huawei Mate 10

How to Backup and Restore Huawei Phone

How to Manage Huawei Mate 9/Mate 10 on Computer

How to Transfer iPhone Contacts to Huawei Mate 10

My mother bought a new Huawei Mate 10 phone and she is planning to sell the old iPhone. She asked me that how to import the contact list from iPhone to the new Huawei with one click. I haven’t used Android phone so I have no ideal at all. Can anyone tell me that how to do the transfer with the most easiest way?

Once decided switching from iPhone to Huawei Mate 10, one of the most important data you should migrate to your new phone is the contacts(phone number, E-mail address, house address). Importing contacts from iOS device to Android device sounds is not a simple task as you think. For most people, they might sync the contacts from the iPhone to the computer using iTunes, then export the contacts to Google Account on the new Android. Thirdly, log in to Google account to download contacts on Huawei Mate 10. This method looks too much complicated. Is there a more easier way to complete the iPhone to Huawei transfer? The answer is YES.

Import Contacts from iPhone to Huawei Mate 10

Phone Transfer, a great data transfer tool enables to transfer files between iPhone and Android, iPhone and iPhone, Android and Android. With this program, you can transfer contacts between iPhone and Huawei Mate 10 with only one click. Except contacts, other files also can be transferred between two mobile devices no matter it run on the same OS system or not, including text messages, photos, videos, music, call logs, calendars, apps. What’s more, Phone Transfer provides three more modes to you: backup data from phone to the computer, restore data for phone on the computer from backup, erase phone data before selling. Phone Transfer works on all mobile devices, such as, iPhone X/8/7/6S/6; Huawei(Mate 10/9, P10/P9), Samsung(Galaxy S8/S7/S6, Note 5/4/3), Motorola, HTC, Lenovo, ZTE, OnePlus, LG, and more.

d_win d_mac

How to Sync iPhone Contacts to Huawei Mate 10

Step 1.Run Phone Transfer and Select the Transfer Mode
Run the Phone Transfer on the computer. Select “Phone to Phone Transfer” mode among the four options.

phone transfer home page

Step 2.Connect Devices to the Computer
Connect both of your iPhone and Huawei Mate 10 to the computer with USB cables, it will take seconds to detect the phones. Make sure iPhone is listed on the left (source device) while Huawei Mate 10 on the right (target device), you can click “Flip” to exchange the position if needing.

connect devices to the computer

Step 3.Select Contacts File and Transfer
Click “Contacts” file.(If you want to transfer other files, you can select more than one file to transfer). Then click on “Start Transfer” button to start the transfer. Only minutes, the contacts data will be transferred to your Huawei Mate 10 completely.

transfer contacts to Huawei Mate 10

d_win d_mac

More Guides about Huawei Mate 10 you may be Like:

How to Transfer iPhone Data to Huawei Mate 10

How to Transfer iPhone Photos to Huawei Mate 10

How to Recover Deleted Data from Huawei Mate 10

How to Import Music/Videos to Huawei Mate 10

How to Transfer iTunes Music to Huawei Mate 10

How to Transfer Samsung Data to Huawei Mate 10

How to Backup and Restore Huawei Phone

How to Manage Huawei Mate 9/Mate 10 on Computer