“I saved thousands of SMS on my iPhone 6S,now I need to clean the SMS box and free up space my device.How to export the SMS from iPhone to my computer for keeping data?I just want the simple ways.Thanks advanced.”-Jane
Classically,people sent SMS in daily instead of making call,for work,for privacy.For most of us,text messages are an important part of personal data to backup.If you’re using iPhone, you may know you can backup iPhone data via iTunes.However,sometimes you cannot read the backup files normally through iTunes.Well,there is another easy way to help you directly export text messages from iPhone to computer.In this guide,we will recommend you the best tool for helping to export SMS from iPhone to computer.
Export SMS from iPhone to Computer Directly
A super data exporter named iPhone Data Exporter can fix your problem,perfectly help to export SMS from iPhone to computer directly.iPhone Data Exporter empower to export more than 22 types of files to computer,such as messages, photos, contacts, notes and more;support to export data directly from iPhone,from iTunes backup or iCloud backup;allow you to preview and selectively export the data you want;work well for almost the entire models of Apple,including iPhone 7,iPhone 6S, iPad Pro, iPod Touch,etc,.


How to Extract SMS from iPhone to Computer Directly
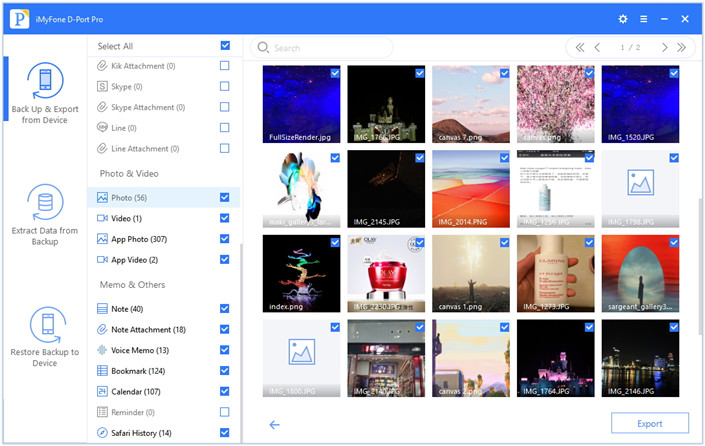
Step 1.Select the File Types to Export
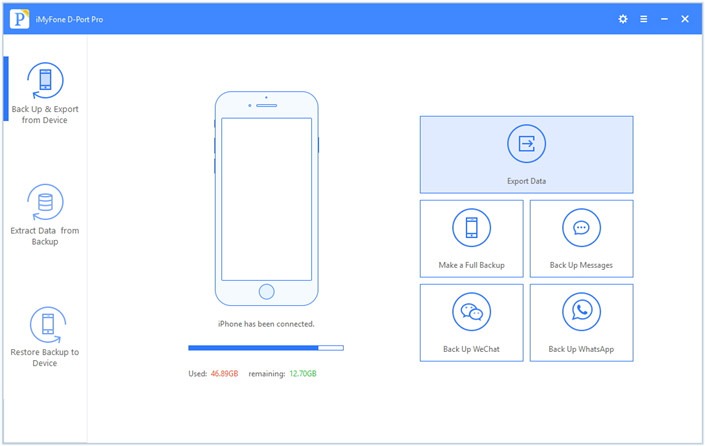
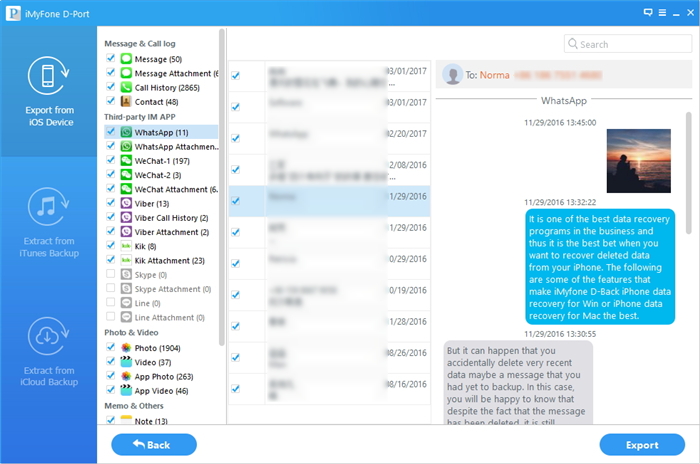
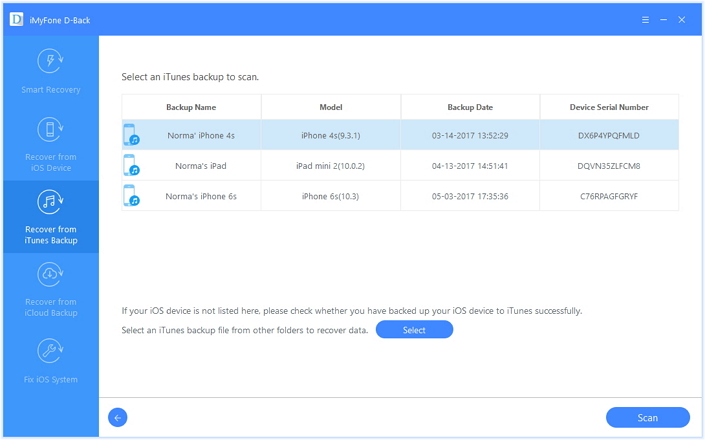
Firstly,download iPhone Data Exporter and launch it on computer.From the “Export from iOS Device” tab, click “Start” to proceed.

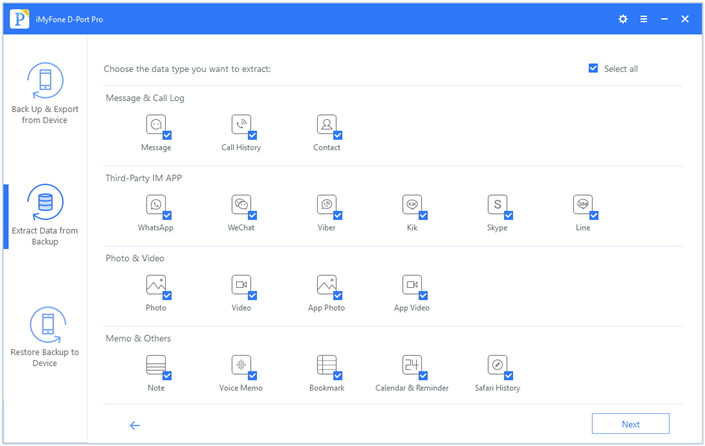
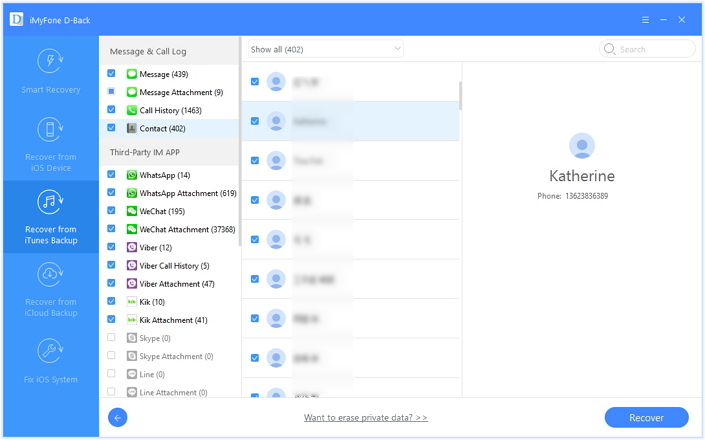
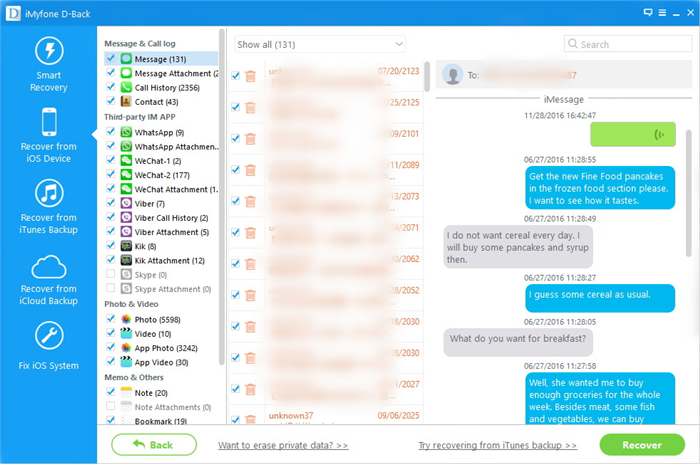
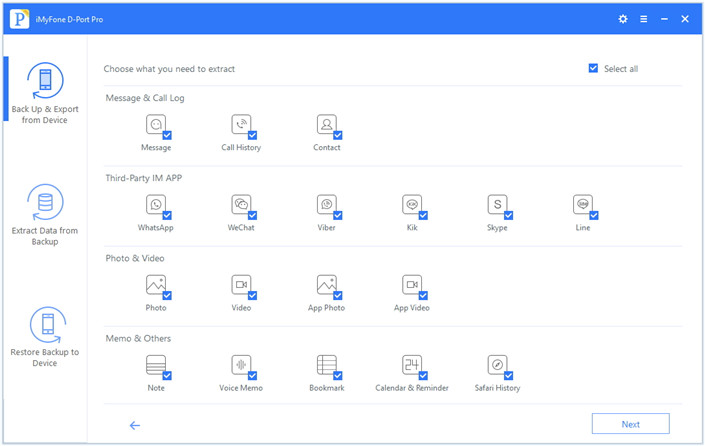
Select the file types you need to export and click on “Next“.For SMS export,you should click “Message“.The iPhone Data Exporter will prompt to connect your iPhone to the computer.
Step 2.Scan iPhone Data Completely
Once your device is connected, click “Scan” button and then the program will scan your device.

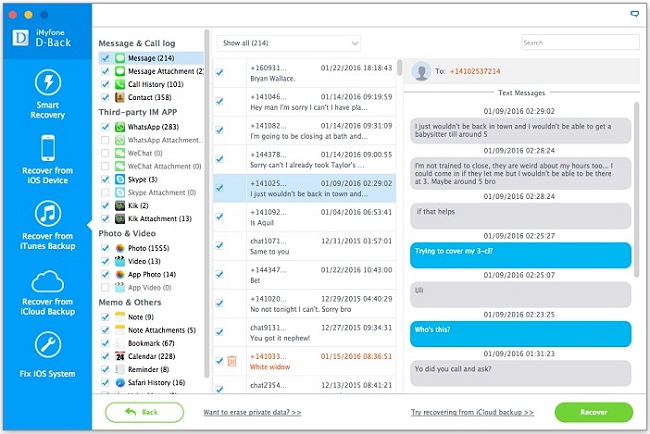
Step 3.Preview and Export SMS from iPhone to Computer
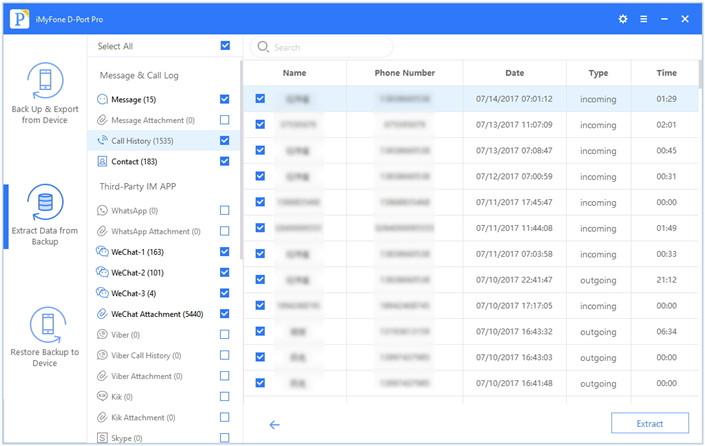
Once the program finishes scanning the device,it will display all the text messages and attachments in the preview interface of program.You can preview the content and select what you need.Then click “Export” to extrat the selected data to your computer.
A pop-up window will open asking you to select the destination to save the selected files. Wait until the program finishes exporting data from your iPhone to PC/Mac.
Related Article:
How to Export Files from iPhone 7/6S/6 to Computer
How to Export Photos from iPhone to Computer
How to Extract Data from iCloud to Computer
How to Extract Data from iTunes to Computer
How to Extract WhatsApp Messages from iPhone to Computer