[Summary]: Your iPhone/iPad screen is locked or disabled and don’t know how to access data from the devices? Looking for a way to access to your iPhone 8 or iPhone X data when you forget the password? This page will teach you a reliable and efficient method to unlock a disabled iPhone passcode, backup your disabled iPhone data, and recover data from locked/disabled iPhone without backup.
Forgot iPhone X password!
“I forgot iPhone X password and now I’m locked out of my iPhone! I don’t want to lose any of my important files and private data, such as photos, contacts, messages and notes, I want to know is there any way to unlock iPhone X and recover data on it?”
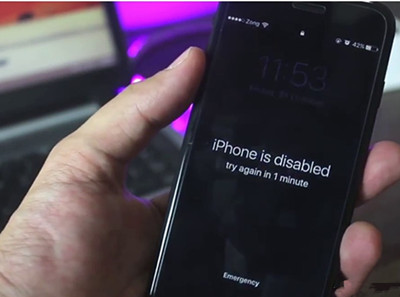
iPhone 7 is Disable
“Help, I forgot iPhone passcode! When I set up a new unlock passcode that I couldn’t remember the exact code after that, then I try several times to enter the new password, but it said my iPhone is disabled now. please help, is there a way to unlock a disabled iPhone 7 without losing any data now?”
iPad Screen is Locked
“I don’t want to erase all data off my iPad Pro in a rush even though I cannot remember the password. How can I backup data to computer firstly before unlocking the phone by erasing the iPad device?”
If you forget your password accidentally, you will not be able to use your iPhone, so you can’t access any of the data on it. Fail to unlock your iPhone when you forget passocde? Don’t worry, It’s highly recommended for you to don’t rush to erase the iPhone/iPad/iPod before getting important personal data back. Keep reading this article, we will teach you three effective methods to fix iPhone locked/disabled issue without losing any data now.
Part 1: How to Backup Data on Locked iPhone/iPad
In order to avoid data loss issue in iPhone or iPad, it’s highly recommended users try to backup data from locked iPhone/iPad to computer firstly. After backuping your locked iPhone data into computer safely, you not need worry about your device will be erased after unlocking.
Professional iOS Toolkit – iOS Data Backup & Restore software is an professional thrid-party iPhone data backup & restore tool, which is designed to extract or backup iPhone 8/iPhone X or iPhone 7/6S/6/5C/5S/5/4S etc data into computer with simple clicks. You can selectively backup all the data such as contacts, SMS, photos, videos and more to preserve, and then you can restore them after you unlock iDevice’s screen.
Free download this iOS Toolkit – Data Backup & Restore program and follow below steps to backup data on locked iPhone/iPd/iPod now:


iOS Toolkit – Data Backup & Restore Key Features:
– Backup & Restore iPhone/iPad/iPod data onto PC or Mac, do what iTunes can’t and save time.
– 1 click to make your whole iPhone/iPad backup on computer.
– Backup data from iDevices and restore the backup itmes to iOS devices or Android devices.
– Backup App data on devices, such as WhatsApp, Kik, Wechat, Viber, Line, Skype, etc.
– Restore iCloud/iTunes backups to iPhone/iPad or Andorid device selectively.
– No data loss on devices during transfer, backup and restore.
– Supports iPhone X / 8 (Plus)/ iPhone 7(Plus)/ iPhone6s(Plus), iPhone SE and the latest iOS 11.4/ iOS 12 fully!
Simple Steps to Backup Data from Locked iPhone to Computer
Tips: If your locked/disable iPhone can be detected by the computer, you can try this method to access/extract/backup data from the locked/disabled iPhone.
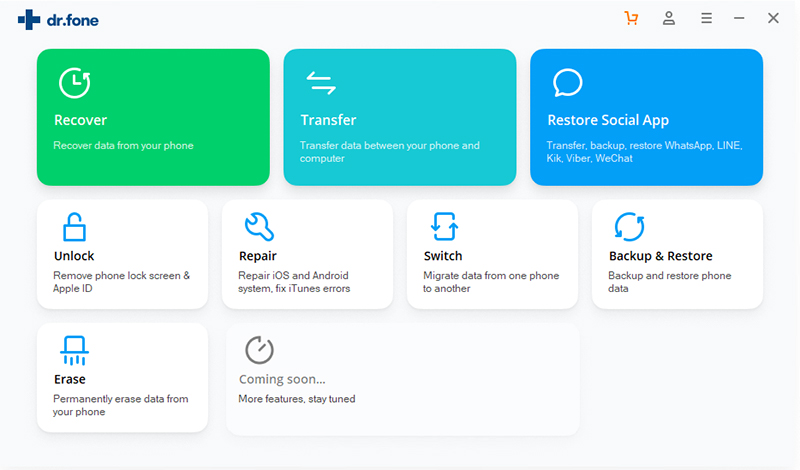
Step 1. Run iOS Toolkit and Click Data Backup & Restore
First of all, please free download the iOS Toolkit on your PC or Mac computer, then launching it, you’ll there are 8 main features in the main interface. If you want to backup iPhone data, please choose “Backup & Restore“. And then connect your disable iPhone to the comptuer via USB cable.
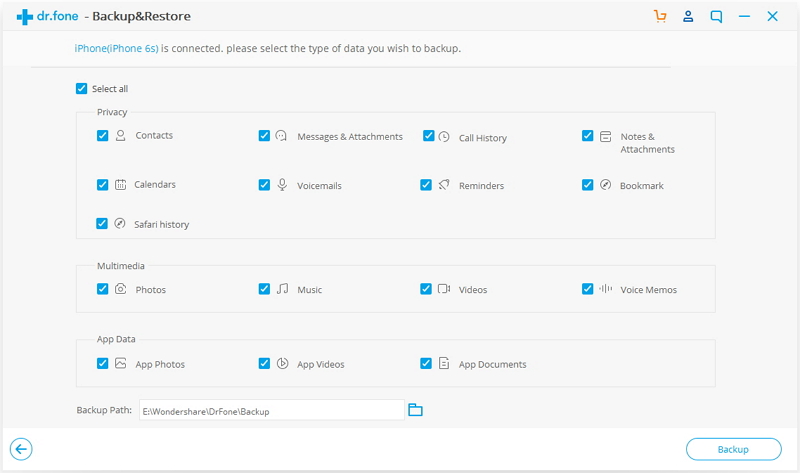
Step 2. Select the Type of Data you want to Backup from Locked iPhone
After connecting the device with computer, the program will immediately recognize the device. In this steps, you can see the program supports backup all the types of files in the iPhone/iPad, please select the type of files you want to backup, and then click on “Backup” button.
Step 3.Begin Backup Data on Locked iPhone
Above steps, you have select what you want to backup, the program will take you a few minutes to finish the backup, it depends on the capacity of the file.
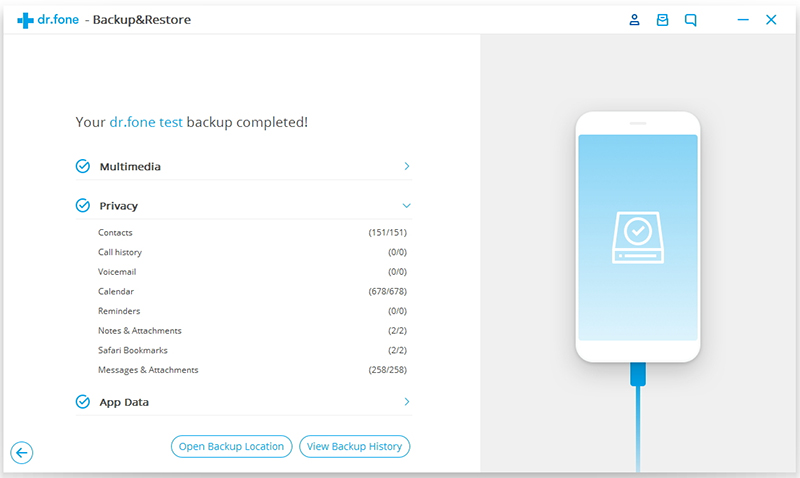
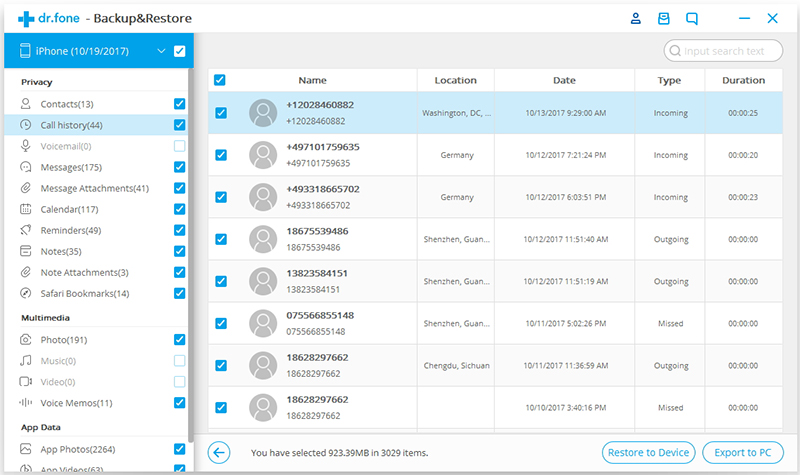
Step 4. Preview Backup Contents
Finally, you can view and access all the backed up contents in a gallery. If you want, you can also ‘Restore’ them or ‘Export’ them to your PC or your other devices later.
Part 2: How to Unlock a Disabled iPhone Passcode
If you forgot the passcode for your iPhone, iPad, or iPod touch, or your device is disabled, this part will shows you two methos to unlocked a disable/locked iDevice.
1.Unlock iPhone Passcode with iTunes(Data Loss)
Free way to unlock your disabled iPhone passcode is using iTunes, but this method will erase the device. According to Apple officially recommendation, users can unlock iPhone passcode with iTunes, please follow the next step-by-step guides to erase the device and unlock your disabled iPhone by iTunes.
If you have already make your iPhone backup with iTunes, please learn how to unlock iPhone passcode by iTunes effortlessly. After unlock the device, you can later restore the backup file to the iOS device easily.
1.Download and run the latest version of iTunes on your computer.
2.Connect your iPhone to PC and wait for the iTunes progrram to detect it.
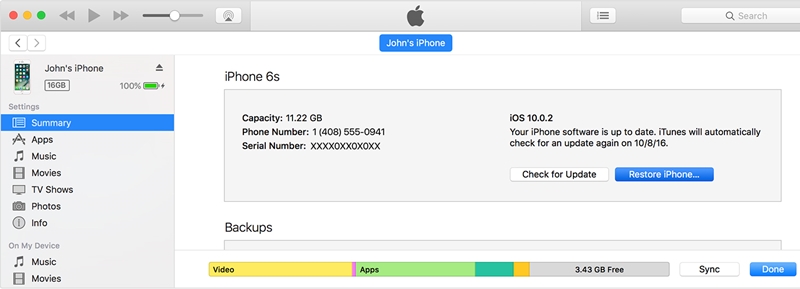
3.Go to the devices section to select your iPhone and click “Summary” option.
4.Finally, please click on the “Restore iPhone” button on the right to erase your iPhone without password.
Of course, if you haven’t sync your iPhone with iTunes, you will lose all the original data on your iPhone after these operations. Don’t worry, below is an effective method to use a third-party iOS Unlock tool to unlock your iPhone passcode without data lossing.
2.Unlock a Disable iPhone Passcode with iOS Unlock(No Data Loss)
iOS Unlock is a part of iOS Toolkit, you can use this all-in-one iOS Toolkit to unlock remove lock screens, when you forget the password on your iPhone or you just don’t know the password on a second-hand iPhone or iPad. How it done? Pluse turn off the “Find My iPhone/iPad” option, then you can use this iOS Unlock tool to unlock your iPhone and iPad in 5 minutes successfully. It’s very simple to unlock your iPhone locked/disable screen, and no tech knowledge required, everybody can unlock the iDevices at home. No matter which version of iPhone, iPad, iPod you use, it compatible with the latest iPhone X, iPhone 8, iPhone 8 Plus and iOS 12 beta supported.
Simple Steps to Unlock a Disabled iPhone Passcode
Step 1. Run iOS Toolkit and Select “Unlock” Function
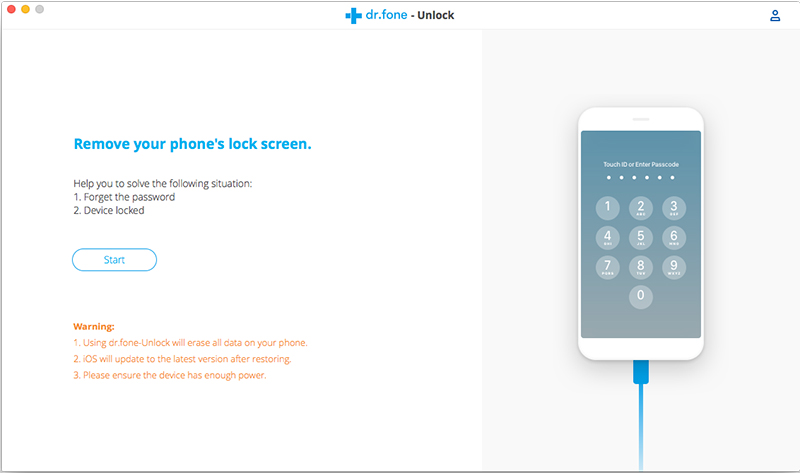
First of all, please download the iOS Toolkit on computer and select the “Unlock” option from its main interface.
Step 2.Connect iPhone to Computer
Then, connect your iPhone to the computer via USB calbe, and click on the “Start” button on the interface.
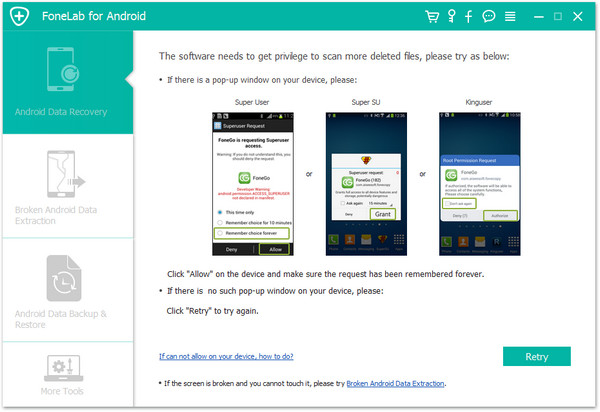
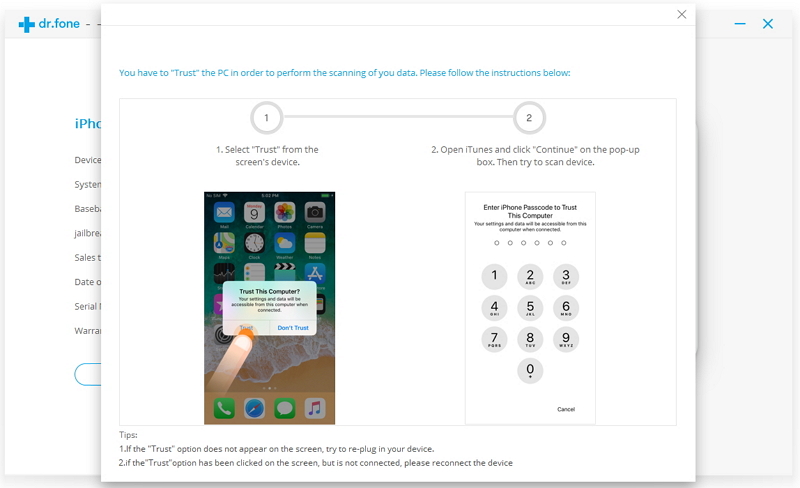
After when your iPhone will be detected by the computer, it will display a prompt to trust the computer. Please agree to it and close it instead.
Now, on the next window, you need to provide some crucial details related to your iPhone.
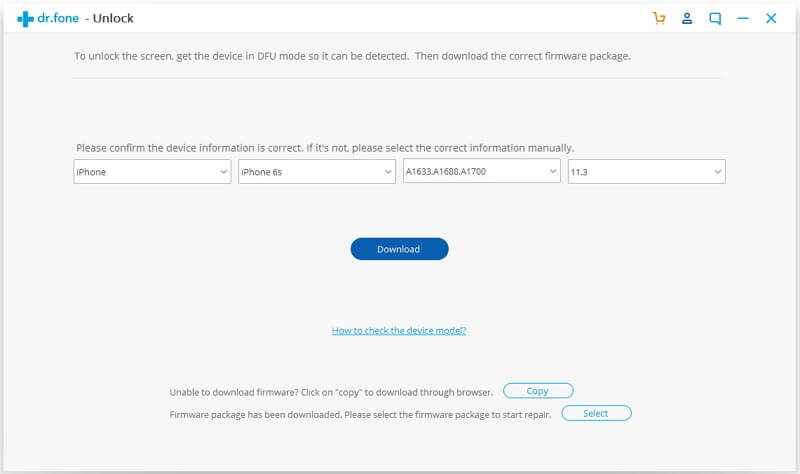
Step 3.Select the Correct Information of your iPhone
In order to unlock the disable iPhone, you need to download the correct IPSW firmware and install on the device, please select the correct information and click on the “Download” button to get its firmware update. You might need to wait for a while for the application to complete the download.
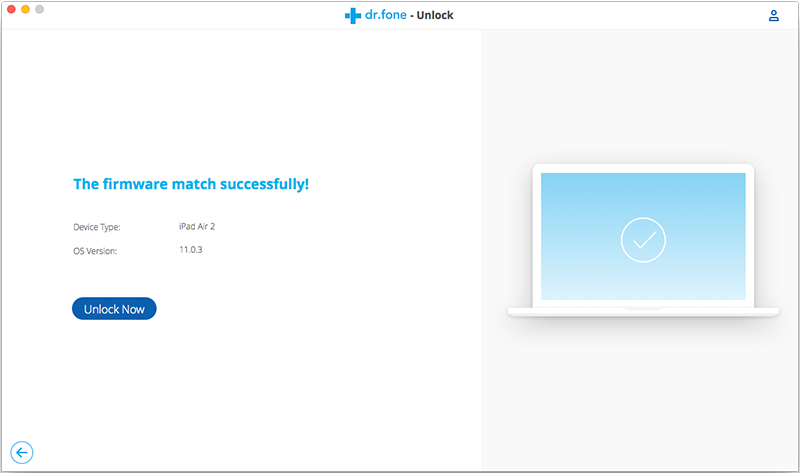
Step 4.Unlock Disable iPhone Passcode Now
After download the firmware complete, you will get the following interface. Uncheck the option of “Retain Native Data” and click on the “Unlock Now” button.
Please typing the on-screen code to confirm unlock your disalbe iPhone.
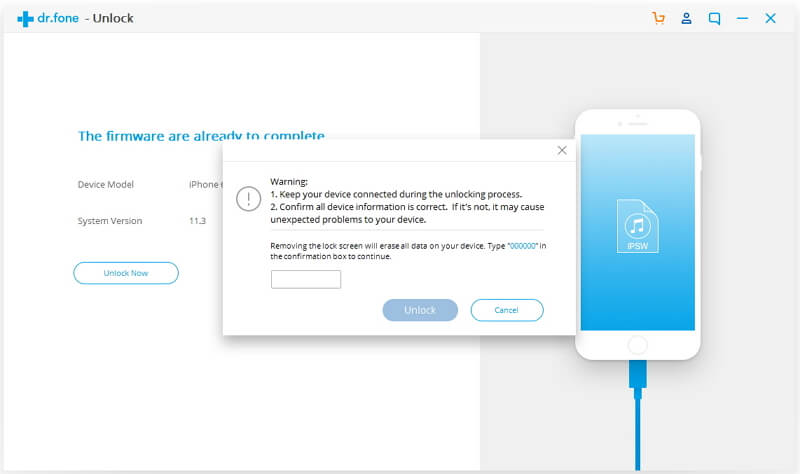
After agreeing with the confirmation message, the application will start fixing your iPhone. You might need to wait for a few minutes.
Step 5. Your iPhone Locked Screen has beeen Removed
Once the unlocking process is completed successfully, you will be notified by displaying the below windows.
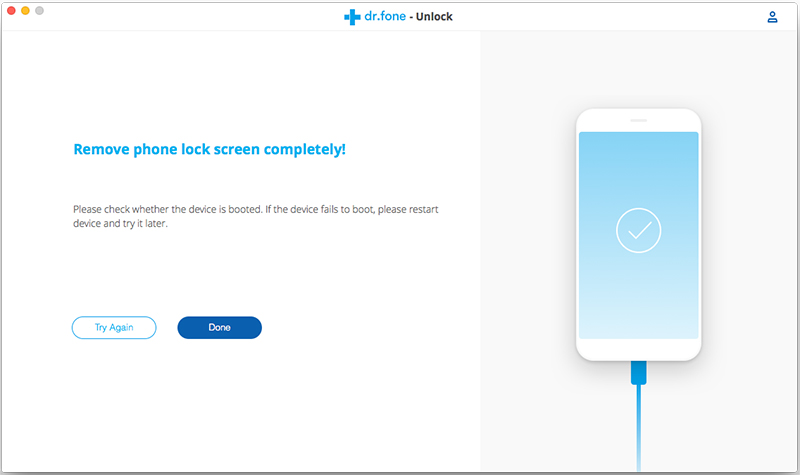
Well done, now you have successfully unlock disabled iPhone and easily to access iPhone data.
Note: Once lost data after unlock your disalbe iPhone passcode, please don’t worry, you can also use this iOS Toolkit – Data Recovery feature to recover lost data from a locked/disabled iPhone. Part 3 will introduce this issue in detail.
Part 3: Recover Lost Data from Locked/Disabled iPhone without Backup
Unlocking iPhone is a process that involves erasing all the data on your iPhone. In this case, if you don’t have a backup, you would lose all your data. That is why we mentioned in Part 1 that you should use the iOS Data Backup & Restore to make your iPhone backup at first.
However, if your lost data on iPhone after unlock it by iTunes.
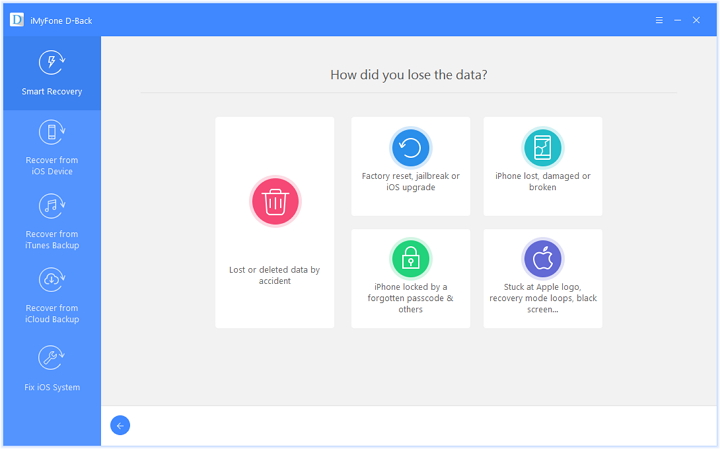
Don’t worry, the iOS Toolkit – Data Recovery can help you scan and recover lost data from iPhone/iPad after unlocking it.
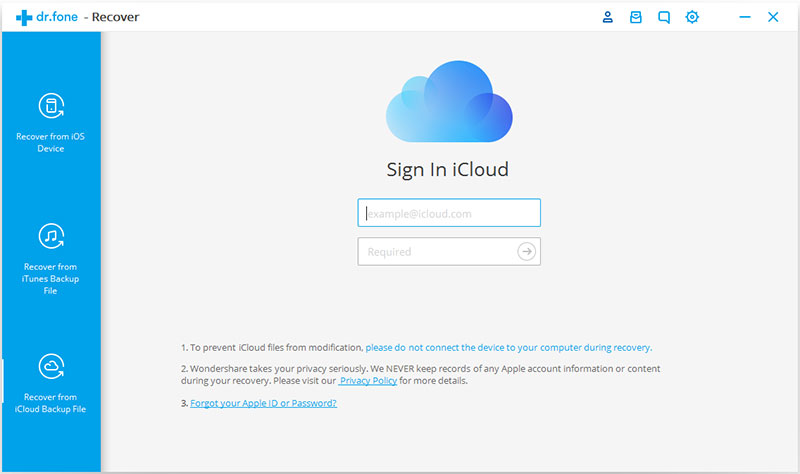
iOS Toolkit – iOS Data Recovery can help you recover lost data including photos, videos, contacts, messages, notes, call logs, and more from iPhone, iTunes and iCloud. The iOS Data Recovery enables users recover those data lost due to many common scenarios: Files lost after factory reset, iOS 12/11/10 upgrade, jailbreak or ROM flashing; Data lost after iPhone screen locked or your forgotten passcode; Device stuck in recovery mode, black screen Apple logo screen and not responding; iPhone is disable and unable to sync for backup,etc. If your iPhone is locked or disalbe, you can not only choose the “Unlock” or “Repair” function to fix it’s issues, but also use the “Recover” fuction to recover lost data from a disalbe/locked iPhone through three recovery modes: “Recover from iOS Device”, “Recover from iTunes Backup File” and “Recover from iCloud Backup File“.
Tips: If you want to recover lost or deleted WhatsApp, Viber, WeChat, Kik, Line, photos, messages, contacts, notes, etc, you can try this iPhone Data Recovery, which is highest iPhone App data recovery rate in the industry.
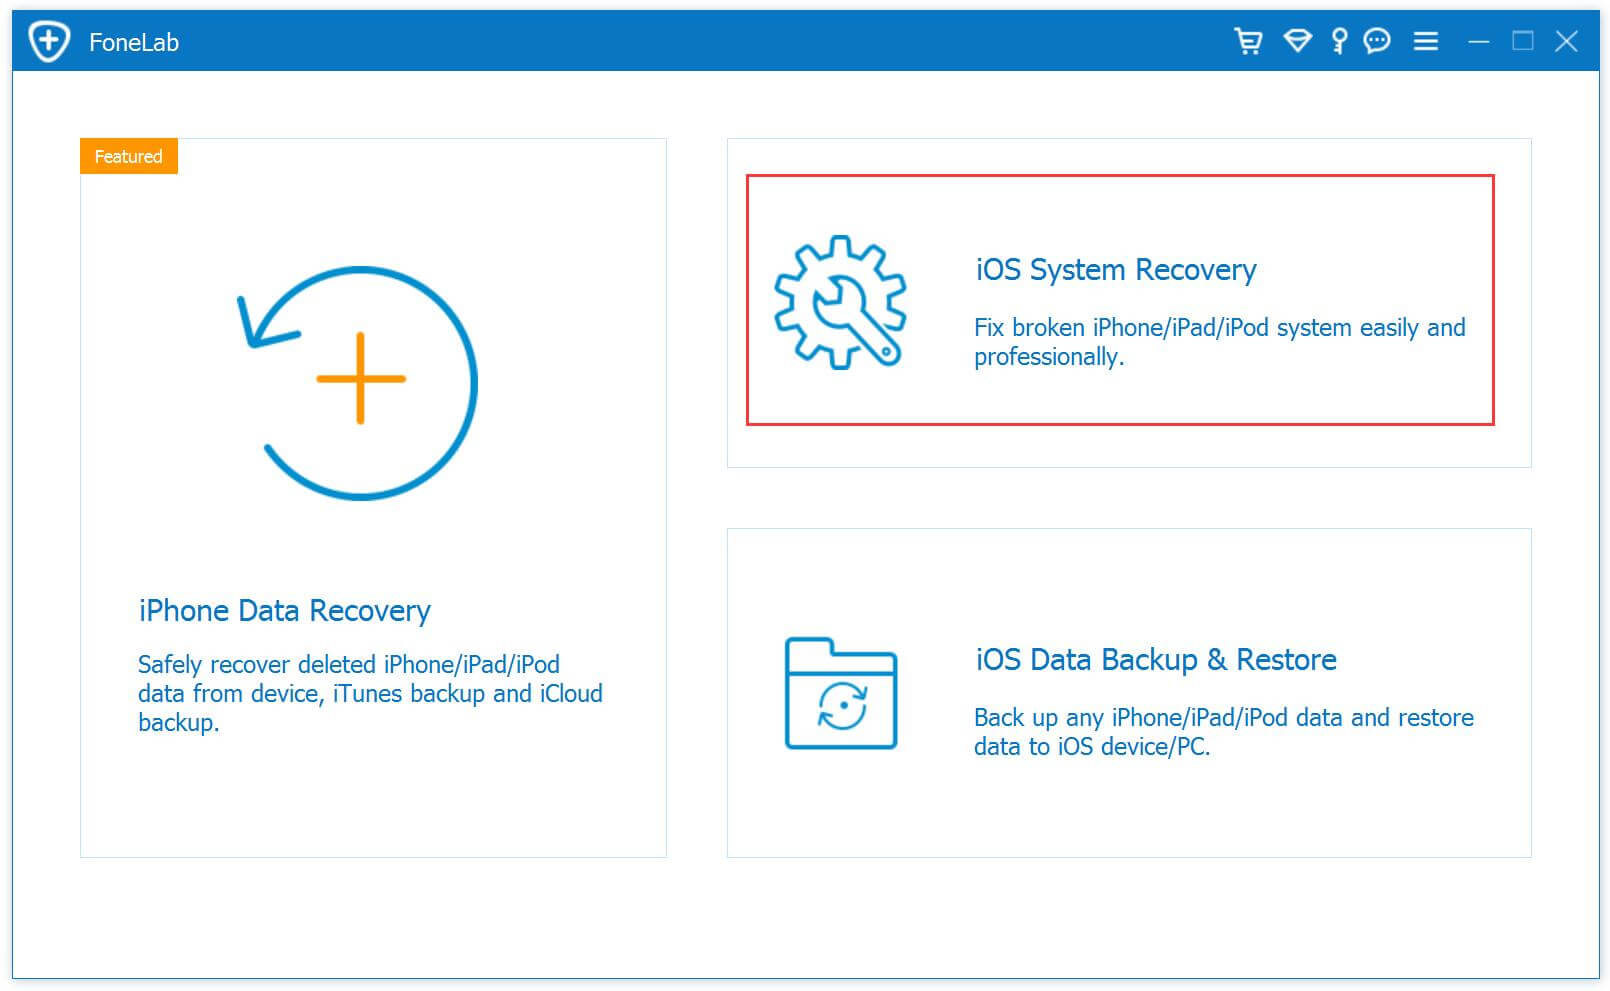
If you want to fix various iOS problems at home, you can try this professional iOS System Recovery, which enables you fix iPhone from black screen, DFU mode, recovery mode, Apple logo, headphone mode, etc. to normal state.
Tutorial: Steps to Recover Lost Data from Locked/Disabled iPhone
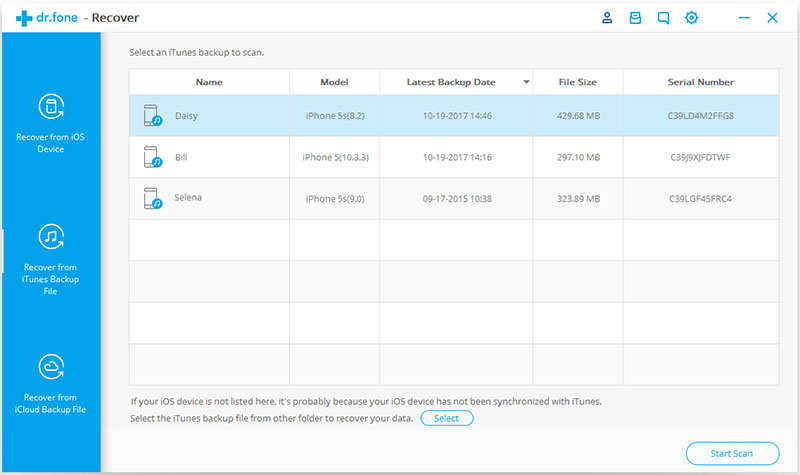
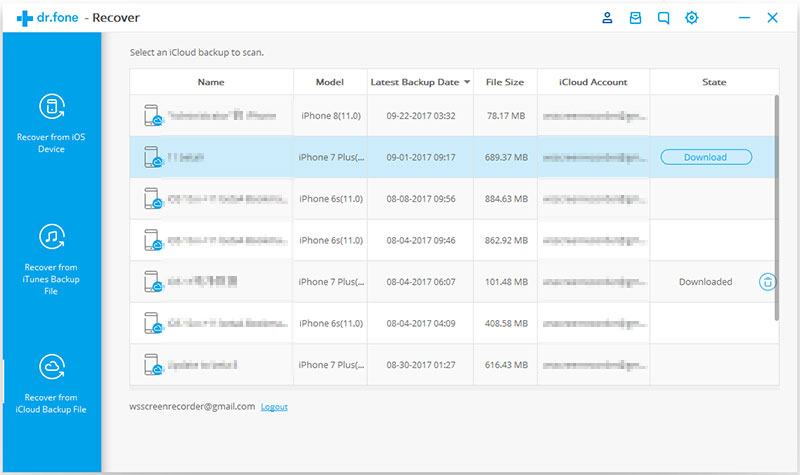
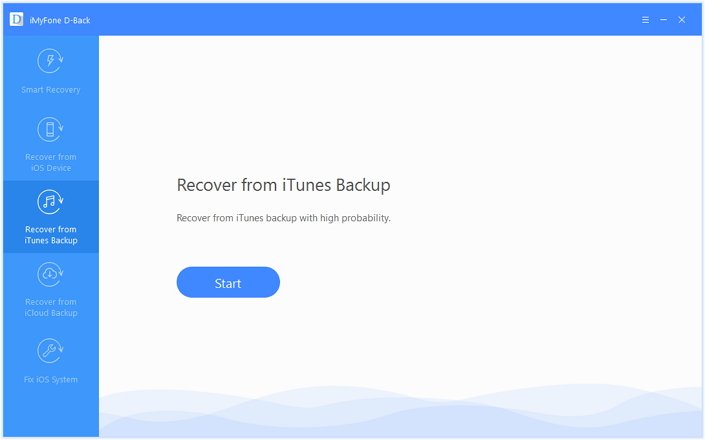
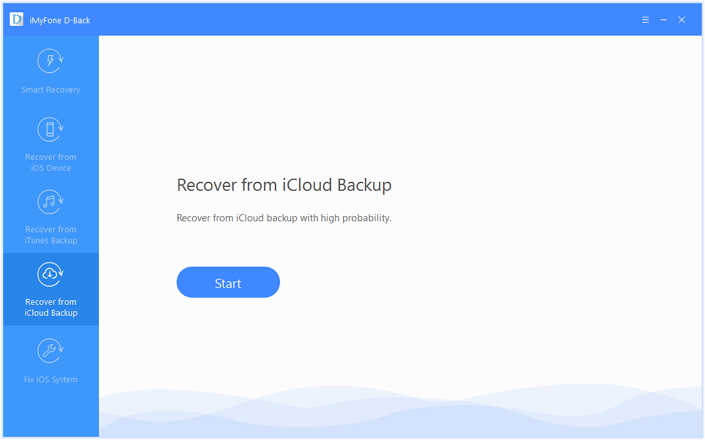
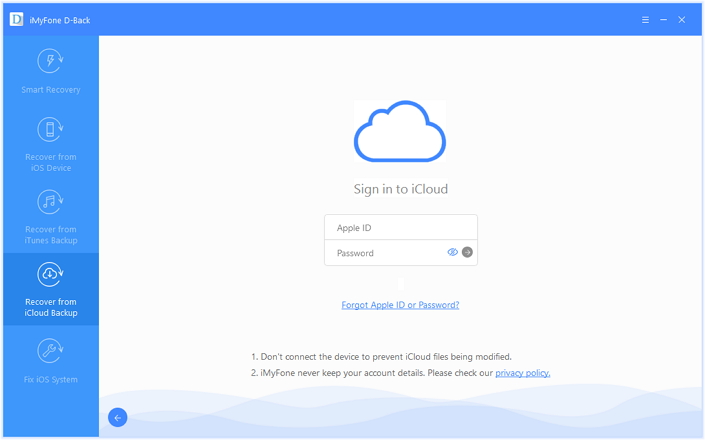
Haven’t make your iPhone backup but lost data? This part tech you how to use iOS Toolkit – Data Recovery to directly recover lost data from disabled iPhone without backups, als the “Recover from iTunes Backup File” and “Recover from iCloud Backup File” modes are available in this solution, and you can choose a proper recovery module according to your own situation.
Step 1. Download the Run iOS Toolkit on PC or Mac
Download and run the iOS Toolkit for Windows or iOS Toolkit for Mac on your computer first.
After launching the program on the computer, you can get the main interface as below, please clck “Recover” function and choose the “Recover from iOS Device” option to recover your iPhone lost data.
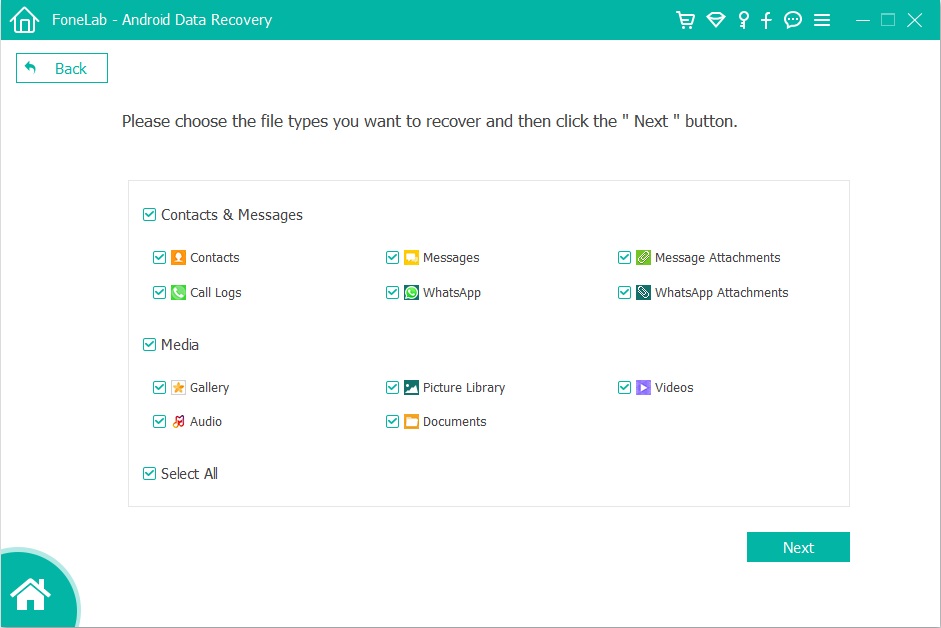
Step 2. Connect iPhone to Computer and Select File Types to Scan
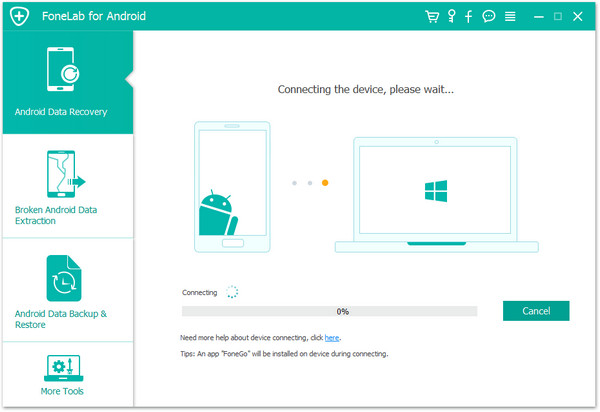
In this step, please connect your disalbe iPhone to comptuer via USB calbe and select the file types that you want to get back, and click on ‘Start Scan.’

Step 3. Scan Disabled iPhone for Lost Data
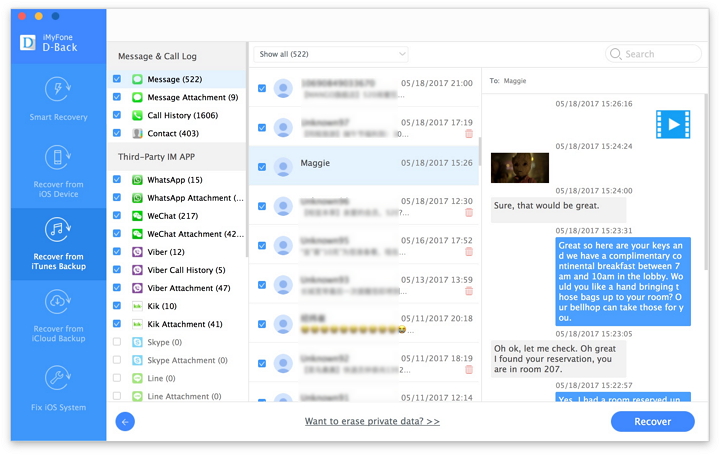
Then, the program start scan all lost data from your diabled/locked iPhone, the scanning process will last for some minutes. Then you will see the results interface with all data types shown on the leftsection. You can choose one type and have a look at the items including deleted and existing ones on this interface.
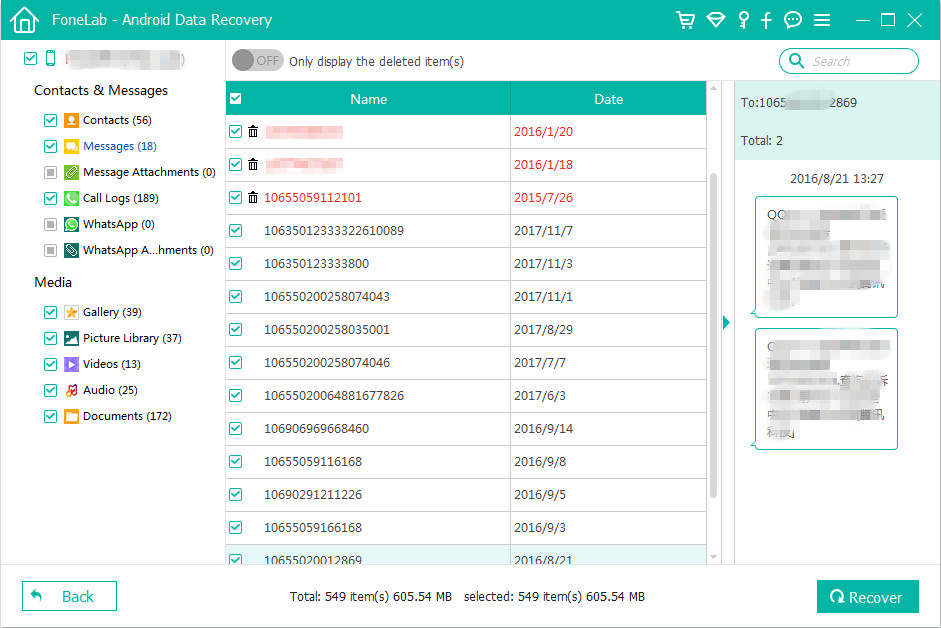
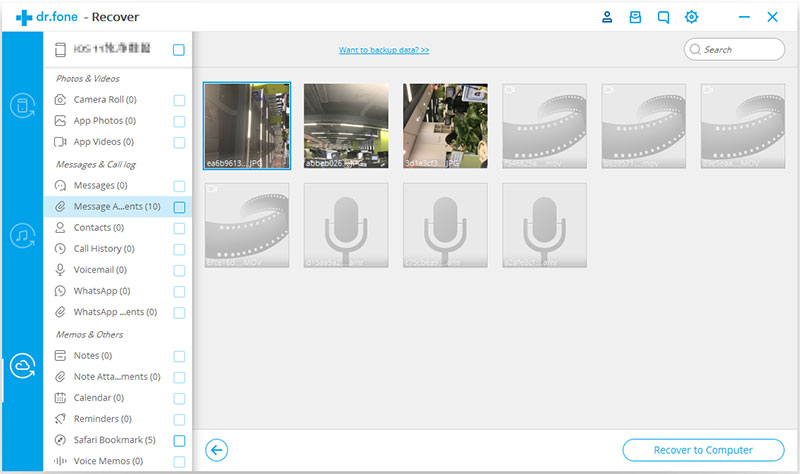
Step 4. Recover Lost Data from Diabled/Locked iPhone
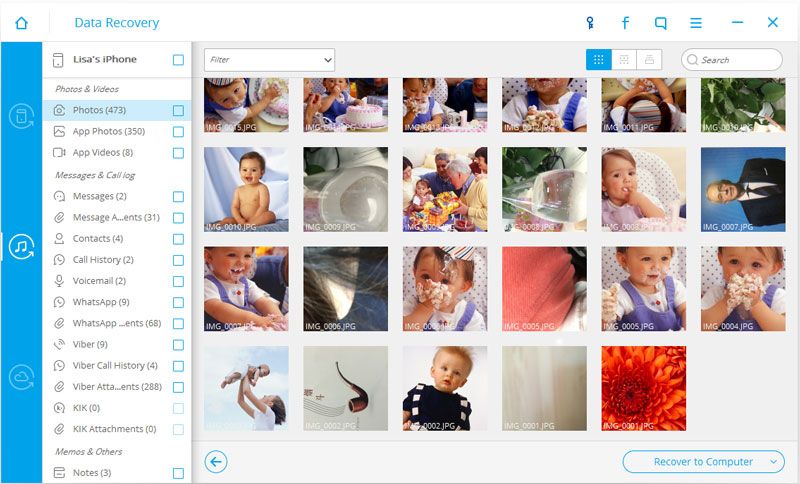
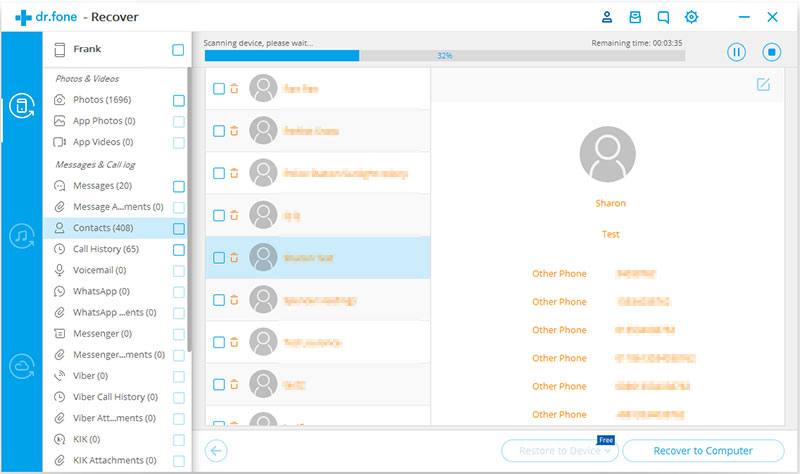
After the scan is finished, all recoverable data will be clearly organized as the picture below shows. Click each tab to check all files, or only preview the deleted items by choosing “Show only the deleted files”. Finally, preview and recover your disalbed iPhone lost data. For example, if you just want to recover contacts and text messages on locked/dabbled iPhone, you should click on “Contacts” “Messages” from the left list, preview them, choose the contacts & SMS you want to get back and then click “Recover” button, and then click on ‘Restore to Device’ or ‘Recover to Computer’.

So, if your iPhone/iPad is diabled/locked, all hope isn’t lost. The iOS Toolkit not only can help you unlock screen passwords from iPhone and iPad, but also enables users to bacup & restore iPhone data and recover lost data from iPhone/iPad/iPod, even if you haven’t made a backup, it is an all-in-one iOS Toolkit for “Unlock”, “Backup & Restore”, “Recover”, “Switch”, “Transfer” and “Repair”.
Related Articles
How to Remove Locked Screen on iPhone without Data Loss
How to Recover Lost Data on Locked iPhone
How to Restore Data on Locked iPhone
How to Fix iPhone to Normal after iOS 12 Update
How to Install IPSW File on iPhone iPad with/without iTunes
Recover Data from Locked/Disabled iPhone

iOS Data Recovery
Recover Your iPhone iPad Lost Data
Now, Even without Backups
Compatible with iOS 11/12 & iPhone X/8 (Plus)
Recover Lost Data Now