Do you want to backup to iPhone 14 to computer? Wanna backup iPhone without iTunes? This passage will introduce an awesome iPhone Backup software, and guide you how to backup contacts, SMS, photos, videos, notes from iPhone 14 to computer easily.
Question 1: “How do I backup my iPhone 14 photos to my computer?” – Nick
Question 2: “How do I back up Contacts from iPhone 14 to PC without iTunes” – Jenny
Question 3: “Can I backup my iPhone text messages to my computer?” – Mike
A restore is helpful to fix some software problems. Do you need to to restore your iPhone 14 data? If yes, you’d better to backup iPhone 14 data to computer in advance. We know that iPhone and Windows do not work well together. To backup data from iPhone to computer, you can use a third-party iPhone Backup Software. In this article, we will introduce an awesome iPhone Backup Software, and teach you how to backup Contacts, SMS, Photos, Videos, Notes from iPhone 14 to computer. You can backup all data from iPhone 14/14 Plus/14 Pro/14 Pro Max to computer without iTunes or iCloud!
Way 1. Backup iPhone 14 to Computer without iTunes
Usually, it will take a long time to create a backup with iTunes and iCloud. Take it easy! A professional iPhone backup tool can help you quickly backup photos, contacts, SMS, videos, notes from iPhone 14 to PC/Mac.
U.Fone iOS Toolkit – iOS Data Backup & Restore is your best option. It is an all-round iOS data backup & restore tool, iOS data recovery tool, as well as iOS system recovery tool. This software enables users to easily and quickly backup iPhone/iPad/iPod Touch to computer without iTunes or iCloud. What’s more, it lets you selectively back up any iOS data you want to computer. With it, you can easily backup photos, contacts, SMS, videos, music, text, notes, WhatsApp, app data and more to computer with just a simple clicks.
Highlights:
- Backup all data and file from iPhone/iPad/iPod to PC/Mac.
- Backup iPhone 14/13/12/11/X/XR/S/8 to computer without iTunes.
- Backup iPhone videos, photos, music, SMS, contacts, notes, app data and more to computer.
- Recover lost/deleted data from iTunes/iCloud/iPhone backup.
- Restore iPhone without data loss.
- Restore the backup files to iPhone without iTunes/iCloud.
- Fixes your iOS system issues like recovery mode, DFU mode, White/Blue/Black screen, etc.


How to Backup Photos/Contacts/SMS/Videos/Notes/ from iPhone 14 to Computer
Step 1. Download U.Fone iOS Data Backup & Restore
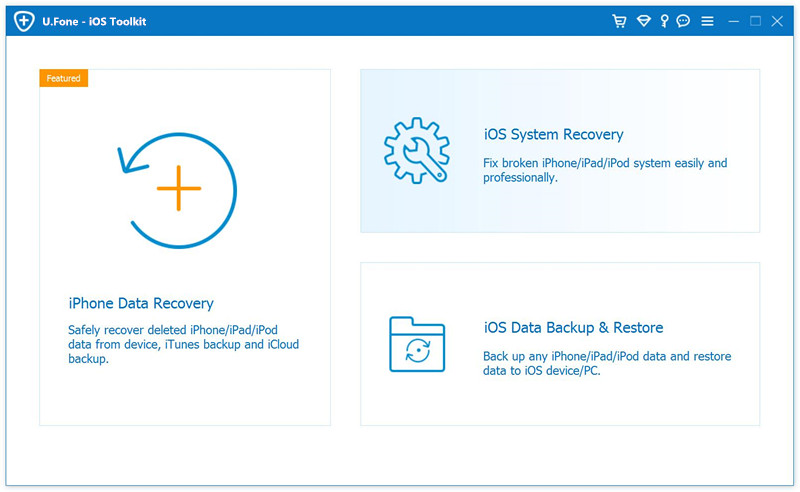
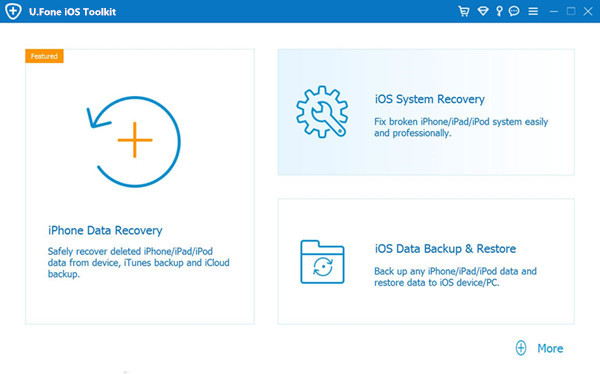
Start by downloading and installing U.Fone iOS Toolkit on your Windows PC or Mac computer. Launch the program, and select “iOS Data Backup & Restore” mode.
Step 2. Select iOS Data Backup
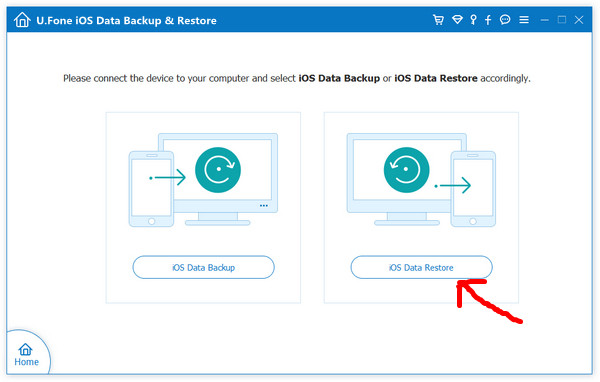
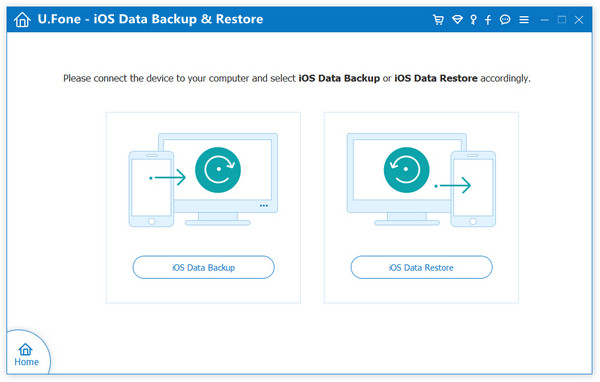
After this, you will see two options: iOS Data Backup and iOS Data Restore. Here you need to choose “iOS Data Backup” option.
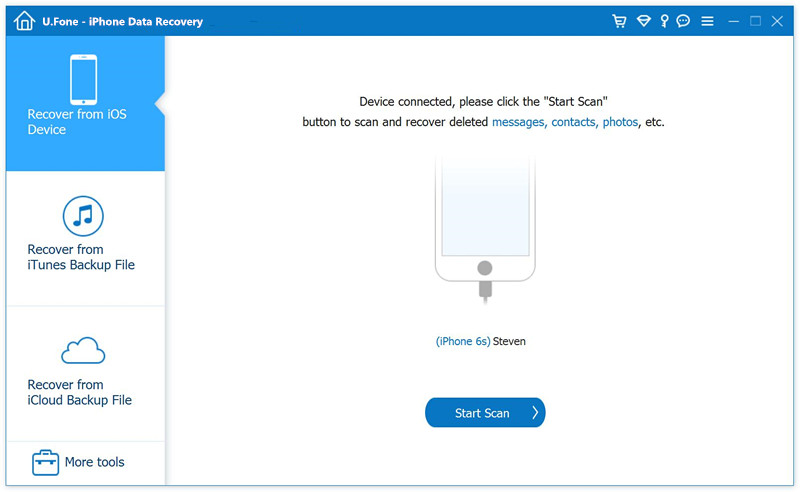
Step 3. Connect iPhone 14 to Computer
Next, connect your iPhone 14/14 Plus/14 Pro/14 Pro Max to computer via an Apple USB cable. Then it will detect your iPhone 14, and show you two backup modes. Choose “Standard backup” and click “Start” button.

Tips: If you choose “Encrypted backup”, you need to set a password for it. When you backup and restore your iOS data, you are required a correct password to go on.
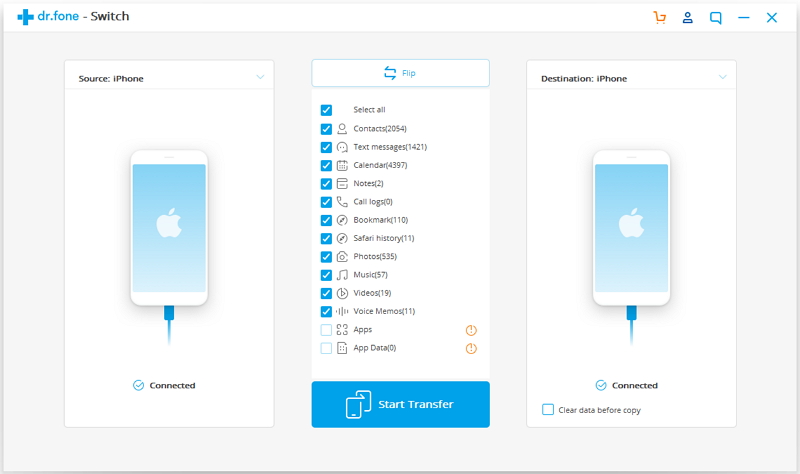
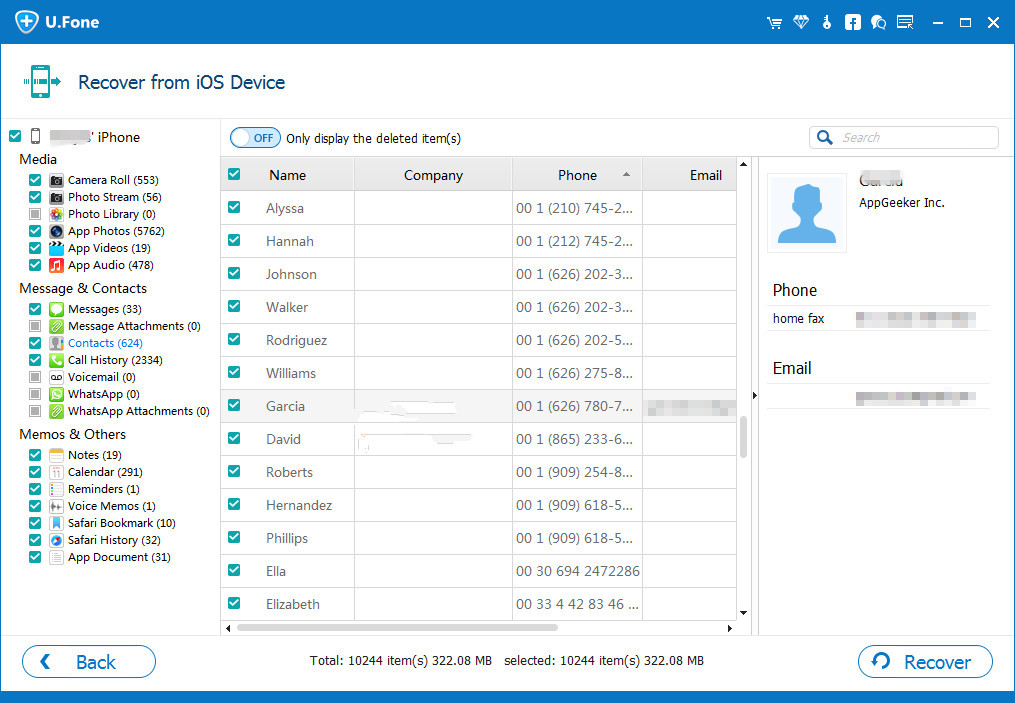
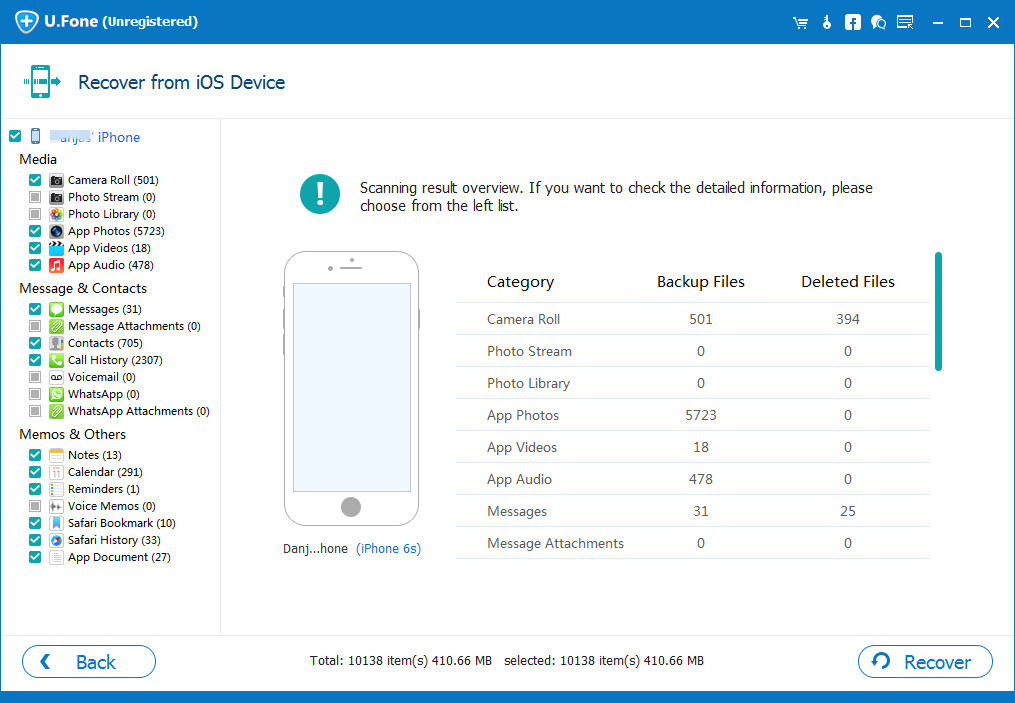
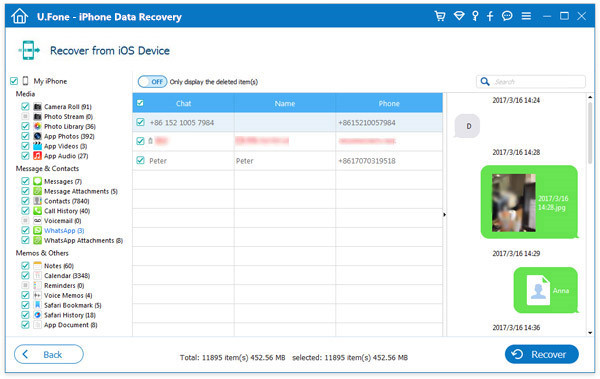
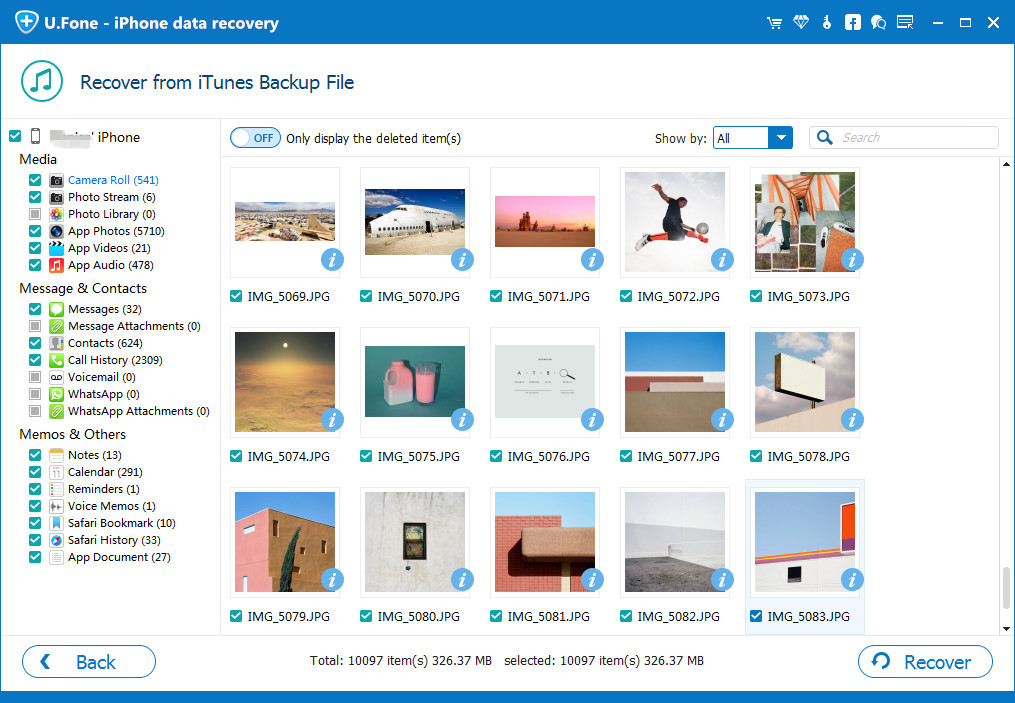
Step 4. Select iPhone 14 Backup File Types
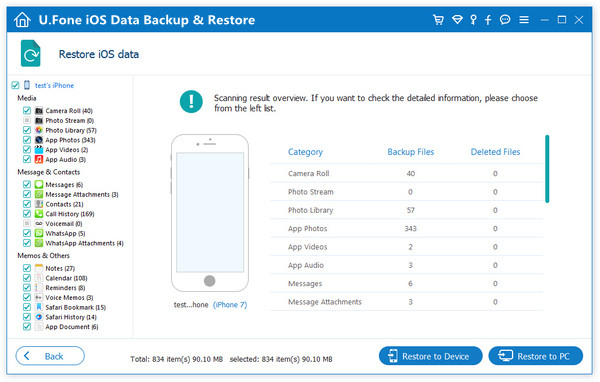
In the next window, you will see all file types, including Media, Message & Contacts, Memos & Others.
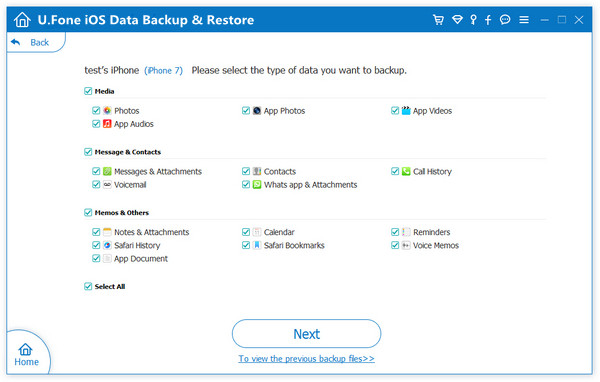
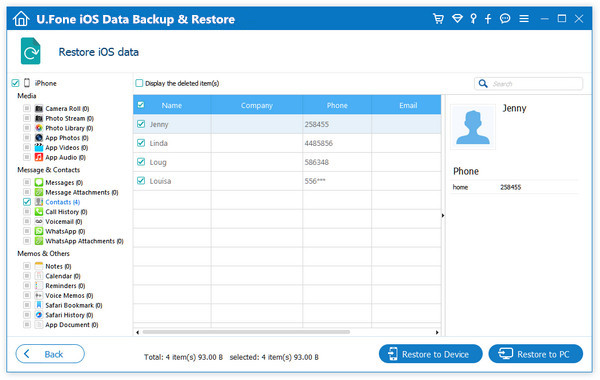
You can select any data you want to backup, or just tick “Select All“, then click “Next“.
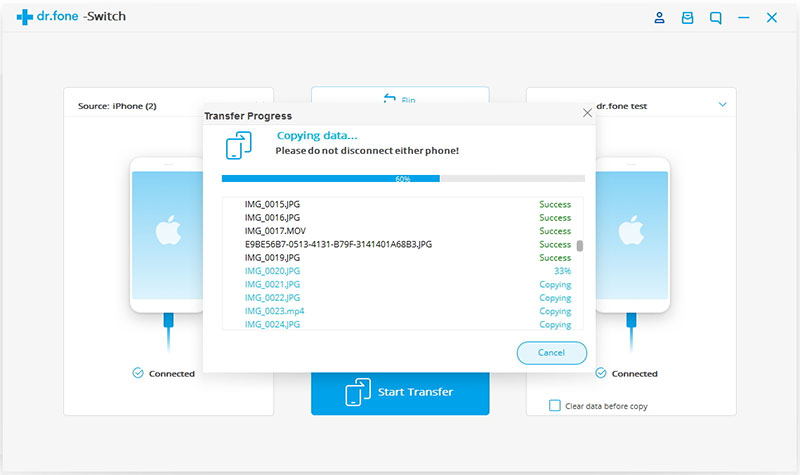
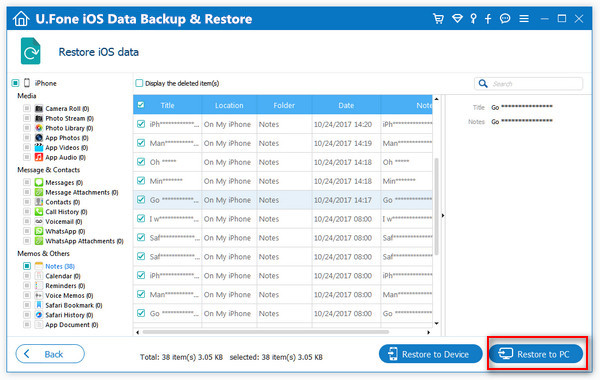
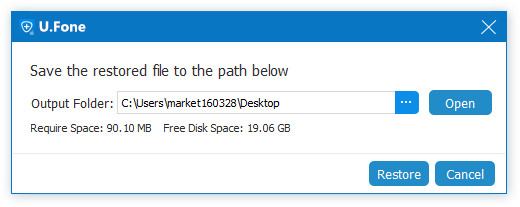
Step 5. Back Up Data from iPhone 14 to Computer
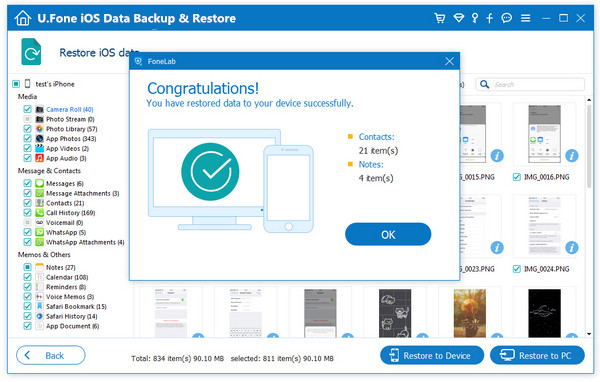
This tool will start to back up iPhone 14 files to computer without iTunes. During the process, keep your iPhone 14 connected to computer.
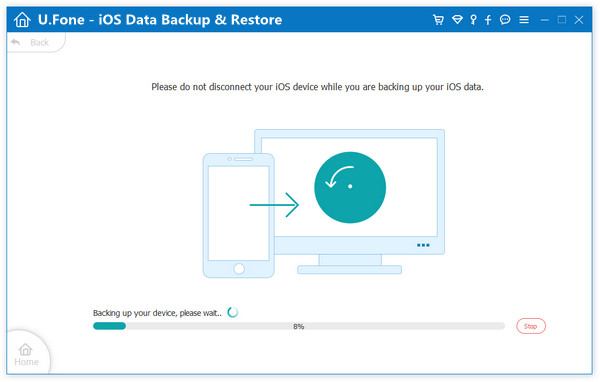
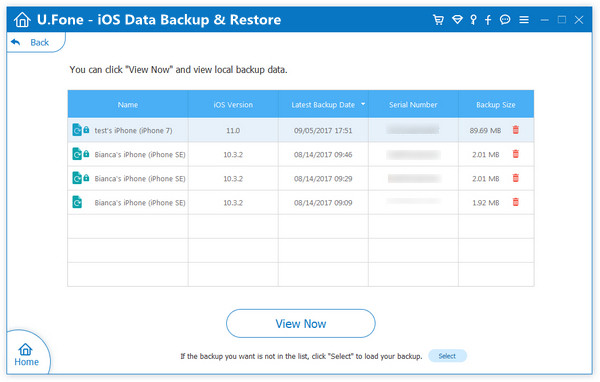
After the backup is completed, you can click “View Now” to view the local backup data. Now all backup files are stored on your computer locally!
Way 2. Backup iPhone 14 to Computer Using iTunes
iTunes is another good helper to backup iPhone 14 data to computer. Compared to U.Fone iOS Data Backup tool, you can only backup all iPhone data on your computer with iTunes. Follow the steps below:
Step 1. Open iTunes on your Windows PC, sign in with your Apple ID.
Step 2. Connect your iPhone 14 to the computer via USB cable. iTunes will display your iPhone 14, tap on it.
Step 3. Trust your computer on the iPhone 14 screen.
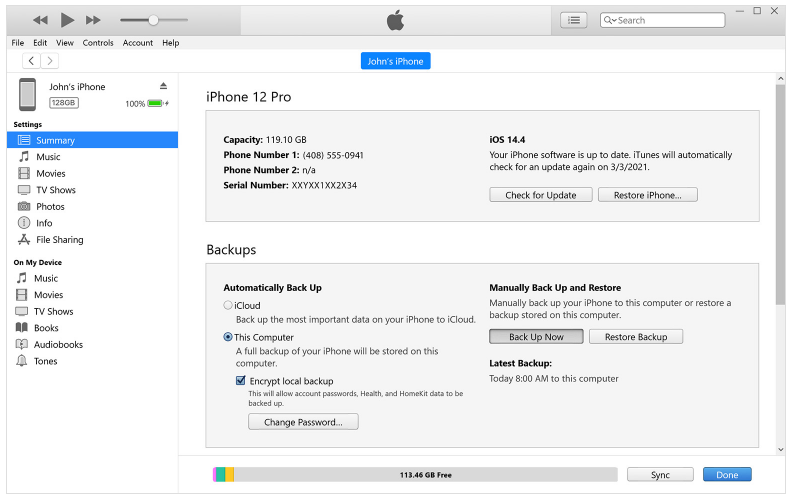
Step 4. In iTunes window, click on your iPhone 14 icon.
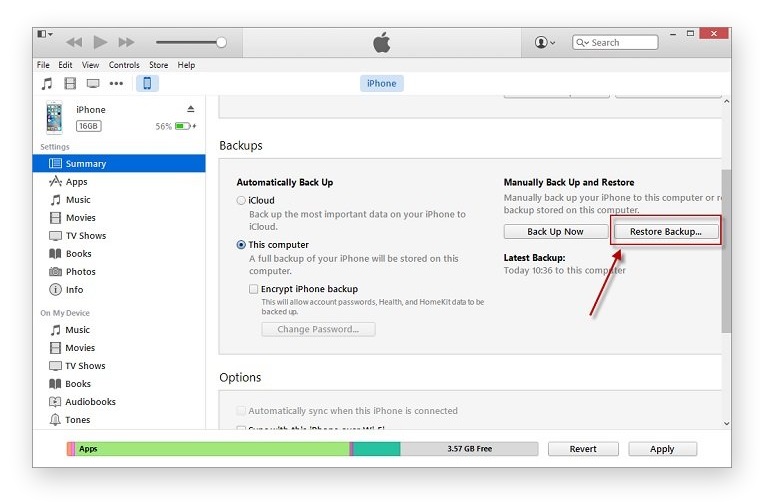
Step 5. Tap “Summary” > “Backups” > “This Computer”, tick “Encrypt iPhone backup”.
Step 6. Click on “Back Up Now” and wait for the backup to complete.
Restrictions: After creating an iTunes backup, you can see the backup file and the exact time and date it was created. However, you cannot check the backup file details and do not have access because Apple usually reformats the file. To backup data from iPhone to computer, we recommend you use a profession iOS backup tool, such as U.Fone iOS Toolkit – iOS Data Backup & Restore. Now try it free!