Summary: According to the reports, the Galaxy series of models are the best sold phones on the market. Samsung Galaxy phones makes it attractive for most of Android users. However, some Samsung users will eventually encounter some trouble problem as both software and hardware. This tutorial will show you how to fix the common frozen Samsung problems with ease.
“My Samsung phone is frozen at the black screen. How to restore it to normal?”, “I am not sure what was happened on my phone, it get frozen and can’t do anything on it.” Do you ever seem these similar problems or are you facing one of the terrible situation? Most of people will leave the battery out for 10 seconds, then reinsert, and power back on. Some people will perform a hard reset on the frozen device by pressing the power button, volume up, and home key all at the same time. Unfortunately not all frozen device can be fixed by these normal ways. If you need another better solution to perfectly fix your frozen Samsung device, just keep reading the follow passages.
Fix Frozen Samsung Phone to Normal
You are in the right place. Broken Android Data Extraction – Android Data Recovery is able to help you out, regardless of whichever frozen situations on Android device. Broken Android Data Extraction enable to fix frozen, crashed, or locked Android phone to normal and extract data for backup on computer. With the help of it, you can fix frozen Samsung device problems, fix frozen Samsung phone to normal state with only few clicks.


More Features of Broken Android Data Extraction:
-Fix frozen, crashed, black-screen, virus-attack, screen-locked phone to normal without data loss.
-Extract messages, contacts, call history, WhatsApp, photos, etc. from broken device.
-Support almost all Samsung phones like Samsung Galaxy S, Samsung Galaxy Note, etc,.
-Safe and easy to use.
How to Fix Frozen Samsung Phone without Data Loss
Step 1. Run Broken Android Data Extraction on the Computer
Install and run Broken Android Data Extraction on your computer first. Click “Broken Android Data Extraction” option on the interface of program.
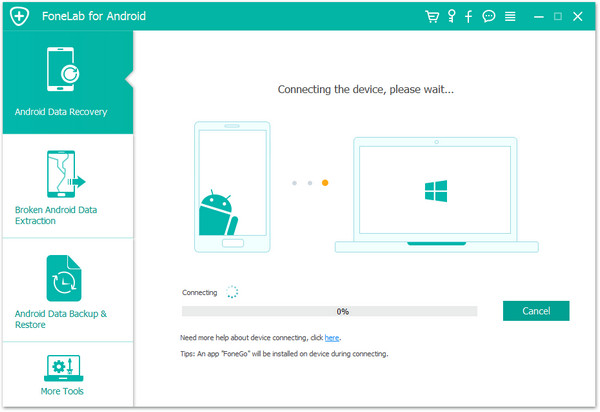
Step 2. Connect the Frozen Samsung to Computer
Now connect your frozen Samsung device to the computer with a USB cable. For frozen case, click “Start” on the right sight to begin the fixing process.
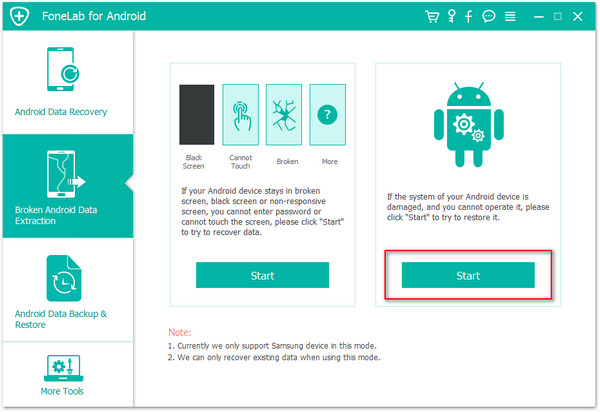
Step 3. Select the Broken Situation of Samsung
Choose the situation that match your Samsung device. Click “Next” to go on.

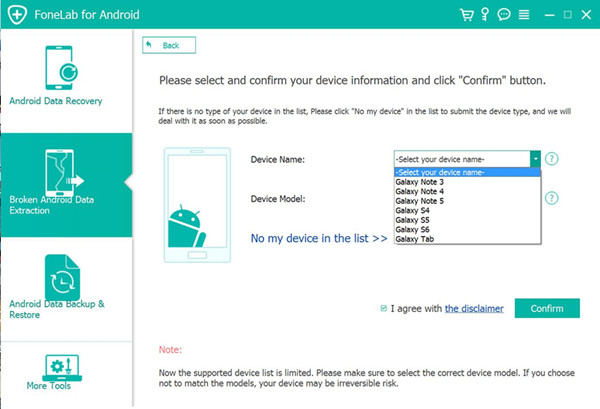
Step 4. Select the Name and Model of Samsung
Choose the correct information of your Samsung device including the device name and model. Then click “Confirm“.
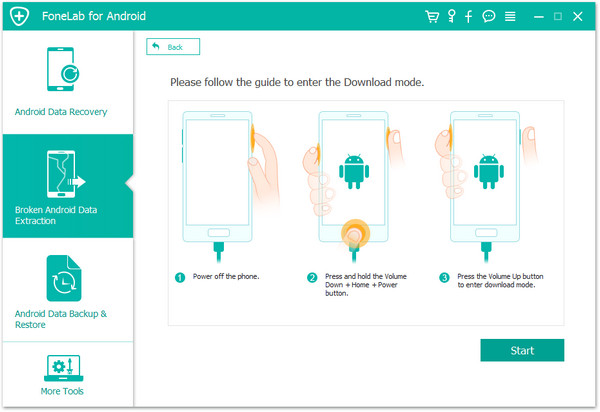
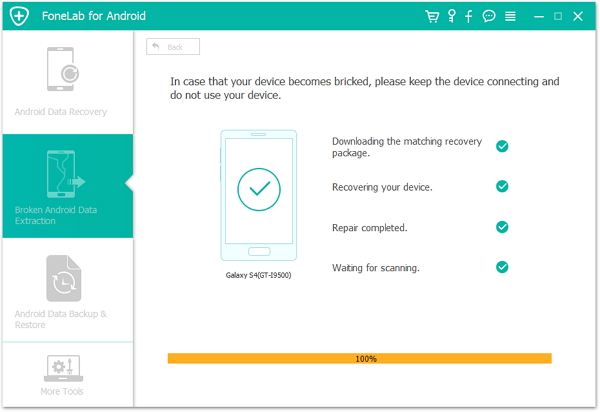
Step 5. Download Recovery Package for Fixing Samsung
In this step the program will download recovery package and then repair the broken Android system for your Samsung. Once it is done, you should switch to “Android Data Recovery” feature to access then recovering data from Samsung, including the deleted data.
Now the program is analyzing data on Samsung and fixing Android system on Samsung.
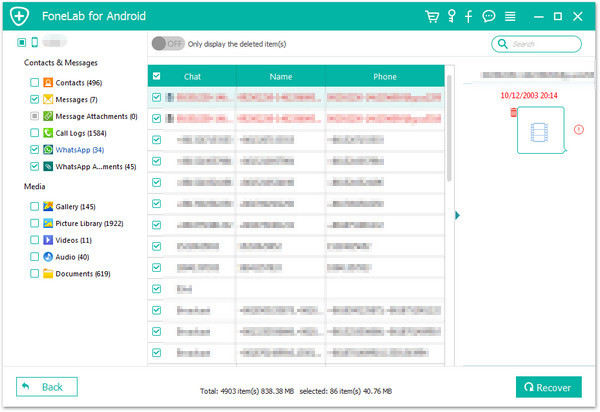
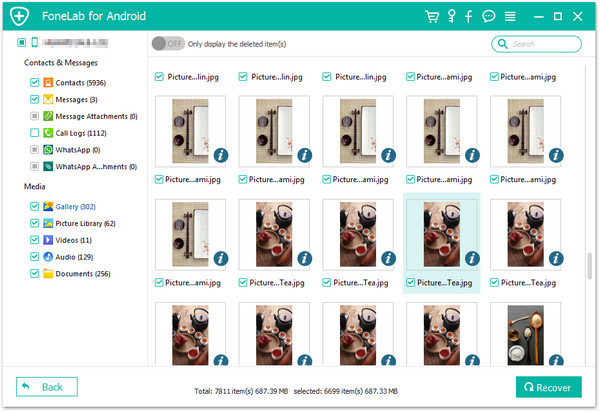
Step 6. Recover Data from Samsung Phone
Now your phone has been restored to a normal device. Preview and mark the items you want to recover and click “Recover” to save the selected data on the computer.
Related Articles:
How to Unfreeze a Samsung Galaxy Phone
How to Fix Frozen Samsung to Normal
How to Fix Bricked Samsung Phone
How to Fix Samsung Frozen on Samsung Logo
How to Fix Samsung Galaxy Black Screen of Death
How to Fix Samsung Galaxy Stuck in Download Mode
How to Recover Deleted Data from Samsung Galaxy