[Summary]: Your contacts have been deleted, lost, disappeared or missing after iOS 13/iOS 12.1.4 update on your iPhone and looking for methods to get them back as soon as possible? This article will share you three best ways to recover lost contacts/phone numbers on iPhone after updating to iOS 12 or iOS 13.
Three Best Way to Recover Lost Contacts from iPhone after iOS 12/13 Update
Apple’s official website has released the iOS 12.1.4 and iOS 13 will be release in 2019, when release an new iOS system, you may jump to the new system right away. However, some users complained that they lost important data such as Contacts after the iOS update. More and more users are eager to know how to recover lost data contacts after updating to iOS 12.1/iOS 13.
How to Recover Lost Contacts after iOS 12/13 Update?
As a professional iOS data recovery tool, iPhone Data Recovery offers you 3 modes to get back lost contacts and other files on iPhone, iPad, or iPod touch after iOS 12.1 upgrade.
3 recovery modes are offered for iPhone contact recovery: Recover from iOS Device, Recover from iTunes Backup, and Recover from iCloud Backup.
It scans your iPhone deeply and finds the lost or deleted contacts after iOS 12.1 or iOS 13 update.
You are enabled to preview lost iPhone contacts from iTunes/iCloud backup and selectively recover them without restoring,
It helps recover all types of iOS data, including contacts, text messages/iMessages, message attachments, photos, notes, whatsapp messages, call history, etc.
It recovers deleted iOS data in various circumstances, such as accidental deletion, phone formatting, factory reset, virus attack, inappropriate operation, unexpected error during iOS system upgrade and so forth.


Method 1. How to Recover iOS 13/12.1 Lost Contacts without Backup
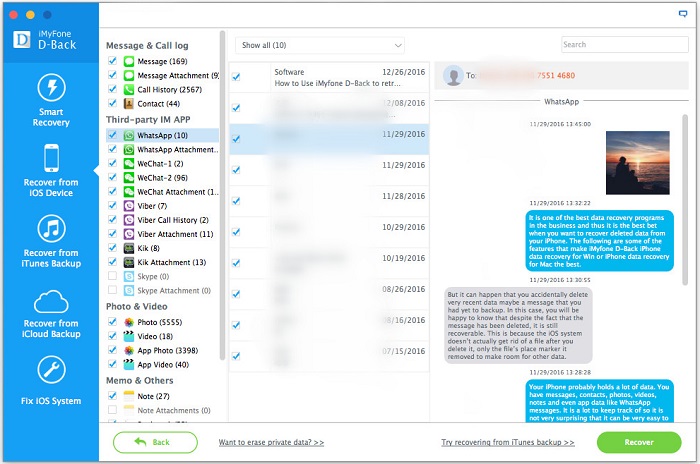
Firstly, get the iPhone Data Recovery software installed on the computer. After running it, you will gain this main page as below. The software provides several recovery modes, where using Smart Recovery you can choose the appropriate recovery method based on the data loss situation.
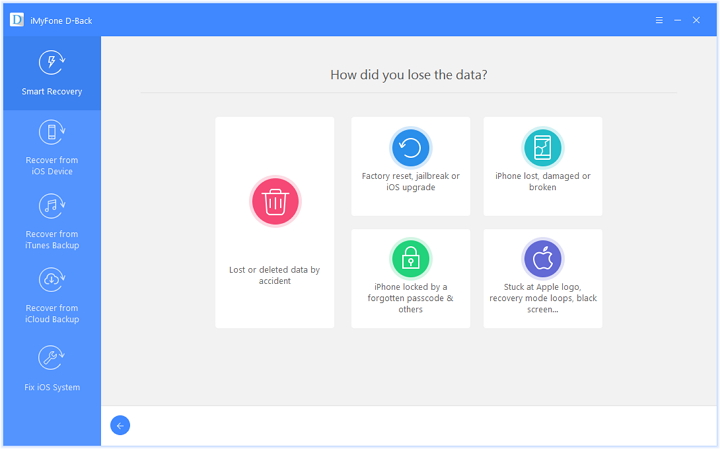
Step 1.Connect iPhone with the Program
Connect your iPhone to the PC or Mac with an original USB cable. Then open the iPhone Data Recovery program and it will detect your device automatically. Select “Recover from iOS device“option to activate the process.

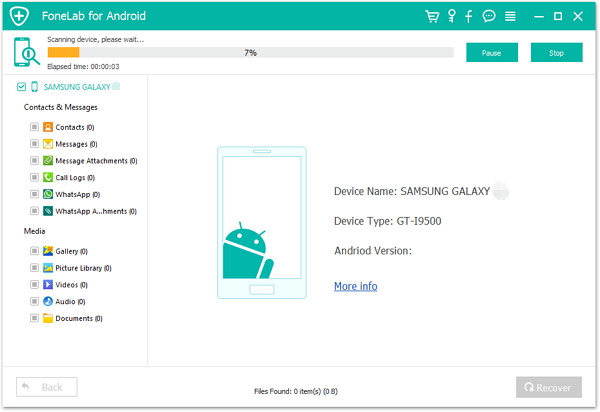
Step 2.Scan Data on iPhone
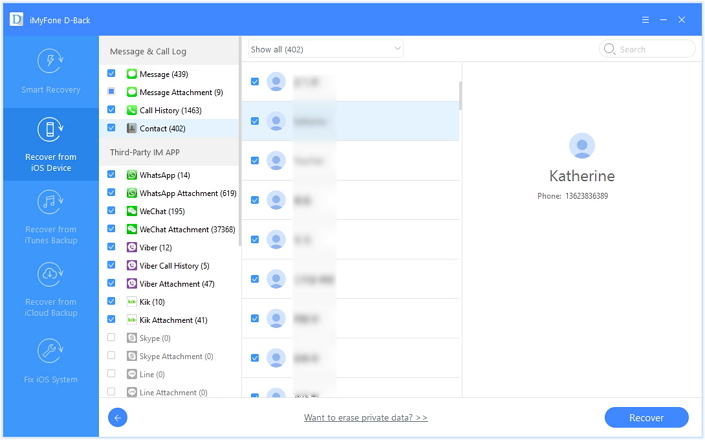
Here you can see the complete info about your iPhone, and all the recoverable files. Then tick the “Contacts” option and click the “Next” button to start to scan the lost or deleted contacts on iPhone.

After that, the program begins scanning your iPhone for deleted or lost contacts.

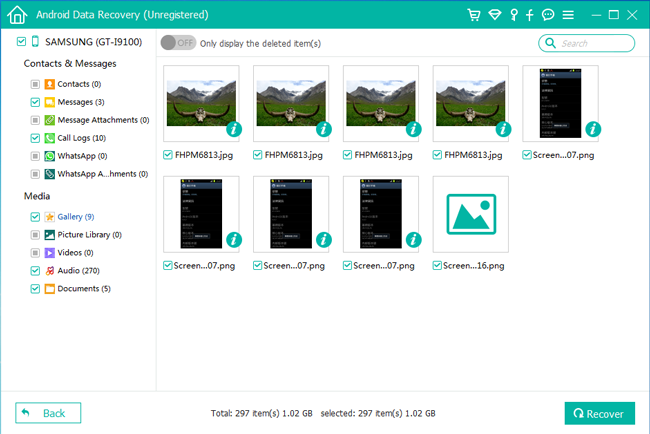
Step 3.Preview and Recover Lost Contacts from iPhone Directly
Wait a while until the scanning is completed. Next choose the “Contacts” item on the left column to preview the lost iPhone contacts. Simply click the “Recover” button to retrieve all selected contacts.
Method 2. Recover Lost Contacts after iOS 13/12.1 Update with iTunes Backup
Once you have iTunes backup files, you can use iPhone Data Recovery to retrieve lost contacts on iPhone after iOS 12 upgrade by extracting from iTunes backup files.
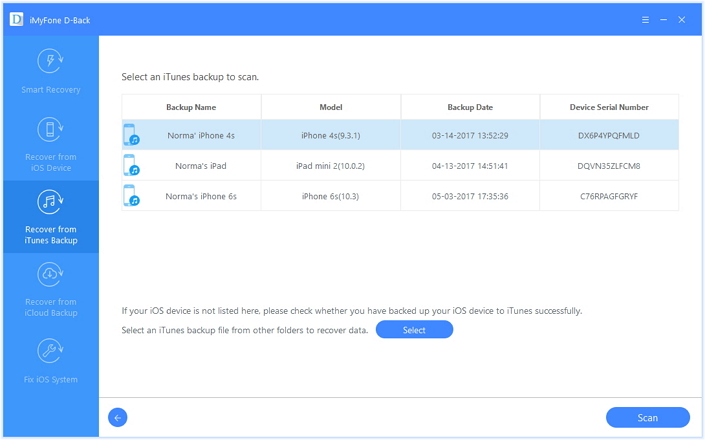
Step 1.Choose and Extract the iTunes Backup
Open the program and then hit the “Recover from iTunes Backup” mode on the top menu bar. All your iTunes backup files will be shown in the list. You need to choose one backup file that may contain the missing contacts you want and click on “Scan”.
Step 2.Preview and Restore Contacts from iTunes Backup
When the scanning is done, all the recoverable contacts will be displayed. Tick all iPhone contacts you want to restore and then click the “Recover” button to get contacts back quickly.

Method 3. Recover Lost Contacts after iOS 13/12.1 Update with iCloud Backup
Alternatively, you can use iPhone Data Recovery to recover iOS 12.1.3/iOS 13 missing contacts if you have iCloud backup before iOS 13 update.
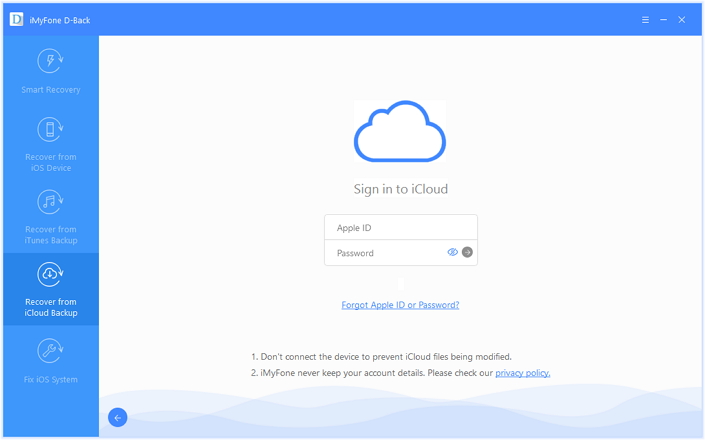
Step 1.Run the Software and Log into iCloud
Launch the program on the computer and switch to the “Recover from iCloud Backup” recovery mode. Then enter your Apple ID and passcode to sign in the iCloud account.
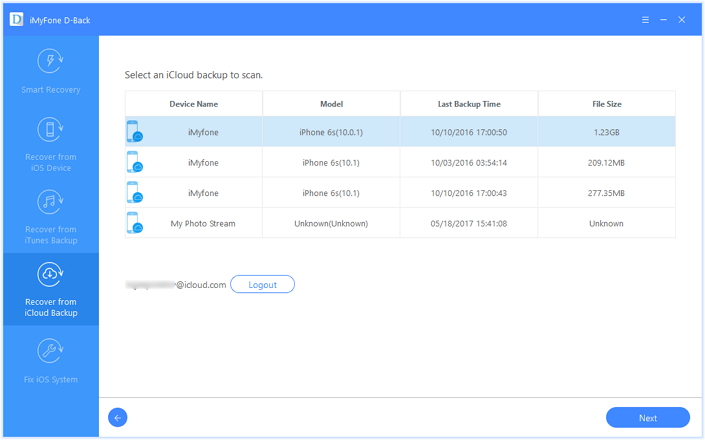
Step 2.Download A Backup File and Scan
Once you signed in, you can see all iCloud backup files you have. Select the latest backup file and click the “Next” button to download and extract the iCloud backup file.
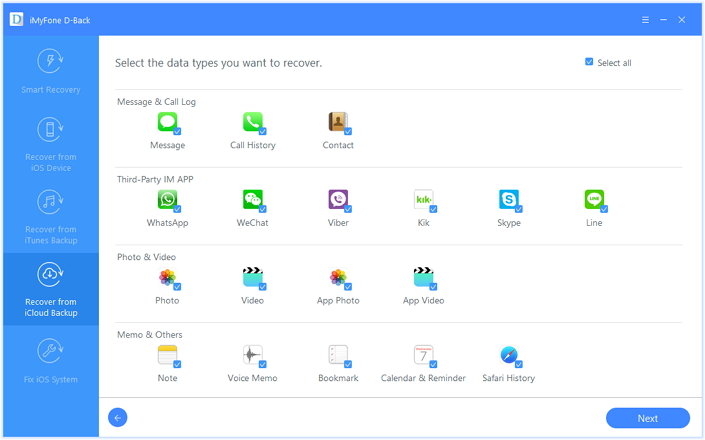
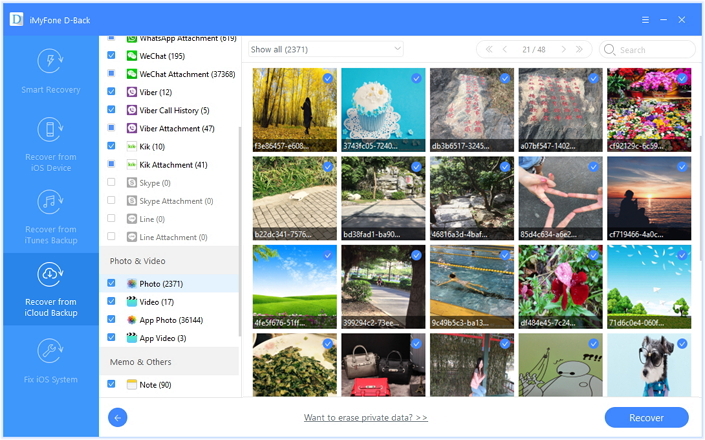
Step 3.Restore Missing iPhone Contacts via iCloud Backup
Wait until the download process is completed, all the recoverable contacts are listed. You are able to preview the contacts and tick all or the important ones you desire. Click the “Recover” button to export them to your computer.
Related Article
Ways to Recover Contacts from iPhone after iOS 12 Update
Restore WhatsApp Data on iPhone/iPad after iOS 12 Update
Ways to Recover Lost iPhone Photos after iOS 11 Update
Restore Deleted App Data from iPhone after iOS 12 Update
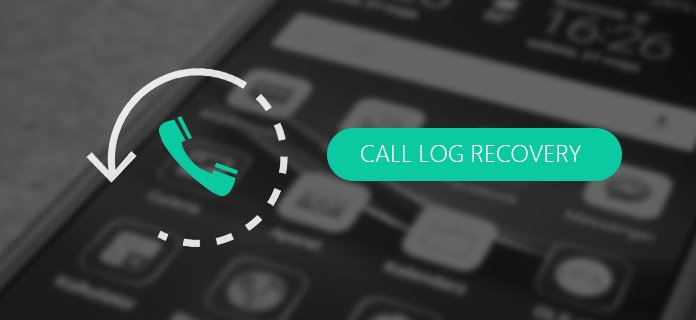
Recover Call Logs from iPhone/iPad after iOS 12 Update