All posts by DHZ

How to Convert VOB to MOV for QuickTime Player on Mac

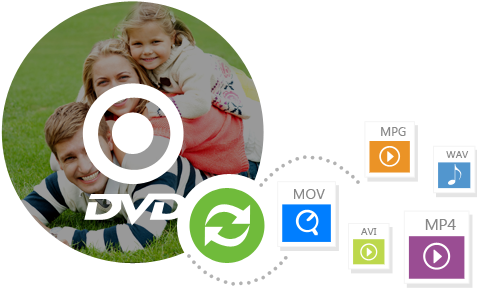
Summary: If you want to transfer freely different video formats like convert VOB to MOV, you should never miss this famous DVD Creator + Blu-ray Creator, which provides you the professional way of converting videos/HD videos like VOB, MOV, MP4, M4V, WMV, ASF, MKV, AVI, 3GP, 3G2, FLV, SWF, HD MPEG, HD MP4, HD WMV etc,.

Last night, I try to play VOB files on the Quicktime player but failed. Does anyone know the best VOB to QuickTime converter to smoothly convert VOB files to play with QuickTime Player on Mac? Thank you.

MOV is the default video format of Mac operation system. Generally, you will obtain the VOB files when you rip the video from DVD disc. If you have some VOB files on your Mac and want to play them with QuickTime, enjoy them on Apple’s device: iPhone, iPad, iPod, etc., or edit the video files in programs like iMovie and Final Cut Pro, you will need to convert VOB file to MOV, a Mac friendly format.It should be the major reason that you need to convert VOB to MOV. In this article, you’ll learn how to convert DVD VOB files to MOV with ease.

The Best VOB to MOV Converter on Mac

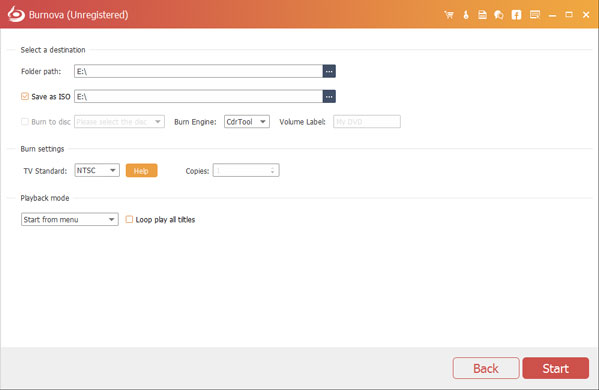
To do this job perfectly, a video converter is needed. Here VOB to MOV Converter(Mac) is recommended as the best tool to convert VOB to MOV on Mac. It enables to convert other video formats like MP4, M4V, MOV, AVI, WMV, FLV, MKV and so on. Once the conversion is finished, you can watch the MOV files for quicktime player on Mac. Moreover, DVD Creator + Blu-ray Creator allows to editing download, edit, burn videos on computer, burn local videos with any formats to DVDs or Blu-ray Discs/ISO/folder. Generally speaking, this program is good to help you convert videos for any format, create your own DVDs and Blu-ray discs with your own video file.

d_win d_mac

How to Convert VOB to MOV for Quicktime Player on Mac

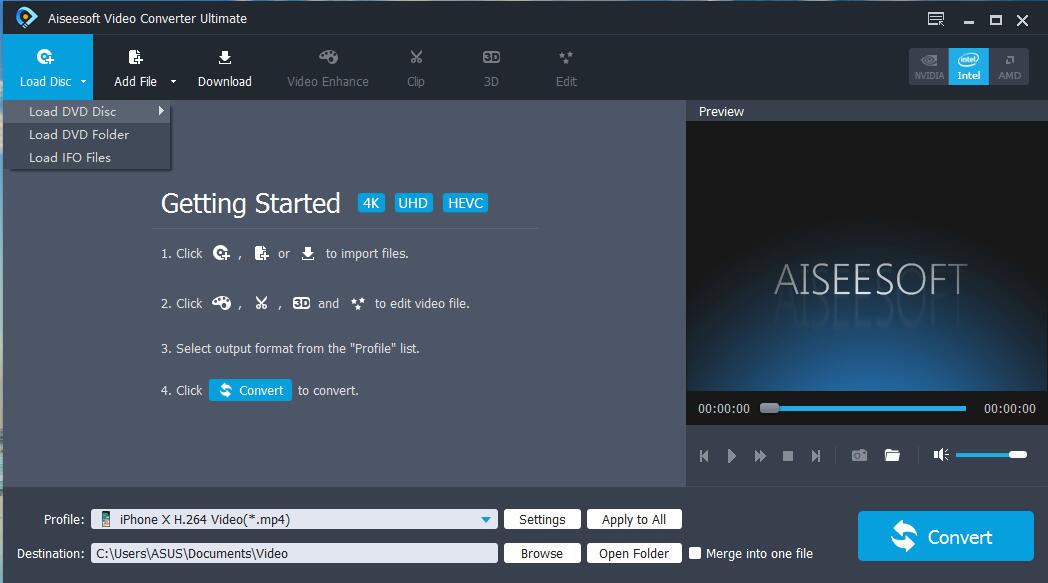
Step 1. Run Program on Mac
Please download and run the VOB to MOV Converter on Mac computer.

Step 2. Add VOB files on Program
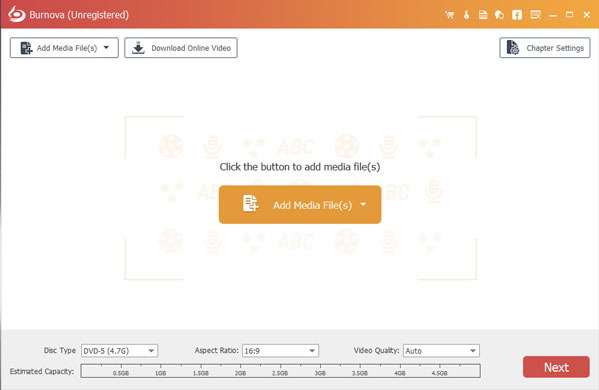
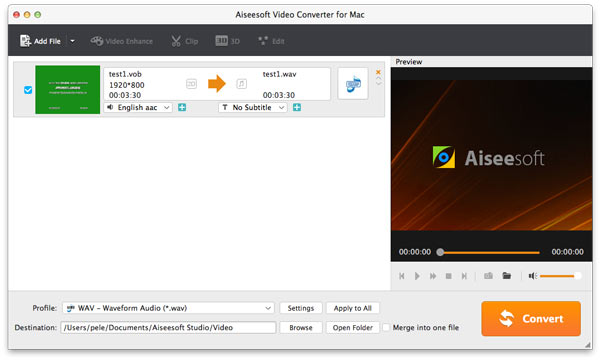
Now you should click the “Add File” to import VOB files on the Mac computer.

add vob file

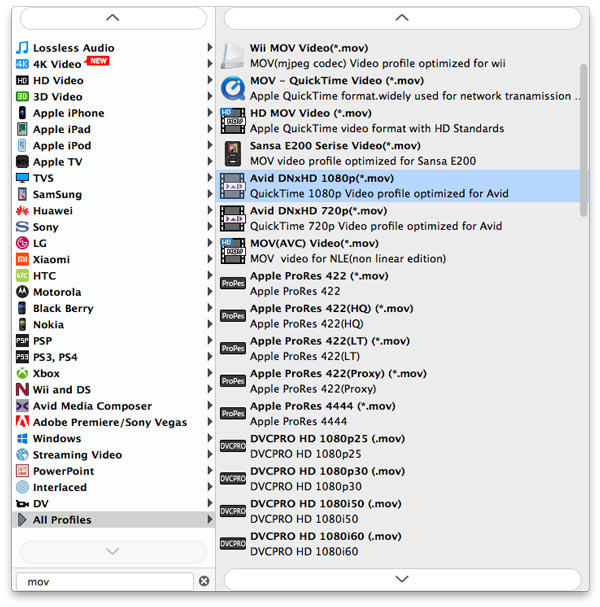
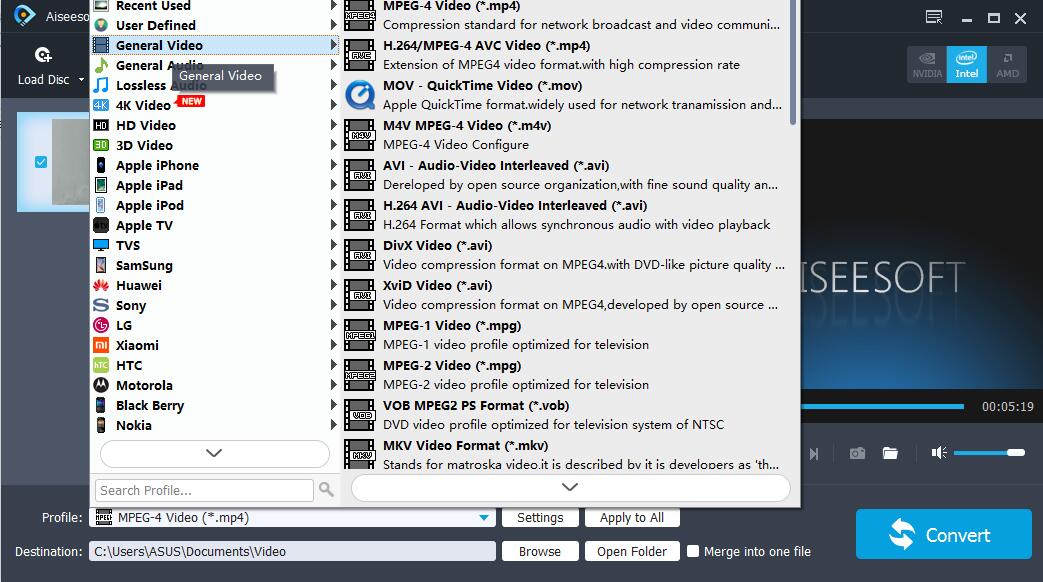
Step 3. Select Output Preference
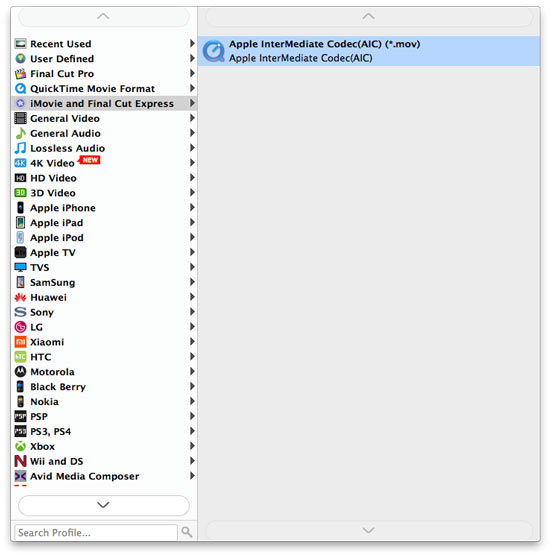
Choose the out preference from the “Profile” > “iMovie and Final Cut Express” >”Apple InterMediate Codec” for converting VOB to MOV files. And you can also convert files to other format.

choose vob format

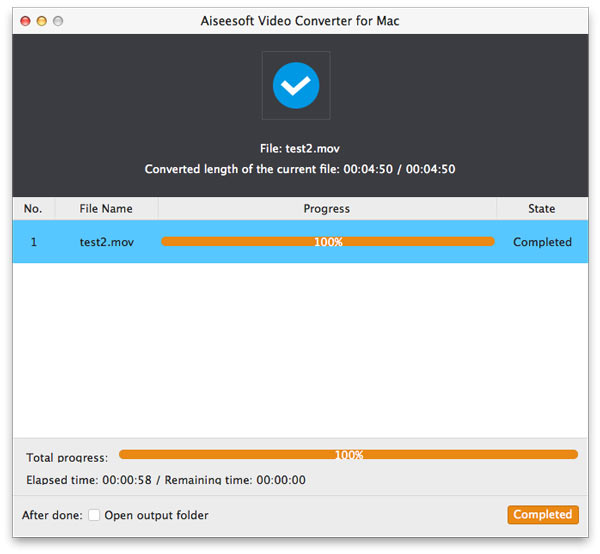
Step 4. Convert VOB to MOV
Finally, click “Convert” to begin VOB to MOV conversion. After a successful conversion, you can enjoy this MOV file on your Quicktime Player directly.

convert to mov

d_win d_mac

More Guides you may be Interested in:

How to Convert MTS to MOV for QuickTime Player on Mac

How to Convert DVD/Video to MP4

How to Burn MP4/AVI to DVD Disc/Folder/ISO

How to Burn Movies/Videos to DVD on Mac and Windows

How to Burn Videos to Blu-ray Disc/ISO File/Folder

How to Burn Videos/Movies to DVD Disc/Folder/ISO

How to Convert DVD Movies on Samsung Galaxy

How to Rip and Convert DVD Movies for iPhone/iPad

How to Convert MTS to MOV for QuickTime Player on Mac

Hi. I’m new in Mac. I have a MacBook Pro and a Panasonic digital camera that films great HD videos with MTS format. The QuickTime Player doesn’t support MTS videos, are there any converter tools to convert the videos to a supported format that can be able to watch these videos on QuickTime player on my Mac? Thanks in advance.Any ideas are welcomed.

What is MTS/M2TS File
The .mts/.m2ts file format is used for the HD recordings of some Sony, Panasonic, Canon and other AVCHD camcorders. You can use the Picture Motion Browser provided by Sony to play camcorder M2TS videos currently. There are only a few players can play .mts/.m2ts files.

What is MOV File
MOV is a file extension especially developed for Apple QuickTime Player.It can store video, animation, graphics, 3D and virtual reality (VR) content or text. Since it’s an Apple format, it’s widely supported by Mac programs.

Why you need to Convert MTS to MOV on Mac
When you take videos with digital camera, these files are often saved as .mts or .m2ts extensions of the AVCHD format. As a Mac computer user, you might have encounter this depressed situation: some MTS videos files are unplayable on QuickTime Player on your Mac. So what’s next step? If you want to play MTS video files for QuickTime Player on Mac, you should convert MTS to MOV files first. Convert the format of MTS video files to QuickTime compatible formats like MOV, MP4 and M4V for course. MOV is a QuickTime movie file format that is widely used on Mac system and can be easily edited.To perform this job, you need a media files converter tool for help, which is named DVD Creator + Blu-ray Creator. In the follow passages, you will get the complete solution to help you convert MTS to MOV efficiently and easily.

Convert MTS to MOV or MP4 for iPad, iPhone, iPod and Android

Here, we will introduce a superior MTS to MOV conversion tool – MTS to MOV Converter to you, which provides the best solution to convert MTS/M2TS video to MP4, MKV, MOV, WMV, FLV, AVI and other video formats without any quality loss.. The program also supports the other broadest formats on Apple devices. The multiple and powerful functions always empower you to do this conversion job perfectly. Additionally, it offer for you a simple solution to burn local videos with any formats, downloaded online videos from website, to burn DVD to any video format.After turns MTS to MP4,you can enjoy the converted MP4 videos on any digital devices, such as iPhone, iPad, iPod, Samsung Galaxy S9/S8/S7/S6, Samsung Galaxy Note 8/7/5/4/3, Huawei phone, PSP, PS4, Xbox One, Xbox 360, etc. It is supported by various media player software such as: Windows Media Player, VLC, QuickTime player, etc.

d_win d_mac

MTS Converter Features:

-Convert MTS to other video format
Convert MTS/M2TS file to popular high-definition/standard-definition video without losing quality.

-Edit MTS video file
Edit MTS recordings with ease. You can crop or add personal watermark on MTS video.

-Convert MTS with fast speed
With NVIDIA® CUDA™ and AMD APP acceleration technology, you can convert MTS files at super-high conversion speeds.

Steps to Convert MTS to MOV on Mac

Step 1. Download the MTS to MOV Converter
To begin with, please download the MTS to MOV Converter program on Mac, then installing and run it on Mac.

Step 2. Add MTS file(s) from Camcorder
When you running it on the computer, click the “Add Files” to load MTS file or the whole AVCHD folder.

load mts videos

Step 3. Select MOV as the Output Preference
You will find different optimal MOV formats from the program. For instance, when you need to convert MTS to Avid DNxHD 1080p (.mov), you can find and select it from the list on the left interface based on specific categories or by entering “MOV” in the search box on the bottom.

choose mov format

Step 4. Convert MTS File(s) to MOV
When you choose the desired format, you can also personalize the video file by adjusting the video brightness, saturation, hue and contrast. After setting all settings, click the “Convert” button to convert MTS file to MOV.

convert mts video to mov

It will done in a few minutes, please be patiently. Once the conversion is finished, you can directly play the output MOV file for QuickTime Player on Mac.

Download the MTS to MOV Converter – Video Converter Ultimate and try to Convert MTS File(s) to MOV on Mac.

d_win d_mac

More Guides you may be Interested in:

How to Convert DVD/Video to MP4

How to Burn MP4/AVI to DVD Disc/Folder/ISO

How to Burn Movies/Videos to DVD on Mac and Windows

How to Burn Videos to Blu-ray Disc/ISO File/Folder

How to Burn Videos/Movies to DVD Disc/Folder/ISO

How to Convert DVD Movies on Samsung Galaxy

How to Rip and Convert DVD Movies for iPhone/iPad

Convert MTS to MOV

How to Convert DVD/Video to MP4

I want to convert some favorite DVDs to MP4 format, to watch them on my iPhone 8 conveniently. Any software help me do this? Please send me some advice.

I have bought a Lady GaGa DVD MV,now I want to watching this MV on my Samsung Galaxy S8,the Galaxy S8 supports .MP4 format,how can I convert DVD to MP4 for Samsung Galaxy S8?

In the past days, we like to watch the DVD videos via DVD players. As we know, playing videos on DVD player is a traditional way for entertainment. Compare to the old way, there are some newer ways to view videos in our daily life. For instance, people like to download/take videos and transfer these videos for watching on mobile device, iPhone, iPod or Android tablet. Which make more fun in life and make us enjoying videos more convenient.

If you have some favorite videos download on the Internet or if you have some previous home-made DVDs videos which means a lot for you, such as your wedding, graduation ceremony, dinner party or your kid’s birthday, etc,. you may be want to play back these wonderful moments on your computer or other mobile device for watching freely. In fact, there are more than one way to convert DVD discs to MP4 that compatible with a range of mobile devices, and to help out here’s our guide on how to convert DVD/videos to MP4.

Rip DVD Videos to MP4 with Video Converter

Want to convert DVD to MP4 videos? We will show you the best way to do that. Here we sincerely recommend a professional DVD to MP4 converter to help you rip DVD to MP4, which named DVD/Video to MP4 Converter. It is an excellent DVD creator tool to convert DVD/videos to MP4 or other formats, convert MP4 videos to DVD or blu-ray discs with great quality. To sum up, this amazing DVD creator can be used to burn videos with any formats to DVD or Blu-ray discs easily. What’s more can it do for you? Save time to download videos and movies from online video websites, edit video file before burning your DVD, add audio track and subtitle as you like. Let’s check the steps to convert DVD to MP4.

d_win d_mac

Simple Steps to to Burn DVD to MP4

Step 1. Launch DVD Creator + Blu-ray Creator
First of all, please launch /video-converter-ultimate/. After downloading, install and run it on your PC/Mac.

dvd creator home page

Open the DVD drive on your computer and insert the DVD disc to it. DVD drive will automatically detect your DVD disc soon.

Step 2. Load DVD on the Computer

dvd loaded

Back to the interface of program, click “Load Disc” on the top bar and then the DVD file will be loaded to the program. This powerful software provides two loading modes for you to choose from, Navigation Mode and Parser Mode. You can select the suitable one according to your need.

Step 3. Choose MP4 Format for Conversion
After loading, all the available DVD files will be displayed in the interface of program. Mark the DVD files you want to convert and then click “Profile” to choose “MP4” format as the output video formats.

output format mp4

Step 4. Convert DVD to MP4 File
Click “Browse” button to select the destination folder for the converted MP4 videos. When all the preparations are done, click “Convert” button to start to convert DVD to MP4.

burn DVD to MP4

The selected DVD will be ripped to MP4 with high video quality after a few minutes. After that, you can enjoy the DVD contents on PC/Mac and any compatible mobile device freely.

d_win d_mac

More Guides you may be Interested in:

How to Burn MP4/AVI to DVD Disc/Folder/ISO

How to Burn Movies/Videos to DVD on Mac and Windows

How to Burn Videos to Blu-ray Disc/ISO File/Folder

How to Burn Videos/Movies to DVD Disc/Folder/ISO

How to Convert DVD Movies on Samsung Galaxy

How to Rip and Convert DVD Movies for iPhone/iPad

How to Convert YouTube FLV Video to Samsung Galaxy

How to Play Apple Music on Amazon Echo

I just got Amazon echo and I am looking for an answer online but couldn’t get the perfect one. Is it possible to play Apple Music on Amazon Echo? (I know there’s no official Apple support for it, I’m wondering if there’s a skill for it)

What is Amazon Echo? It’s a smart speaker developed by Amazon.com, is the key to making your home a smart home, play music on it with high quality. If you want to stream some Apple Music tracks on it, then you can’t miss this post which will show you a great method to enjoy Apple Music on Amazon Echo without limits.

apple music amazon echo

Apple has its online music streaming service – Apple Music, and Amazon has its own online music streaming service – Amazon Music unlimited. However, you may encounter with the situation that: you have purchased an Amazon Echo, but you are an Apple Music subscriber, how to stream Apple to Amazon Echo easily? Since Apple Music is DRM-protected, you can’t play Apple Music on Amazon Echo directly. On the other hand, you can’t freely transfer Apple Music to other audio players even you have “downloaded” for playing offline due to the DRM-protected. How to play Apple Music on Amazon Echo without limits? Here is the solution.

Remove DRM Protection for Playing on Amazon Echo

Generally,if you can remove the DRM from Apple Music, then you can upload them to Amazon without limitation any longer. Apple Music Converter is the tool which you are looking for. It supports an ideal solution for converting DRM-protected M4P Apple audio files, then you can freely play the converted Apple Music on Amazon Echo after syncing. In this way, you can convert Apple Music to any common audio files, such as, MP3, M4A, AC3, AIFF, AU, FLAC, M4R and MKA. Once the conversion is completed, you can play back the converted Apple Music on any compatible audio players, for example, Android device, iOS device, PSP/PS4/PS3, Xbox One, MP3 player and computer.

d_win d_mac

How to Sync Apple Music to Amazon Echo

Step 1. Download and Install Program on Computer
Apple Music Converter is available for both Mac and Windows users. Download and install the correct version that match your computer, then run it on computer.

Step 2. Select Apple Music M4P songs
After the program is running, you will find it automatically loads the whole iTunes Library.

If you added Apple Music songs/albums to iTunes library, click “Music” on the left side and sort all songs by Type. Check the songs marked with “Apple Music AAC audio file“.

If you added Apple Music playlists to iTunes library, click the playlist name on the left side and all songs in it will be displayed on the main interface. Check all of them or the ones you want to remove DRM from.

select music to convert

Step 3. Remove DRM Protection from Apple Music
Click “Convert” button to start removing DRM from Apple Music, converting Apple Music M4P songs to free common files. Apple Music Converter converts M4P to DRM-free format at 16x playback speed and supports multiple output formats: MP3, M4A, AC3, AIFF, AU, FLAC, M4R and MKA. You can also customize output songs bitrate and sample rate as you like. Click “Options” button to customize filename format, which can contain Title, Artist, Album, TrackID and DiskID.

setting the parameter

remove DRM from Apple music

d_win d_mac

Now the Apple Music have been converted to DRM free music files, you can upload the converted Apple Music songs to My Music on Amazon from your computer. (Amazon.inc supports free users up to 250 songs storage to My Music.)

How to Upload Converted Apple Music to Amazon Music

Step 1. Run Amazon Music app on your PC or Mac and log in your ID, then drag and drop files from your computer into the Upload selection in the right sidebar under Actions.

Step 2. Select My Music > Songs > choose Offline filter in the right navigation sidebar and click the “upload” icon to choose the converted Apple Music files or folder to upload. And now you can start uploading.

upload music to amazon player

After the above steps, you can play these songs on your Amazon Echo without limits.

More Apple Music Guides you can Check:

How to Save Apple Music Songs to SD Card

How to Play Apple Music on MP3 Player

How to Download and Listen to Apple Music Songs offline

How to Get Apple Music on PS4

How to Copy Apple Music Songs and iTunes Playlist to USB Stick

How to Convert iTunes M4V Videos/Movies to MP4

How to Burn MP4/AVI to DVD Disc/Folder/ISO

[Summary]:Want to burn MP4 and AVI to DVD disc or DVD folder/ISO? Here is the best MP4/AVI to DVD burning software for Mac and Windows for you to burn MP4 video and movie to DVD in high quality for playing on any DVD players.

burn mp4 and avi to dvd

How to burn MP4 video to DVD disc
“I have a lot of MP4 Movies on my GoPro Hero 5,The GoPro specs page simply say that it’s “H.264 codec, .MP4 file format” and lists various resolution possibilities (e.g. 1080p @ 30 FPS; 720p @ 60 or 30 FPS),I want to burn GoPro MP4 video to DVD disc and send it to my friend,any HD MP4 to DVD converter for me edit GoPro MP4 video files and burn to a DVD disc on Mac?” – Jodiy

How to Burn AVI Video Files to a Playable Video DVD on Windows 10?
“Last week I had took lots of very memorable video in my wedding,these videos are very important to me, but it occupy a lot of my memory space on the computer. My wife told me that I can burn these AVI videos to DVD disc for backup,but I have upgraded to Windows 10 and don’t know how to burn AVI to DVD on the new operating system,I want to know how to burn AVI videos to DVDs losslessly on Windows 10?” – Sammi

MP4 and AVI both are popular video format compatible with a majority of modern gadgets. However, some home DVD players, especially old ones, don’t accept MP4 and AVI movies.If you have downloaded movies from Youtube to MP4 or had take some videos in MP4 format by mobile phone, iPhone/iPad, GoPro, digital camera, Panosonia camcorder and other mobile devices, it’s a great idea to burn MP4 files to a DVD disc. Then you can watch the bruned video on your DVD player with families.To create a DVD disc, DVD folder or DVD ISO for backup further burning from AIV or MP4 files,what you need is a powerful MP4/AVI to DVD burner to help you convert MP4, AVI to the DVD disc.

DVD Creator + Blu-ray Creator for Windows and Mac helps you to create and edit DVD files in an easy way,you can not only use this MP4 to DVD burner, AVI to DVD burner to burn DVDs losslessly from MP4, AVI files and other popular format like WMV, FLV, MP4, MKV, M4V, MOV;but also burn MP4, AVI, MOV, WMV and more to Blu-ray disc/Blu-ray folder/ISO easily.Besides,before burnING MP4, AVI movie to DVD or Blu-ray disc,you can also add and choose menu, background music and title to the DVD you will create.

d_win d_mac

Supported OS: Windows 10/8/7/XP/Vista, Mac OS X 10.12 (Sierra), 10.11, 10.10, 10.9, 10.8, 10.7, 10.6

How to Burn MP4 to DVD in the Easiest Way

Let’s teach you the easy guide to create a playable disc of high quality from any MP4 files or movies for example,and the watch it on your car DVD player and TV set including Sony or car multimedia system.

Step 1.Launch DVD Creator + Blu-ray Creator
To burn a DVD on Windows or Mac computer,you need to download and launch DVD Creator + Blu-ray Creator for Windows or DVD Creator + Blu-ray Creator for Mac at first.

launch DVD Creator

Step 2.Add MP4 or AVI Video Files to the Software
Then click “DVD Disc” and “Add Files” button to load your MP4 video or AVI video to the software,you can import several video files to the program at once. If you want to create a DVD disc from a DVD folder/ISO files,please click the down arrow and choose “Add Folder”, then the whole folder will be loaded at one time, even there is file with other format.

Step 2.Add MP4,AVI File

Tips:You can also burn videos to Blu-ray Discs,just click “Blu-ray Disc” in this step if you need.

Step 4.Insert a Blank DVD disc
Insert a blank (empty) DVD into the DVD burner drive of your computer.

inset DVD disc

Step 3.Edit Video before Burning
Edit MP4 Video Files
Before burning, you can adjust the visual effect, add watermark and make other adjustments to edit the video file before burning it to DVD.

edit mp4 video

Rotate Media Files
Click the left or right arrow to choose a DVD menu. You can edit the DVD menu in detail. Or if you don’t need a menu, just check No Menu.Before burning MP4 to DVD,you can preview the video if you like.

rotate mp4 video

Step 4.Start to Burning MP4 Video to DVD Disc
Finally,just click the “Burn” button on the right bottom to burn your MP4 video(s) (movie(s)) to DVD disc.

burn mp4 to dvd

This is all the simple steps you need to burn MP4 to DVD disc, easy, right? here you can also convert DVD to MP4 with simple steps.

d_win d_mac

When MP4 to DVD burning completes, the DVD disc will eject automatically. You may insert the burned DVD disc directly into a normal DVD player to enjoy on TV with home DVD player hooked up.

Tips: Only four easy steps directly burning AVI files and MP4 files to DVD disc in Windows or Mac computer, you can also use the program to burn MP4, AVI to Blu-ray disc,and create DVD folder or ISO image file for backup or further burning at ease.In additional,if you want to convert, enhance, edit, download video and convert homemade DVD to any format,you can try this Video Converter Ultimate.

Related Article

How to Burn Movies to DVD on Mac and Windows

How to Burn Videos to DVD Disc/Folder/ISO
How to Rip DVD Movies to Samsung Galaxy

How to Convert DVD Movies for iPhone/iPad

Remove DRM from iTunes Movies and Convert M4V to MP4

How to Recover Deleted Files on Computer

[Summary]: Permanently recover deleted files or folders in Windows 10/8/7/XP or Vista computer? Just take it easy, follow the most solution here to recover permanently deleted files from computer with Data Recovery software in simple clicks now.

Lost deleted files on computer is a common situation that you may encounter in daily life, like the documents, photos, videos, E-mail, and others. You may click “Delete” button to delete the files then you feeling regret and want to get it back but have no ideas. If you can’t find your files in the Recycle Bin or you have emptied the Trash Box, and you don’t have a proper backup system in place- something you should fix in case this happens to you again, then you need a dedicated file recovery tool. One thing I should note you is that:If you continue to use the device, it might write some new data and completely erased the contents of the old deleted files. In this case, the chance of a successful data recovery is decreased. The situation can become much more trouble when you try the way to restore the deleted files on computer.

Data Recovery – Restore Deleted Files on Computer

If you want to recover the deleted files on computer without backup, you may need to try this practical software called Data Recovery. It is a good and easy recovery tool is strongly recommended. It’s built to recover almost all deleted/lost files like photos, documents,emails, audio, videos and more from computer or any other removable storage media, like external hard drive/flash drive/USB drive, memory card, digital camera. It can rescue your data lost due to deletion, formatted partition, hard drive problem, RAW hard drive, crashed computer or other reasons. Several data recovery solutions are available: Deleted Files Recovery, External Device Recovery, Recycle Bin Recovery, Formatted Disk Recovery, Lost Partition Recovery, Virus Attack Data Recovery, System Crash Data Recovery, and All-Around Recovery.

d_win d_mac

How to Recover Permanently Deleted Files/Folder on Computer

Step 1. Run Program and Select a Recovery Mode
Firstly, please run Data Recovery program on the computer, and select “Deleted File Recovery” mode. The option can help you recover files that are deleted accidentally, automatically due to a power failure, or by pressing Shift + Del.

select a recovery mode

Note: You can choose “All-Around Recovery”, it is a deeply scan and recovery mode for deleted files on device, it supports to recover deleted data caused by any curses.And this mode will cost you more times. Normally, we suggest you try the first mode, if it is not work for you, you can try the other.

Step 2. Select a Location to Scan Data
Please select a hard disk drive(Disk C, D, E, F, G) where you lost your data and click “Start” button to begin scanning data on your computer.

select a location to start finding data

Step 3. Scan the Hard Disk of your Computer
Now the program will start a quick scan. Once it is completed, you could preview some files. If you can’t find your lost files you can try “All- Around Recovery” on the left-bottom from the screen.

scan computer hard disk

Deeply Scan with All-Around Recovery Mode:

all around recovery

Step 4. Preview and Recover Deleted Files from Computer
Lastly, you are allow to preview the recoverable files before the recovery. You can select the targeted files and restore your files by clicking “Recover“.

recover deleted files on pc

Note: Please don’t save the files into the hard disk where you deleted or lost the data.

d_win d_mac

Related Articles:

How to Recover Deleted Photos on Computer

How to Recover Deleted Photos from Samsung Galaxy

How to Recover Deleted Photos on Android Phone

How to Recover Deleted Photos from iPhone

How to Recover Deleted Photos from iPad

How to Transfer Photos from Computer to Mobile Phone

Recover Deleted Files on Computer

How to Recover Deleted Contacts from OPPO R11/R11s

There are three big changes coming with OPPO’s new R11s compared to this summer’s R11. The first is the 6-inch, 18:9 aspect ratio display. There’s very little bezel, though the edges aren’t quite as curved as they are on the Samsung Galaxy S8. Overall, this new display looks great. If you look closely, you can see what OPPO is calling the starry night effect, where there is a slight red gradient at the top and bottom of the glass. It’s a subtle touch, but it makes the phone feel more like a single piece of hardware.

OPPO has win a certain amount of customers for its solid quality. Most of mobile users keep important information like phone number, contact name, e-mail address, Company name, websites, etc on their phone. Contacts are probably the most important data, because the basic function and the purpose of the invention of mobile phones are to make calls. So it is terrible to lost contacts from your OPPO phone, especially when you have never saved contacts to Gmail, Outlook, Yahoo, cloud or any other places. This article aims to face the issue that losing contacts on OPPO phone, since many reasons can cause data loss.

Restore Deleted Contacts from OPPO R11 Directly

Android ToolKit Android Data Recovery enables you in recovering contacts from OPPO R11/R11s that has been lost for any reasons, such as unintentional deletion, Android system updated, restore device to factory reset restoring, or more. The software will scan the phone automatically for any lost files, you are allow to preview data before recovery. Moreover, Android ToolKit enables to backup & restore Android, extract data from broken Android device, etc,. This program works well for almost all Android models and all Android OS, including the latest Android 8.0.

OPPO phone supported by this program: OPPO phone supported by this program: R11/R11s, R9/R9s, F1/F1s/F1 Plus/F3/F3 Plus, etc,.
File type supported by this program: Contacts, SMS, Photos, Videos, Audio, Call log, WhatsApp Messages, Documents and more.

d_win d_mac

How to Restore Deleted Contacts from OPPO R11/R11s

Step 1. Run the Program and Connect OPPO Phone
Firstly of all, please download and run the Android ToolKit – Android Data Recovery on the computer. Then you will see different options displayed on the program and then select “Android Data Recovery” function to go on.(Here “Broken Android Data Extraction” and “Android Data Backup & Restore” are available.)

Android ToolKit home page

Connect your OPPO R11/R11s phone to the computer using a USB cable. Make sure USB debugging is enabled on your phone.

connect OPPO phone

Then you should allow the program detecting your OPPO R11/R11s phone to the computer, simply tap “OK” when you get pop up message on your phone, and ensure USB debugging on your phone.

allow to detect OPPO

Step 2. Select Contacts File to Scan
In this step, the program will detect all recoverable types of data on your device. You can select the specific files you want and detect them by ticking the “Next” button to go on. For contacts recovery, you should click “Contacts ” file.

select gallery file to scan

You’ll get a window as follow on your device after your phone is detected by the program, please click “allow” for the program scanning and analyzing the deleted data from OPPO R11/R11s.

allow scan OPPO phone

Scanning will begin. Please wait patiently and don’t interrupt the connection between the phone and computer until the scan is completed.

scan OPPO for deleted data

Step 3. Preview and Restore Deleted Contacts from OPPO Phone
Lastly, you can preview all recoverable data from the list of program after the scanning process finished. Choose the contacts you want to restore under “Contacts” file and then saving them on the computer by clicking “Recover” button.

recover deleted contacts from OPPO R11

d_win d_mac

Related Articles:

How to Recover Deleted Files from OPPO R11/R11s

How to Recover Deleted Photos from OPPO R11/R11s

How to Recover Deleted Photos from OPPO Phone

How to Root Android on Computer without Data Loss

How to Manage Android on Computer

How to Stream Apple Music to Android

How to Burn Movies/Videos to DVD on Mac and Windows

Summary: Sometimes, you want to burn movies/videos to DVD on Mac or PC computer. To keep those video memories, edit and burn movies/videos to DVD is definitely the best choice since DVD discs are long lasting and can be enjoyed on any DVD player or TV conveniently. How to burn a DVD on Mac or Windows? Here comes the question, just keep reading to get easy steps.

Suppose you purchased/downloaded movies or videos on the Internet, for example, iTunes store, Youtube and want to watch it in your DVD Home theatre system. But the main problem in doing so is that how to burn the videos to DVD? Burning videos to DVD will provides you a more fast and convenient way to enjoy the videos on DVD player or TV for more entertainment. Searching “how to burn a DVD” on the Internet, there are several solution to burn DVD on computer. For intances, you can burn a DVD in Windows Media Center, or use a free DVD authoring program like DVD Flick to burn movies to DVD. You can achieve the goal to burn DVDs with these methods, however, you may take too much efforts with the confusing steps.

Burn Movies/Videos to DVD on Computer Efficiently

Here I highly recommend you a very high comment DVD burning tool – DVD Creator + Blu-ray Creator. This is a professional tool that works functionally to burn local movies/videos to DVD on Mac and Windows or burn local movies/videos to Blu-ray disc/ISO file/folder with its high quality. With the user-friendly interface, you can easily follow the guide to burn movies/videos to DVD disc/ISO file/folder with any formats, including DVD-R, DVD+R, DVD-RW, DVD+RW, DVD+R DL, DVD-R DL, DVD-5, DVD-9, etc,. Besides this main features, this program allows to download online videos, add audio/subtitle before burning, edit videos before burning. Once the efficient burning process is finished, you can play the DVD on any DVD player or TV. You can also send the DVD discs to family and friends to share your life and memory with them.

d_win d_mac

Main Features of DVD Creator + Blu-ray Creator:
-Easy to burn videos to DVDs.
-Easy to burn videos to Blu-ray discs.
-Create DVD/Blu-ray from various video formats.
-Download online videos on the Internet.
-Rotate, clip, crop, effect, adjust your videos before burning.
-Add audio track and subtitle before burning.

How to Burn Movies/Videos to DVD on Computer

Step 1.Insert a Black DVD Disc
Insert a blank DVD disc to the DVD drive of Mac or Windows computer.

inset DVD disc

Step 2. Add Media File(s) for Burning
Run DVD Creator + Blu-ray Creator on computer after installing it. Click “Add Media File(s)” to add one or more video files to it.

dvd converter home page

Tips: You can click the edit button in the main interface of program to enhance the videos before burning to DVD. Click “Next” to edit DVD menu. Click “Next” to get the DVD burning settings.

Here you can make the DVD settings as the following:

• Select create video to DVD disc or DVD folder/ISO file.

• Choose the TV standard as NTSC or PAL.

• Make the video quality as Auto, Low, Medium or High.

• Play the DVD file from the first title or menu, or with or without loop all titles.

rotate video

edit video

Step 3. Burn Files to DVD on Computer
After making all settings, click “Start” to burn your videos to DVD.

burn video to dvd

DVD Creator + Blu-ray Creator provides you the best solution to burn a DVD disc as easy as possible. To make you get better burning experience, you can also find other advanced features, such as video editing, DVD menu creating and more.

d_win d_mac

More Guides you may be Interested in:

How to Convert DVD Movies on Samsung Galaxy

How to Rip and Convert DVD Movies for iPhone/iPad

How to Transfer Videos between Samsung and iPhone

How to Convert YouTube FLV Video to Samsung Galaxy

How to Burn Apple Music to CD

Ultimate Solution: How to Play Apple Music on PS4

Summary: Is there a way to get Apple Music to Sony PS4? If you have the same question, you will get a solution here. While more and more people like to play games on PS4, Sony added a new feature for PS4 – allowing users to play music files on PS4 while playing games on it after transferring. This article is going to shows you how to sync Apple Music files to PS4 for playing freely.

As we know, PS4 is specially designed for playing games rather than enjoying music. However, considering to make users get better enjoyment while playing games, Sony added a new feature for PS4. That’s allowing users to play music files on a USB drive which connects one of the available ports on the PS4 and even play them while we are playing games as well. Your PS4 can even play unprotected local music files in MP3 or AAC (M4A) formats in the background while you play a game.

Why We Can’t Play Apple Music on PS4 Directly
The reason why Apple music will fail to play on PS4 is that it matters that Apple Music is not available for PS4 since Apple Music is DRM-protected. It means PS4 can’t play Apple Music songs directly. So how to stream Apple Music to PS4 for playing freely? Here, I’ll be showing you the most easy methods to stream Apple Music to PS4. The only way to sync Apple Music to PS4 for playing without limits is removing DRM from Apple Music files. Otherwise, there will be no way to get it work.

Remove DRM Protection from Apple Music for Syncing on PS4

Let’s start with a powerful Apple Music DRM Removal – Apple Music Converter. This is one of the best Apple Music converter tool I have found. This terrific software let’s you remove DRM from Apple Music, convert protected M4P Apple Music to normal MP3 or other common formats with 16X conversion speed and lossless quality, then you could freely sync and play back the converted music songs on PS4. More importantly, Apple Music Converter enables to play the converted music files on any compatible devices without limits after transferring, including PS4/PS3/PSP, Xbox One, Android device, iOS device, MP3 playing, and computer.

d_win d_mac

How to Stream Apple Music to PS4

Step 1. Open Apple Music Converter
iTunes will be opened along with this software and load all iTunes files after running the program on computer.Then you can see the main interface as below. From the “Playlist” section, you can open one that contains your Apple Music tracks and then choose the Apple Music you want to remove DRM from.

select music to convert

Step 2. Choose Output Format
The audio format supported by Sony PS4 are MP3 and AAC (M4A). You could choose either one from the output format list. You can also adjust the output quality as your requirement.

setting the parameter

Step 3. Start Apple Music Conversion
Finally, click on “Convert” button to start converting Apple Music to MP3 or M4A format. You can find the converted Apple Music files in your output folder after a few minutes.

remove DRM from Apple music

d_win d_mac

Step 4. Sync Apple Music to PS4 for Enjoying

1) Prepare a USB drive.

2) Create a folder called “Music” on the USB storage device on your computer. Then copy the converted Apple Music from your computer to this folder.

3) Reject the USB and connect it to a USB cable of PS4. Now you can see a “Media Player” icon in the Content Area. The music player icon will move to the right when a new application is started.

4) Then select the track you want to play, press “X“. That’s all.

More Apple Music Guides

How to Download and Listen to Apple Music Songs offline

How to Play Apple Music on iPod Nano and iPod Shuffle

How to Save Apple Music Songs to SD Card

How to Play Apple Music on MP3 Player

How to Copy Apple Music Songs and iTunes Playlist to USB Stick

How to Convert iTunes M4V Videos/Movies to MP4

How to Recover Deleted Photos from OPPO R11/R11s

News about OPPO R11/R11s
Oppo R11s and R11s Plus full review – face recognition login, improved fingerprint sensor as handsets ape Apple iPhone X. The first thing that strikes you with the new R11s family is the new bezel-less design. Gone is the familiar front-facing fingerprint reader, which has been vanquished to the back for a larger display and a high screen-to-body ratio. In effect, the R11s is a 6-inch smartphone while the R11s Plus is the R11 Plus with a larger 6.4-inch screen. Elsewhere, both devices sport a gorgeous AMOLED screen, sleek aluminium curves, and a beefed-up dual camera.

Advancement in technology has affected almost all facets of human lives. Nowadays, people like to take photos to record meaning moments and saved on mobile device in order to check it at anytime. There are different brands of smart phones have been introduced into the market and one of the most trending brands of smart phones is the Oppo mobile. The most popular products produced by this China based “OPPO” manufacturer are – Oppo R11, R9s and F3. Oppo has been featured with its good image & video quality features. This is why people that have used this product before always like to keep it.

Photos Lost from OPPO Phone & How to Recover

One of the depressed affair most people using Oppo smart phone face is losing meaningful photos in the camera. You may delete some important photos carelessly, or the files get missing after Android OS update,factory reset restoring, etc,. These days data loss has become common and once you lose data you must be look for solution on how to get back deleted data from Oppo Android phones. Well, you can restore all those deleted data with the help of powerful Android ToolKit – Android Data Recovery tool.

If you lost previous photos from OPPO Android devices then without any backup, you can use this amazing tool and get the satisfied result. Android ToolKitAndroid Data Recovery is current one of the most powerful Android data recovery programs to recover deleted files from Android smartphones and tablets. With using this program, you can easily restore deleted photos from OPPO R11/R11s under any data loss situations. Only only photos, but also other types of Android data are supported to be restored, like contacts, messages, call logs, WhatsApp messages, documents and more. This data recovery tool has a very clean and intuitive user interface which requires no special technical skills to use it. Moreover, Android ToolKit has other functions for managing Android data safely, including Android data backup & restore, broken Android data extraction. It works well for almost all Android models, for instances, OPPO R11/R11s/R9s/F3, Samsung(Galaxy S8/S7/S6), Huawei(P10/P9), HTC, Motorola, Lenovo, LG, ZTE, Xiaomi, etc,.

d_win d_mac

How to Restore Deleted Photos from OPPO R11/R11s

Step 1. Run the Program and Connect OPPO Phone
To begin with, please download and run the Android ToolKit – Android Data Recovery on your computer. Then you will see different options displayed on the program and then select “Android Data Recovery” function to go on.(Here “Broken Android Data Extraction” and “Android Data Backup & Restore” are available.

Android ToolKit home page

Connect your OPPO R11/R11s phone to the PC with using a USB cable. Make sure USB debugging is enabled on your phone.

connect OPPO phone

After that, you should allow the program detect your OPPO R11/R11s to the computer, you will get pop up message on your phone, simply tap “OK” and ensure USB debugging on your phone.

allow to detect OPPO

Step 2. Select Gallery File to Scan
Now the program will detect all recoverable types of data on your device. You can select the specific files you want and detect them by ticking the “Next” button to go on. For photos recovery, you should click “Gallery” file.

select gallery file to scan

Then you’ll get a window as follow on your device after your phone is detected by the program. Now please click “allow” for the program scanning and analyzing the deleted data from OPPO R11s/R11.

allow scan OPPO phone

Please wait patiently and keep connection with the phone and PC until the scan is completed.

scan OPPO for deleted data

Step 3. Preview and Restore Deleted Photos from OPPO Phone
In the last step, you can preview all recoverable data from the list of program after the scanning process finished. Choose the photos you want to restore under “Gallery” file and then saving them on the computer by clicking “Recover” button.

recover deleted photos from OPPO

d_win d_mac

Related Articles:

How to Recover Deleted Files from OPPO R11/R11s

How to Recover Deleted Data from OPPO Phone

How to Recover Deleted Photos from OPPO Phone

How to Root Android on Computer without Data Loss

How to Manage Android on Computer

How to Stream Apple Music to Android