All posts by DHZ

Android SMS Recovery: Recover Deleted Text Messages on Android

Summary
How to recover deleted text messages from Android phone? This article teach you how to restore deleted SMS on Samsung Galaxy, Huawei, LG, HTC, Sony, Google Pixel, Nexus, OnePlus, Motorola, Xiaomi, Redmi, Oppo, Meitu, Windows Phone, Sharp phones and others.

Sometimes you may delete important text messages on Android mobile phone by accidentally, or you may lose all the messages after a factory resetting, rooting, flashing ROM, system crash, Android update, etc.

You May Like:

To recover deleted text messages on iPhone, go to Recover Deleted Text Messages on iPhone.

To extract text messages from the broken Samsung phone, check Recover Text Messages from a Broken Screen Samsung Phone.

If your Samsung phone sudden death with black screen, learn Fix your Samsung Phone and Recover Data.

U.Fone android data recovery

How to Recover Deleted Messages from Android?

Actually, the deleted text messages are moved to a hidden space of your phone memory, so the regular file explorer can’t access those deleted data. Therefore, you still have chance to recover the deleted text messages from your Android phone if those deleted data are not overwritten by new data.

Best solution: Android SMS Recovery

If you want to recover deleted messages from Android phone memory, you need to root your Android phone firstly, because root permission for a complete scan to find deleted or lost text messages in the phone memory by some professional Android SMS Recovery software.
Therefore, although there are Android data recovery software claiming that they can recover deleted data from Android phone without rooting, it is actually impossible to get back your deleted/lost data without rooting.

SMS (short message service) messages are more commonly known as text messages. Even though you may think that deleted text messages are gone for good, this isn’t necessarily so. Deleted SMS messages are stored in the Android itself, as well as on the network. But this isn’t permanent. Time is of the essence when retrieving deleted SMS messages on Android phone.

When a text message is deleted on the Android, it doesn’t disappear permanently. First, a copy of it is sent to the network provider. Next, the copy in your phone isn’t permanently deleted, but rather marked as “deleted” by the Android’s internal database. Even though you see the message as “deleted,” it has actually just been moved to a less accessible region of the phone’s memory. However, not even this is permanent, and the message will be automatically deleted later. The exact length of time that the Android will keep a deleted SMS in its memory can’t be precisely determined. However, it will vary, depending on one major factor.

What Should I Pay Attention to Before Recovering the Deleted SMS?

Actually, the deleted text messages still exist in your phone and can be recovered before being overwritten by the new data.

Important: Once you find that some important text messages are deleted or erased, please TURN OFF wireless/mobile data on your phone immediately and Do Not add new data to your phone, you’d better not use your phone to take new photos, create a new data, etc. The most safest measures is to put your Android phone in Airplane mode, then get an Android SMS recovery app to find and recover your deleted messages as soon as possible.

Android SMS Recovery Software: Recover Deleted Text Messages

This Android Data Recovery software not only can help you recover deleted SMS from Android phones, but also enables you recover deleted contacts, photos, videos, audio and WhatsApp messages from almost all Android devices, such as Samsung, Huawei, LG, Motorola, Xiaomi, Redmi, Oppo, HTC, Sony, Google Pixel, Nexus, OnePlus and others.
In addition, the Broken Android Data Extraction function can help you fix bricked, frozen, crashed, black-screen, virus-attack, screen-locked Android phone to normal, and extract text messages, contacts, call logs, photos, videos, audios, WhatsApp, etc. from frozen or broken Samsung phones/tablets.

Detail Features:

  • Directly recover deleted Text Messages and MMS from Android phone, retrieve the sent and received text messages, including the texts, contacts name, phone number, date;
  • Allow you view the deleted text messages before recovery, so that you can recover the deleted messages selectively;
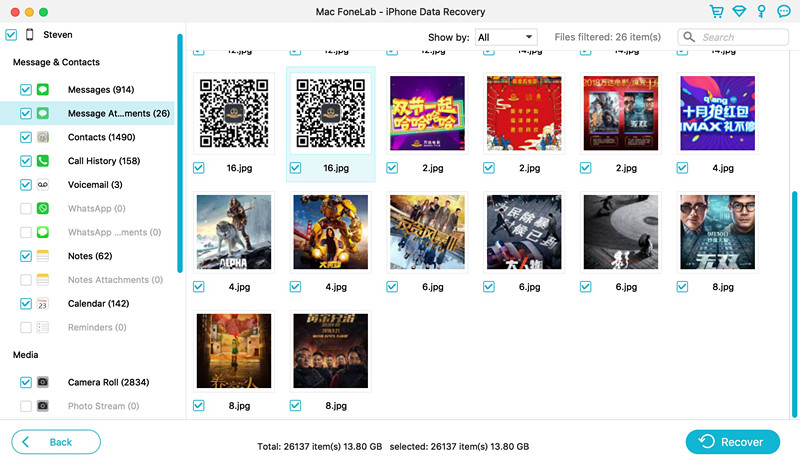
  • Export the recovered messages as HTML, CSV format for you view or print on computer, it can also recover messages attached images;
  • Also can recover lost or deleted photos, videos, audio files, contacts, call history, WhatsApp messages, documents from Android phone and SD cards inside your Android device.
  • Extract SMS from Samsung phone when your Samsung phone’s screen-locked, broken screen, black screen, etc.
  • Recover data from dead/broken Samsung phone internal storage.
  • Fix Android OS to normal like frozen, crashed, black-screen, bank-screen, virus-attack, screen-locked, Samsung logo screen, system bricked, etc.
  • Best data recovery for Samsung Galaxy(e.g. Galaxy S10/S9/Note9/S8/S7/S6/Note 10/Note 9/Note 8), Huawei(e.g. Mate 30/Mate 20/P30/P20), LG, Sony, Google Nexus, OnePlus, HTC, Motorola, ASUS, , Xiaomi, Redmi, Oppo, Meizu and more, covering most Android brands;
  • Works well with all Android OS, including Android 7.0/8.0/9.0
  • Compatible with Windows 10/8/7 and macOS Catalina/macOS Mojave/macOS High Sierra.

It’s completely safe and reliable, please free download the Android Data Recovery software on your Windows PC or Mac and start to rescue your important data.

d_win d_mac
d_win d_mac

Tips: Our software can only be downloaded and used on computer, if you access via mobile phone, please share the page to your Facebook, Twitter or Linkedin, when you use the computer, you can get this page and download the software on computer to have a free trial.

Guide: How to Recover Deleted SMS Messages on Android

Step 1: Launch Android Toolkit on Computer
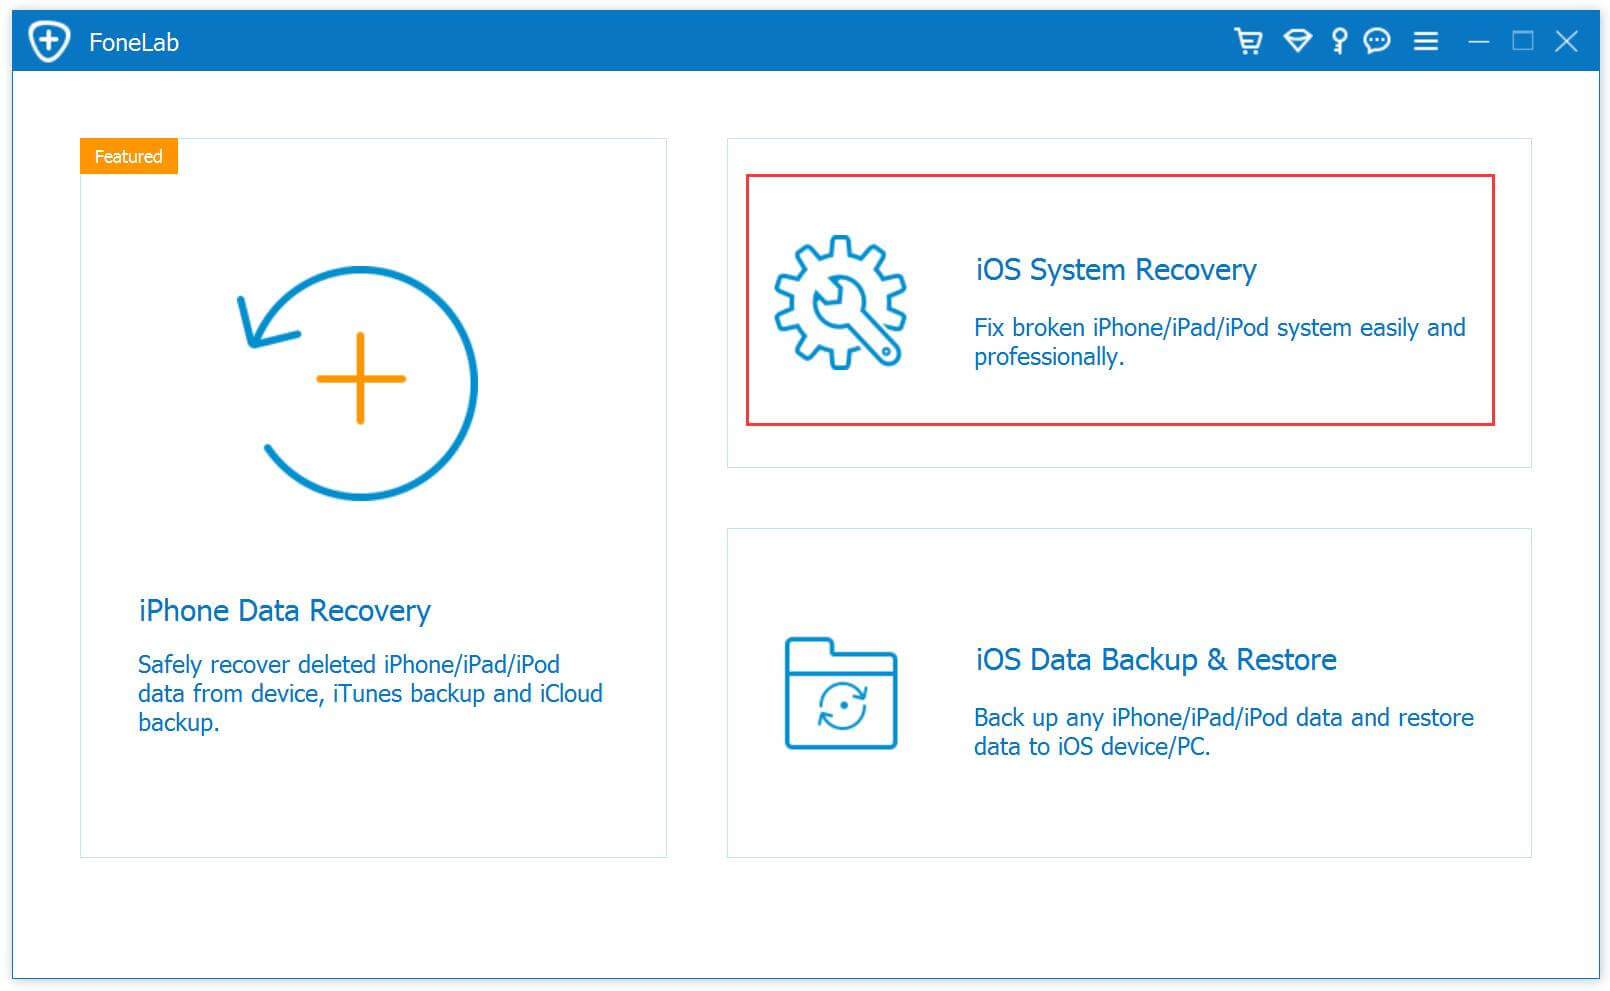
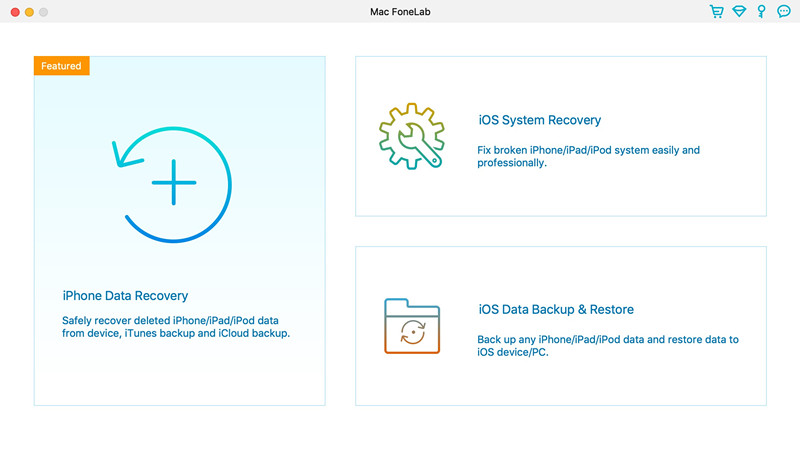
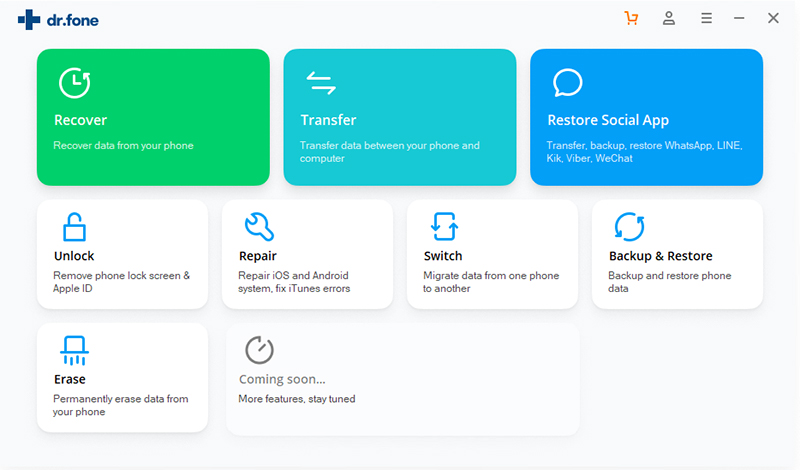
Download the Android Toolkit on the computer, install it, and then run it. You can see there are three main functions: “Android Data Recovery”, “Broken Android Data Extraction” and “Android Data Backup & Restore”.

To recover deleted messages on Android phone, please click on “Android Data Recovery” to continue.

Android SMS Recovery

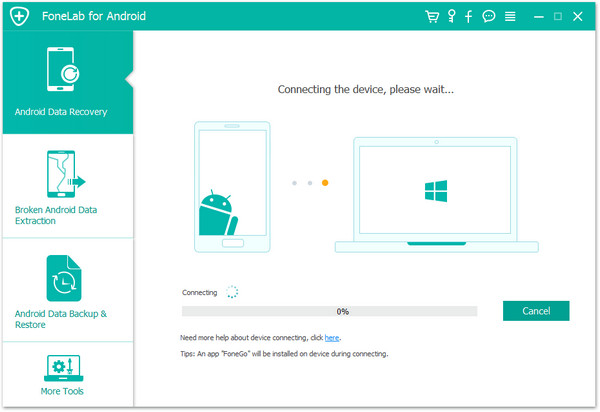
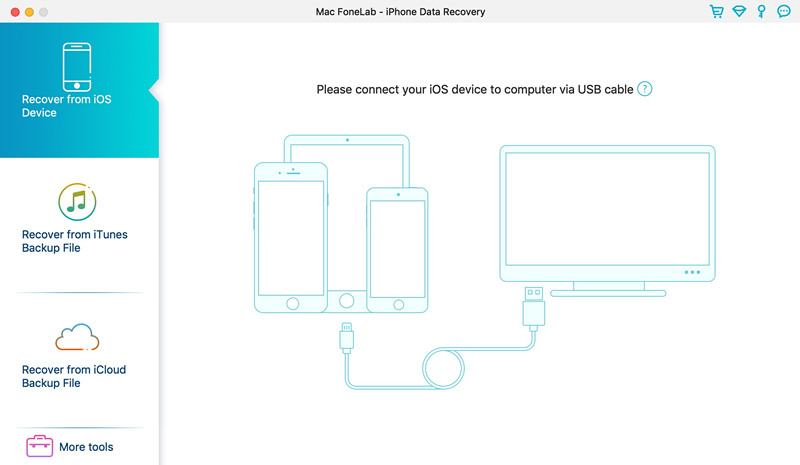
Step 2: Turn on USB Debugging on Android
Connect your Android phone to the computer, and hook up Android phone to the program via USB. Click Allow when prompted on the handset.

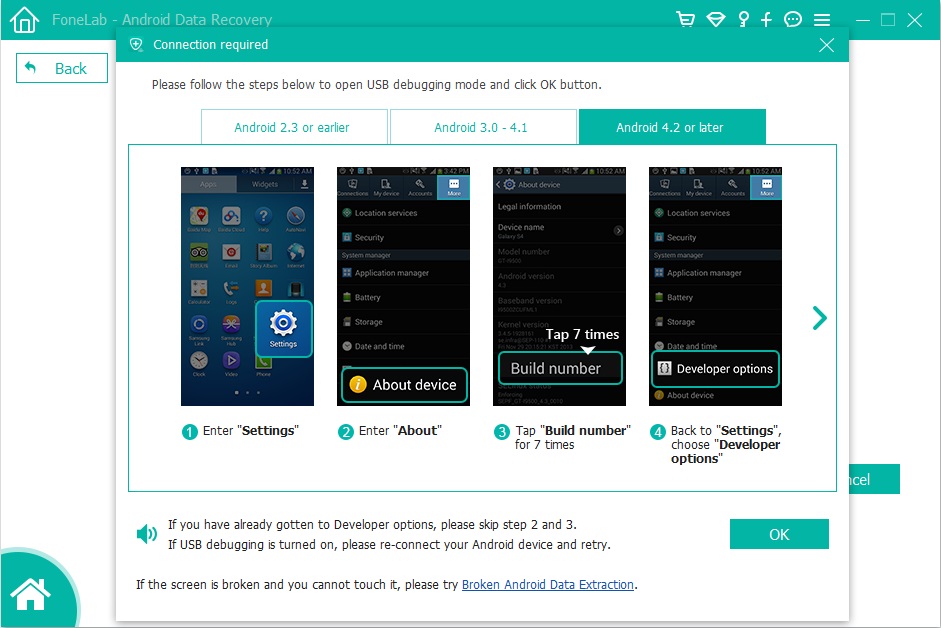
Follow the steps on the screen to enable USB debugging mode on the phone for full connection. For example, if your phone (e.g. Galaxy S10/S9/Note9/S8/S7/S6/Note 10/Note 9/Note 8/HUAWEI Mate 20/P30/P20) is running Android 4.2 or newer (Android 7.0/8.0/9.0):

Enter “Settings” < Click “About Phone” < Tap “Build number” for several times until getting a note “You are under developer mode” < Back to “Settings” < Click “Developer options” < Check “USB debugging”

enable usb debugging

For Android 4.1 earlier, refer to the tutorial on how to enable USB debugging on Android.

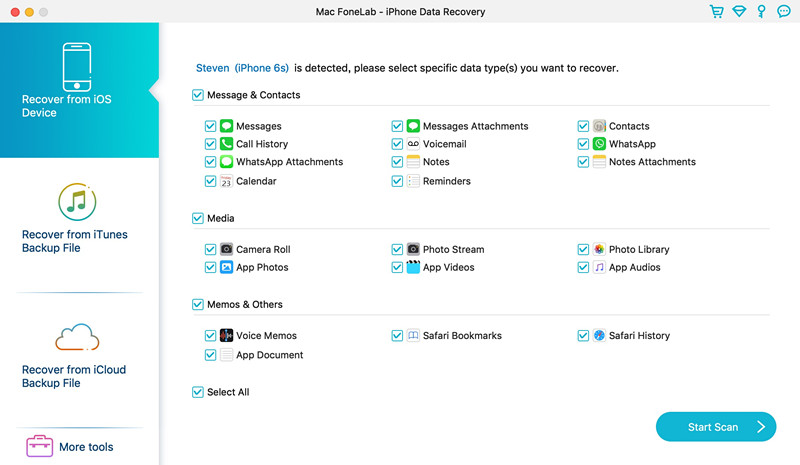
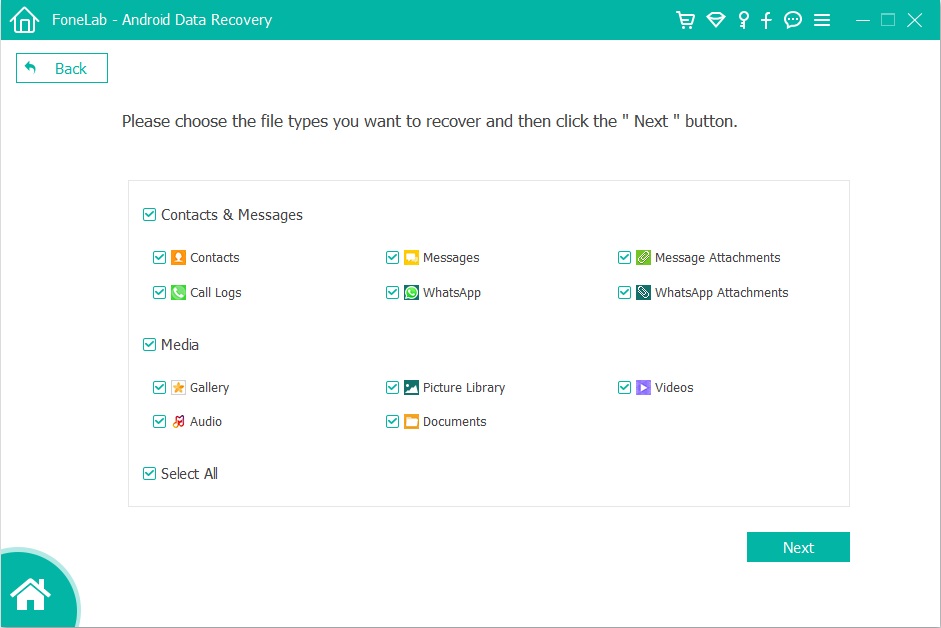
Step 3: Choose “Messages” for scan and recovery
From the next panel, highlight the option for “Messages” and “Messages Attachments“, and press Next button.

select messages to scan and recovery

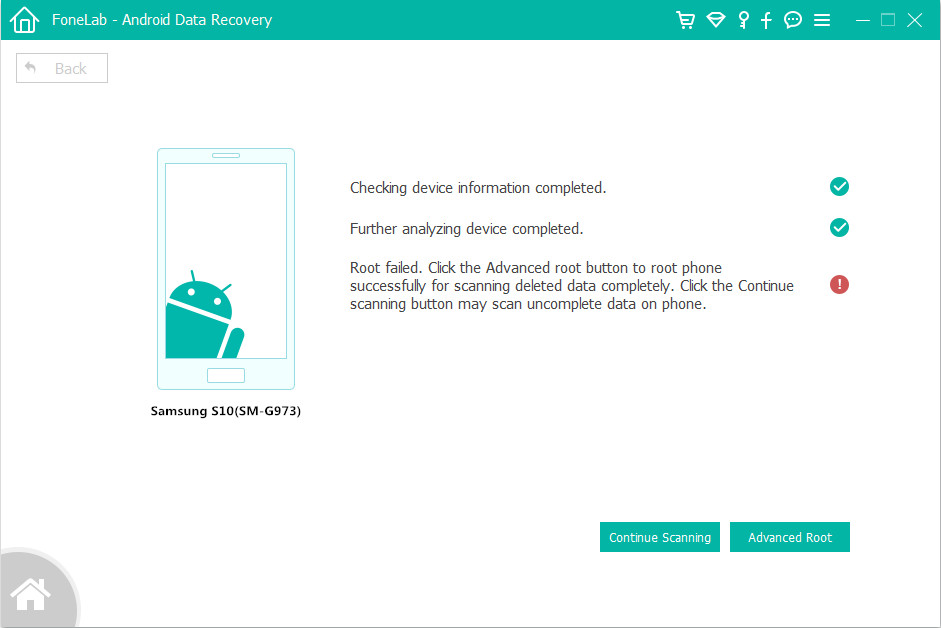
The app analyzes the Android phone, and will need root permission for a complete scan to find the deleted messages in the phone memory.

To do this, click Rooting Tools button. From the opening webpage, download KingoRoot tool to root the Android device.

We also have the guide on this: How to root and unroot an Android device

root Android to deep scan

Step 4: Recover Text Messages from Internal Memory on Android Phone
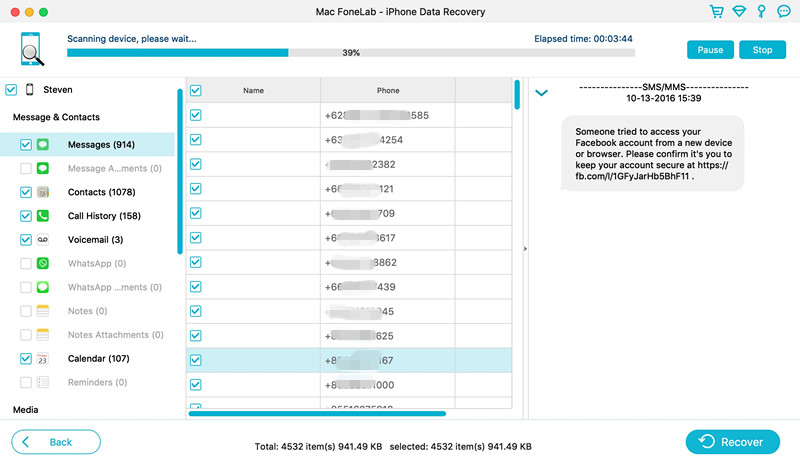
Once rooted, the software continues scanning the deleted data from Android phone. Leave it do its business.

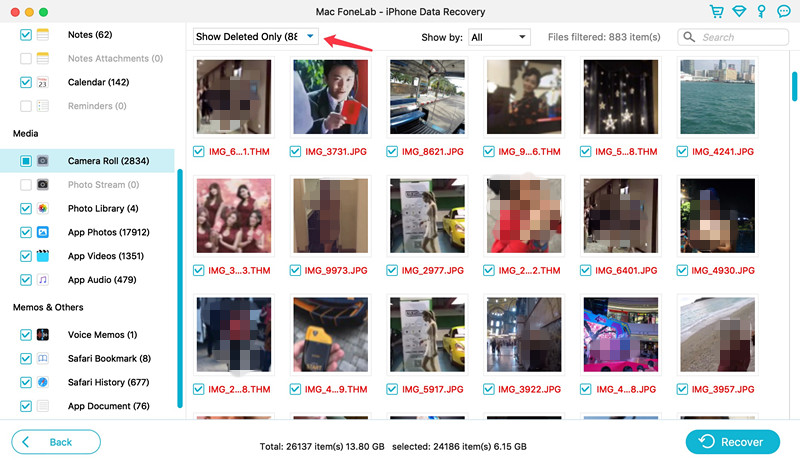
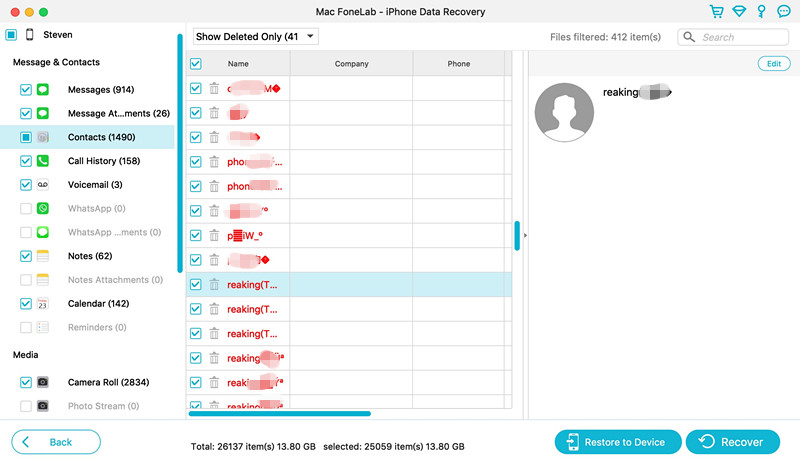
When scanning completes, you should see the deleted and existing text messages on the window, if you only need to view the deleted text messages, please tap “Only display the deleted items” to ON, it will shows you the deleted messages as red font.

Recover deleted Text Messages on Android

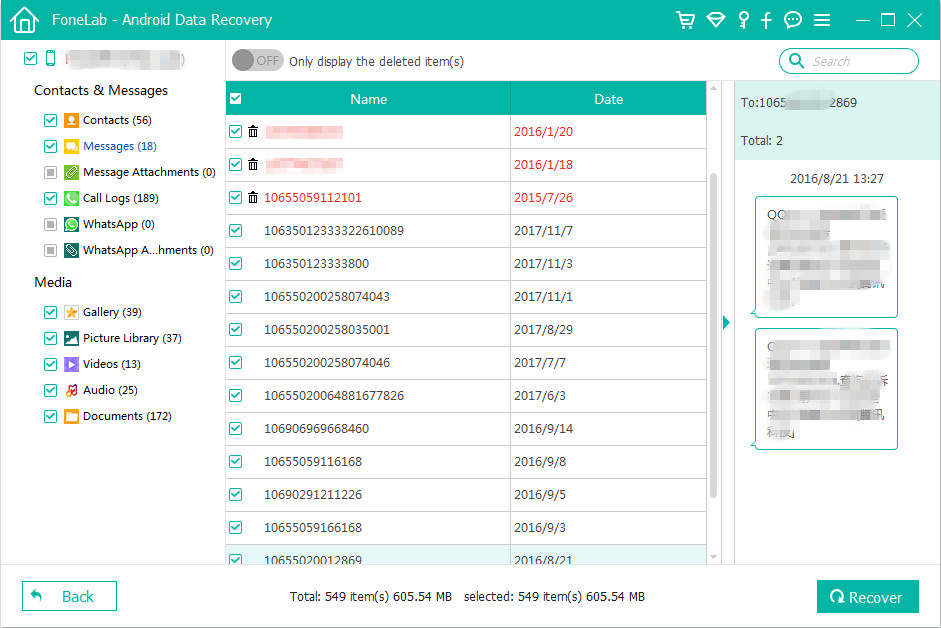
You can view the deleted messages before recovery, then click the text messages you want to restore and then click the “Recover” button, all your missing text messages will be save onto your computer within few seconds.

The recovered messages will be saved in universal CSV and HTML format on your computer, both two formats for you easy to view or print.
If you want to view, edit or print the recovered messages, you can open the CSV file by using Microsoft Excel, WPS Office or in a text editor like Notepad and Text.

restored Android messages on pc

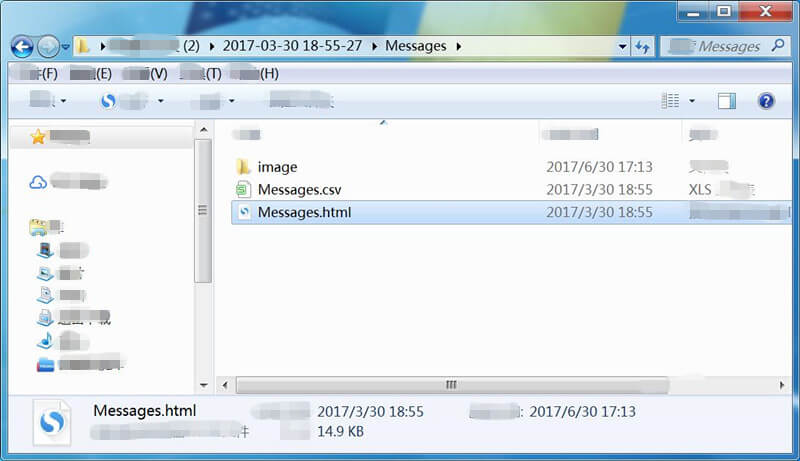
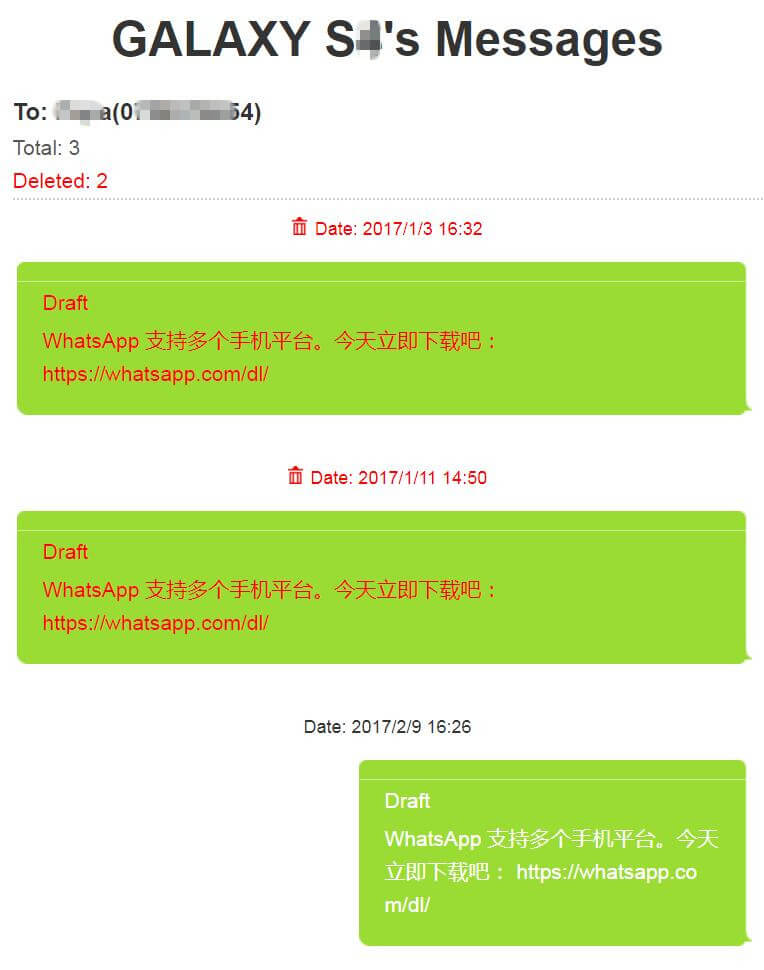
If just want to read the messages or print them, you can open the HTML file by some populart browser, such as Firefox, Google Chrome, Internet Explorer.

text messages exported from android

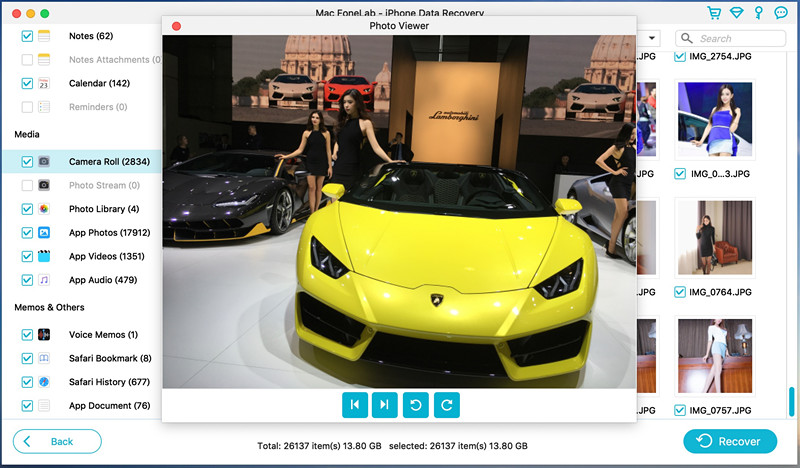
You can see the Android Data Recovery also can recover deleted photos from Android devices, all recovered photos will be saved on your computer.

restored android photos on pc

As well as recovering other types of Android data.

restored android data on pc

Free download the Android Data Recovery software to recover your text messages.

d_win d_mac
d_win d_mac

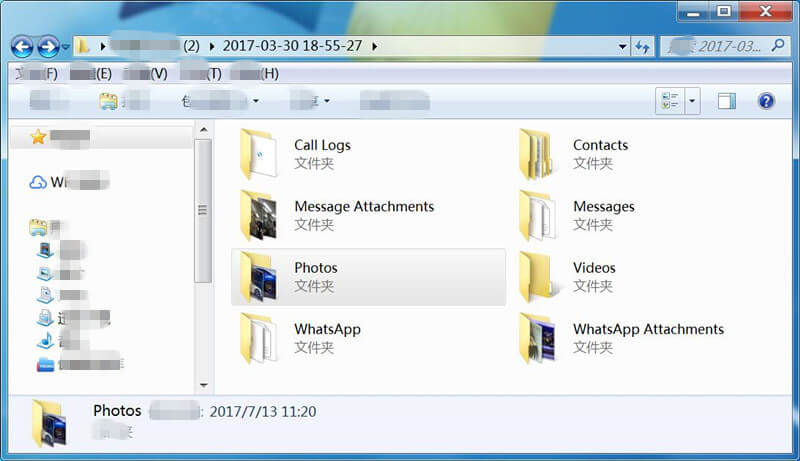
Back up Messages and Other Data from Android Phones to Computer

In daily life, it is difficult to avoid some accidents. If your mobile phone is stolen or lost, your important data can no longer be retrieved. Therefore, it is very necessary to back up your Android data regularly.

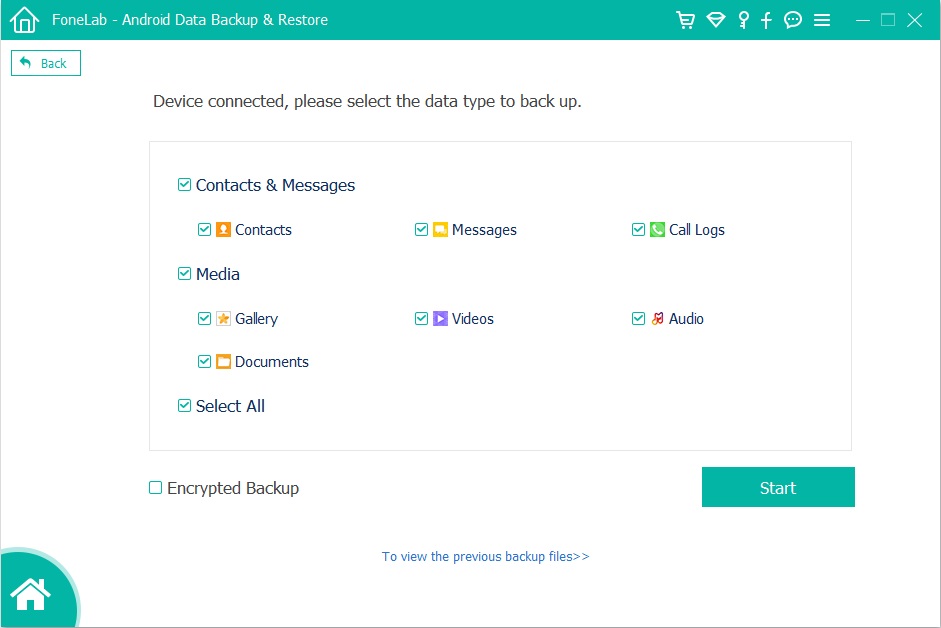
Another function on the Android Toolkit is Android Data Backup & Restore, it can help you backup messages, contacts, phone numbers, WhatsApp messages, call logs, gallery, videos, music and documents from Android to computer easily, you are able to set a password for protecting your important backup. In addition, if you want to get back the data, you can directly restore Android data to your Android phones easily.

android data backup

d_win d_mac
d_win d_mac

Above is the whole guide to recover deleted text messages from Android phone. If you deleted or lost messages, iMessages on iPhone, you can also learn this guide about how to recover deleted SMS from iPhone, iTunes and iCloud. If you want to backup your iPhone messages to computer, you can use this useful iPhone Data Backup & Restore software, which allows you backup messages, WhatsApp messages, Kik messages, Line messages, contacts, photos, videos, notes and more easily.

3 Methods to Recover Deleted Photos from Samsung Galaxy S/Note

Summary
Lost or deleted some important photos on Samsung phone? Here is a powerful Samsung Photo Recovery Tool, which helps you recover deleted photos from Samsung Galaxy S20/S10/S9/S8(Plus)/S7/S6(Edge) easily.

Lost photos, contacts and messages after factory reset Samsung phone? Deleted some important photos from your Samsung Galaxy phone by careless? Don’t worry! Actually, the lost or deleted photos still stored in your phone internal memory, these deleted data are just be hidden and stored in a special location, the deleted Samsung photo files can be recovered before being overwritten by the new data. When you deleted photos on Android device, you’d better not use your phone to take new photos, don’t add or transfer files to the phone, preventing the new data cover the deleted data, then looking for an effective method to recover the deleted photo files as soon as possible. Want to know how to recover deleted photos from Samsung Galaxy phone? This article teach you three effective methods to recover deleted and lost photos from Samsung Galaxy S20/S10/S9/S8/S7/S6/S5, as well as Galaxy Note 10/Note 9/Note 8/Note 5 and other Samsung smart phones.

samsung photo recovery

Method 1: Recover Recently Deleted Photos and Videos from Gallery Trash(Within 15 days)

For iPhone users: If you accidentally delete photos on iPhone(iOS 8 or higher iOS version), you can recover deleted photos and videos on Recently Deleted album in Photos App within 30 days, if these photos and videos were deleted more than 30 days, all will be automatically erased.
Also read: 4 ways to recover deleted photos on iPhone(iOS 13 included)

iPhone’s Recently Deleted Feature is very useful, when we accidentally delete photos, we can quickly retrieve photos in a short time. Contemporary, there is a similar Recently Deleted Feature on Samsung Galaxy smart phones, it named Trash (or Recycle Bin), which located in Gallery app.

If you delete a photo or video from Samsung Galaxy S10/S9/S8/S7 or other Samsung Galaxy phone, those deleted files will moved into the Trash, then these already deleted photos/videos are automatically permanently deleted after 15 days. However, you can recover all recently deleted photos & videos from Gallery Trash within 15 days. Let’s follow the below simple steps to restore recently deleted photos on Galaxy S10 & S10 Plus & S10e from Trash (or Recycle Bin):

Step 1. Open Gallery app.
Step 2. Tap Three dots on the top right of the screen.
Step 3. Select Trash option, then you can find all recently deleted pictures and videos.
Step 4. Select the photos or videos you want to get back.
Step 5. Finally, just tap Restore on the bottom.
All selected photos and videos will be back in the Gallery Album where they were in.

samsung cloud recycle bin photo recovery

Tips: Before restoring deleted photos and videos from Samsung via Trash (or Recycle Bin) folder, there are several things you need to know firstly:

1. Recently Deleted only helps you recover those what are deleted by you, but are not deleted permanently from your Samsung phone. In other words, this is limited to that you delete those photos from Gallery, and didn’t delete them from Trash (or Recycle Bin) folder.

2. Gallery Trash only keeps deleted photos for 15 days, once it gets the deadline, they will be removed from Gallery Trash folder automatically. So your photos were deleted from Samsung 30 days ago, they have been already deleted permanently. If you want to get back the deleted pictures and videos, please go to Gallery Trash folder to restore them as soon as possible.

Method 2: Recover Deleted Photos from Google Photos app(Within 60 days)

As well all know that most Samsung phones/tablets are running Google’s Android system, so there are many build-in Google service on Samsung Galaxy smartphones, Google Photos app, the Google Photos app is one of the app that we often use on Android devices, we can upload Samsung photos to Google Cloud for back by using Google Photos app.

If you have backed up your photos to the Google Photos app on Samsung phone, once your important photos are lost or deleted, you can restore the deleted photos from Google cloud over your Google account, since the deleted photos will kept on the trash for 60 days. Here is how to restore deleted pictures from Google Photos app:

Step 1. Open the Google Photos app on your Samsung phone and sign in your Google account.
Step 2. Tap Three dots on the upper left of the phone screen, and then tap “Trash” from the top-left menu.
Step 3. All the deleted photos will be display in details, then select the photos you want to get back
Step 4. Tap “Restore” to restore the deleted photos from Google Cloud, then you will find all recovered pictures back in Samsung Gallery app as well as Google Photos library.

restore samsung photos from google cloud

Also Read: Recover Deleted Photos & Videos on Android

Note: If you delete photos for more than 60 days, you can’t get back the deleted photos via this method, as well as the method 1. If you looking for an effective method to recover Samsung deleted/lost data, you should use a third-party Samsung Data Recovery software, which can help you directly scan and recover deleted photos, videos, contacts, messages, WhatsApp data and more from Samsung internal memory, or recovering formatted/lost/deleted/missing data from SD card. Let’s follow the below Samsung photo recovery solution, you can recover deleted photos from Samsung Galaxy without backup.

Method 3: Recover Deleted Photos from Samsung without Backup(Recommend)

If you failed to recover deleted photos from Gallery Trash and Google Photos app, just use an utility Samsung Files Recovery and connect your Samsung phone with the computer to scan, view and recover the deleted photos.

This Android Data Recovery not only can help you recover deleted photos, videos, contacts, messages, call logs, WhatsApp messages, music and documents from Samsung phone, but also allows you fix crashed, frozen or locked Samsung phone to normal and extract photos from broken Samsung Galaxy S6, S5, S4, Note 5, etc. The Android Data Recovery function works well with almost all Samsung phones, such as Samsung Galaxy Galaxy S10/S10+, Samsung Galaxy S9/S9+, Samsung Galaxy S8/S8+, Samsung Galaxy S7/S7 Edge, Samsung Galaxy S6/S6 Edge, Samsung Galaxy Note 10/Note 10+, Samsung Galaxy Note 9, Samsung Galaxy Note 8 and other and other brands of Android phones directly. Now, let’s see how to recover deleted photos on Samsung Galaxy S10 by using this powerful Android data recovery software.

d_win d_mac
d_win d_mac

How to Recover Deleted Photos from Samsung Galaxy S10/S10+

Currently, this Android Data Recovery supports below Samsung Galaxy S10 models, such as SM-G977P, SM-G975U, SM-G973U, SM-G977U, SM-G977T, SM-G970U, SM-G973F, SM-G970F, etc. The software helps you recover (extract) photos on Samsung Galaxy S10 (Plus) & S10e, it won’t hurt your phone’s data.

Step 1: Launch the Android Toolkit on PC or Mac
Please click the above download button to download the application on the computer, install it, and then run it. To recover Samsung lost or deleted data, please click on “Android Data Recovery” to continue.

Samsung Photo Recovery

Note: The application is only read and recover your Android data without any personal information leaking.

Step 2. Connect Your Samsung Galaxy S10 to Computer
Then connect Samsung Galaxy S10/S10+ to the computer via a USB cable.

connect Samsung to computer

Step 3. Turn on USB Debugging
Enable USB debugging on your Samsung Galaxy S10 for for full connection first, click Allow when prompted on the handset.
You can also learn how to enable USB debugging mode on your different Android OS.
1. Android 2.3 or earlier: Go to “Settings < Applications < Development < USB debugging”.
2. Android 3.0 to 4.1: Go to “Settings < Developer option < USB debugging”.
3. Android 4.2 or newer: Go to “Settings < About Phone < Build number” for several times until you get a note about “You are under developer mode”. Then, you should go back to “Settings < Developer options < USB debugging”.

enable usb debugging on huawei

Step 4. Select “Gallery” and “Picture Library” for Scanning
You can see the application can recover all types of data from Android devices, in order to saving time for scanning process, just select “Gallery” and “Picture Library” for scan and recovery if you only recover the deleted photos.

select photos to scan and recovery

Step 5. Root for Deep Scanning Your Phone(Option)
If you just want to extract existing data from Android phone, please click “Normal Scan” option to go on, the application will shallow scan all existing files and shows the detail to you, this scanning mode will take less time.

If you want to recover more deleted and lost data, you need too root permission for a deep and complete scan to find more deleted and lost photos in the phone memory.
To root the phone, click “Rooting Tools” button, it will open a page for you to download KingoRoot tool to root the Samsung Galaxy S10.
Please don’t worry, you can also get the device back to it’s original status after data recovery complete.
We also have the guide on this: How to root and unroot an Android device safely

root Samsung S10 to deep scan

After rooting the Samsung phone successfully, click “Retry” button after your confirm your Samsung Galaxy S10 has been rooted. Then, the app analyzes the phone and deep scanning the deleted and lost photos from Samsung Galaxy S10 internal memory.

Step 6. Preview and Recover Deleted Photos on Samsung Galaxy S10
When scanning completes, the application will shows you all recoverable photos, you can view the scanned pictures one by one before recovery them. After previewing the deleted photos, tap “Recover” to recover deleted photos on Samsung Galaxy S10 and them on the computer.

recover photos on samsung galaxy s10

During the recovery process, please keep your Samsung phone connected with the computer. Only few minutes, all of you lost/deleted photos be recovered and save on the computer.

Step 7. Transfer Files Back to Samsung Phone for Viewing and Using
Then, you can directly copy the photos to your phone’s folder or SD card for view on Samsung phone again. Here, we recommend you this powerful Android & iOS Manager tool, it can help you import photos, videos, music contacts from PC/Mac to Samsung Galaxy phone at ease, as well as transferring data between iOS and Android devices.
Also read: How to Manager Samsung Phone on Computer

add photos to samsung galaxy s10

Download the Android Toolkit – Android Data Recovery and start recovering deleted photos on your Samsung phone.

d_win d_mac
d_win d_mac

Tips 1: Recover Photos from Samsung Phone’s SD Card

Some people will set the SD card as a pictures and videos storage path instead of directly storing the in the phone internal memory. If you lost the photos on the corrupted card or your SD card is formatted, please stop using the memory card, then using a professional Data Recovery(Mac/Windows) to recover lost/deleted/formatted photos on SD card as soon as possible

Tips 2: Backup Photos and More Android Data Regularly

Although our Android Data Recovery software can help you recover deleted and lost data, once your phone is broken, damaged or lost, you will lost your important data forever. We strongly recommend you backup your Android data to computer regularly.

This Android Data Backup & Restore tool back up all types of files on your Android device, including contacts, messages, call logs, gallery, videos, audio and documents. After creating Android data backup on computer, you also can set a password for protecting your important backup. For the backup files, you can preview and select the data you want and restore them back to Android phone easily.

Samsung Photo Recovery

How to Transfer Music from iTunes to iPhone 11(Pro) with Ease

[Summary]: How to transfer music from iTunes library to iPhone iOS 13 without using iTunes itself? This article will recommend you the best iTunes alternative for Windows & Mac to sync music from iTunes to iPhone 11 and iPhone 11 Pro(Max) and even won’t erase your existing data.

iTunes is a great program for Apple users to download, store, manage, sync and play music. Because of this great cloud storing facility, Apple Music users can access massive songs, playlist and albums online, Apple users also can transfer data between iPhone, iPad, iPod touch, iPod Nano through iTunes backup & restore, although this process is a bit cumbersome, the iTunes is free. When you have got an new iPhone 11(Pro), you may want to transfer music, contacts, messages, notes, call logs from old iPhone to iPhone 11(Pro). Upgrading your iPhone? Here’s how to transfer data from old iPhone to new iPhone easily.

iTunes is already a “sign” for Apple in a sense. In just a few years, Apple Music subscribers use iTunes to downloading music and enjoy music online, the digital music era has never stopped, and iTunes’ core mission has been completed.

In the new macOS Catalina(macOS 10.15), the original concept of iTunes was completely removed, and Apple completely separated all of its important features. The macOS Catalina system splits iTunes into Apple Music, Podcast, and Apple TV apps, and the resources provided by iTunes can be found in new apps.

Where are your iTunes music gone after update to macOS Catalina?
1.Music that you’ve imported or purchased will be in the new Apple Music app.
2.The iTunes Store will still be available to buy music on Mac, iOS, PC, and Apple TV.
3.iPhone, iPad, and iPod backup, restore, and syncing will move to Finder.

apple music on MacOS catalina

However, you will get a messages “iTunes has been updated to focus on music, movies, TV shows, podcasts and audiobooks” on the new iTunes 12.7.

Because Apple removes the function to manage, ringtone and apps, but you still can use iTunes 12.7 to transfer music from iTunes library to iOS 13 devices. Let’s have a look the detail guide to transfer music from iTunes to iPhone 11.

Method 1: Transfer Music from iTunes Library to iPhone 11 via iTunes 12

Here are the steps for syncing your music from iTunes library to iPhone 11 by using iTunes 12, as well as the previous iTunes version.

Step 1. Launch iTunes 12 and connect your iPhone 11 to computer with a USB cable.
Step 2. The iTunes will detects your iPhone connected, then click on iPhone device tab on iTunes.
Step 3. Tap on the “Music” tab from the left sidebar.
Step 4. Click “Entire music library” or “Selected playlist, artists, albums and genres” option and check the songs you want to transfer.

transfer music from itunes to iPhone 11 via iTunes

Step 5. Then, click Apply to transfer the music from iTunes 12 to your iPhone 11.

use iTunes to transfer music from itunes to iPhone 11

Disadvantages of Using iTunes:

  • When you using iTunes to sync music, it will erase the existing songs on iPhone at the same time.
  • You can’t transfer songs you want selectively, just transfer all songs of your iTunes library.
  • You can only add music to iPhone from one iTunes library, or your iPhone will be erased.
  • You can’t directly import songs, videos and photos from computer to iPhone. You need to add the media files to iTunes library, and then syncing them to your iPhone, it will wastes a lot of time.
  • You can’t transfer the downloaded Apple Music songs to iPhone, if you want to transfer Apple Music to iPhone, iPad, iPod Touch or iPod Nano, you need to use an Apple Music Converter to remove DRM from Apple Music firstly, then using a third-party iPhone Music transfer to add the DRM-free Apple Music to iPhone/iPad/iPod.

Method 2: Transfer Music from iTunes 12 to iPhone 11 and More iOS 13 Devices (without iTunes)

Looking for a fast and reliable way on how to transfer music from iTunes to iPhone 11/11 Pro/XS/XR/X/8/7/6S/6(Plus)? It’s highly recommended that you use third-party software, here we recommend the iOS Toolkit – iOS Transfer, which not only can help you transfer music from iTunes to iPhone without erasing the existing songs on iPhone, but also can help you transfer music, videos, photos from iOS to iOS, Android to iOS, Android to Android. You can use this powerful iOS Toolkit to transfer music and videos from iPhone to iTunes, as well.

iOS Transfer Key Features:

  • Transfers and manages all data like photos, videos, music, messages, etc. on iPhone, iPad and iPod.
  • Transfer music and videos between iTunes and iOS or Android.
  • Works smoothly all iPhone (iPhone 11/11 Pro included), iPad, iPod touch, iPod Nano models, as well as iOS 13.
  • Backup your music, photos, videos, contacts, SMS, Apps etc. to computer and restore them easily.
  • Transfer contacts, SMS, music, photos, videos and more from Android/iOS to iPhone 11(Pro).
  • Compatible with Windows and Mac OS.

d_win d_mac
d_win d_mac

2 Steps to Transfer iTunes Music to iPhone 11(Pro)

Step 1. Launch iOS Toolkit on PC or Mac
Download, install and launch the iOS Toolkit on your computer, then click the ‘Transfer’ option go to iTunes to iPhone music transferring.

iOS Toolkit

Step 2. Connect iPhone 11 to Computer
Using a USB cable to connect your iPhone 11 with the computer, the software will detect it and shows your device’s information, then click ‘Transfer iTunes Media to Device’.

Transfer iTunes Media to iPhone 11

Step 3. Scan iTunes Library
The iOS Toolkit will start to scan your all media files of the iTunes library, then it will shows you your all the available files.

scan iTunes music

Step 4. Select Music and Transfer to iPhone 11(Pro)
The software will shows you all the scanned result, then choose the “Music” item that you wish to transfer. Finally, just click ‘Transfer’ button start transferring music from iTunes to iPhone 11.

Transfer iTunes Music to iPhone 11(Pro)

Please waiting, the software helps you sync iTunes music to your iPhone device within a few minutes, depending on how many files you’re transferring. After the transferring process complete, you can disconnect your iPhone with the computer, then you will find all iTunes music be transferred to your iPhone 11, now you can enjoy those music on iPhone 11 freely.

Free download the iOS Toolkit – iOS Transfer and start to transfer music to your new iPhone from iTunes, old iPhone, Android and PC/Mac.

d_win d_mac
d_win d_mac

Method 3: Export iTunes Songs to MP3/M4A and Transfer to iPhone 11(Pro)

Many Apple Music subscribers download songs for offline listening through iTunes on computer, but you can’t transfer the downloaded Apple Music songs to other devices, because the download Apple Music files is M4P format, and those added songs is “Apple Music AAC audio file”, when you try to use iTunes to convert the downloaded Apple Music songs, the iTunes will prompt you “the songs could not be converted because protected files cannot be converted to other formats.”

Apple Music is a streaming music service, when you subscribe the streaming music service, you can play online or download for offline listening on authorized device, but you now allowed to transfer the downloaded Apple Music songs to other devices. Because all Apple Music tracks are DRM protected, which restricts you from sharing, transferring or listening to downloaded Apple Music tracks after canceling subscription. To keep your downloaded Apple Music songs forever on your iPhone other devices, you should learn how to export Apple Music songs from iTunes to MP3 or M4A files and transfer them to your iPhone.

If you want to smoothly play iTunes music in MP3 player, iPod Nano, iPhone and more devices, you need to export iTunes songs to MP3 format firstly. I you have songs that downloaded from Apple Music or bought from iTunes Store, you can’t use iTunes to convert them to MP3 format due to the DRM protection.

Don’t worry, UkeySoft Apple Music Converter is special designed to remove DRM from Apple Music and iTunes M4P songs, then convert them to plain MP3, M4A, FLAC, AU, AAC, etc. You can download UkeySoft Apple Music Converter for a free try. It can convert and export all iTunes songs as MP3, M4A, FLAC or AAC formats with 100% lossless quality, then you can directly import those output MP3 files to your iPhone, iPad, iPod via iTunes or third-party iOS Transfer tool.

This method is the best way to keep Apple Music playable after canceling subscription, please free download the Apple Music Converter and start to get Apple Music for free.

d_win d_mac
d_win d_mac

  • Remove DRM from Apple Music to keep files forever;
  • Convert Apple Music songs, playlist and albums to MP3, M4A, etc.
  • Convert iTunes M4P music, audiobooks to MP3, M4A, etc.;
  • Export iTunes songs and audiobooks as MP3, M4A files;
  • Convert iTunes audio at 16X faster speed with lossless quality;
  • Keep ID3 Tags information after conversion;

Simple Steps to Convert Apple Music and Import Them to iPhone 11(Pro)

The Apple Music Converter can help you remove DRM iTunes M4P songs(purchased from iTunes Store before 2009), audiobooks, and Apple Music songs.

Step 1. Launch Apple Music Converter on Computer
Launch the Apple Music Converter, and iTunes will be launched automatically. For macOS 10.15, the Apple Music app will be launched and loads all Apple Music tracks.

Launch Apple Music Converter

Step 2. Select Apple Music Songs and iTunes Audio Files
Check songs, audiobooks or Apple Music playlists you want to convert.

Select Apple Music Songs

Step 3. Select MP3 or M4A as Output Format
Since the iPhone 11 and most iOS device supports MP3 and M4A audio files, please choose MP3 or M4A as output format. The software also can convert iTunes music to AAC, AC3, AIFF, AU, FLAC, M4R, and MKA.

Select MP3 or M4A as Output Format

Step 4. Start Convert Apple Music and iTunes M4P Songs
Click “Convert” button to start converting the selected songs to MP3/M4A.

Convert

After conversion, you can get all DRM-free audio files in the output folder.

get

Step 5. Transfer the MP3/M4A Files to iPhone via iOS Transfer
The converted Apple Music are saved onto the computer, all output songs is MP3 format, now you can transfer them to your new iPhone 11 and save on it forever. To import the converted Apple Music songs to iPhone, you can use the above iOS Transfer to transfer music from computer to iPhone 11/XS/XR/X.

import

Download the Apple Music Converter and start to get Apple Music for free.

d_win d_mac
d_win d_mac

Conclusion

As you can see, there are three easy ways you can to import music from iTunes to iPhone, iPad or iPod. While iTunes is considered rather powerful, but it will erase all existing data on iPhone after syncing by iTunes. We recommend the iOS Toolkit – iOS Transfer, it can help you transfer music from computer, iTunes, iOS and Android to iPhone directly, it won’t erase your data, but iOS Transfer can’t transfer the DRM-ed Apple Music tracks, so you need to use a third-party Apple Music Converter to remove DRM from Apple Music and convert them to MP3 or M4A, then using the iOS Toolkit – iOS Transfer to add the converted Apple Music songs to iPhone, iPad, iPod, Android devices.

How to Fix “iTunes Unable to Process Purchases at This Time” Issue

[Summary]: Did you get a message that “your iTunes unable to process purchases at this time”? Don’t worry, please log out of Apple ID, disconnect wifi, restart your iPhone/iPad, and log in again via cellular network. In this article, you can also learn how to Fix bugs on iOS 13 and optimize iOS system to enjoy better iOS performance.

Recently, many iPhone users said that their iPhone has repeatedly appeared bugs: “the iTunes Store is unable to process purchases at this time,Please try again later“, and some even reach the frequency every two minutes.

itunes store error

The reason: This bugs is appear on some iOS 13 and iPadOS devices. This may be a problem with the Apple server, some problem in the iTunes Store server. Apple has yet to explain the cause of the bug.

Solution 1: Uninstall the iTunes Store App
Starting with iOS 10, the iPhone already supports uninstalling the app that comes with the system.
For iOS 10, iOS 11 and iOS 12, just press and hold the icon, and when it shakes, click on the small fork in the upper left corner to uninstall.

For iOS 13 users, short press to pop up the App secondary menu, click “Reorder App”, you can also trigger the uninstalled animation.

Solution 2: Exit Apple ID and Restart your iPhone
To fix this bugs, please exit Apple ID, disconnect wifi, restart your iPhone/iPad, and log in again via cellular network.

Note: After exiting the Apple ID, it will cause a problem, the Apple service cannot be used, such as iCloud and Apple Music, because we need to log in to the Apple ID to use these Apple services.

Do not connect to Wi-Fi after restarting the phone. In the state of 4G network, log in to the Apple ID again, which is a simple method to solve the problem.

Of course, if you want to completely fix this bug, the most common method is to update the perfect system. This might be the time for you to exercise a little bit of patience for Apple’s iTunes Support to release a fix. You can always check out the Apple System Status website for server status.

About iOS 13 Bugs

Apple has released the latest version iOS 13 system, which has encountered many bugs. According to Apple’s official update instructions, the iOS 13 system has added users’ favorite dark mode and new privacy protection features, which has increased the speed of software opening and is known as the best system to date. However, a large number of users after upgrading the iOS 13.0 official version of the system reflect the camera can not be used, software flashback, mobile phone fever and mobile phone power consumption and other issues. Subsequently, Apple made an emergency deployment and released three official versions of the system in an 11-day period to update the bugs: iOS 13.1 was released on September 25 and iOS 13.1.1 was released on September 28. The official version, released in the early morning of October 1 iOS 13.1.2 official version. In addition, on October 3, Apple also released the iOS 13.2 Beta1 beta.

download install ios 13.2 beta on iphone

Apple gradually closed the old version of iOS system verification after releasing the iOS 13 system. In the early morning of October 8, Apple officially closed the iOS 13.1 system verification. This means that users will not be able to upgrade or downgrade to that system version. Previously, Apple closed the system verification of iOS12.4.1 and iOS13.0 on October 5, and skipped iOS13.1 and chose to disable the system verification of iOS13.1.1. At present, only the iOS13.1.2 version verification channel is enabled, that is to say, iPhone users with iOS 12.4.1 and previous versions can only upgrade iOS13.1.2 or iOS 13.2 Beta1 after upgrading, and will not be able to downgrade after the upgrade. Go to iOS 12.4.1.

ios 13 update history

From September 20th, Apple pushed the official version of iOS13.0 system. In just 19 days, Apple has pushed four official versions of iOS13.0, iOS13.1, iOS13.1.1, and iOS13.1.2, and closed these four system verifications for iOS12.4.1, iOS13.0, iOS13.1.1, and iOS13.1. The iOS 13 system has also been dubbed the most closed version of the system ever, iOS 13, iOS 13.1, iOS 13.1.1 is called the shortest-lived version update in Apple history.

Fix iPhone iPad iPod to Normal and Optimize iOS Performance

Some bugs on your iPhone and iPad? iPhone is stuck in Apple logo after iOS 13 update? iPhone stuck in headphone mode or DFU mode? iPhone stuck on recovery mode after iOS 13 update?  iPhone restarts endlessly? Or iPhone is frozen for unknown reasons? Even iPhone screen is locked? No matter what situation your iPhone is facing, you can fix iPhone to normal and optimize iOS performance to make your iPhone works better.

This iOS System Recovery not only can help you fix your iPhone/iPad to normal state, but also can help you optimize iOS 13/12/11 to enjoy better iOS performance. It compatible with the latest iOS 13 and iPodOS, like iPad Pro, iPad Air/mini, iPhone 11 Pro Max/11 Pro/11, iPhone XS/XS Max, iPhone XR/X, iPhone8/8 Plus, iPhone 7/7 Plus, iPhone SE, iPhone 6s/6s Plus, iPhone 5s/5s/5, iPhone 4S/4, iPod touch and more. Let’s teach you how to fix bugs on iPhone and optimize iOS performance.

d_win d_mac
d_win d_mac

How to Fix Optimize iOS 13/12 on iPhone

Step 1. Launch the iOS Toolkit on Computer
Click the above download button to download the iOS Toolkit on PC or Mac, then click the “iOS System Recovery”.

launch iOS System Recovery

Step 2. Connect iPhone to Computer
Then, connecting your iPhone with the computer via Apple USB cable, the software will detect it, and then click “Start” button to go on.

optimize iOS performance

Step 3. Select Fixing Mode
The standard mode installs iOS system by retaining device data. The advanced mode will erase data while installing firmware package or fixing the iOS system issues. Suggest that you go to the advanced mode only if the standard mode fails.

iOS optimize mode

Step 4. Click Optimize
If you want to make your iPhone works more better, please optimize iOS system by click “Optimize” option go to next step.

Optimize iOS System

Step 5. Select Firmware
The software will automatically detects your iPhone and displays available firmware package, please select the latest firmware package for your iPhone device. This iOS system recovery is easy to use and safe enough to install iOS firmware and avoid data loss.

Select Firmware - iOS 13/12/11/10

Step 6. Download Firmware Package
Begin downloading firmware package and install it to your iPhone, iPad or iPod Touch device.

Download iOS Firmware for iPhone, iPad, iPod Touch

Step 7. Install IPSW File and Optimize iOS System
After downloading the firmware package completed, the iOS System Recovery will verify the downloaded firmware package and install on your iPhone, no data loss at all.

Start to Optimize Your iPhone

After optimizing iOS system performance complete, your iPhone will restart again, you will find your iPhone runs more smoothly that before.

d_win d_mac
d_win d_mac

More Features:

There are three main function in iOS Toolkit: iOS Data Recovery, iOS System Recovery and iOS Data Backup & Restore, it can help you protect your iOS data and optimize your iPhone/iPad/iPod, making your iPhone runs more smoother.

iOS Data Recovery: Recover lost contacts, messages, notes, WhatsApp messages, safari history, photos and more data from iPhone/iPad/iPod, or from iTunes backups and iCloud backups.

iOS System Recovery: If your iPhone stuck on stuck in DFU mode, recovery mode, Apple logo, headphone mode, etc. This function can help you fix iPhone/iPad/iPod to normal state without data loss, as well as optimizing iOS performance.

iOS Data Backup & Restore: Backup and restore iOS data to your computer, or restore the bacups to iPhone, iPad and iPod touch selectively.

Fix iOS 13/12

How to Recover iPhone Photos, Contacts, SMS after iOS 15 Update

Summary
Lost photos, contacts, messages, notes, call logs and more data after upgrading your iPhone to iOS 15? Don’t worry, this article will teach you how to recover lost data from iPhone after iOS 15 update, you can also restore deleted files from iOS 15 devices, including iPhone 13 and iPhone 13 Pro(Max).

How to recover lost contacts from iPhone after iOS 15 update? After upgradine my iPhone 11 to iOS 15, I find all contacts are disappear, is it possible to restore lost contacts from iPhone after iOS 15 update?

I found all photos are lost after iOS 15 update, how to recover lost photos from iPhone after iOS 15 update? How can I restore photos from iTunes that I have backed up before iOS 15 upgrading? Thanks to help.

Remember backup your iPhone before upgrading to iOS 15, your iPhone data maybe lost if iOS update failed. OTA update is simple but your data will erased if you haven’t backup to iTunes, once your lost iPhone data after iOS 15 update failed, do you want to recover lost data from iPhone? This guide teach you how to recover iPhone data after iOS 15 upgrading, please keep reading the detail guide, you can easily to recover lost pictures, contacts, phone numbers, text messages, iMessages, call logs, notes, etc. from iPhone 13/12/11/11 Pro/XS/XR/X/8/7/6S. In addition, if you lost data after iOS 15 update failed, you can recover lost data after iOS 15 update with a professional iOS 15 Data Recovery.

Part 1: Recover Lost Data from iTunes Backups after iOS 15 Update

If you have sync iPhone with iTunes, the iTunes will create a full backup automatically, so you can restore lost data from iTunes backups, but it will erase existing data from the device, and you can’t view and restore them to selectively.

Step 1. Launch iTunes and connect your iPhone with the computer via USB cable.
Step 2. In iTunes, click “iPhone” icon go to mange your iPhone device.
Step 3. Click “Summary” and select a backup history on the right of the iTunes interface.
Step 4. Click “Restore iPhone…” under Backups section on the right panel, then it will restore the iTunes backup files to your iPhone.

restore iPhone data from itunes backup

Your iPhone will show “Restore in Progress” on the screen, and iTunes will show a progress bar. But you may find all existing data be erased after restoring iTunes data to your iPhone complete.

Part 2: Recover Lost Data from iCloud Backup after iOS 15 Update

If you have backed up your iPhone data to iCloud account before iOS 15 upgrading, you can restore lost iPhone data from iCloud backups. If you haven’t backup your iPhone contents to iCloud or iTunes, you still have chance to recover lost data from iPhone device directly, please keep reading the part 3.

To recover a file, perform these steps inside of the iCloud.com interface:

Step 1. Go to Settings > Genenral > Reset > Erase All Content and Settings.
Step 2. Scroll down to the bottom of the App & Data screen and click Restore from iCloud Backup

icloud restore

Step 3. Sign in to iCloud with Apple ID and passcode
Step 4. Locate the file you wish to restore, please mark the data you want (repeat for as many files as you wish to recover)
Step 5. Click Restore File(s)
When you do this, the file will be recovered to the original location specified below the file name in your iCloud Drive account.

A note on recovering contacts, calendars and reminders: When you restore these files, you are not restoring individual contact cards, calendars, or individual reminders (below screenshot).

icloud data restore

Note: When you restore to a new archive of contacts:
Then archive of contacts you select will replace contacts on all your devices, it means this method will erase all your existing data on the iPhone or iPad.
Your current contacts will be archived so that you can get them back if needed.
Restoring from an iCloud backup can take some time.

Part 3: Directly Recover Lost Data from iPhone after iOS 15 Update

iTunes can help use backup iPhone data to local computer, and iCloud helps us backup iOS data to cloud. If you haven’t backup your iPhone data to iTunes or iCloud before iOS 15 upgrading, you can use a professional iOS 15 Data Recovery to recover lost data from iPhone/iPad directly.

This iOS 15 Data Recovery is an all-in-one iPhone/iPad/iPod Data Recovery, it works well with Windows and Mac computer, to recover lost data from iPhone after iOS 13 update, just download, install and launch this iPhone data recovery on your computer, then connect the iPhone to your computer, the software will detect it automatically, then using this iOS Data Recovery scan and recover lost data from iPhone, your iPhone data will be recovered and save onto the computer safely, it can help you recover lost contacts, messages, notes, call logs, photos, videos, WhatsApp messages from iPhone after iOS 15 update. In addition, the iPhone data recovery supports extract data from iTunes and export to computer, so you can use this program extract iTunes data, then preview and recover it selectively. If you have backup iPhone data to iCloud, this iOS data recovery can help you download iCloud data to computer, then you can preview the detail contents and restore them easily.

iOS 15 Data Recovery – Three Ways

Directly Recover Data from iPhone after iOS 15/14 Update: Recover lost and deleted data from iPhone directly, even you haven’t backup to iTunes or iCloud.

Restore Data from iTunes Backups after iOS 15/14 Update: Restore iPhone lost data from iTunes, it won’t erase existing contents and settings from iPhone device.

Recover Data from iCloud Backup after iOS 15/14 Update: Download iCloud data and restore them backup to iPhone without erase existing data and settings.

d_win d_mac
d_win d_mac

How to Restore iPhone Data after iOS 15 Update

This part show you how to recover lost iPhone data on Mac by using iPhone Data Recovery(Mac), you can also follow the same steps to recover iPhone lost data in Windows 10/8/7/XP.

Step 1. Launch iOS Toolkit on PC or Mac
Click the above download to download the software, install and launch on your computer. To recover lost data from iOS devices, iTunes and iCloud, click “iPhone Data Recovery” function.

iphone 11 data recovery

Step 2. Connect iPhone to Computer
If you want to recover lost data from iPhone directly, please click “Recover from iOS Device” mode and connect your iPhone with the computer.

connect iPhone 11 to computer

Step 3. Select Data to Recover
In this step, please select what types of data you want to get back, including contacts, SMS, call logs, photos, videos, WhatsApp messages and all kinds of content, then click “Start Scan” button start to scan lost data from your iPhone.

Select Types of Data

Step 4. Start Scan iPhone Lost Data
The software begin scanning lost data from your iPhone, please keep your iPhone connected with the computer. If you find the data you want, you can click “Stop” button to end scanning process.

scan deleted sms from iphone

Step 5. View Data before Recovery
After scanning complete, you can preview the file you want before recovering them.

view iphone photos before recovery

If you only want to recover the deleted files, please click “Show Deleted Only” to show all already deleted files.

show deleted iPhone data

View photos before recovering – screenshot 1

View photos before Recovery

View photos before recovering – screenshot 2

View photos before Recovery

Step 6. Recover iPhone Data and Save onto Computer
Select the files you want to get back and click “Recover” button to save them onto your computer.

recover iphone lost data

Well done, all iPhone lost data be recovered and saved onto your computer, if you want to put them back to your iPhone for view and use, you can use this iOS Manager tool to import files from computer to iPhone/iPad/iPod directly.

d_win d_mac
d_win d_mac

Recover iPhone Fils after iOS 15 Update

How to Recover Messages and Contacts on iPhone 11/XS/XR/X/8

[Summary]: Deleted text messages and contacts on your iPhone? This post teach you an effective way to recover deleted messages, iMessages and contacts from iPhone with iOS 13/iOS 12.

Although WhatsApp, Kik, Line and more social app is squarely aimed at the smartphone segment of the handset market which adds sophisticated functions to the basic callling and texting capabilities of most phones, we can calling and texting whenever you want without connecting the cellular network, so, it is no doubt that contacts and messages data plays an important role in iPhone communication, when we have bought an new phone, we will save the import contacts to phone for calling expediently. But, sometimes, you may deleted contacts, text messages on iPhone by accidently, or lost contacts after iOS upgrading. At the same time, more and more people want to know how to recover deleted contacts or SMS on iPhone, for some of them deleted it accidently, lost data after upgrade iOS, or had iPhone stolen, etc.
Also read: Recover WhatsApp/Viber/Line/Messenger/Kik/WeChat Messages from iPhone/iPad

– You may delete contacts and messages by careless.
– iPhone have been stolen so that all important contacts and messages are gone;
– Failed iOS update cause some important contacts have gone;
– Mistakenly reset your iPhone cause all contacts and text messages erased;
– Transfer data to another iPhone and missing some contacts and messages

How to recover lost contacts from iPhone after update to iOS 13?”“How to restore lost contacts after factory reset iPhone?” “How to recover deleted contacts on iPhone when deleted contacts by careless?” “Is it possible to recover deleted contacts and messages on iPhone 11 Pro

It’s common to encounter the problems we list above for iPhone users. And everyone has accidentally deleted contacts and messages on iPhone, no matter the data lost or deleted, you still have chance to retrieve lost contacts and SMS from iPhone.

Take it easy. Deleting or losing data from iPhone is not a big disaster, you can find them back with a intelligent iPhone Data Recovery program. We all know that iTunes can automatically back up your iPhone data and update it every time when you sync it. So you can extract your contacts from the iTunes backup. In addition, if you have upload iPhone data to iCloud, you can restore iPhone lost contacts and SMS from iCloud backups. If you haven’t sync your iPhone to iTunes or iCloud, you can use a professional iPhone Contacts & SMS Recovery to recover deleted/lost contacts and SMS from iOS 13/iOS 12 devices, such as iPhone 11, iPhone 11 Pro(Max), iPhone XS(Max), iPhone XR, iPhone X ,iPhone 8, iPhone 8 Plus, iPhone 7, iPhone 7 Plus, iPhone 6S, etc.

This iPhone Data Recovery provides three recovery modes to recover iPhone lost data: Directly scan and recover lost contacts, SMS, photos, videos, notes, WhatsApp messages, etc. from iPhone 11/XS/XR/X/8/7/6s/6; Restore iPhone lost data from iTunes backups; and restore iPhone data from iCloud backups.

d_win d_mac
d_win d_mac

How to Recover Deleted SMS and Contacts from iPhone 11(Pro)

Step 1. Run the iPhone Data Recovery
First of all, download, install and launch the iPhone Data Recovery on your computer, then click “iPhone Data Recovery” function.

iphone 11 data recovery

Step 2. Connect Your iPhone to Computer
Connect your iPhone 11 with the computer via an Apple USB cable, the software will detects it.

connect iPhone 11 to computer

Step 3. Select Contacts and SMS to Recover
If you want to save time to recover contacts and text messages, only select “Contacts” and “Text Messages” item and click “Start Scan” button begin scanning your iPhone device.

Select SMS and contacts

Step 4. Scan Lost Contacts and Messages
The iPhone Data Recovery start to scanning lost/deleted contacts and messages from your iPhone, keep connecting your iPhone with the computer during scanning process.

scan and recover contacts from iPhone

Step 5. Preview and Recover SMS & Contacts from iPhone 11
Only few minutes, the software will scan and show all the missing contacts & messages, please check the detail and save the data that you want to get back. Finally, just click “Recover” button to recover deleted/lost contacts & SMS from iPhone 11.

Recover deleted contacts from iPhone 11

recover contacts from iPhone 11

Recover deleted messages and messages attachments from iPhone 11

recover messages attachments from iPhone 11

Your missing data will be saved onto your computer, if you want to transfer the recovered contacts to iPhone for using, you can use this iOS Manager tool to transfer contacts from computer to your iPhone.

Tips: You also can recover other lost data from iPhone directly in the same steps, like WhatsApp messages, Kik messages, Line messages, photos, videos, notes, call history, bookmarks,ect. In additional, if you use iPad and iPod Touch, this iOS data recovery allows you lost data from iPad and iPod Touch.

Notes: The directly iOS data recovery mode shown above will certainly lead you to successfully get back your lost contacts and messages. You can also restore iPhone lost data from iTunes or iCloud backups, is it amazing? Now, please free download the iPhone Data recovery and learn how to Recover Lost Contacts from iPhone directly.Try it now.

d_win d_mac
d_win d_mac

How to Transfer WhatsApp Messages from iPhone to iPhone 11(Pro)

[Summary]: Here is a easy method to transfer WhatsApp messages from old iPhone to new iPhone 11, iPhone 11 Pro and iPhone 11 Pro Max, you can also backup iPhone WhatsApp messages and WhatsApp message attachments, and restore the backup to iPhone 11(Pro).

I have bought an new iPhone 11 pro, lots of important chat history and pictures stored on my iPhone 7, how to transfer WhatsApp messages from iPhone 7 to iPhone 11 Pro?

iTunes can’t sync WhatsApp messages, how to sync WhatsApp messages from iPhone X to iPhone Pro?

iPhone 11 and iPhone 11 Pro(Max) on sale now, more and more Apple fans upgrade to new iPhone 11, we can sync contacts, SMS, photos and videos from old iPhone to new iPhone via iTunes, but it’s difficult to transfer WhatsApp messages between two iPhone devices, because the data stored in the WhatsApp app, if you want to copy iPhone WhatsApp messages to iPhone 11, you need to use a third-party iPhone to iPhone WhatsApp transfer tool.
Also read: How to transfer contacts data from iPhone to iPhone 11(Pro)

This WhatsApp transfer & manager tool – Restore Social App, which is a part of iOS Toolkit, it not only can help you transfer WhatsApp messages from iPhone to to iPhone, but also helps you backup iPhone WhatsApp messages & attachments, then export them to the computer and restore the backup to iOS/Android device, such as iPhone 11(Pro), Samsung Galaxy S10/S9/S9, Note 10/Note 9, Huawei Mate 30/20(Pro), Huawei P30/p20(Pro), etc. So, when you have bought an new phone, you can use this powerful WhatsApp transfer & manager tool to backup, restore WhatsApp messages or transfer WhatsApp messages from iOS to iOS/Android devices at ease.

Free download the iOS Toolkit and try to transfer WhatsApp data between iPhones.

d_win d_mac
d_win d_mac

Simple Steps to Transfer WhatsApp Messages from iPhone to iPhone 11(Pro)

Step 1. Launch iOS Toolkit on PC or Mac
The iOS Toolkit works well with Windows and Mac computer, please free download the software, install and launch it on your computer, then select “Restore Social App” option from the tool list.

iOS WhatsApp backup, restore, transfer

Step 2. Go to WhatsApp Transfer, Backup & Restore Function
The software will pop up an new windows, you can see the software also supports backup and restore LINE/Viber/Kik/Wechat chat history. To transfer WhatsApp messages between two iPhones, please click “WhatsApp” tab.

There are four main features:

Transfer WhatsApp Messages: Transfer WhatsApp messages from one device to another(from iPhone to iPhone, or from iPhone to Android).

Backup WhatsApp Messages: Backup WhatsApp messages and WhatsApp photos/videos from iPhone to computer.

Restore WhatsApp Data to iOS device: View WhatsApp backup and restore it to iPhone/iPad selectively.

Restore WhatsApp Data to Android device: View WhatsApp backup and restore it to Android phone/tablet selectively.

Backup WhatsApp messages

Step 3. Connect iPhone 11(Pro) and Old iPhone to Computer
Then connect your old iPhone and iPhone 11 to the computer. Once the program detects them, you will get the window as follows.

iPhone to iPhone WhatsApp transfer

Step 4. Confirm Transfer WhatsApp Messages to iPhone 11(Pro)
Now, click “Transfer” button start to move WhatsApp message from old iPhone to new iPhone 11. Since the software will erase existing WhatsApp messages from the destination device(iPhone 11), you need to click “Yes” to confirm the transferring process if you still want to move forward.

Confirm Transfer WhatsApp Messages

Tips: If you don’t want to erase existing WhatsApp messages from the destination device, please backup your WhatsApp data at first, then restore them to your device after the transferring processing complete.

Step 5. Start to Transfer WhatsApp Messages from old iPhone to iPhone 11(Pro)
The software start to transfer WhatsApp data to your new iPhone 11, including WhatsApp chats, sent and received pictures and videos.

Start to Transfer WhatsApp Messages to iPhone 11

Step 6. iPhone to WhatsApp Message Transfer Done
During the transfer, please keep connecting the two device with the computer, when you see the window below, you can disconnect your device and view the transferred WhatsApp messages on your iPhone 11(Pro).

drfone-whatsapp-transfer04

Tips: You can also backup WhatsApp messages from old iPhone to your computer, and then restore the backup WhatsApp messages and WhatsApp message attachments to your iPhone 11/iPhone 11 Pro(Max).

This is a powerful WhatsApp transfer, backup and restore tool, it can help you transfer WhatsApp messages from iPhone/iPad/Android to iPhone/iPad/Android directly, backup WhatsApp to PC or Mac in 1 click, and restore WhatsApp backup to new iPhone or Android. Please free download this iOS Toolkit and start to transfer your important WhatsApp messages.

d_win d_mac
d_win d_mac

How to Optimize iOS 13/12 Performance to Speed Up Slow iPhone

[Summary]: Want to optimize iOS 13 or iOS 12 performance to speed up your iPhone/iPad, this article teach you an effective ways to optimize iOS performance, no data loss at all.

iOS 13 has been released. It is likely to push many an older iPhone or iPad to the limits of its capabilities, the iOS 13 compatible with iPhone 11, iPhone 11 Pro(Max), iPhone XS(Max), iPhone XR, iPhone X, iPhone 8(Plus), iPhone 7(Plus) and iPhone 6S(Plus), the iPhone SE or the 7th-generation iPod touch; iPadOS is compatible with any iPad, iPad mini and iPad Pro that was released in 2014 or later; and tvOS 13.1 is compatible with any Apple TV that can run tvOS 12.

Optimize iOS 13 Performance

Many iPhone users complain about the performance of iOS 13. However, it is important to identify the exact reason behind it before you try to enhance iOS 13 performance. When you use your iPhone, data files will get stored in it along with time. And too much useless files, like junk files and caches, will surely effect your iOS device. To improve iOS 13 performance, you can erase junk files on iPhone, if your iPhone runs in iOS 12, iOS 11 or older version, you can reinstall iOS system to optimize your iOS performance. Most users may use iTunes to upgrade or downgrade iOS system, but you may lost data after restore iPhone via iTunes, to reinstall iOS system on iPhone without erasing all data and settings, this article will teach you an effective and easy method to optimize iOS 13 or iOS 12.4 performance, so that you can speed up your slow iPhone/iPad, please keep reading the below guide to install iOS 13, iOS 12.4 on your iPhone without data losing.

How to Fix Bugs on iOS 13 or iOS 12 Performance?

To optimize iPhone, iPad and iPod performance, try updating iOS system on your device again, it means you need to reinstall the latest iOS 13/12 or iPadOS, in ordering to upgrade your iPhone without erase all current data, you need to use an iOS System Recovery.

This iOS System Recovery provides all iOS firmware for optimizing your iPhone, iPad and iPod, including iOS 13, iOS 12, iOS 11, iOS 10, iOS 9 and more previous version, you can view as the below screenshot:

iPhone Firmware Files (IPSW firmware files)

iphone firmware - iOS 13

iPad Firmware Files (IPSW firmware files)

iPad firmware - iOS 13

iPod Touch Firmware Files (IPSW firmware files)

iPod Touch firmware - iOS 12

After download, install and launch this iOS System Recovery on your PC/Mac computer, then connect your iOS device to the computer, the software will detect your device and shows all information of the device, then click “Optimize” button go to optimize your iOS performance, please select your device’s name and mode, the program will list suitable iOS firmware files for optimizing your device, the iOS System Recovery can download suitable firmware to computer and install it on your iPhone, iPad or iPod Touch, no data loss at all. It means, this software can help you upgrade or downgrade your iOS system.

In addition, if your iPhone/iPad stuck into recovery mode, DFU mode, white Apple logo, etc. The iOS System Recovery also can help you fix iPhone and iPad to normal status, it won’t erase the data and settings while repairing the iOS system issues, this program also enables users fix all types of errors on iTunes.

Download the iOS Toolkit – iOS System Recovery to fix or optimize your iOS system.

d_win d_mac
d_win d_mac

Key Features:

  • Fix all iOS system issues when iPhone stuck on white Apple logo, recovery modes, DFU modes, boot loop, etc.
  • Fix your iOS 13/12/11/10/9 system without data loss.
  • Work for all models of iPhone, iPad and iPod touch.
  • Offers iOS 13, iOS 12/12.4, etc. firmware to download.
  • Reinstall iOS system without data loss.
  • Optimize iOS performance without using iTunes.
  • Support all iOS devices like iPhone 11 Pro Max/11 Pro/11, iPhone XS/XS Max/XR/X/8/8 Plus, iPad Pro, iPad Air, iPad mini, iPod and more.
  • Fix iTunes issues: iTunes error when syncing/backing up/updating/restoring iOS devices.
  • Works well with Windows 10/8/7, Mac OS X 10.7 or higher.

Guide: Download and Install iOS 13 to Optimize Your iPhone/iPad

Step 1. Launch iOS Toolkit on Computer and Connect Your iPhone
Download, install and run the iOS Toolkit on your Windows or Mac computer, then connecting your iPhone with the computer via USB cable. And click the “More tools” option at the bottom left of the interface.

connect iPhone to computer

Then, click the “iOS System Recovery” function.

launch iOS System Recovery

You an see this iOS System Recovery can help you fix ios to normal, fix iTunes error, upgrade or downgrade your iOS system, or optimize iOS performance. Please click “Start” button to go on.

optimize iOS performance

Step 2. Select Standard Mode and Advanced Mode
The standard mode installs iOS system by retaining device data. The advanced mode will erase data while installing firmware package or fixing the iOS system issues. Suggest that you go to the advanced mode only if the standard mode fails.

iOS optimize mode

Step 3. Optimize iOS System
As above we have told you that the software can help users get iPhone, iPad and iPod Touch out of white screen, Recovery Mode, Apple logo, black screen, and fix other iOS issues.
If your iDevice works normally and you want to optimize iOS system only, you will get a tips as below said “The device system is in normal state, and you can continue to optimize”, if you want to enjoy better iOS performance, please click “Optimize“.

Optimize iOS System

Step 4. Select IPSW firmware Files to Download
The software will pops up an new windows, it will automatically detects the model type of your iDevice and displays available iOS system versions, please select the latest iOS firmware to download, we suggest you upgrade to the latest version for optimizing your iPhone/iPad/iPod Touch. For example: If you want to upgrade iPhone to iOS 13, please select a corresponding iOS 13 firmware; If you want to downgrade iOS 13/iPadOS back to iOS 12.4.1 on your iPhone or iPad, please choose iOS 12.4.1 and click “Next” button start to download firmware for your iDevice.

Select Firmware - iOS 13/12/11/10

Step 5. Download iOS Firmware for iPhone, iPad, iPod Touch
The software start downloading firmware package for installing IPSW file and repair your iPhone, iPad or iPod Touch device.

Download iOS Firmware for iPhone, iPad, iPod Touch

Note: Do not disconnect or operate your device during the download processing.

Step 6. Start Installing IPSW file to Optimize Your iPhone
After downloading the firmware package completed, the tool starts to verify the downloaded iOS firmware, then just click on “Repair” to start repairing your iOS and install the downloaded IPSW files on your iPhone, the tool will optimize your iOS device.

Start to Optimize Your iPhone

After installing complete, your iPhone will start up again, an you can find all iOS system issues are gone, your will find the iOS runs more smoothly that before.

d_win d_mac
d_win d_mac

These is one of the most effective methods to improve iOS 13 performance, you can also use this iOS Data Eraser to erase all junk files, useless documents & Apps permanently and complete, or backup iPhone photos, videos to computer, which is another method to get more additional storage space, so you can speed up your iPhone/iPad/iPod(touch).

iOS System Recovery

3 Ways to Fix iPhone Stuck in Recovery Mode After iOS 15 Update

Summary
Your iPhone stuck in boot loop, recovery mode or Apple Logo screen when upgrading to iOS 15/iOS 14.8? Here how to fix iPhone 12/11/XS/XR/XS Max/X/8/7/6S stuck in recovery mode loop after iOS 15 update failed.

iPhone stuck in Recovery Mode and won’t restore” during/when iOS 15 upgrading, recently, many iPhone users have encountered similar problems, some users may ask how to get iPhone out of recovery mode, you can find an effective solution to fix iPhone stuck in recovery mode after iOS 15 update. When you get a corrupted iOS operating system during software update, you may try to restore it by putting your iPhone in Recovery Mode. If your iPhone 12/11/SE/XS/XR/XS Max/X/8/7/6S upgraded to iOS 15 is stuck in Recovery Mode, you can’t miss this article which covers the potential solutions to the problem “iPhone stuck in Recovery Mode in iOS 15”. By the ways, you can also fix “iPhone stuck on Apple logo in iOS 15” without data loss, read it for reference if you get the same problem.

Method 1: Force Restart iPhone to Fix “iPhone stuck in Recovery Mode” in iOS 15

When your iPhone is stuck in Recovery Mode, you can try to force restart your iPhone and get it out of recovery mode. The way to force restart your iPhone varies according to the iPhone you are using. Choose one of the three ways below to reboot your iPhone.

For iPhone 6 or earlier, hold and press both Sleep/Wake button and Home button until you see the Apple logo. (Sleep/Wake button is also called Side button.)

For iPhone 7/7 Plus, hold and press both Sleep/Wake button and Volume Down button until the Apple logo appears.

hard reboot iphone 7/7 plus

For iPhone 11/XR/XS/X, iPhone 8 and iPhone 8 Plus, quickly press and release the Volume Up button, quickly press and release the Volume Down button and then press and hold the Sleep/Wake button until you see the Apple logo.

force restart iPhone 11/XR/XS/X/8

Method 2: Using iTunes to Restore iPhone when iPhone Stuck in Recovery Mode

If your iPhone stuck in Recovery Mode after iOS 15 update failed, you can also use iTunes to restore your iPhone, but this method will erase all data and settings on your iPhone, f you don’t care about the data on your phone, you can restore your iPhone by using iTunes.

What should you need to do before using iTunes to restore iPhone?
Download and install the latest version of iTunes application on your PC or Mac computer.

To avoid problems like “iPhone not connecting to iTunes”, so you need to update your iTunes to the latest version.
Please go to iTunes > Help > Check for Updates on your Windows PC or App Store > Update > Install on your Mac to update your iTunes to its latest version.

When your iPhone stuck in Recovery Mode, then follow the steps below to restore your iPhone by using iTunes:

Step 1: Connect your iPhone to your computer and launch iTunes.

Step 2: Then you may see a window in iTunes telling you “iTunes has detected a device in Recovery Mode”. If so, tap on Ok in the window.

Step 3: Tap on the iPhone Device button in iTunes and choose Summary.

Step 4: Click Restore iPhone > Restore to reset your iPhone to factory settings. After that, your iPhone will be set up as new.

Restore iPhone with iTunes

Note: The iTunes will erase all data and settings on your iPhone, if you looking for a safely method to fix iPhone stuck in recovery mode in iOS 15/iOS 14, we recommend you use a safe iOS System Recovery tool, please keep reading the below iOS system fixing solution.

Method 3: Fix iPhone Stuck in Recovery Mode via iOS System Recovery

Put your iPhone in DFU mode at first
If you iPhone in iOS 15 is stuck in Recovery Mode and you don’t want to fix it with the help of some third-party software, the last solution you can try to use the 3 best iOS System Recovery to fix iOS system to normal after putting your iPhone in DFU mode, which enables you to fix the iOS 15 software issus without data loss.

Then, fix iPhone Stuck in Recovery Mode by using iOS System Recovery

This iOS 15 System Recovery is designed to fix your iPhone and iPad back to normal status without data loss, it not only can help you fix frozen, disabled or bricked iOS devices to normal, but also enables you fix iPhone from DFU mode, recovery mode, Apple log, etc. This professional iOS System Recovery is easy to use & 100% safe without any data loss, so you can fix iPhone stuck in recovery mode at home.

iOS System Recovery For Any Situations:

  • Recovery mode: iPhone is stuck in recovery mode
  • DFU mode: iPhone gets trouble into DFU mode
  • Black Screen: iPhone is in black/blue/red/white screen
  • Apple logo: iPhone shows Apple logo
  • Headphone mode: iPhone stuck in headphone mode
  • Frozen: iPhone is frozen for some reasons
  • iPhone disabled: iPhone is disabled after unlock failure
  • Loop restart: iPhone is in the loop of restarting
  • More situations: iPhone is in more abnormal situations

Now, you can download the free trial version to have a try. Please choose the right version for your computer.

d_win d_mac
d_win d_mac

What’s more, this program also can help you recover lost data from iPhone and iPad, and back up your important data regularly to protect your data. You can follow our step by step guide on how to recover lost data from an iPhone, it works well with all iOS devices, including iOS 13, iOS 12, iOS 11, iOS 10, etc.

How to Fix iPhone Stuck in Recovery Mode after iOS 15/iOS 14.8 Update

Step 1: Launch the iOS Toolkit and Connect iPhone to Computer
Open the iOS Toolkit and click the “More tools” option at the bottom left of the interface. Then, connect your iPhone with the computer via USB cable.

connect iPhone to computer

A new window pops up, offering you three options to choose from. Since we’re going to fix iPhone stuck in recovery mode, choose the “iOS System Recovery” option to proceed.

launch iOS System Recovery

The software will pops up an new window, then click “iOS Mode issues”, you can see the program can fix iOS device stuck on recovery mode, headphones mode, DFU mode, etc. Then, hit the “Start” button at the lower right corner to go on.

select iOS Mode issues option

Step 2: Select a Fix Mode
You then will get into a new window, like the screenshot below. Please select “Standard Mode” or “Advanced Mode” to fix your iPhone device, then click “Confirm” to go on.
Standard Mode” – Fix your device with this mode, all data on your device will not be lost.
Advanced Mode” – Fix your device with this mode, it will erase all data on your device.
Suggest that you go to the advanced mode only if the standard mode fails.

iPhone fixing mode

You then will be prompted to set up a connection between your iPhone and the computer with a USB cable. Do it as required

Step 3: Optimize iOS System(Option)
The software will detect and analyze your iPhone device and shows all information of the device, if your iPhone is working properly, you will get the screenshot as below:

iPhone information

Tips: If you want to enjoy better iOS performance, you can continue to optimize your iPhone, please click “Optimize” button to go on. So, this iOS System Recovery can help you update or downgrade iPhone/iPad/iPod Touch without data loss.

If your phone is working abnormal, you need to put your iPhone into DFU mode or recovery mode at first, then the software will detect it and download the suitable firmware to fix iOS system to normal, please keep reading the below steps.

Step 3: Enter DFU Mode or Recovery Mode(Skip)
Just follow the on-screen instructions to put your iPhone into DFU mode.

put iPhone into DFU mode

Or, put your iPhone into Recovery mode, just follow the on-screen instructions to put your iPhone into Recovery mode.

put iPhone into recovery mode

This case teach you how to fix iPhone to normal when it stuck on recovery mode, so you don’t need to put your iPhone into recovery mode or DFU mode, the software can detects it.

Step 4: Select Firmware Package
In this step, you need to select a suitable firmware package for your iPhone, the software provides the latest iOS 13 for iPhone 11/XS/XS Max/XR/X/8/7/6S(Plus).

Select Firmware - iOS 13/12/11/10

Step 5: Download Firmware Package for Fix your iPhone
The software automatically detects the model type of your iPhone and displays available iOS system versions. Select a version and click on “Next” button start downloading Firmware package for repair your iPhone device.

Download Firmware - IPSW files

Do not disconnect or operate your device during the download processing.

Tips: Then the iOS firmware will be downloaded. Since the firmware we need to download is large, it will take some time to complete the download. Make sure your network is stable during the process. If the firmware is not download successfully, you can also click on “Download” to download the firmware using your browser, and click on “Import” to button to import the downloaded firmware package to the software, it will help you install the downloaded firmware without erase your iPhone data.

Step 6. Start Fixing the iPhone in Recovery Mode
After downloading the Firmware package completed, then click the “Repair” button at the lower right corner. The software start to fix iOS system to normal, please keep connecting your iPhone device with the computer during the fixing processing.

fix iPhone stuck in recovery mode

When it’s done, your iPhone will restart automatically and get back to normal.

Why not download this powerful iOS Toolkit – iOS System Recovery to fix your iPhone device to normal status, or optimizing iOS system to enjoy better iOS performance.

d_win d_mac
d_win d_mac

No matter your iPhone stuck in the loop of restarting, stuck on Apple logo, stuck in black screen, or screen locked, this iOS System Recovery can help you fix iOS system to normal without data loss. Additionally, the powerful “iPhone Data Recovery” can help you recover deleted iPhone data such as photos, contacts, text messages, notes, reminders, etc.

Complete Guide on How to Put iPhone into DFU Mode

Before fix iOS system to normal by using this iOS System Recovery, if the software can detect your device, you need to put your iPhone into DRU mode firstly. Let’s learn how to put iPhone in DFU mode and read it for reference no matter you are using an iPhone 11/XR/XS, iPhone 8, iPhone X, iPhone 7 or iPhone 6.

1)Put iPhone 8/X/XR/XS/11 in DFU mode

Step 1: Connect your iPhone 8/X/XR/XS/11 to your computer and launch iTunes.

Step 2: Press and quickly release the Volume Up button, press and quickly release the Volume Down button and then press and hold the Side button (Sleep/Wake button) until you get a black iPhone screen.

Step 3: When your iPhone screen goes black, release Side button only and then quickly press and hold both Side and Volume Down Buttons for 5 seconds.

Step 4: Then release Side button only and hold the Volume Down button for another 5 seconds.

Step 5: During the process, pay close attention to iTunes. When you see a small window in iTunes telling you iTunes has detected an iPhone in recovery mode, release the Volume Down button and check your iPhone screen. If it’s black, fortunately, you have put your iPhone 8/8 Plus/X in DFU mode successfully. While if it’s not, for example, it’s the “connect to iTunes” screen, you have to repeat the steps above to enter DFU mode again.

Step 6: If you have put your iPhone 8/X/XR/XS/11 in DFU mode successfully, click OK and then choose to Restore iPhone. When it’s completed, your iPhone will exit DFU mode automatically.

2)Put iPhone 7/iPhone 7 Plus in DFU mode

Step 1: Connect your iPhone 7/7 Plus to your computer and launch iTunes.

Step 2: Press and hold Sleep/Wake button (Side button) until a slider appears. Drag the slider to shut down your iPhone.

Step 3: Then hold and press both Sleep/Wake button and Volume Down button for 10 seconds.

Step 4: Keep holding Volume Down button only for 5 seconds after the 10 seconds.

Step 5: If your iPhone screen remains black, you are now in DFU mode. And iTunes will tell you that it has detected your iPhone. (To exit DFU mode, you just need to turn off your iPhone.)

3)Put iPhone 6 or earlier in DFU mode

Step 1: Connect your iPhone 6 or earlier to your computer and run iTunes.

Step 2: Hold and press Sleep/Wake button (Side button) until you see a slider on the screen. Drag the slider to switch off your iPhone.

Step 3: Press and hold both Sleep/Wake button and Home button for 10 seconds.

Step 4: Then keep holding Home button only for another 5 seconds.

Step 5: If your iPhone screen stays black, your iPhone is in DFU mode now. At the same time, a window in iTunes will pop up and tell you iTunes has detected your device. (To exit DFU mode, you just need to turn off your iPhone.)

iOS 14/15 System Recovery

[Full Guide] Recover Data from iPhone 11/XS/XR/X/8 after Factory Reset

[Summary]: After resetting your iPhone to factory settings, all your data on the iPhone is erased? Don’t worry, this post teach you how to recover lost photos, contacts, text messages, notes, videos etc after factory reset iPhone 11 and iPhone 11 Pro.

My iPhone 11 can’t download App on App store, so I perform a factory reset, but all data including contacts, SMS, photos are lost after factory reset iPhone 11 Pro, how can I recover iPhone lost data after factory reset?

When the iPhone is not responding or some problems, performing a factory reset will fix a problem with your iPhone, but you may found all data and settings will be erased after factory reset iPhone.

Actually, the data is not completely erased after factory reset, these data are only hidden, the data can be restored as long as it not covered by new data. When you find the data deleted, lost, erased, wiped, you need to use a professional iPhone Data Recovery to recover lost data from your iPhone as soon as possible. This article will share with you the best iPhone data recovery solution, you can recover lost data on iPhone 11/11 Pro/XS/XS Max/XR/X/8/8 Plus/7/7 Plus/6S/6/SE/5s/5 after a factory reset.

Follow the below free iTunes/ iCloud data recovery solution and using the iPhone data recovery software to recover lost data from iPhone, iTunes and iCloud.

Method 1: Using iTunes to Recover iPhone Lost Data After Factory Reset

When you using iTunes to sync iPhone files, the iTunes will help you create a backup files automatically. So, you can use iTunes to restore the iTunes backups to your iPhone, if you have an iTunes backup. Let’s follow the below step-by-step guide on how to use iTunes to recover iPhone lost data after factory reset.

Step 1. Open iTunes on your computer that has backup files.
Step 2. Connect your iPhone to your computer.
Step 3. Select your iPhone icon when it appears in iTunes.
Step 4. In the Summary panel, click “Restore from backup…
Step 5. Select a backup from a list of archives available, then click Restore.

restore iphone data from itunes after factory reset

Step 6. After completing the steps, you should see your missing data will shown on your iPhone again.

Note: It is free to restore data to iPhone by using iTunes, but all current data will be overwritten and erased, you can preview and recover the lost data selectively. If you looking a more simple way to recover data from iTunes backup files, we recommend you use a safely iPhone Data Recovery.
Also read: How to recover iPhone data from iTunes

Method 2: Recover iPhone Data After Factory Reset With iCloud Backup

If you have backup your iPhone data to iCloud before performing a factory reset, follow these simple steps to recover the lost iPhone data from iCloud backups:

Step 1. Turn on your iPhone.
Step 2: Follow the on-screen prompts to set up the device.
Go to Settings > Generaol > Reset > Erase all content and settings > Erase Now.
Step 3: When arrive at “App & Data” screen, select “Restore from iCloud” Backup
Step 4: Sign in iCloud with Apple ID and password.

restore data from iCloud

Step 5: Proceed to “Choose backup,” then choose from a list of available backups in iCloud.
Here your iPhone will begin to restore the data from iCloud backup.

restore iphone data from icloud backup

Note: When you restore data from iCloud backup then all previous data will be erased from iPhone. If you want to selectively recover iPhone data From iCloud backup, we recommend you use a profession iPhone Data Recovery.
Also read: How to recover iPhone data from iCloud

Method 3: Directly Scan and Recover iPhone Lost Data after Factory Reset

If you haven’t backup your iPhone with iTunes and iCloud, or can’t be sure the backup files you made. Don’t worry, you can use an professional iPhone Data Recovery to directly scan and recover lost data from an reset iPhone, remember don’t add new data to the devices or do no take photos with your phone, just follow the below steps to recover your iPhone lost data as soon as possible.

Free try this iPhone Data Recovery to directly scan and recover lost data on iPhone 11/11 Pro/XR/XS/XS Max/X/8/7/6 Plus/6/5C/5S/5/4S/4, etc. after factory reset. It is an powerful and safe iPhone data recovery program, which is designed to recover all kinds of data including photos, videos, call history, text messages, contacts, notes, reminder, WhatsApp messages, etc. No matter the was data lost or deleted, the software also can help you fix iPhone to normal and extract data on it.

d_win d_mac
d_win d_mac

More Features:

  • Support to recover deleted iPhone data without any iTunes or iCloud backup. No matter who accidentally delete your iPhone data, iPhone data recovery tool can help you to recover them, even if you haven’t created any iTunes or iCloud backup.
  • Extract data from iTunes or iCloud backup, preview the details of backup file and selectively choose the contacts, SMS and notes you need to restore, save as CSV, TEXT, or HTML format to computer so that you can view or print them at any time.
  • Support to recover 22+ file types for all iPhone iPad iPod, including photos, videos, contacts, text messages, iMessages, mms, notes, call history, safari bookmark, voicemail, voice memos, WhatsApp, WebChat, Viber, Kik, Skype, message attachments etc.
  • Support all iOS devices running a variety of versions of iOS versions, compatible with all windows and mac computer, get back lost data due to deletion, device crashed, smashed or broken, device loss, jailbreak, iOS upgrade or factory settings restore etc.
  • Provide the most powerful features to fix iOS system to normal, you won’t lost any data after your phone stuck at apple logo/ recovery mode, white/black screen and other issue. When your iOS system appear some problems, can’t boot sucessfully, you still have a way to get notes back.
  • iOS Data Backup & Restore: One click to backup your iPhone or iPad data, including contacts, text messages, photos, videos, podcast, music, WhatsApp, Messenger, etc. And easily restore data to iOS devices from backups.

User Guide: Recover Lost Data on iPhone 11(Pro) after Factory Reset

This guide shows you how to recover lost photos from iPhone 11 by using iPhone Data Recovery(Mac version), you also can follow the same steps to recover iPhone lost data on Windows 10/8/7/XP.

Step 1: Download, Install and Launch iOS Toolkit
First of all, please free download the iOS Toolkit on your computer, then install and launch it on computer, you will get it’s main interface as below, then click “iPhone Data Recovery”.

iphone 11 data recovery

Step 2: Get Your iPhone 11 Connected to Your Computer
To directly scan and recover lost data from iPhone device, please click “Recover Data from iOS Device” and connect your iPhone 11 to computer, then you will see 3 recovery modes, simply select “Recover from iOS Device”.

connect iPhone 11 to computer

Step 3: Select the Types of Data you want to Recover
As soon it detects your device, the below window will appear, please select photos, contacts, sms, notes and more types of data you want to recover.

Select Types of Data

Step 4: Start Scanning Your iPhone to Find Lost Data
Click on the “Start Scan” button to start analyzing your iPhone 11. If your iPhone can not be detected, please click here to get help.

scan iPhone

Note: please always make sure that your iPhone is connected to keep the scan progress on going and avoid unnecessary termination of the process, otherwise it will start again.

Step 5: Preview and Recover Lost Data from Your iPhone 11(Pro)
Once the scanning process is complete, you can preview all found data before performing recovery. These data will be displayed in three categories according to file types. If you only want to recover the deleted files, then you can select “Only display the deleted items” to ON. Here you can preview the deleted/lost data. Finally, please choose the contents you want to recover, press the “Recover” button to save them on your computer.

Recover data from iPhone after factory reset

Step 6: Transfer the Retrieved Files Backup to iPhone or iPad
After saving the lost data on the computer, you can easily transfer the data back to your iPhone, iPad or iPod Touch through iTunes or this iPhone/iPad/iPod Transfer tool, this iOS transfer tool not only can help you import files from computer to iPhone/iPad/iPod, but also helps you backup your iPhone data easily.

With this iOS Toolkit, all data recovery, backup and restore becomes easy. It can help you easily and quickly recover lost data from iPhone after factory reset. This powerful iOS Toolkit also can help you fix iOS system to normal, when your iPhone stuck in recovery mode, Apple logo, DFU mode, etc.

d_win d_mac
d_win d_mac