Summary: In this post, we will show Android users steps to recover missing files after a Android 9.0 update as well as instructions to backing up Android data to the computer.
Even though most phones don’t have Oreo yet, Google has released the first beta tester build of Android P that anyone with a compatible device can install. It’s available on Google’s own Pixel devices, as well as partnered devices from Essential, Nokia, Oppo, Sony, Vivo, and Xiamoi, and we’re already digging into it to highlight all of the features and changes. There’s still no word yet on exactly what “P” stands for – Pie, Popsicle, Pudding, Pineapple Upside Down Cake – it’s anyone’s guess at this point. It will officially be Android 9.0, and we know for sure that it’s bringing lots of changes along with it.
Just like earlier issue of data loss on Android after OS update, similarly you may encounter data loss on your Android device after 9.0 update. There are various users who have been facing this issue. After upgrading their phone to Android 9.0 or other Android OS, they have been missing or lost some personal data on the smartphone. Sometimes the update gets failed and then they lose their data including contacts, pictures, videos, messages, some apps, music and more. To help you restore deleted data from Android after 9.0 update without hassle, U.Fone Android Data Recovery is the tool you need.
Android 9.0 Update Data Recovery
Android ToolKit – U.Fone Android Data Recovery help Android users recover deleted data after Android 9.0 update. The types of recoverable files including contacts, text messages, gallery, videos, WhatsApp messages, documents, etc,. Almost all devices running any Android OS operating system are supported, including Samsung, Huawei, Google Pixel, LG, HTC, Sony, ZTE, Lenovo, Motorola, and more. Besides to Android OS update, this program supports to recover deleted data for any data loss causes, such as, accidental deletion, Android OS rooting, factory reset restoring, and so on. In addition, Android ToolKit is an all-in-one data manager tool for Android device, features with Android data recovery, Android data backup & restore, broken Android data extraction.


How to Retrieve Deleted Data after Android 9.0 Update
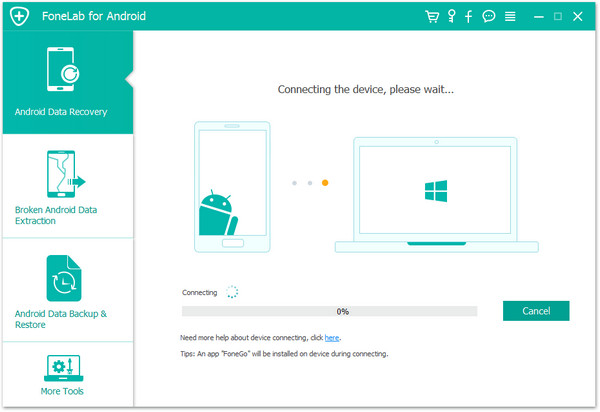
Step 1.Run Program and Connect Android to the Computer
To start with, please install Android ToolKit – U.Fone Android Data Recovery on the computer, run it and connect Android phone to the computer. It will take a few seconds to detect your phone automatically by program. In the home page of it, click “Android Data Recovery” selection.

Step 2.Enable USB Debugging on Android Phone
Unlock your phone and allow USB debugging mode on your phone. If you have already allowed the USB debugging mode on it, you will see a pop-up window on the screen, mark “Always” allow from this computer and click “OK“.

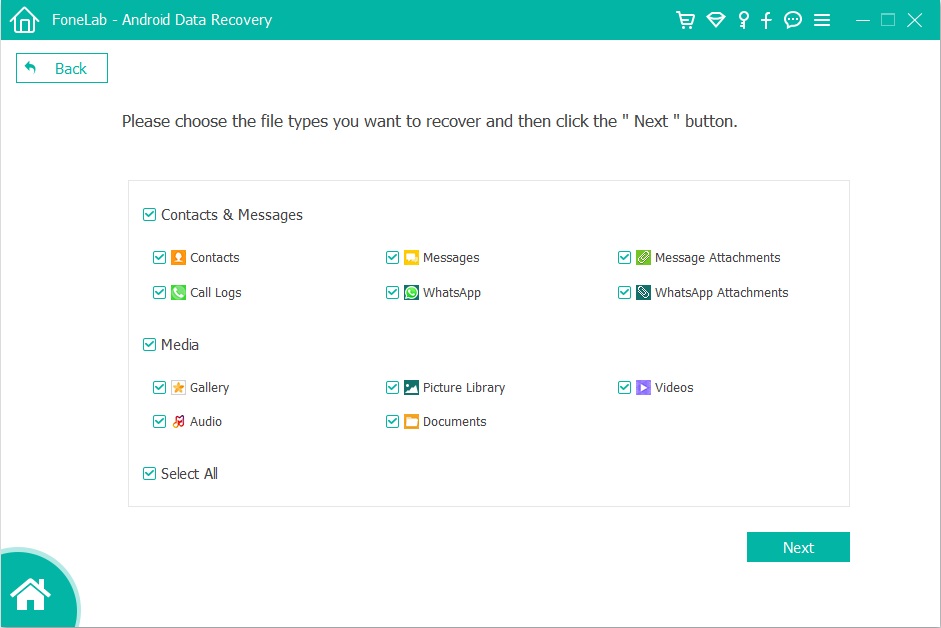
Step 3.Select Files Type to Recover
All types of recoverable Android data will be displayed in the interface of program. Select your want files contain the data you need to restore and then click “Next“. It will take a few minutes to analyze the deleted and existent data on your phone.
Step 4.Scan Android Data
With safety, you should click “Allow” on the interface of your phone to allow the program analyze the data on your phone.
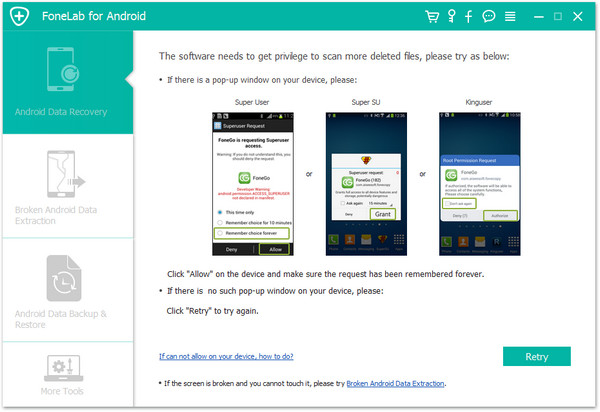
The program will begin to scan and analyze your data from the phone.

Step 5.Recover Deleted Data after Android 9.0 Update
Once the scanning is completes, you could preview and select the data to recover from your Android phone directly after Android 9.0 update. Save and recover the selected data to the computer by clicking “Recover“.

More Guides about Android Tips:
How to Recover Lost or Deleted Data from Android
How to Recover Data from Frozen Android
How to Restore Lost Data from Rooting Android
How to Recover Lost Data from Android SD Card
How to Transfer iTunes Music to Android
How to Manage Android on the Computer
Android Data Recovery
Recover Your Lost Data from Android
Now, Even Device Broken
Compatible with Android 8.0 Oreo/7.0, etc.