[Summary]: Is it possible to recover lost data from iPhone 11/11Pro (Max) without any backup? Sure! This article shows you three effective method to recover iPhone data without iTunes, Finder or iCloud backup. You can also learn how to restore iPhone data from iTunes/Finder or iCloud backups.
How can I recover iPhone data without iCloud or iTunes backup?
I accidentally deleted messages and contacts from my iPhone 11, and I haven’t enable iCloud automatic backup service and forgot to backup my iPhone with iTunes. Now, I need them urgently, but I’ve heard that there is no way to recover deleted files on an iPhone except through backup. Is that really? Is it possible to recover iPhone lost data without iTunes or iCloud backup? Please help! Thanks in advance.
If you have backed up your iPhone with iTunes or iCloud, restoring from backup file is the simple way to recover your iPhone data, but to be honest, not everyone will backup data regularly. Once you lost data without any backup in Finder (or iTunes) and iCloud, is it possible to recover lost data from iPhone directly?
If you deleted or lost data on iPhone accidentally, you should use a professional iPhone Data Recovery software to recover them back as soon as possible in case the lost files are overwritten by new data. In this guide, we’ll walk you through the steps you need to restore iPhone data without backup. We’ll also explain how to recover lost data from iTunes or iCloud backup if you have made before.
Part 1: iPhone Data Recovery: Recover iPhone Data without Backup
This iPhone Data Recovery can help you recover all data such as photos, messages, videos, contacts, Voice Memo, Notes, WhatsApp messages and more from iPhone, iPad and iPod. It not only allows you directly recover deleted data from iPhone without backup, but also enables you restore lost data from iTunes backup; or extract iPhone data from iCloud backup. So, if you ever backup your iPhone data to iTunes or iCloud, you can extract your lost data from backup iTunes/iCloud files. But, if you never backup your iPhone, you can scan and recover deleted data from iPhone directly. What’s more, the iPhone Data Recovery won’t overwrite the current data, which is different for using iTunes or iCloud restoring method.
- Recover deleted photos, video, contacts, messages, notes, etc. from iPhone without any backups.
- Extract and preview all content in iCloud/iTunes backup files.
- Selectively restore data from iCloud/iTunes backup to computer.
- Preview all deleted files in detail before recovery.
- Never cover the existing iPhone data, 99% recovery rate.
- Support the latest iOS 13, iPhone 11, iPhone 11 Pro, iPhone 11 Pro Max, etc.


Note: When you deleted data on iPhone, it is not really lost immediately and the data is still saved on the device, until other new overwritten it for multiple times. If you find the data lost or deleted, you had better stop to use your iPhone and try to recover deleted data as soon as possible.
How to Directly Recover iPhone 11 Lost Data on Mac?
Below are the instructions on how to recover lost data from iPhone 11 without a backup using the iPhone data recovery software. This guide shows you how to recover lost data on iPhone 11 on MacOS computer, such as Mac: Mavericks – 10.9 | Yosemite – 10.10 | El Capitan – 10.11 | macOS Sierra – 10.12.1/ 10.12.2/ 10.12.3/ 10.12.4/ 10.12.5/ 10.12.6 | macOS High Sierra – 10.13.1/ 10.13.2/ 10.13.3/ 10.13.4/ 10.13.5/ 10.13.6 | macOS Mojave – 10.14.1/ 10.14.2/ 10.14.3/ 10.14.4/ 10.14.5/ 10.14.6 | macOS Catalina – 10.15. You also can download the Windows version to recover iPhone data on Windows laptop/PC, including Windows 10 | Windows 8.1 | Windows 8 | Windows 7 | Windows Vista | Windows XP.
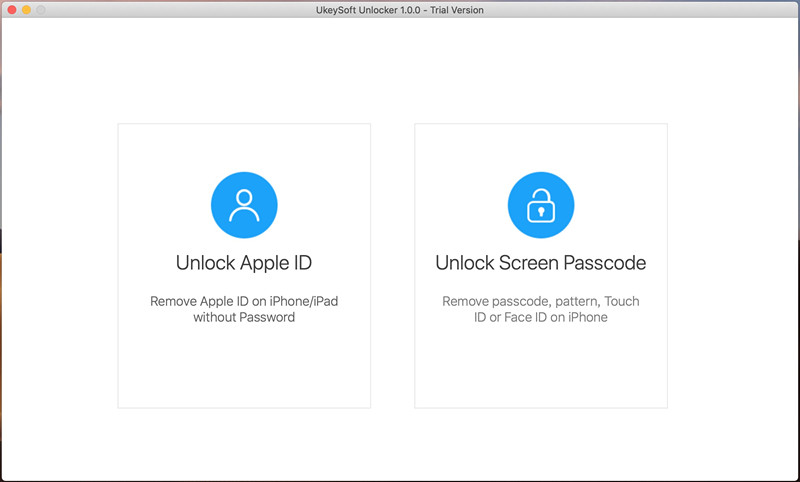
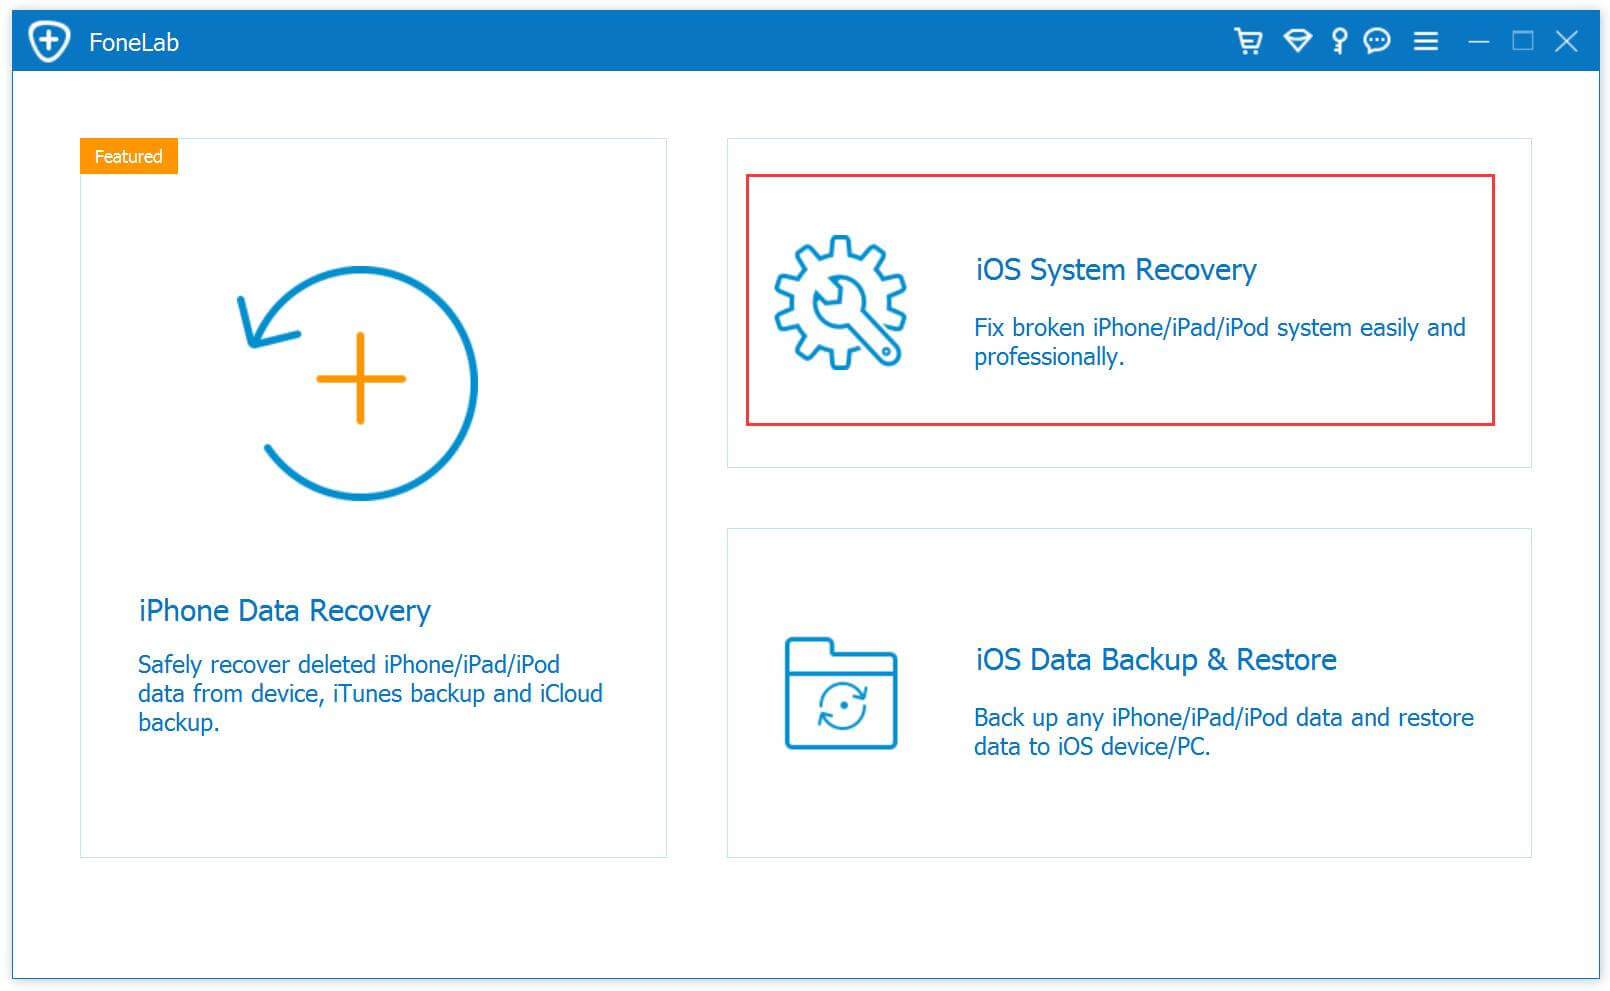
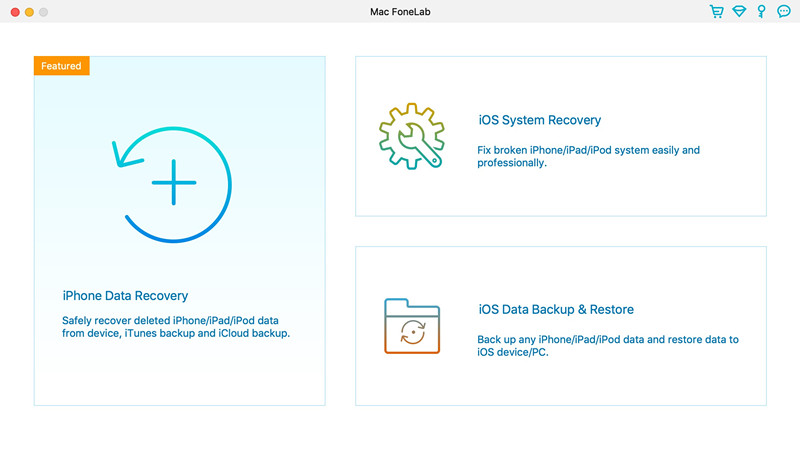
Step 1. Download and Launch iPhone Data Recovery on Mac
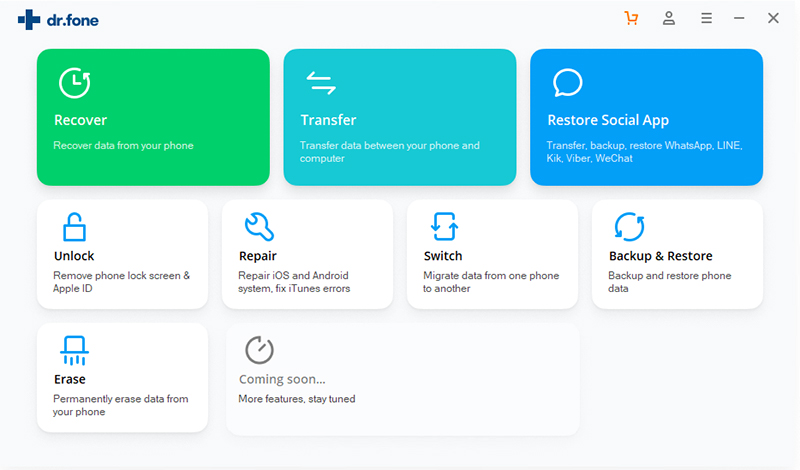
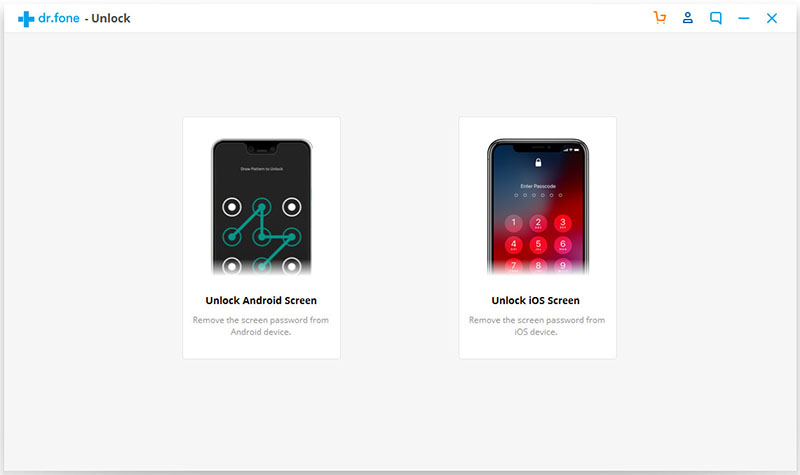
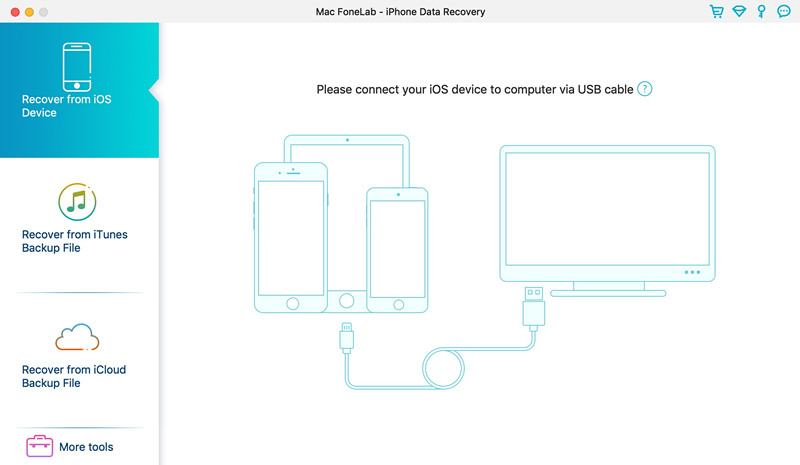
Download the iPhone Data Recovery(Mac) on Macbook, then install and launch it, you will will it’s main interface as below screenshot. In order to recover lost photos, contacts, SMS and more from iPhone 11 without backup, please choose“iPhone Data Recovery” feature.
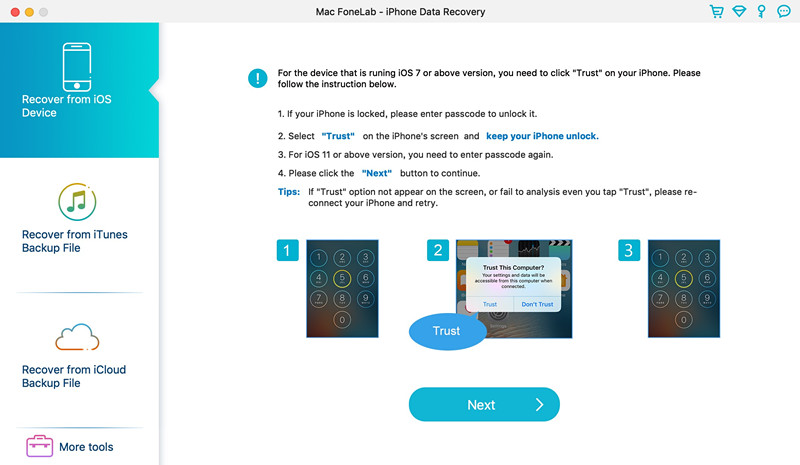
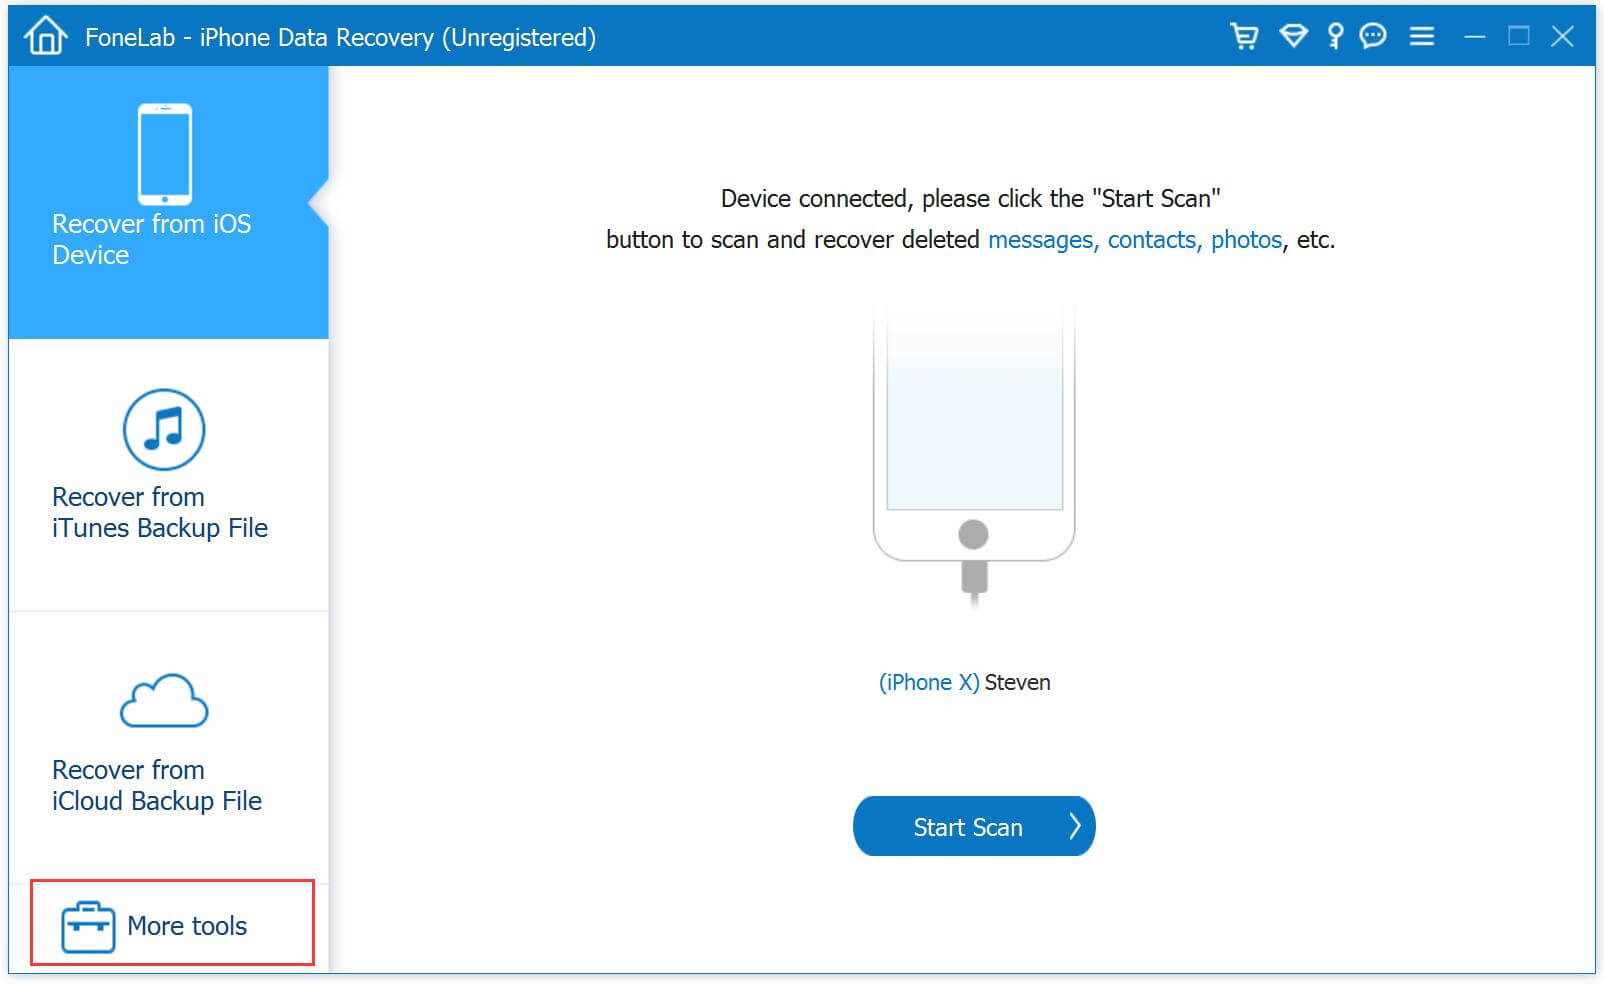
Step 2. Connect iPhone 11 to Macbook
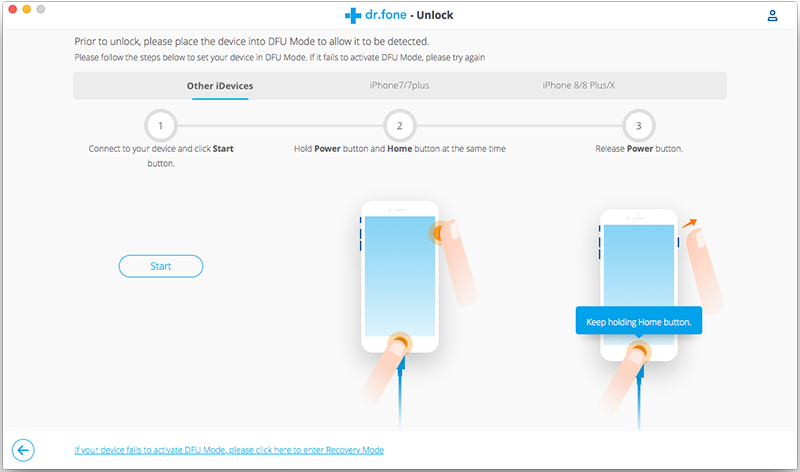
The software can help you directly scan and recover deleted data from iPhone without backup, if you want to directly recover iPhone lost data, please connect the device to computer via USB cable.
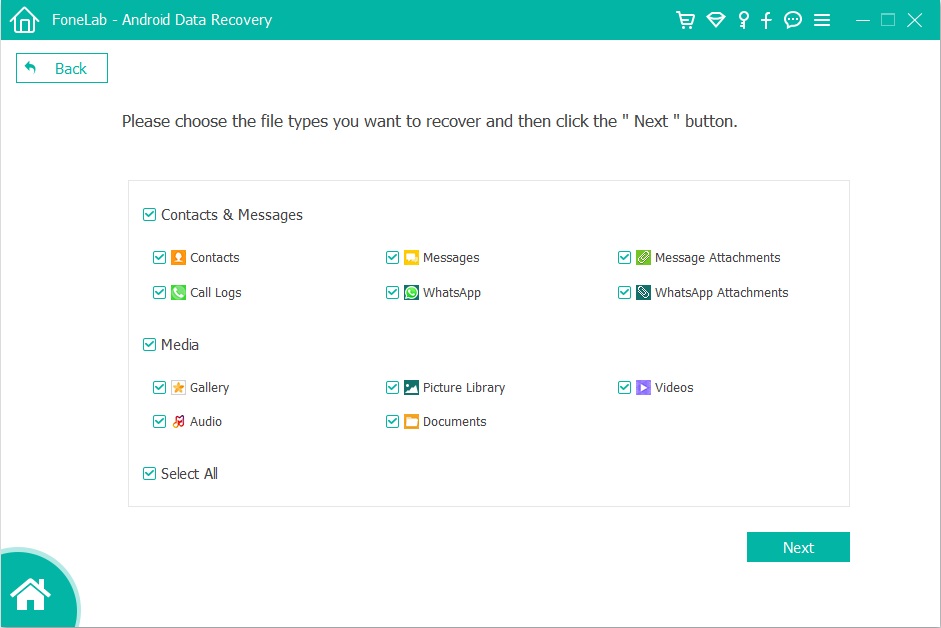
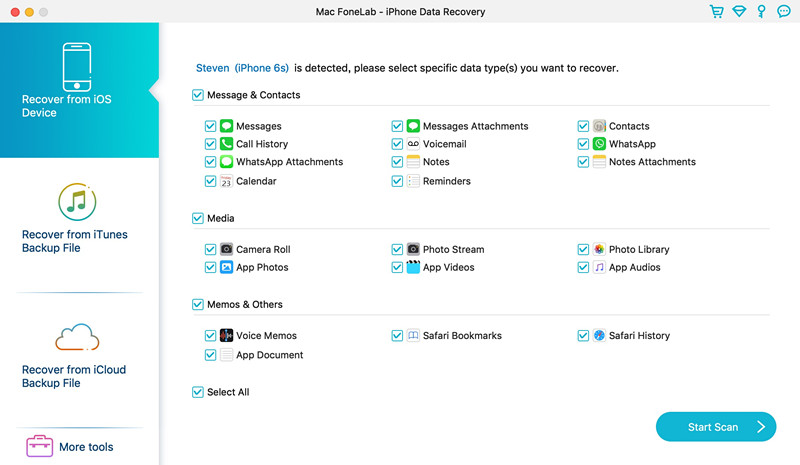
Step 3. Select the Types of Data to Scan
When the software detects it, please select what data types you want to retrieve by checking the boxes next to data name and click the “Scan” button to initiate a deep scan on iPhone for searching for lost data files.
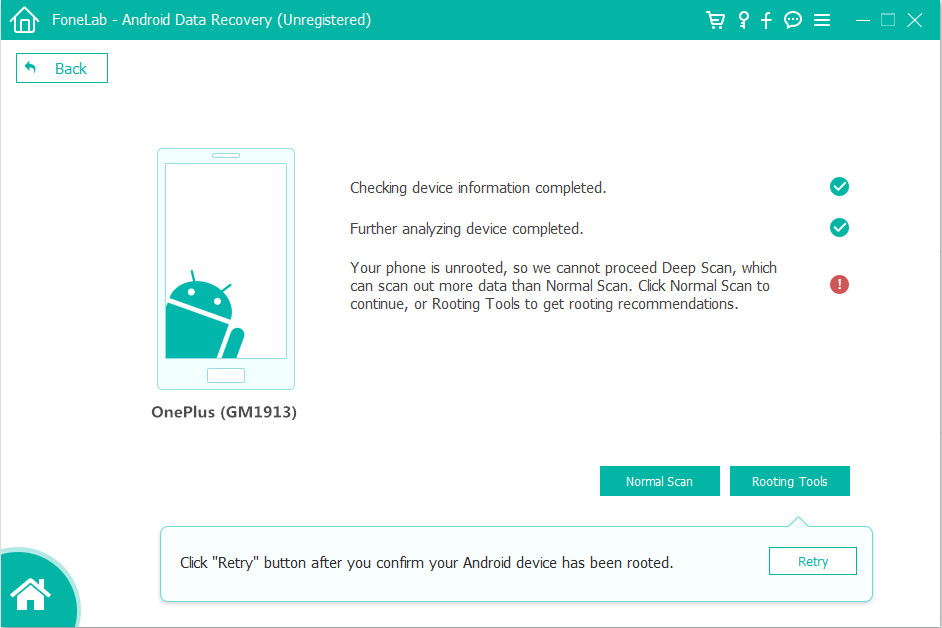
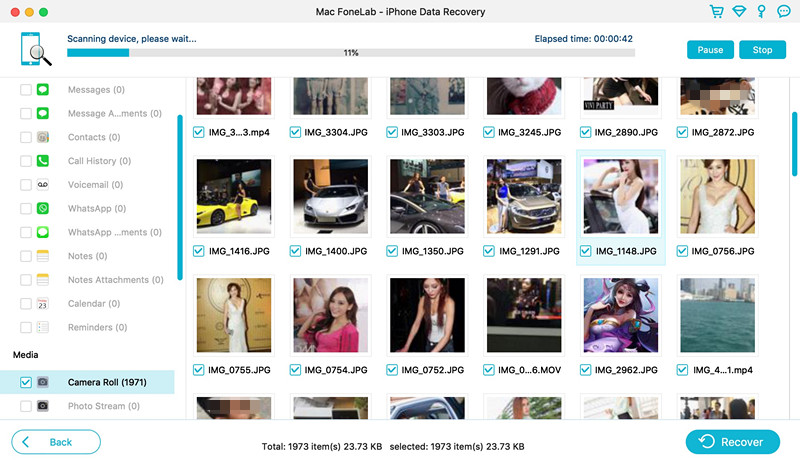
Step 4. Start Scanning Lost Data from iPhone 11
The iPhone data recovery start to scan all lost data from your iPhone device, then be patient while the scan is going on. The progress bar on the screen will show you the progress of the scanning activity, the total time for this scan may vary for different people depending on the amount of data stored in your iPhone. After the process is over, all found files are displayed on the screen.
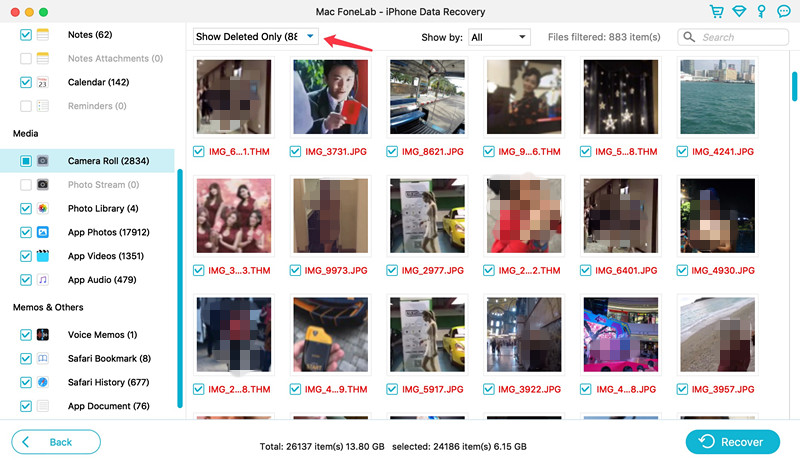
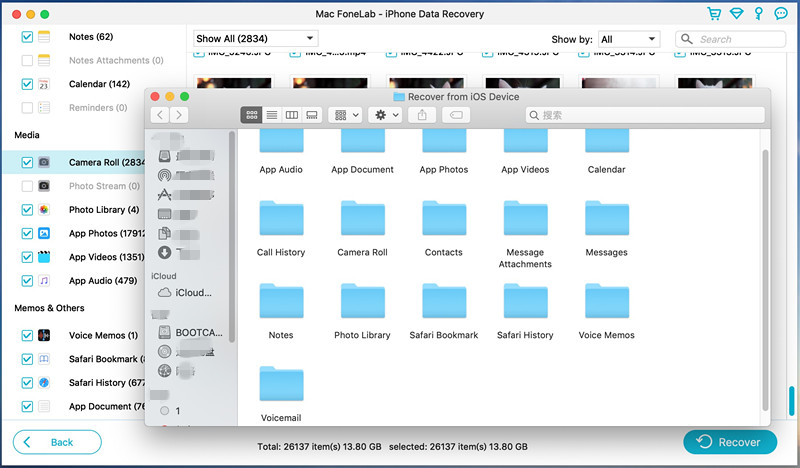
Step 5. Preview the Lost Data
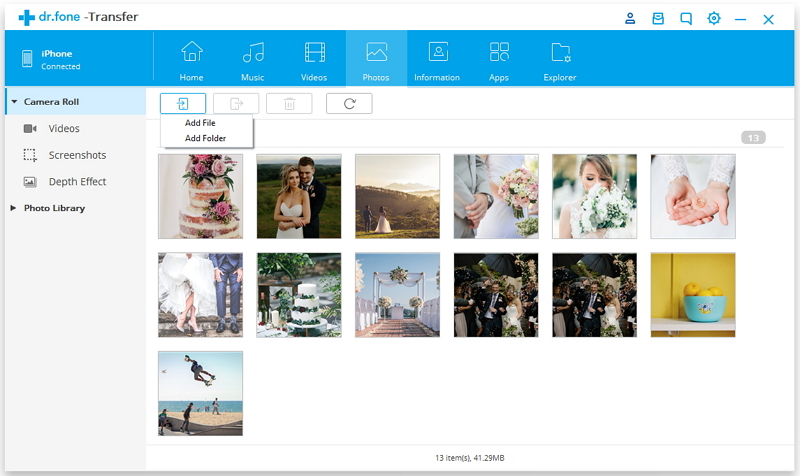
In this step, you can preview all types of content that you want to restore by clicking the specific category on the left pane to expand the list. For example, click “Camera Roll” category to view the scanned photos and videos. You also can just view the deleted files, please tap “Show Deleted Only”, it will shows you all deleted photos and videos. Then, tick the boxes next to each file name to choose files you want to retrieve.
Step 6. Recover iPhone Data without backup
Now, just click “Recover” button on the bottom right corner. In the opening box, specify a location, the program starts recovering data from your iPhone storage and save the data onto computer.

Step 7. Import Files Back to iPhone
After recovering your iPhone data completed, all data save onto your computer folder. If you want to transfer the recovered files to iPhone, iPad or iPod touch for viewing and using, you can use this iPhone iPad iPod Manager(Windows/Mac) to import them back to the device directly.
You see how simple and easy it is on how to recover iPhone data without iTunes or iCloud backup? The iPhone Data Recovery also allows you selectively recover what you want from iCloud/iTunes backup, it won’t cover the existing iPhone data.
If you have created iPhone backup with iTunes or iCloud, let’s shows you how to restore data from backup with iTunes or iCloud if you have made before.
Part 2: Recover iPhone Data from iCloud Backup
If you have ever backup iPhone with iCloud, it is easy to recover your iPhone previous data from iCloud backup. However, you need to verify that an iCloud backup exists firstly. Go to Settings > [Your Name] > iCloud > iCloud Backup. If you can see there is a last backup history was made, please follow the below simple steps to erase your iPhone to restore data from iCloud backups.
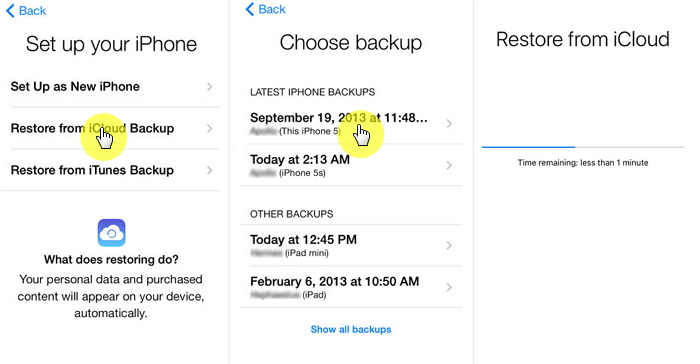
Step 1. On your iPhone, please go to Settings > General > Reset, then tap Erase All Content and Settings.
Step 2. On the Apps & Data screen, tap Restore from iCloud Backup.
Step 3. Login to iCloud with Apple ID.
Step 4. Select from a list of available backups in iCloud, just restore them.
Note: This method will erase existing iPhone data, it means the previous backed up content will cover the existing content. So, we recommend you use a iPhone data recovery to restore data from iCloud backups, this method is 100% safe.
Also read: Download iCloud backup – Selectively Recover iPhone data from iCloud backup
Part 3: Recover iPhone Data from iTunes/ Finder Backup
Apple inc. offers Finder or iTunes (Mac with 10.14 or earlier, or on PC) for Apple users to manage, backup, convert or sync files. If you have backed up iPhone data with Finder or iTunes (Mac with 10.14 or earlier, or on PC), you can restore the previous data to iPhone from iTunes/ Finder backups. Let’s learn how to restore iTunes data to iPhone steps-by-steps:
Step 1. Launch the iTunes or Finder that you have created backups before.
Step 2. Connect your iPhone to computer and open Finder or iTunes.
Step 3. Select iPhone device icon on the window.
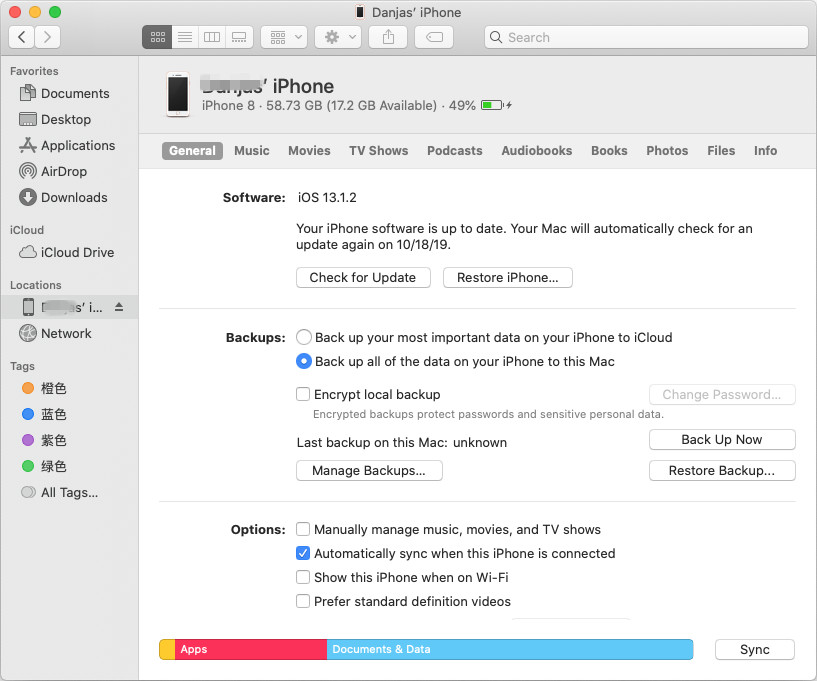
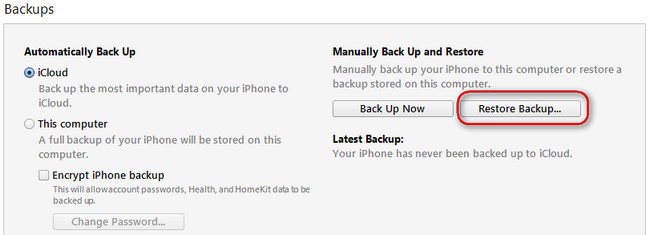
Step 4. Click Restore from Backup.
Step 5. Choose the backup data that contains your lost data.
Step 6. Click Restore. Please wait patiently, all your backed data will restore to iPhone soon.
But, you will found all existing iPhone data was lost, because iTunes/ Finder restore method overwrites the existing data. So, we recommend you use a third-party iPhone data recovery to extract data from iTunes/ Finder backups, then import them to the devices.
Also read: Extract iTunes backup – Recover iPhone data from iTunes backups