All posts by DHZ

How to Transfer iTunes Music to Samsung Galaxy S9/S9+

[Summary]: Want to know how to transfer music including Apple Music tracks from iTunes to Samsung Galaxy S9? This article will teach you how to transfer music and playlist from iTunes to Galaxy S9/S9+/S10 by iTunes to Android Transfer, you can also learn how to stream Apple Music to Samsung phone.

You may like:

* Samsung Galaxy S9 Manager: Transfer Files to Galaxy S9/S9+

* How to Transfer Data from iPhone to Samsung S9

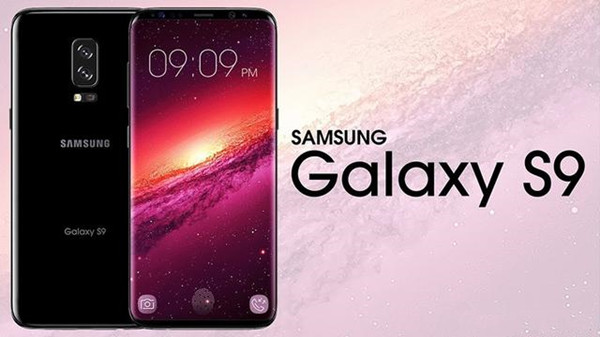
Samsung Galaxy S9 will debut next year, the source said the company has already begun production of 2018 flagship processor, Samsung’s own Exynos mobile processor. That means the Galaxy S9 smartphone coming out next year will be using 10 nm process technology, whether it is the rumored Exynos 9810 processor or the rival Snapdragon 845 processor, with the only difference being that Samsung’s own Exynos 9810 will use the second-generation process, while Qualcomm uses the original generation process.

transfer music to samsung galaxy s9

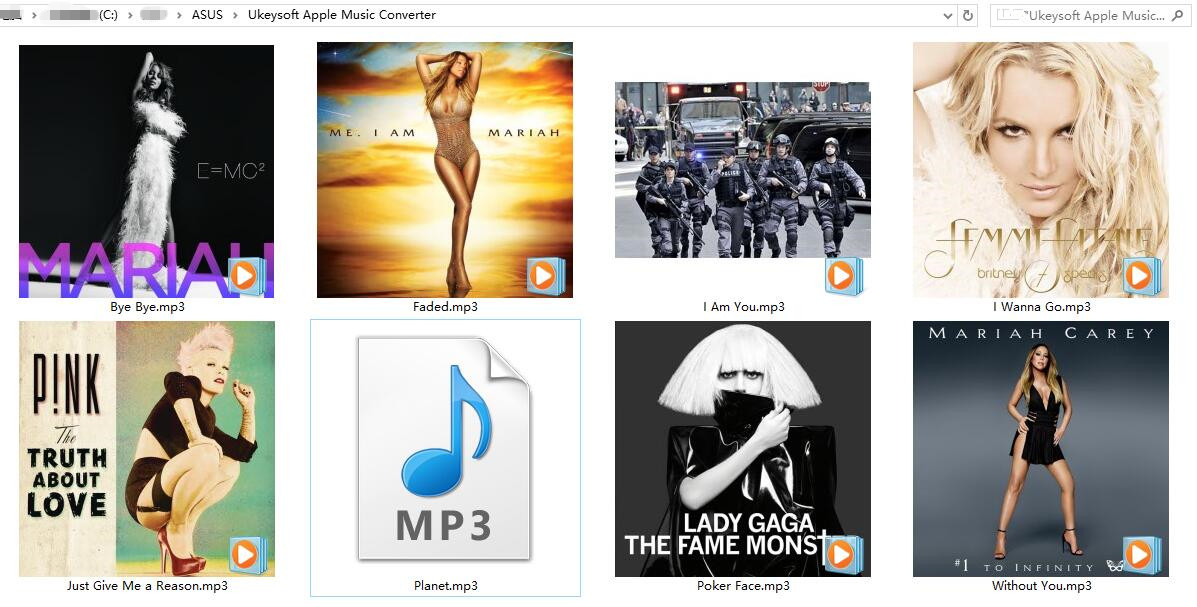
iTunes music is protected with DRM encryption,Samsung Galaxy S9 supports MP3 format.In order to enjoying iTunes music on Android phone,you can remove DRM from iTunes music and convert iTunes music to MP3,then transfer music to Samsung Galaxy S9.

When I got a new Samsung Galaxy S9,I want to listen to Apple Music on Samsung Galaxy S9.For me, the easiest way to transfer music from iTunes to Galaxy S9, or from any device like Galaxy S8/S7/S6, iPhone 8/7/6S is by manually doing it myself. Plug a micro-SD card into a computer or your Galaxy S9, and drag all songs, albums, or collections to it. This can move everything at once and make this process extremely easy.

Using the included USB to USB Type-C cable connect your Galaxy S9 and get started.

iTunes Locations

Windows XP – C:\Documents and Settings\ (username)\ My Documents \My Music \iTunes
Windows 7, Windows Vista and Windows 8 – C:\ (username) \My Music \iTunes
Mac OS X – /users /username/ Music/ iTunes
Once you’ve found your iTunes music folder you’ll want to open that and have it handy on the desktop. Now simply plug in the S8 via USB to your computer, or insert an SD card. Users may need to pulldown the notification bar on the Galaxy S9 and select USB options to turn on Media Transfer Protocol (MTP). Although it may be set to that by default.

Part 1: How to Transfer iTunes Playlist and Music to Samsung Galaxy S9

Those using a Mac will need to install the iTunes to Android Transfer (Mac or Windows) program,which not only can help you transferring music from iTunes to Samsung Galaxy S9,but also allows you switch files includs photos, videos, music, contacts, text messages, Apps from on an old Galaxy to Samsung Galaxy S9, but the same steps apply from iPhone X, iPhone 8, iPhone 7, iPhone 6S/6/SE,etc.

Free download the iTunes to Samsung Galaxy Transfer and try to sync iTunes music to S9 with one click:

d_win d_mac
d_win d_mac

Samsung S9 Transfer – Transfer Music from iTunes to Samsung Galaxy S9

Backup and Restore Data – Backup your music, photos, videos, contacts, SMS etc. from Samsung S9 to computer and restore them easily.

Manage SMS and Contacts – Manage, export&import your Contacts and SMS, deduplicate Contacts, reply SMS with computer.

One-click Root Samsung S9 – Root your Android phones/tablets to take full control of your device.

Transfer Files to Samsung S9 – Transfer music, photos, videos, contacts, SMS between two mobiles (both Android and iPhone are supported). App Manager – Install, uninstall, import or backup Apps in batch.

Gif Maker – Create Gif from photos, motion photos, videos.

iTunes Manager and Transfer – Add iTunes Music to Samsung or transfer music from Samsung to iTunes.

Fully compatible with 3000+ Android devices (Android 2.2 – Android 8.0) from Samsung, Google Pixel, LG, HTC, Huawei, Motorola, Sony etc.

Easy Steps to Sync iTunes Playlist and Music to Samsung Galaxy S9

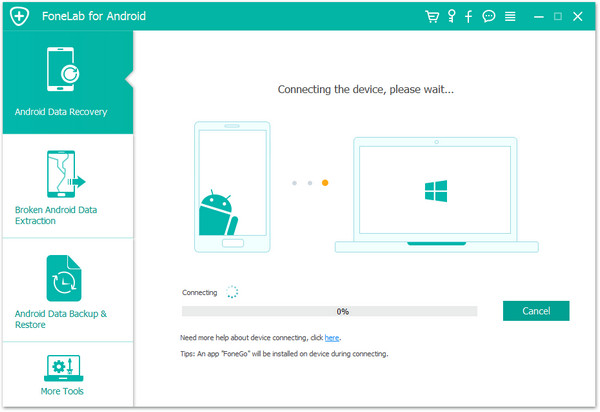
Step 1. Connect your Samsung Galaxy S9 to iTunes to Android Transfer
iTunes to Android Transfer is available as a free-to-try copy. Download it to your computer and install the same. Start the program by clicking the icon. The program appears showing the different options it provides in the menu bar. Now, connect the Samsung Galaxy S9 to the computer. Establish the connection using the USB cable provided by Samsung to avoid disruption during transferring process.

transfer iTunes music to Samsung Galaxy S9

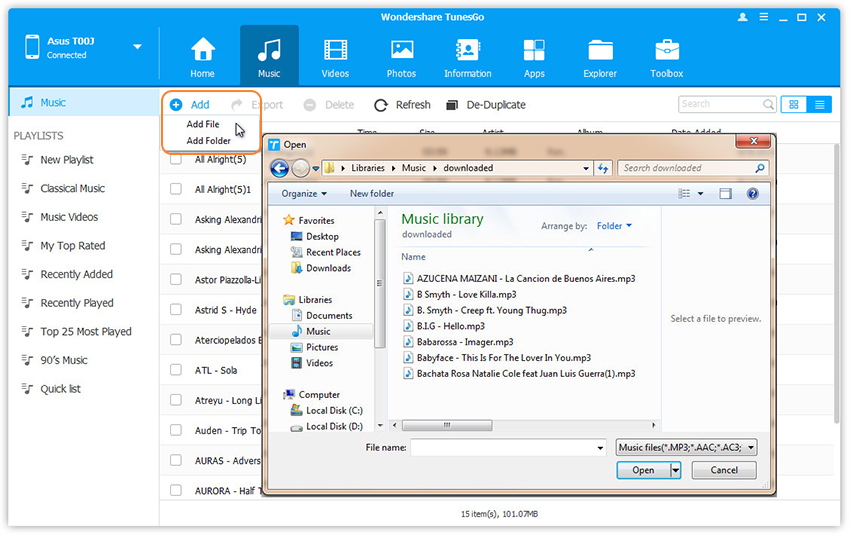
Step 2. Transfer iTunes music to Samsung Galaxy S9
As soon as the program recognizes the Galaxy S9 device, you can proceed to the transferring process by choosing the “Transfer iTunes Media to Device” option.
A new pop-up message opens up that displays several options. These choices give you the chance to move iTunes media to the connected Samsung Galaxy S9. TunesGo will scan for all the available iTunes files. Upon completing the scan, it will display the media according to their categories such as movies, songs, podcasts, and others.

sync iTunes music to samsung galaxy s9

By default, iTunes to Android Transfer will select all the contents of the results window. However, as you are trying to move only music from iTunes to Samsung Galaxy S9, you can uncheck all other categories except Music. To begin transferring the selected category, press “Transfer.”

Step 3. Transfer music from iTunes to Samsung Galaxy S9
The Program will initiate the process of moving the music contained in the iTunes library to the Samsung Galaxy S9 device. The time to complete the process is dependent on the total size of the data. The program will display the progress of the transfer. It is preferable to leave the system until the process completes to ensure that there is no disruption. Upon completion, TunesGo will display successful completion message. You can end the operation by clicking the “OK” button.

add itunes music to samsung galaxy s9

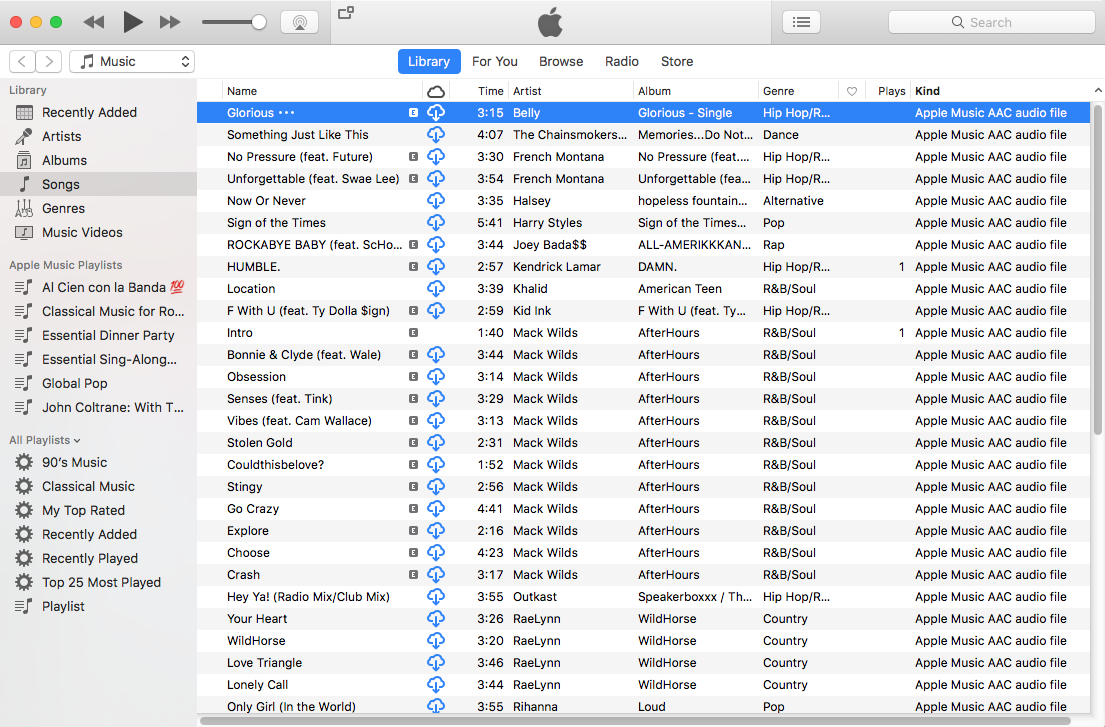
Then you can disconnect the device from the computer and browse the music app on Samsung Galaxy S9 to view the copied songs from iTunes library.
Note: A significant benefit that the software provides is that it will scan for duplicates during the scan for music files from iTunes library. It will then proceed to the process of transferring the content to Samsung Galaxy S9. Therefore, you need not worry about copying similar contents repeatedly.

d_win d_mac
d_win d_mac

Way 2: How to Transfer Songs from iTunes Library to Galaxy S9 by Samsung Kies

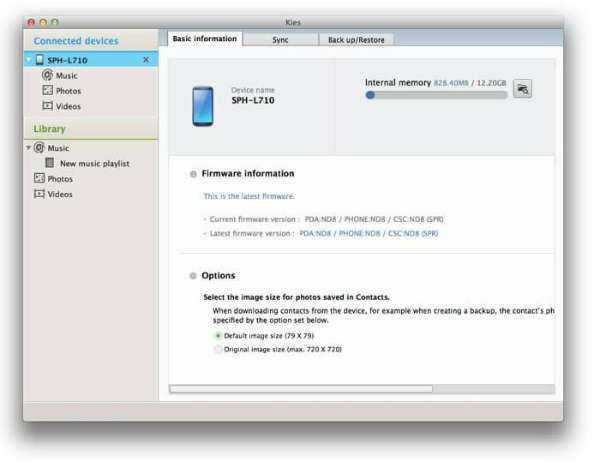
Samsung Kies is user-friendly files transfer software that created by Samsung Company for users switch files to Samsung Galaxy,it also allow you manage, download and transfers data from iTunes to Samsung Galaxy S/Note series devices. The transfer range include music as well. So you can use this software to sync music from your iTunes to Samsung Galaxy S9. The following music transfer operation is based on Mac OS computer.

Step 1: Open your browser and go to this website to download Samsung Kies software. Here choose the Mac OS version.

Step 2: Wait a few moments until the software is successfully downloaded, and then install it on your computer and launch it.

Step 3: Use the matched USB cable to link your Samsung Galaxy S9 with the computer and wait a moment for the detection of your phone by the software program. Once the device is confirmed being detected, your phone will be showing on the left column of the application window.

itunes music to samsung galaxy s9 by samsung kies

Step 4: Click on the “File” button on the top of the interface, a menu will drop down and click the “Import iTunes playlist to Library” option. Then find out the “New playlist” option under the “Library” menu on the left side of the interface, click on it, then all music from iTunes library will be saved.

itunes music to samsung galaxy by samsung s9 by kies

Step 5: Select the music among the music files that you want to transfer from iTunes form to Samsung Galaxy S9. Then click on the “Transfer to device” button to transfer the music to your Galaxy S9. All the operation is done, so quick and easy.

Well done,you know how to transfer music and playlist from iTunes library to Samsung Galaxy S9,as a new Samsung Galaxy S9 users,you can also use the Android iOS Manager tool to transfer data between Android/iPhone and Samsung Galaxy S9, manage & transfer files from computer to Galaxy S9, backup data from Samsung S9 to computer and root your Samsung Galaxy S9 geting more permissions.Now,free download the Android iOS Manager for Mac/Windows and try to transfer iTunes media files to your Galaxy S9 easily

d_win d_mac

Related Article

How to Stream Apple Music on Galaxy S8/S7/S6

How to Watch iTunes Movies on Samsung Galaxy S8/S8 Plus

How to Listen to Apple Music Offline

How to Keep iTunes Music Songs Forever

How to Convert Apple Music to MP3

How to Recover Data Files from Samsung Galaxy S9/S9+

[Summary]: Looking for a Samsung Galaxy S9 data recovery to recover your lost data? You can quickly recover lost or deleted data files on Samsung Galaxy S9 or S9 Plus with Android data recovery, recoverable data includes photos, contacts, SMS messages, WhatsApp messages, videos, audios, document files, call logs and so on.

samsung s9 data-recovery

People also read:

* How to recover deleted photos from Samsung S9/S9+

* How to Backup and Restore Samsung Galaxy S9/S10

When you deleted files on Samsung S9 by accidentally, don’t worry, this post will lead you to retrieve deleted data from Samsung Galaxy S9 and S9+ for reference. You can check it in advance.

Reasons May Lead to your Samsung Galaxy S9 Data Loss

Let’s conclude the reasons of Samsung Galaxy data loss:

  • Deleted the important files by mistake.
  • The USB disconnected accidentally when you are transferring data from your Samsung Galaxy to the computer.
  • The sudden power off of the device when you are using it. This may lead to data loss, too.
  • The virus infection. If your PC is infected by virus, you may lose your data when you connecting your Samsung Galaxy to it.
  • Android system update failed will lead to lose data on Samsung Galaxy.

Restore Deleted Data from Samsung Cloud backup

Samsung Galaxy Galaxy S9/S9+ are coming with in-built feature “Samsung Cloud”. This is an Samsung’s cloud backup service, which is developed for Samsung users backup data to cloud. If you have backed up data to Samsung cloud before, you can restore lost contacts, photos, videos, gallery, calendar, notes and many others.

If you have backed up data from Samsung Galaxy S9 to Samsung cloud, one you deleted data on the device, please follow the below steps to restore data to Samsung Galaxy S9:

Unlock your Samsung Galaxy S9, then open Settings app and click on “Backup and Reset” option. Now, under “Samsung account”, click on “Restore”.

samsung cloud restore data

A Reliable Samsung Galaxy S9/S9+ Data Recovery

To recover deleted data from Samsung S9, you need to use a third-party Samsung Galaxy S9/S9+ Data RecoveryU.Fone Android Data Recovery, it can help you recover deleted data from Samsung Galaxy S9, S9+ breezily. With this powerful data recovery software, you can recover contacts, messages, photos, videos, audios, call history, WhatsApp data and more files from Android easily.It work well for any data loss cases on Android, like deleted accidentally, Android system update, restore device to factory reset, virus attack, etc,.Almost all Android models are compatible with this software, such as, Samsung Galaxy S20/s20+, Samsung Galaxy S10/S10+, Samsung Galaxy S9, S8/S8 Plus, S7/S7 Edge, S6/S6 Edge, Note 8/5/4/3, J7/J5, A7/A5, etc.

d_win d_mac
d_win d_mac

Part 1: Recover Lost Data from Samsung Galaxy S9 with Android Data Recovery

Step 1.Run Program and Connect Samsung Galaxy S9 to the Computer
After you installing and running the Android Data Recovery program on the computer, click”Android Data Recovery” mode in the home page of program.

Android Data Recovery home page

Then please connect your Samsung Galaxy S9 phone to the computer via an USB cable.To get it successfully detected, you need to enable the USB debugging on your Samsung smartphone.

connect Samsung S9 to computer

Step 2.Allow Program Connect Samsung to the Computer
Please click “OK” on the phone and go on, allow the program detect your device on the computer.

allow to connect samsung

Step 3.Select  the Files to Restore from Samsung
After allowing program detect your device on computer, you’ll see this window,different types of files can be chose to be scan by program.Select the deleted files from Samsung that to be scanned and then click “Next” to go on.

select file to recover

Tips: You can click “Select all” to have all your Samsung data scanned.

Step 4.Allow Scanning and Analyzing Data on Samsung
You’ll get a window as follow on your device after your device is detected by the program.Tap “Allow” on your device to enable the program to scan your device for deleted data.

allow scanning samsung

Note:Please make sure that your phone battery is more than 20% charged and keep the connection between your phone and the computer.

Step 5.Scan Samsung for Deleted Data
Now the program will begin to scan data on your phone.The scanning process will cost you only minutes.

scan Samsung for deleted data

Step 6.Recover Deleted Data from Samsung Galaxy S9
When the scan is finish, you are allowed to preview all data found on your phone, including contacts, SMS, photos and more. Preview then retrieving the data you want to restore by clicking “Recover” button to save them on the computer.

recover deleted data from Samsung Galaxy S9

d_win d_mac
d_win d_mac

Video Guide – Recover Photos,Contacts,SMS and More from Samsung Galaxy S9/S9+

Above aritcle show you how easy to recover deleted data on Samsung S9,if you don’t know how to use the Android data recovery,you can also follow the easy steps below video guide.The Android Data Recovery also allows you recover lost data from almost all Android phones(Android 9.0 included)on the market, such as HUAWEI, OPPO, ViVo, LG, Google, Samsung, HTC, OnePlus, Xiaomi, Vivo, Oppo, Nokia Android phone and so on.

Part 2: Restore Data from Samsung Galaxy S9 with Google Account

Another way here we provides with you to recover data from Samsung Galaxy S9 phone is using Google service. If you want to restore data to your device from Google, here are several ways to achieve.

A.Google Account
Since you have backed up your password and data from Samsung phone onto google account before you losing data, your apps should start reloading and restoring when you log in google.

If it doesn’t restore phone automatically, you can check your setting menu.
Setting > Personal > Backup & Restore > Automatic Restore

sync data with google account

Tips: if you have sync your phone contacts to google account, you are able to retrieve the deleted contacts within 30 days by Google Contacts > More > Undo changes > time to go back to > Confirm.

B. Google Photo APP
If you used google photo app to back up your photos and videos, you can easily restore them to your device.

Google photo > Sign in Account > photo icon

C. Google Drive APP
You can check the backed up files and folders in google drive, including images, audios, and videos, and documents etc,.

Tips: How to Protect Data and Avoid Data Loss on Samsung Galaxy S9

Back up you data – Want to avoid using Samsung data recovery in the future? The easiest way to do this is to regularly back up your device.

Read More: Full Guide to Backup Samsung Galaxy S9/S9+ Safely

(For iPhone users,if you have make your iPhone backup with iTunes or iCloud,once your iPhone was stolen or lost,you can use a iPhone data recovery software to restore data from iTunes/iCloud backup without device in hand.)

Education is key – The more you know about your phone, the less likely you are to accidentally delete important data. Damaged, improperly used or mishandled phones are more likely to lose data, and so the more you learn about your Samsung device, the better.

Keep it safe and in good hands – Many people pass their phones off to their kids and allow little ones to play with their device for hours unsupervised. Once your child has your Samsung phone in their mitts, it is very easy for them to delete photos, songs, contacts and important messages. Always keep an eye on them when they are playing around with your phone.

To sum up:
In this post, we show you the introduction of 2 effective methods to recover data from Samsung Galaxy S9/S9 +. In short, though you can’t undo factory reset, you can retrieve lost Samsung data with Android Data Recovery software or google account. It’s easy for you to restore backup from previous google backup files, so sync your data regularly is necessary. If you need to recover without backup, then Android Data Recovery is a really good choice for you when encounter data lost on Samsung Galaxy S9/S9 +.

Related Articles

Transfer WhatsApp Messages from iPhone to Galaxy S9/S9+

How to Root Samsung Galaxy S9/S9+ with One Click

Samsung Galaxy S9 Manager: Transfer Files to Samsung Galaxy S9/S9+

How to Recover Data from Broken Samsung Phone

How to Stream Apple Music on Samsung Galaxy S9

Samsung Data Recovery

How to Recover Deleted Call History from iPhone X

Summary: iPhone will record the incoming call, outgoing call, and missed call automatically, we can check the call history in the call list on device, including the date and documents. It may cause inconvenience when you lost call logs on iPhone. So are there any ways to restore the deleted call history on iPhone X or other iPhone models? Of course yes, just read this guide to learn how to recover deleted call logs from iPhone X with 5 different ways.

Have you accidentally deleted some call history from iPhone X? It will lead to a big problem occur when there are some unsaved phone numbers on the call logs list that you lost. If you have a backup, all you need to do is restoring the device from backup. But if you don’t have a backup, or you don’t want to restore the whole backup, you should find another better solution. Here we will offer a perfect solutions for you, to restore the deleted call history from iPhone X even without backup.

Restore Deleted Call History from iPhone X

Fortunately, there are some useful data recovery tools will give you a great help to restore deleted data on iPhone, here iPhone Data Recovery is the best one that we suggest you to use. As its name, iPhone Data Recovery enable to restore deleted files on iPhone for three recovery modes: directly recover from iPhone without backup, recover from iTunes backup, recover from iCloud backup. The recoverable types of files including call history, contacts, text messages, photos, videos, notes, WhatsApp data, and more. With using iPhone Data Recovery, you can easily restore deleted call history from iPhone X with/without backup. iPhone Data Recovery works for all data losing circumstances, such as, deleted accidentally, iOS system update, iOS system jailbreak, restore device to factory reset, etc,. Compatible with all iOS devices, like iPhone X, iPhone 8, iPhone 7, iPhone 6S/6, iPad and iPod.

d_win d_mac

Part 1: How to Restore Deleted Call History from iPhone X Directly

Step 1.Run Software and Select Recovery Mode
First of all, please run the software on the computer. From the main interface, select “Recover from iOS Device” option. Proceed by clicking the “Start” button.

iphone data recovery mode

Step 2.Select Call History File to Scan
In the next window, select “Call History”. Before clicking “Next” button, connect the iPhone X to the computer.

select call logs file to recover

Step 3.Scan Data on iPhone X
Once the program detects the phone, press the “Scan” button to begin scanning.

scan data on iPhone

Step 4.Preview and Recover Deleted Call Logs from iPhone X
The recoverable “Call History” is available in the interface after scanning is complete. You can mark the necessary files, or check deleted files by selecting “Show only deleted files” option. Press the “Recover” button to recover selected call logs from iPhone X.

recover deleted call logs from iPhone X

d_win d_mac

Part 2: Restore Deleted Call History on iPhone X with iTunes Backup

Step 1.Run Software and Select Recovery Mode
If you have done iTunes backup before, you will see the backup files listed once you running iPhone Data Recovery and then click the second mode”Recover from iTunes Backup” option. Choose the backup file you want in the iTunes backup files list and click “Scan”.

iPhone data recovery home page

Step 2.Preview and Recover Deleted Call Logs from iTunes Backup
It will be taken to scan your iTunes backup files. And you are allowed to preview all the content in backup file. Choose the files contain the deleted call logs data you want and click “Recover” to begin the recovery. Then save the selected data to the computer.

recover call log from iTunes

d_win d_mac

Part 3: Restore Deleted Call History with iCloud Backup

Step 1.Sign in your iCloud Account to Login
Run the iPhone Data Recovery Program on computer and choose “Recover from iCloud Backup” mode. Enter your ID and Password to get your backup.

sign in icloud account

Step 2.Select the Backup File from iCloud
The program can help you selectively recover the data from iCloud backups,including call logs, photos, App photos, videos, notes, contacts, SMS, iMessages and more, please select the file types you need.

select call log file to scan

Step 3.Download iCloud Backup File
Click “Download” button to download the selected backup file from iCloud, and move on to the next step.

download icloud file

Step 4.Preview and Recover Call Logs from iCloud Backup
After the download process is completed, the program will scan and analyze the downloaded data,then it will search the results and list to you,to recover previous iPhone backed up data from iCloud,please select the files you need and preview them before recovery, for call logs recovery, you should click “Call History” and then click “Recover” button,the program will save the selected on the computer.

recover call log from iCloud

d_win d_mac

Part 4: Restore Deleted Call History from iTunes Backup via Phone Transfer

The second tool here we want to suggest you to use  is this Phone Transfer tool, which is an all-in-one data transfer and management program. It enable you to extract iTunes backup files to iPhone X and other iOS device or computer, as well as iCloud files. Additionally, this program is famous for transferring files between two mobile devices based iOS system, Android system or Symbian system.

Free Download Phone Transfer:

d_win d_mac

Step 1.Run Program and Select Mode
Firstly run Phone Transfer on computer, then just clicking “iTunes” under “Restore from Backups” option in the primary window of the program.

restore from backups

Step 2. Extract Backup File from iTunes Backup
Select the “Call logs” file to transfer from your iTunes backup, then clicking “Start Transfer“. Then it will be restored to your computer or iPhone X, even other iOS device.

restore iTunes files

d_win d_mac

Part 5: Restore Deleted Call History from iCloud Backup via Phone Transfer

Step 1.Run Program and Select Mode
After running Phone Transfer on computer, click on “iCloud” under “Restore from Backups” option in the primary window of the program.

restore from backups

Step 2. Extract Call Log File from iCloud Backup
Sign in iCloud account and select the “Call Logs” file to extract from iCloud backup.

Step 3. Restore Backed Up File to Computer
Download the iCloud files by clicking “Start Transfer” to save it on the computer or your iPhone X, even other iOS device.

extract call logs from iCloud backup file

d_win d_mac

Part 6: How to Backup Call History for iPhone X

U.Fone iOS Data Backup & Restore is your perfect choice to backup call logs for iPhone X safely. It enables you to make an iOS backup from your iPhone/iPad/iPod quickly and safely. All types of data can be transferred to your computer as a backup, such as, call logs, photos, messages, contacts, WhatsApp messages, documents, etc,. Comparing to iTunes and iCloud, it is a better tool to backup iPhone data on computer because:

  1. You can select the needed data to backup;
  2. You are allowed to preview iPhone backup before restore;
  3. You enable to restore backup to iPhone without erasing your current data.

unfone ios backup restore

Free Download U.Fone iOS Data Backup & Restore:

d_win d_mac

More iPhone X Tutorials You can Check:

How to Recover Deleted Data from iPhone X

How to Transfer Android Data to iPhone X

How to Transfer iPhone Files to iPhone X

How to Backup & Restore iPhone X on the Computer Safely

How to Transfer Videos/Music/Photos to iPhone X

How to Manage Files for iPhone X on the Computer

Recover Deleted Call History from iPhone X

How to Upload Apple Music to Google Drive

Anyone know how to get Apple Music from iTunes to Google Drive?

You will see people often ask such a question in the Apple forum. Actually, you have 15 GB of free storage to use across Google Drive. But all Apple Music files from iTunes are DRM protected, which prevent you playing them on other non-apple devices. While Google Drive doesn’t support DRM-protected files like Apple Music which is formatted in M4P. Therefore, you can’t freely upload the Apple Music files to Google Drive directly unless you remove the DRM from Apple Music and convert Apple Music M4P to MP3.

Best Tool to Crack DRM from Apple Music Files

To upload Apple Music Google Drive, all you need is a DRM removal program. Apple Music Converter enables you to strip DRM from Apple Music files by converting Apple Music to unprotected MP3, AAC, FLAC,WAV or other DRM-free audio formats supported by Google drive.

Key Features of Apple Music Converter:

Crack DRM from protected Apple Music and iTunes M4P songs;
Convert Apple Music tracks to DRM-free MP3, AAC, WAV, FLAC, M4A, M4B;
Convert audio files at 16X faster speed with CD quality;
Keep ID3 Tag and metadata information;
Fully compatible with the latest version of iTunes.

d_win d_mac

Guide to Remove DRM from Apple Music for Syncing to Google Drive

Step 1. Launch Apple Music Converter

Download, install and launch Apple Music Converter. After launching the program, iTunes will be also automatically launched and disappear quickly.

launch apple music converter

Step 2. Select Apple Music Tracks

All playlists in iTunes library will be displayed in different categories. Select the music songs you want to convert by clicking on them one by one.

select Apple music tracks

Step 3. Choose Output Settings

Next, go to “Output Settings” and select you desired “Output Format” and “Output folder” from the given options. You are suggested to select MP3 as output format.

Select Output Format - MP3

Step 4. Remove DRM from Apple Music

Finally, go to “Convert” to remove DRM protection from Apple Music songs. Once the conversion is succeed, the output audio are kept with all ID tags and metadata. Afterward, you can enjoy DRM-free Apple Music songs and upload them to Google Drive easily.

remove drm and convert apple music to mp3

Now, find the converted music on your computer and transfer Apple Music tracks to your Google Drive.

locate the converted apple music songs on computer

Step 5. Upload Converted Apple Music to Google Drive

Sign into Google Drive with your email and password > Add music files to your Google Drive (Drag and drop it to the Google Drive interface, or you can go to “New” in the upper left corner of the screen and select “File Upload” or “Folder Upload” to import the song to Google Drive).

upload-apple-music-to-google-drive

d_win d_mac

Related Articles

How to Play Apple Music on Google Chromecast

How to Convert Apple Music to Google Pixel

How to Play iTunes Music in a Car

How to Download Apple Music on Windows PC

How to Recover Deleted WhatsApp from iPhone XS/X/8(Plus)

Summary: Deleted WhatsApp message on your iPhone and lost the important chat data on it? What can you do? How to get back deleted WhatsApp chat history from iPhone X/iPhone 8(Plus)? Just follow this guide to learn 4 ways to recover deleted WhatsApp text messages, video messages, videos, photos and attachments with easy steps.

WhatsApp is one of the most popular chat apps among young people, just like other instant messaging apps, WhatsApp makes it possible for users to share interesting things with their family and friends by simply sending messages, photos, videos and attachments. WhatsApp chat history might contain valuable content or information from your family, friend, workmates, commercial partners or more people. Losing WhatsApp messages on iPhone may lead to losing important data and leak personal information to someone. So it’s urgent to recover deleted WhatsApp chat conversation from device. This tutorial is going to show you how to restore deleted WhatsApp from iPhone X/iPhone 8(Plus) with the help of iPhone Data Recovery.

Restore Deleted WhatsApp Messages from iPhone X/iPhone 8(Plus)

iPhone Data Recovery provides a much safer way to recover deleted WhatsApp data from iPhone X/iPhone 8(Plus) with three recovery modes: directly recover from device, recover from iTunes backup, recover from iCloud backup. Not only WhatsApp txt messages, but also WhatsApp videos messages, photos, videos and attachments are also allow to restored. It allows retrieving contacts, SMS, photos, videos, notes, call history, apps data and more kinds of iOS data on iPhone/iPad/iPod device. iPhone Data Recovery enable to restore deleted data on iOS device after losing data due to any situation, like deleted by mistake, iOS system update, iOS system jailbreak, restore device to factory reset, etc,. Compatible with all iPhone models, including iPhone X, iPhone 8(Plus), iPhone 7(Plus), iPhone 6S(Plus), iPhone 6(Plus).

d_win d_mac

Part 1: Recover Deleted WhatsApp from iPhone X/iPhone 8(Plus) with WhatsApp Cloud Backup

Although WhatsApp does not save your WhatsApp data on its servers, it lets you back up the chat history and attached media files to iCloud if you enable the auto backup option in WhatsApp settings. You can follow below steps:

Step 1. Make Sure You have Backup in iCloud
Make sure that you have backed up WhatsApp messages in iCloud or turned on auto backup before. You can check this via WhatsApp → Settings → Chats → Chat Backup.

auto backup whatsapp

Step 2. Restore WhatsApp by Uninstalling & Reinstalling the App
Uninstall WhatsApp on your iPhone and then reinstall it from the App Store. After installation, verify your phone number to get access. When you see a welcome notification prompting you to restore chat history, tap on Restore Chat History. Once the restore process is done, you will see the deleted WhatsApp messages on your iPhone again.

restore whatsapp from local backup

Part 2: Directly Restore Deleted WhatsApp Data from iPhone X/iPhone 8(Plus)

Step 1. Run iPhone Data Recovery and Connect iPhone X/iPhone 8(Plus) to the Computer
First of all, download and install the iPhone Data Recovery on your computer. Connect iPhone to the computer then start the process and select “Recover from iOS Device“, click “Start“. And then, the program will detect your iPhone soon.

iPhone data recovery home page

Step 2. Select WhatsApp File to Scan
From “Recover from iOS Device”, choose “WhatsApp” file and click “Next” button to enter the scan process.

select whatsapp files to scan

iPhone Data Recovery will begin to scan your iPhone for deleted WhatsApp chat data.

scan data on iPhone

Step 3. Recover Deleted WhatsApp Data from iPhone Directly
After the scanning, you can find the recoverable files in the scanning result. Select the WhatsApp data under “WhatsApp” and “WhatsApp Attachments” files and then click “Recover” to save the selected data on your computer.

recover WhatsApp data from iPhone

d_win d_mac

Part 3: Restore Deleted WhatsApp Data from iTunes Backup File

If you have a backup of the messages in iTunes, follow these simple steps to get them back.

Step 1. Select Recovery Mode and Select WhatsApp File
From the main window, select the “Recover from iTunes Backup” option and then click “Start” to begin. Select “WhatsApp” in the next window and then click “Next” to begin.

select WhatsApp file iTunes backup

Step 2. Select the iTunes File to Scan
The program will display the iTunes backup files on that computer in the next window. Select the most relevant one and then click “Scan” to analyze it.

extract backup file from iTunes

Step 3. Recover WhatsApp Data from iTunes File
Once the analysis is complete, you should see all the WhatsApp messages on that backup file displayed in the next window. Select the ones you would like to recover and then click “Recover” to save them to the computer.

recover WhatsApp iTunes backup

d_win d_mac

Part 4: Restore Deleted WhatsApp Data from iCloud Backup File

Follow these simple steps if the WhatsApp messages are in your iCloud backup.

Step 1. Select Recovery Mode and Select WhatsApp File
Select “Recover from iCloud Backup” in the primary window and then click “Start“. Ensure that “WhatsApp” is selected in the next window and click “Next” to continue.

select WhatsApp file iCloud backup

Step 2. Sign in to iCloud and Select iCloud File
Sign in to iCloud and then select the most relevant iCloud backup file from the list. Click “Next” to analyze the selected file.

download iCloud backup

Step 3. Recover WhatsApp Data from iCloud File
From the scan results page, select the deleted WhatsApp messages and then click “Recover” to save them to your computer.

recover WhatsApp from iCloud

d_win d_mac

Part 5: How to Backup iPhone X/iPhone 8(Plus) WhatsApp on the Computer Safely

iOS Backup & Restore is the ideal backup & restore tool for securely backup & restore iPhone on the computer. More than 19 types of iOS data can be backup and restore, including text messages, call logs, photos, contacts, WhatsApp messages, documents, etc,. What’s more, it could do the backup & restore job for your iOS device without erasing your existent data.

unfone ios backup restore

Free Download iOS Backup & Restore:

d_win d_mac

More iPhone X Tutorials You could Click:

How to Recover Deleted Data from iPhone X/8

How to Transfer Android Data to iPhone X/8

How to Transfer iPhone Files to iPhone X/8

How to Backup & Restore iPhone X/8 on the Computer Safely

How to Transfer Videos/Music/Photos to iPhone X/8

How to Manage Files for iPhone X/8 on the Computer

Recover Deleted WhatsApp from iPhone X/8

How to Play Apple Music on Google Chromecast

“A few days ago, I got a Chromecast Audio. And I am used to listen to Apple Music but now I intend to cast the Apple Music to Chromecast for listening. Can anyone think of a way to get Apple Music streaming into a Chromecast Audio?”

Chromecast Audio, developed by Google, is a small device that plugs into your speaker for streaming music through WiFi. It allows you to cast your favorite music from a multitude of streaming services like Spotify, Google Play Music, iHeartRadio, TuneIn Radio and Pandora to Speaker. But sadly, Apple Music is not available to stream through the Chromecast device.

You may like to read

* How to Burn Apple Music to CD
* How to Convert DRM-Protected Apple Music to MP3

Why? Unlike the common music songs, the audio tracks in Apple Music are protected by Apple’s FairPlay DRM technology.  Apple Music does not support Chromecast or Chromecast Audio. Therefore, Only if you kill DRM lock from the Apple Music offline songs you can easily stream and play Apple Music on your Mac or Windows PC and cast them to Chromecast/Chromecast Audio.

Apple Music Converter is aimed to break DRM restrictions which can completely delete DRM encryption from offline Apple Music M4P songs and convert Apple Music to MP3, AAC, M4A, M4R, FLAC, etc for casting on Chromecast. It works at 16X faster speed to save your time.

Now the following tutorial will guide you to easily cast your Apple Music songs to Chromecast with the help of Apple Music Converter for Mac or Windows.

d_win d_mac

Tutorial: How to Cast Apple Music to Chromecast Audio

Step 1. Launch Apple Music Converter

After installation, launch the Apple Music Converter. iTunes will be launched automatically as well.

launch apple music converter

Step 2. Select Apple Music Tracks

All the media files in your iTunes library will be shown automatically on the interface of the program. You only need to click the playlists in left side and then choose the Apple Music you want to play with Chromecast.

select Apple music tracks

Step 3. Choose Output Format for Chromecast

Now in the “Output” section, choose the MP3 format that is fully compatible with Google Chromecast from the drop-down list. The program can preserve all the ID tags including cover, date, author, genre, etc to the output MP3 audio files. You can also edit them.

Select Output Format - MP3

Step 4. Remove DRM & Convert Apple Music to MP3

Then you can start to convert the DRM M4P songs to MP3 by clicking “Convert” button.

remove drm and convert apple music to mp3

After the process finished, go to the output folder to check your Apple Music songs with your computer.

locate the converted apple music songs on computer

Step 5. Stream Apple Music to Google Chromecast

When the conversion finishes, you can cast the converted Apple Music tracks from your PC or Mac to Chromecast Audio as desire. On Windows, you need Chromecast Audio Stream. On Mac, you can use Soundcast.

d_win d_mac

Related Articles:

How to Play Apple Music after Canceling Subscription

How to Enjoy Apple Music on Samsung Galaxy S8

How to Save Apple Music Songs and Playlists for Offline Listening

How to Play Apple Music on Chromebook

How to Convert iTunes Videos from M4V to MP4 on Mac

How to Convert Apple Music to Google Pixel

[Summary]:Looking for a way to stream Apple Music to Google Pixel/ Pixel 2XL for offline listening even canceling Apple Music subscription service?This aritcle main teach you a easy way to convert Apple Music and local iTunes M4P music songs to MP3 for enjoying on Google Pixel phone without Apple Music App.

People also like to read:

* How to Remove DRM from iTunes Movies and Watch on Android

* How to Convert DVD/Video to MP4

As we all know that the Apple Music and iTunes M4P songs not compatible with Google Pixel,in order to listening iTunes Music & Apple Music on Pixel phone,you must to remove DRM from Apple Music and convert M4P to MP3 for listening on Google Pixel/ 2XL.In additional,if you want to listen to iTunes Music on Google Pixel phone,you can use a iTunes for Android tool – iTunes to Android Transfer to transfer iTunes Music to Google Pixel/ 2 XL.

convert apple music to google pixel

Here,the Apple Music Converter is an Apple Music DRM removal tool, iTunes Audiobook Converter and iTunes M4P to MP3 Converter, which not only can help you remove DRM from Apple Music/iTunes Music,but also enables you convert iTunes M4P Music, Apple Music songs to MP3, M4A, etc.After converting Apple Music to MP3 complete,you can enjoying Apple Music on many other popular media devices, including Google Pixel/2(XL), Samsung Galaxy S8/S7/S6/Note 8/Note 5, HTC, Huawei Mate/P, MP3 player, iPod nano/shuffle/classic and chromecast.Let’s show you the tutorial to convert Apple Music M4P songs to DRM-free MP3 for Google Pixel.

d_win d_mac

Tutorial: How to Convert and Transfer Apple Music to Google Pixel 2 / 2 XL

Step 1. Launch Apple Music Converter for Windows or Mac

First of all, download and install Apple Music Converter on your Windows or Mac computer.After that,the iTunes program will be opened at the same time automatically.

The program will launch iTunes automatically and load all your iTunes media together with playlists, so you just need to tick the checkbox before the file you want to remove DRM and convert to MP3. For Apple Music songs, you don’t need to download them to your computer first.

Convert Apple Music to Google Pixel

Step 2. Add Apple Music Tracks

Click the playlist in the left column, then you can add iTunes’s songs, albums or playlists to the program that you want to convert. The program supports batch conversion so you can choose a few Playlists, or select a few songs.

Add Apple Music

Note: If you cannot find the music you want to convert, you can search it. And please make sure that you have downloaded and saved the Apple Music tracks you want on computer.

Step 3. Select MP3 as Output Format

Then,choose MP3 as output format for Google Pixel phone,because most Android phone  compatible with MP3 format.In this part,you can see the Apple Music Converter supports 8 output formats: MP3, M4A, AC3, AIFF, AU, FLAC, M4R and MKA. Just choose MP3 as output format.

select Apple Music to Convert

In addition, you can also specify the location for saving output MP3 files. as well as select audio quality from low, normal, high or set bitrate, sample rate according to your needs.

Step 4. Start Convert Apple Music to DRM-free MP3

Just click the “Convert” button and the Apple Music to MP3 conversion starts, the program will immediately pop up the conversion window.

convert Apple Music to MP3

Once complete, you can click the “Explore output File” button to get the converted DRM free Apple Music or iTunes songs in .MP3 format on computer.

explore Apple Music in MP3 format

Step 5. Transfer Converted MP3 Apple Music/iTunes Music to Google Pixel

Well done! You have successfully converting Apple Music and iTunes Music from M4P to MP3 and saved on the computer,in order to stream converted Apple Music to Google Pixel/2 XL for offline listening,this Android Manager tool could helps you import converted Apple Music from computer to Google Pixel phone.

1.Run the Android Manager tool and connect your Google Pixel to computer via USB calbe
2.Click “Music” and transfer converted Apple Music to Google Pixel phone from computer.

transfer Apple Music to Google Pixel

3.Enjoy Apple Music on Google Pixel 2 / 2XL without Apple Music App

Free download the Apple Music Converter and try to convert Apple Music to MP3 for offline listen on Google Pixel and other Android devices:

d_win d_mac

Final Thoughts

Personally, as an Google Pixel owner, I love this Apple Music Converter much. It is a sad truth that Apple Music not compatible with Google Pixel,and iTunes won’t sync Apple Music songs. and iTunes music to Android phone.But Apple Music Converter and iTunes Music to Android Transfer,both helps us to convert Apple Music to MP3 and make it playable on non-Apple devices,like Android phone,MP3 player, PSP, Zune, MP3 player, mobile phones, etc.

Useful Tips: Movies and TV shows purchased from iTunes Store are also DRM-protected. Do you want to watch iTunes video on Google Pixel phone?
What you need to do is removing DRM from iTunes movies and TV shows and convert M4V to MP4 for watching on Android phone like Google Pixel, Samsung Galaxy, HUAWEI Mate/P, Sony, Motorola,etc.try iTunes M4V Converter.

Related Article

Apple Music DRM Removal – Remove DRM from Apple Music

M4P to MP3 Converter – How to Convert M4P to MP3 on Mac

M4P to M4A Converter – Convert M4P to M4A

Apple Music to MP3 Converter – Convert Apple Music to MP3

Remove DRM and Convert iTunes M4V Videos to MP4

How to Play Apple Music, iTunes Music in a Car

Summary: Most of people like to download some favorite music and listen on the car when driving. A lot of people will copy the songs from USB and insert it to the car for playing, others prefer to listen to iTunes music than copying songs to an USB. Especially the Apple fans, they subscribe and purchase music in iTunes library, and they are searching the ways but get nothing on how to listen the iTunes music in a car offline.In this guide, we will lead you to transfer and listen to iTunes music in a car without limitation.

What is Apple Music? Music is one app, but it’s actually three distinct things – Apple Music, Apple Music Radio and Apple Music Connect. And it’s the combination of the three that Apple is betting represents the future of the music industry. Since Apple music is the most popular music service around the world, thousands of people subscribe and purchase music in iTunes library. However, the purchased iTunes music is time limitation, when the subscription is times up, you can not play the iTunes music any longer. In addition, you can’t play the iTunes music in a car directly for offline. To play iTunes music in a car without limitation for free, you should try this Apple Music Converter.

Convert Apple Music for Free Playing in a Car

If you need to play Apple music or iTunes music in a car for offline playing without using iPhone or other portable audio devices, you can use this Apple Music Converter. It is an useful program that help to convert iTunes music from DRM-ed M4P music to free MP3 files then you can freely play the converted music in a car without limitation. Not only MP3 format, it can also help to convert Apple music to other free format, like AAC, WAV. The conversion is up to 30x speed. Additionally, you can play back the converted music on any compatible audio devices without limitation, like iPod, iPhone, Android device, PSP, MP3 player, and other smartphone.

d_win d_mac

Part 1: How to Play iTunes Music in a Car with iPhone

A: Play iTunes Music in a Car via Bluetooth:
It’s the easiest way and wireless way to stream iTunes music in your car. Almost most series of modern car are equipped with the function of bluetooth. Firstly connect your iPhone to your car is quite simple. On your iPhone, swipe up from the bottom to open Control Center, then tap Bluetooth icon twice to turn Bluetooth off and back on. Pair your car stereo with it by referring to the user manual. After it is get matched, you could play Apple Music songs from iPhone in car.

B: Play iTunes Music in a Car via Apple Carplay :
CarPlay is the smarter, safer in-vehicle interface to operate your iPhone, and now reaches another level by being featured in a KENWOOD multimedia receiver. If your car is compatible with CarPlay, then it is a nice option, as well. It has a lot of practical functions, such as making phone calls, receiving and replying messages or asking for the directions. But it is only workable for iPhone 5 and later running iOS 7.1 or higher. To use it, you need to turn on Siri first. Then plug your iPhone into the USB port. While driving, you just need to ask Siri to play songs from Apple Music.

Part 2: How to Play iTunes Music in a Car with Apple Music Converter

Step 1. Add Apple Music and Playlist to iTunes Library
Just add Apple music songs, albums or playlists you want from Apple Music catalog to your iTunes Library.

Add Apple Music and Playlist to iTunes Library

Step 2.Run Apple Music Converter on PC or Mac
To begin with, please download and run the program on your PC or Mac.After running the program, the program will automatically load your iTunes library.All songs, albums and playlists you added to iTunes library will appear on the interface of Apple Music Converter.

launch apple music converter

Step 3. Select Music songs you want to Convert
If you added Apple music songs or albums to iTunes library, click “Music” on the left column, sort all songs by Type and check songs marked as Apple Music AAC audio file. If you added Apple music playlists to iTunes, click the playlists on the left column and check the songs on the right side. You can also quickly find songs you need with the search feature on the top right corner. On the right side of the interface, you can sort all songs by Name, Artist, Album, Type, just like in iTunes.

select Apple music or playlist

Step 4. Setting MP3 as the Output Format for Converted Songs
Apple Music Converter supports convert DRM protected Apple music songs to popular audio format like MP3, AC3, AIFF, FLAC, MKA, etc.To convert iTunes music to MP3,just tapping purple setting button at the bottom of the menu section, you can choose “MP3” as output format and adjust some basic settings.

Select Output Format - MP3

Tips: Here you can also set the converting speed up to 10X (Mac version can reach up to 20X speed) and adjust the output quality up to 320 Kbps. Besides, the output path is also available to be changed as you need.

Step 5. Converting iTunes Music to Free MP3
Simply click “Start Convert” button to start to convert all of your added Apple Music song to DRM-free MP3.

convert Apple Music to free MP3

When the conversion is finished, you can click “Open Output File” to browse the converted MP3 files.

browse the converted Apple Music

At last, you can plug your USB drive to computer and start transferring the converted iTunes music songs to it for listening offline in your car without limitation.

(Tips: Another way here we suggest you to try is burning iTunes music to CD then playing in a car.)

You can check this guide: How to Burn Apple Music to CD for Playing in a car

d_win d_mac

Related Articles:

How to Play Apple Music after Canceling Subscription

How to Download Apple Music and Playlist for offline listening

How to Convert DRM-Protected Apple Music to MP3

How to Rip Apple Music For Free

How to Keep iTunes Music Songs Forever

How to Record Apple Music M4P Streams as MP3

How to Convert Protected Apple Music to MP3 for iPhone

How to Convert DRM Protected iTunes M4V Videos to MP4

How to Get Apple Music on Google Pixel/Pixel 2 XL

[Summary]: Want to offline listening Apple Music and iTunes Music songs on Google Pixel/Pixel 2(XL) wihtout Apple Music App? This article will teach you the best way to get Apple Music on Google Pixel phone for playable offline with Apple Music Converter & DRM removal tool, step by step to convert Apple Music to MP3 for Google Pixel/Pixel 2 and Pixel 2 XL.

Many Google Pixel phone users may ask “Why Apple music not compatible with Google Pixel?” “How to stream Apple Music to Google Pixel 2” “Any way to convert Apple music to Google Pixel 2 XL” “How to remove DRM from Apple music and enjoy on Pixel” “How to offline listening Apple music on Google Pixele without Apple Music App”…..Apple Music tracks are only playable on Apple device with a current Apple Music subscription, which not allow users listening Apple Music on non-Apple devices, including Android phone(Google Pixel, Samsung, HTC, Sony), MP3 player, iPod nano/shuffle/classic and Car player.

Keep Apple Music Songs Playable on Google Pixel after Canceling Subscription

The answer is “Yes”. Although,Apple Music not compatible with Google Pixel,Apple music is protected with DRM encryption in M4P format,it limited users to listen to Apple Music on non-Apple device, iTunes or without Apple Music App.However,how to get apple music on Google Pixel? How to keep Apple Music songs you downloaded on your computer, Google Pixel forever without worrying about canceling the subscription?What you must to do is removing DRM from Apple Music,and then convert Apple Music to MP3 for Google Pixel.

put Apple Music to Google Pixel 2 XL

If you want to remove Apple Music DRM and convert them as DRM-free MP3 file,you can use an Apple Music to Google Pixel ConverterApple Music Converter,which not only can help you remove the DRM protection from Apple Music legally,but also enalbes you convert M4P Apple Music songs to popular DRM-free audio formats like MP3, AAC, WAV, or FLAC.After Apple Music to MP3 conversion done,then transfer the converted Apple music songs/iTunes MP3 music among Google Pixel or other Android phone like Samsung Galaxy S8, Galaxy S7, Galaxy Note 8, Huawei, Sony, HTC,etc. freely.

Let’s follow the easy guide to stream Apple Music to Google Pixel/XL and Google Pixel 2 / 2XL with the Apple Music to MP3 Converter program. Before we get started, please download Apple Music Converter for Windows & Mac and have a try.
d_win d_mac

Apple Music Converter Key Features:

-Convert Apple Music to MP3/AC3/AIFF/FLAC/M4A
-Convert iTunes M4P songs to MP3
-Convert iTunes audiobooks M4B to M4A/MP3
-Convert Audible AA/AAX audiobooks to MP3/M4A
-Remove DRM from Apple Music and Audible audiobooks
-Remove DRM from iTunes Music songs in M4P format

Easy Steps to Stream Apple Music to Google Pixel/Pixel 2 XL

Step 1.Download and Launch Apple Music Converter
First of all,please download,install and launch Apple Music Converter(Windows or Mac version) on the computer. You can download it from:

d_win d_mac

Before that,import the Apple Music you want into iTunes program.After running the Apple Music Convertr,then the start screen shows all the list of iTunes library locations on the left panel, audio tracks and track information at the center and output conversion settings on the bottom panel.

launch apple music to MP3 converter

Step 2.Select Apple Music you Want to Convert
The Apple Music Converter automatically loads all your Apple Music songs, albums, and playlists that you have added to Library. Check the ones that you want to convert to MP3.

select Apple music songs

Step 3.Choose MP3 as Output Format
And then click Output Format, select MP3 as output format,you can also choose to output to AC3, M4A, M4R, AIFF, FLAC format, etc.

MP3 as output format

Step 4.Begin Convert Seletected Apple Music to MP3
Just click the “Convert” button on the pop-up interface,the program start convert Apple Music to MP files.After it finishes the conversion process, just click the “Export Save File” button,you can find the DRM-free Apple Music songs in MP3 format saved on the computer. Then using the Android Manager & Transfer to import all converted Apple Music Files to Google Pixel for enjoying them anywhere you want!

convert Apple Music to MP3

View converted Apple Music in .MP3 format

find MP3 Apple Music

Free download the Apple Music Converter for Windows or Mac and try to convert Apple Music to MP3 for enjoying on Android devices.

d_win d_mac

Transfer Converted iTunes Music or Apple Music Files from Computer to Google Pixel

All selected Apple Music songs be converted and save on computer in DRM-free MP3 format,now you can use this Android Manager & Transfer to transfer them from computer to your Pixel phone.
Read more:How to transfer music from computer to Google Pixel?

Step 1.Download and Run Android Manager & Transfer and Connect your Google Pixel phone to the computer

d_win d_mac

Step 2.To transfering converted MP3 Apple Music to Google Pixel/2 smart phone from the computer,please click “Music” menu at the top of the main interface.

Step 3.Finally,just click Add >> Add File or Add File Folder,the program will pop-up a new windows for you to select the converted Apple Music songs,then select the songs you want and import them to Google Pixel.After it done,you can enjoy Apple Music on Google Pixel at any time and place, even you cancel the Apple Music subscription service.

transfer Apple Music from computer to Google Pixel

Free download the iOS Android Manager and try to transfer music from computer to your phone easily.

d_win d_mac

Tips:The iOS Android Manager aslo allows you transfer music from iTunes to Android, Android to iTunes, iOS to Android, Android to iOS, Android to Android, iOS to iOS,as well as video, photos, contacts, messages, App and other data.

Useful Tips: Movies and TV shows purchased from iTunes Store are also DRM-protected. If you want to watch iTunes moives on Android devices,you can use this iTunes M4V to MP4 Converter to remove DRM from iTunes movies and TV shows and convert them to MP4 easily.

Read More

How to Transfer Music between iTunes Library and Google Pixel

Download Apple Music and Playlist for offline listening

2 Best Ways to Burn Apple Music to CD

How to Convert iTunes Videos to MP4

How to Download Apple Music on Windows 10/8/7/XP

“Can I download music from Apple Music to my computer?” This is a common problem people will ask in the forums. Is there a simple way to solve this problem? In the next article we will teach you how to download and save Apple Music on your Windows 10/8.1/8/7/Vista/XP.

As an Apple Music lover, you will know that the Apple Music songs that you download are DRM protected without doubt. So you cannot download and stream Apple Music songs simply without iTunes. As long as we can unlock the DRM protected, we can download whatever we want from Apple Music. To save Apple Music albums, songs and playlists for listening offline on your Windows PC, you need a popular and well-recognized DRM killer for Apple Music and iTunes audio files.

As an all-in-one Apple Music/Audiobook/iTunes M4P Converter, UkeySoft Apple Music Converter enables you to remove DRM Apple music songs and download to the computer by recording them to MP3, AAC, WAV, FLAC at 16X faster speed with CD output quality.

Key Features of UkeySoft Apple Music Converter:

– Download Apple Music on PC for offline listening;
– Convert Apple Music and iTunes M4P audio to MP3/AAC/FLAC/WAV;
– Remove DRM protection from iTunes & Audible audiobooks;
– Convert any audio at 16X faster speed with lossless quality;
– Support Windows 10/8.1/8/7/Vista/XP & Mac OS 10.9-10.13 & iTunes12.7.

d_win d_mac

Guide to Download Music from Apple Music on Computer

Step 1. Free Download Apple Music Converter

Download and install Apple Music Converter on your Windows PC, iTunes will be launched automatically.

apple music converter

Step 2. Choose Apple Music M4P Songs

On the screen, you will find all Apple Music songs and playlists you have added to iTunes Library, together with iTunes songs, movies, TV shows, audiobooks, etc. Choose the music you want to remove DRM.

apple music converter

Step 3. Choose MP3 as Your Output Format

Choose output format and customize profile settings. You can change bitrate and sample rate values. Here please select .MP3 from the drop-down list under the “Output Format” column.

apple music converter

Step 4. Start Converting DRM Protected Apple Music to MP3

When all settings are finished, simply click “Convert” button to remove DRM from selected Apple Music songs.

apple music converter

Apple Music Converter removes Apple Music DRM at 16X speed and soon you will get DRM-free songs after conversion.

apple music converter

After conversion, locate the songs and you are able to enjoy your Apple Music songs on your Windows freely.

apple music converter

d_win d_mac

Related Articles

How to Download and Listen to Apple Music Songs Offline

Unlock iTunes DRM and Play iTunes M4P Songs on Any Devices

2 Ways to Burn Apple Music to CD

How to Convert Apple Music M4P to MP3

Remove DRM and Play Apple Music on iPhone without Limitation

How to Play Apple Music with MP3 File on Huawei for Free

How to Stream DRM-free Apple Music to Samsung Galaxy S/Note

Download Apple Music to MP3