[Summary]: Want to transfer iCloud or iTunes data to your new Android phone? This aritcle teach you how to restore iCloud/iTunes backup to Android phone without affecting existing Android data and settings, you can also learn how to backup and restore your Android data on computer.
“I am searching an iCloud to Android restore tool to restore iCloud data to Samsung Galaxy S10+. Any suggestions to restore iCloud backups to Android phone? Please let me know. Thanks advanced.”
“I have backed up iPhone data to iTunes, but my iPhone was lost, then I have bought an new Huawei P30 Pro, since all iPhone data stored in iTunes library, can I restore data from iTunes to Huawei P30?”
Here is the best Android phone overall in 2019, which is the most popular Android smart phone? We have listed some popular Android phones for you to choose: Huawei P30 Pro, Huawei Mate 20Pro, Samsung Galaxy S10 Plus, Samsung Galaxy Note 10+, Google Pixel 3, OnePlus 7 Pro, Samsung Galaxy S10e, OnePlus 6T, Samsung Galaxy S9 Plus, Google Pixel 3a, Samsung Galaxy Note 9, Samsung Galaxy A50, Moto G7 Power, LG G8 ThinQ, Sony Xperia XZ3, Xperia XZ1, Sony Xperia L2, Sony Xperia XA2, Sony Xperia XZ2 Premium, Sony Xperia 10, Xiaomi Mi 9, Xiaomi Mi 8 Pro, Xiaomi Pocophone F1, Oppo A9, OPPO Reno 10x Zoom Edition, OPPO Reno, Meitu T9, Meitu M8, Meitu V6. When you have purchased an new Android phone to replace the old iPhone, the first thing you need to do is transferring data from iPhone to Android phone, but your iPhone is not in hand, for example lost, damaged, stolen, screen-broken, etc. However, how to transfer data from broken iPhone to Android phone? If you have sync iPhone data to iCloud or backup your iPhone to iTunes before, you can restore data from iTunes to Android phone, or download and restore iCloud backup to Android.
Also read: Transfer Contacts from Broken iPhone to Android
The rapid development of communication and mobile technology allows mobile phone to become the indispensable tool for all of us in daily life. Mobile phone store all kinds of personal data, which together form a kind of virtual life. Our friends’ phone numbers, photos, text messages, audio, our agenda, the shopping list, personal documents and more. Losing data from Android device is something that unfortunately happens often and with it all that valuable information is going, even it will be heartbroken if your Android was lost or stolen. To prevent losing data on Android under any unexpected situations, you should be aware of the importance of taking a backup for your Android frequently. Thankfully, there is a number of ways to backup your files on Android. For this post, we’ll take a look at the best Android backup & restore tool.
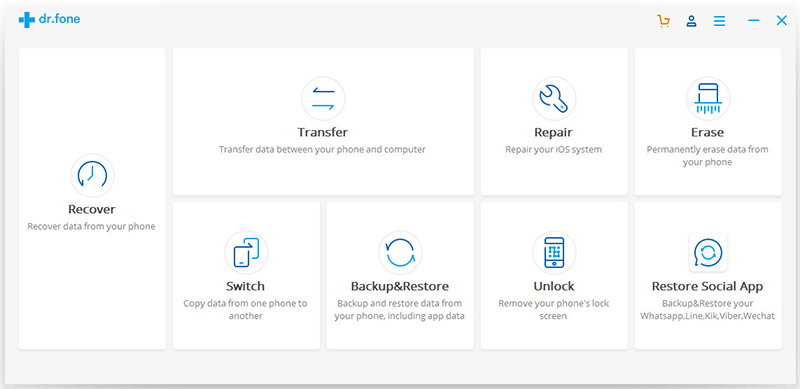
Simple Android Data Backup & Restore Tool
Android ToolKit – Android Backup & Restore tool is a terrific tool for flexibly backup & restore Android data safely. Supported Android files including contacts, call history, messages, calendar, photo, music, video, audio, application, and even application data(for rooted devices). It could be used to backup Android data to computer safely with one click. More importantly, it allow you to preview and restore backup to any Android/iOS devices selectively(transfer content among Android and iPhone that based on different system), restore iCloud/iTunes backup to Android device directly with easy step. Supports 8000+ Android models based on any brands, like Samsung, Huawe, Google, LG, HTC, Sony, Motorola, etc,.


More Features of Android ToolKit:
- Android data recovery, Android SD card recovery, broken Android data recovery.
- Root Android without data loss.
- Switch files between Android and iOS devices.
- Transfer & Android files between Android and computer.
- Unlock Android lock screen without password.
- Erase data from Android permanently.
Part 1: How to Backup & Restore Android Device
How to Back up your Android Phone
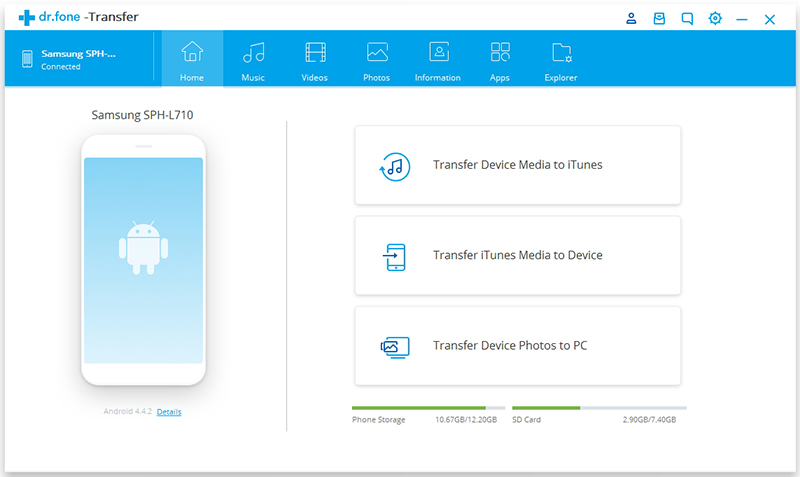
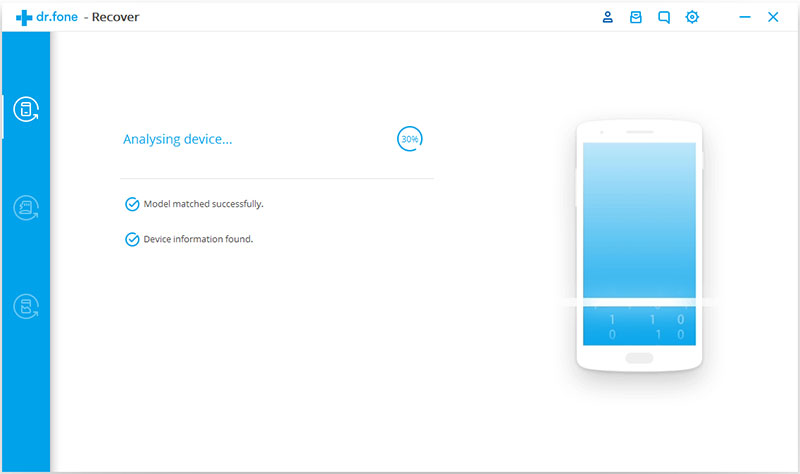
Step 1. Run Program & Connect your Android Phone to Computer
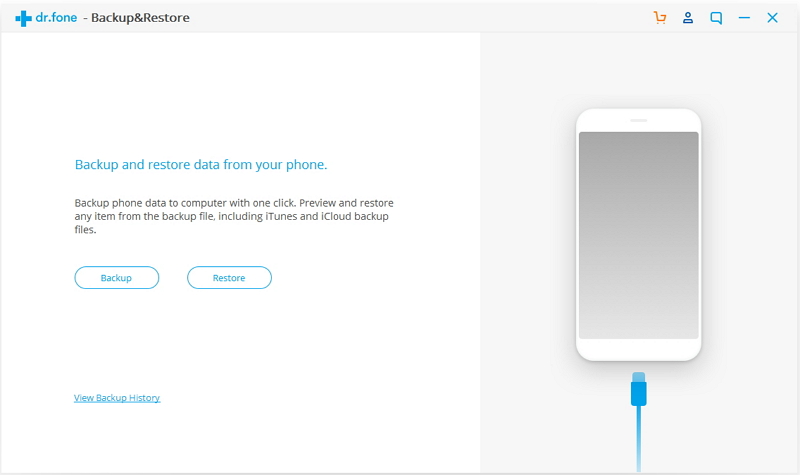
Run Android ToolKit – Android Backup & Restore on your computer, select “Backup & Restore” among all the functions.
Connect your Android phone to the computer using a USB cable. Please make sure you have enabled USB debugging mode on the phone. If your Android os version is 4.2.2 or above, there will be a pop up window on the Android phone asking you to allow USB Debugging. Please tap on “OK“.
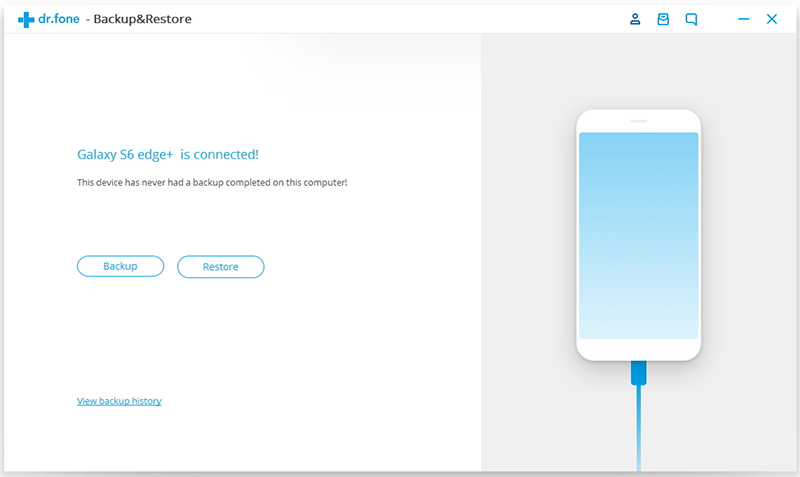
Click “Backup” to start the Android data backup process.
If you have used this program to back up your device in previous, you can view your previous backup by clicking on “View backup history“.
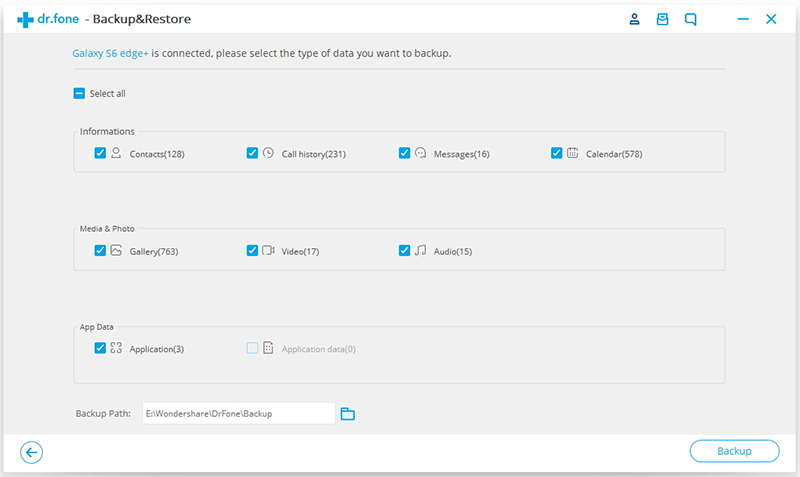
Step 2. Select File Types to Back Up
After the Android phone is connected, select the file types you want to backup. By default, the program has checked all the file types for you, you can unselect the one you don’t need. Then click on “Backup” to go on.
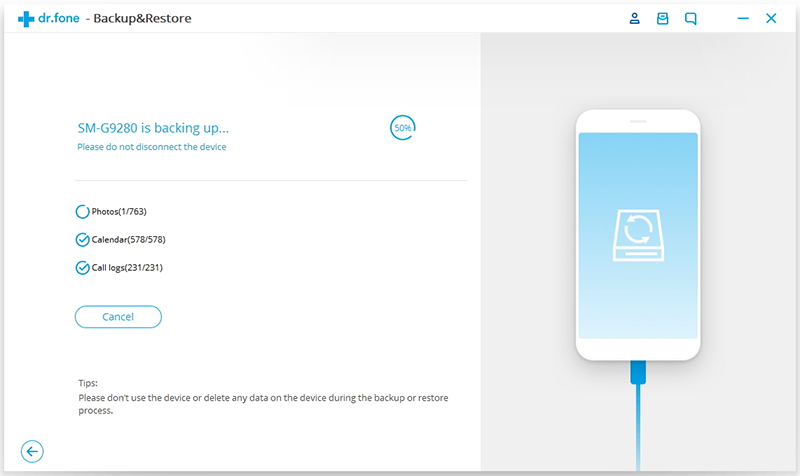
The backup process will take a few minutes. Please keep the connection of your Android phone and the computer, don’t use the device or delete any data on the phone during the backup process.
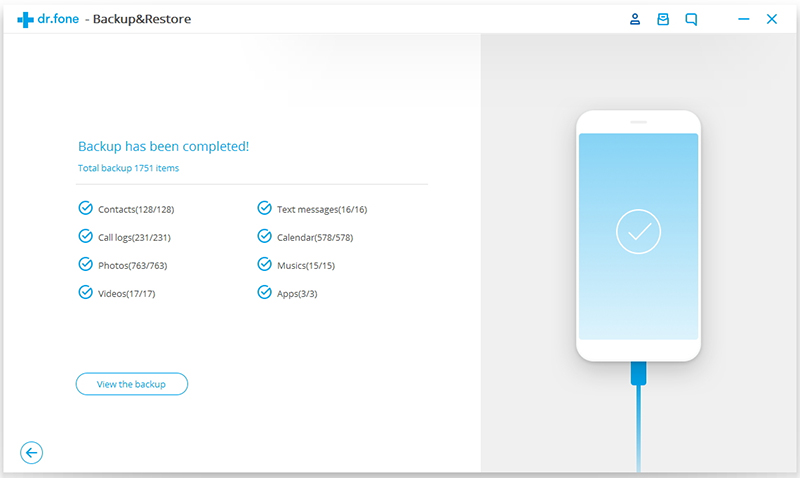
After the backup is completed, you can click on “View the backup” button to browse the backup file.
How to Restore Backup to your Android Phone
Step 1. Run Program & Connect your Android Phone to Computer
Run Android ToolKit – Android Backup & Restore on your computer and select “Backup & Restore” among all the tools. Connect your Android phone to the computer using a USB cable.
Step 2. Select the Backup File to Restore
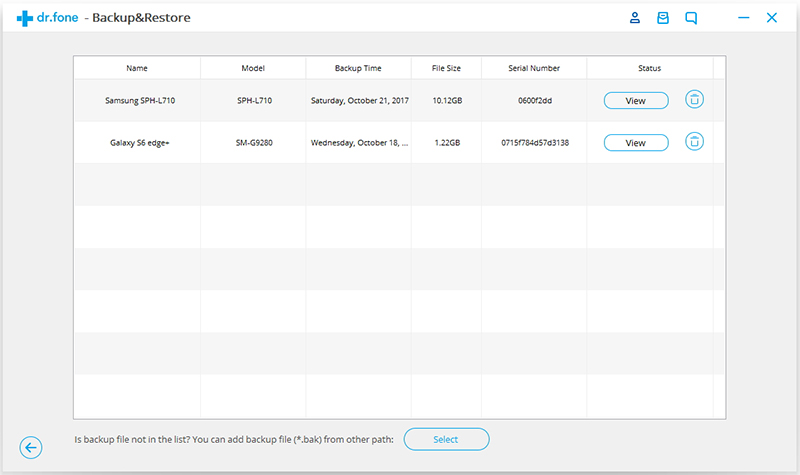
Click on “Restore” button, the program will display all the Android backup files from this computer. Select the backup file you need and click “View” to check it.
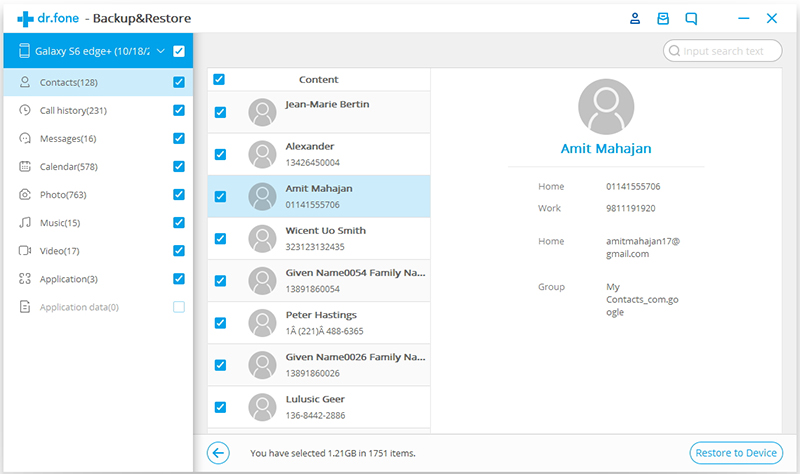
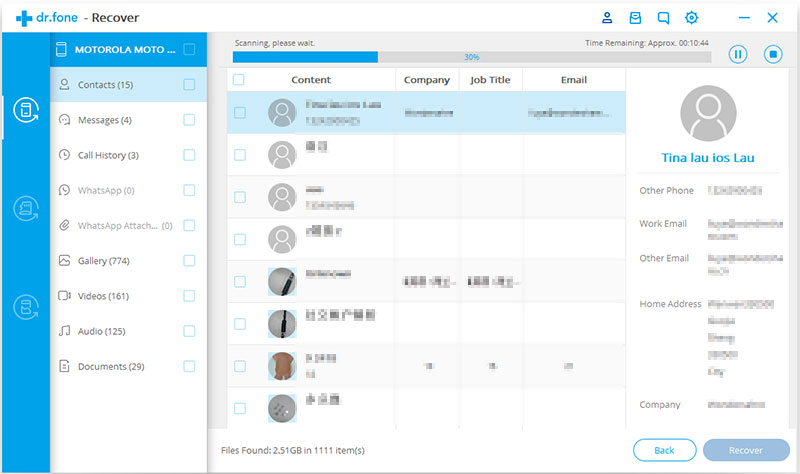
Step 3. Preview and Restore the Backup Data to Android Phone
Here you can preview all data in the backup file. Preview and click all the data you need and finally click on “Restore” to recover it to your Android phone.
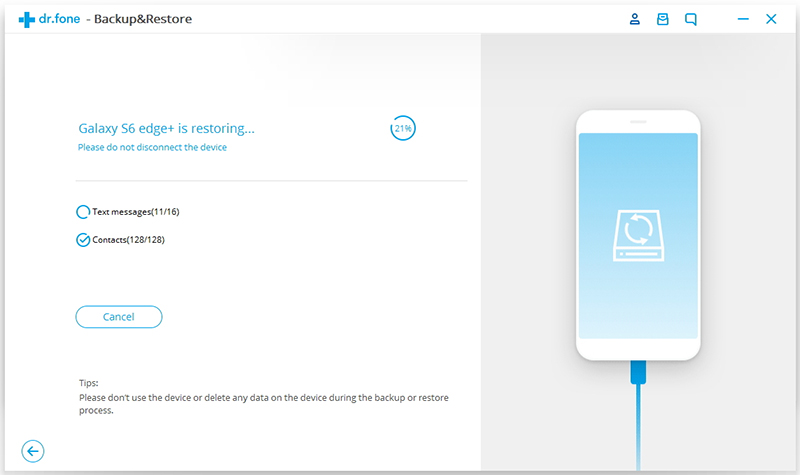
The whole process will only take you a few minutes. Please keep the connection of your Android phone and the computer, don’t use the device or delete any data on the phone during the restoring process.

Part 2: How to Restore iTunes Backup to Android
When you sync iPhone with iTunes, the iTunes application will backup iPhone data automatically, if your iPhone doesn’t in hand, don’t worry, you can restore iPhone data backed up in iTunes to Android phone, you need to use a third-party iTunes to Android transfer.
With Android ToolKit – Android Backup & Restore, you can easily extract, preview, and restore iTunes backup to Android phone/tablet easily, it won’t erase all data and settings off your Android device.
Step 1. Run Program & Connect your Android Phone to Computer
Run Android ToolKit – Android Backup & Restore on your computer, select “Backup & Restore” among all the functions.
Connect your Android phone to the computer via a USB cable. After the connection is finish, click “Restore” to begin the restoring process.
Step 2. Scan All iTunes Backup History
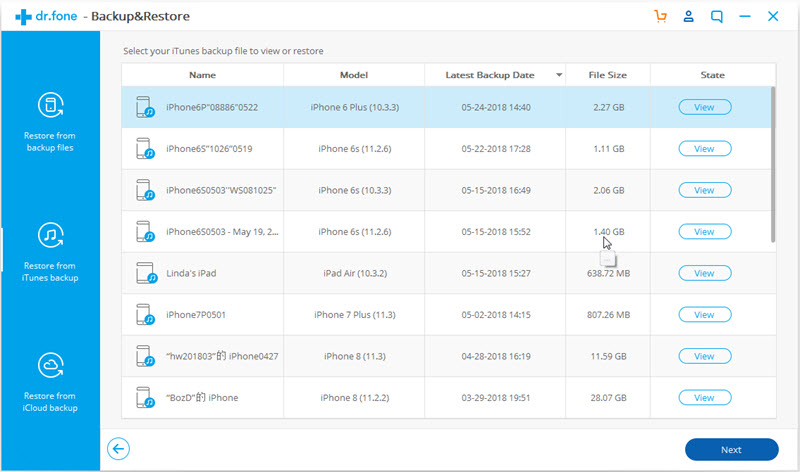
If you want to restore iTunes data to Android phone, please select “Restore from iTunes backup” from the left column, the software will scan all the location of iTunes backup files on your computer, after scanning complete, you can see all backup history.
Step 3. Preview and Restore iTunes Backup Data to Android
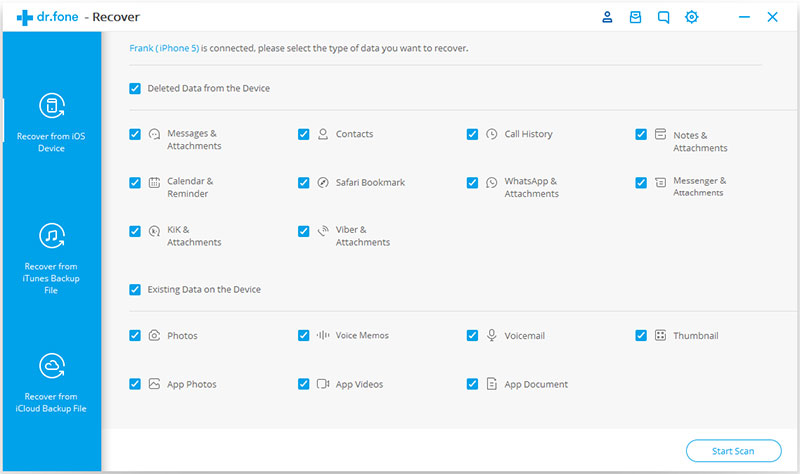
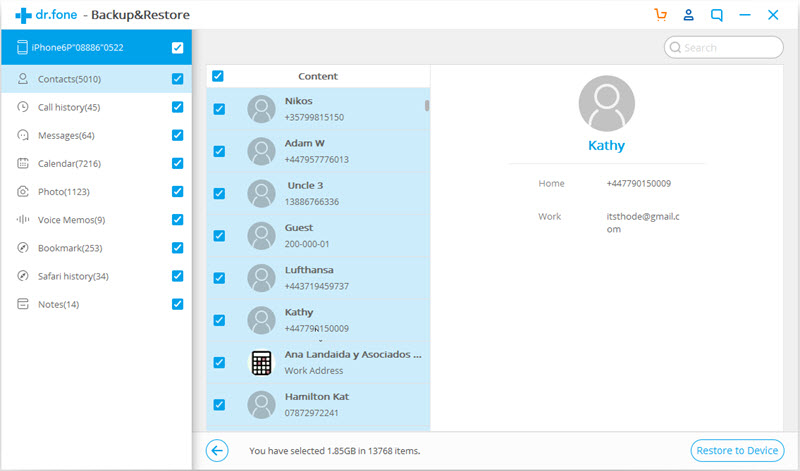
The program will list all types of data, including contacts, text messages, photos, videos and more, select the data you want and click “View” button to view the detail before restore them.
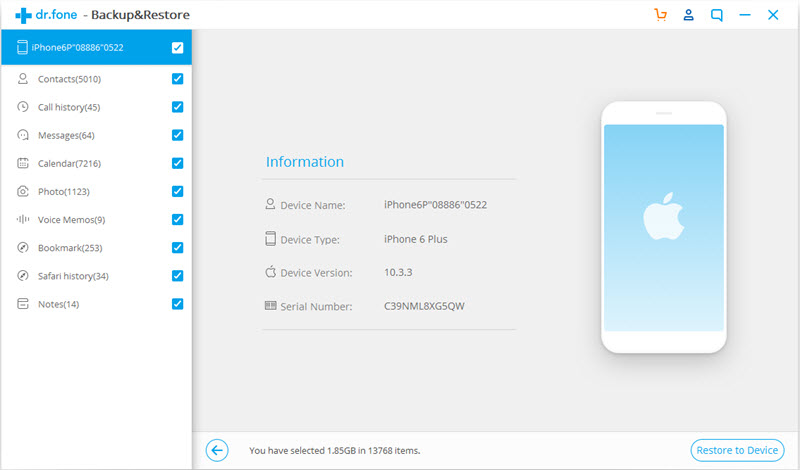
Preview and select all or some of the data, and click on “Restore to Device” to restore the data from iTunes to Android phone.
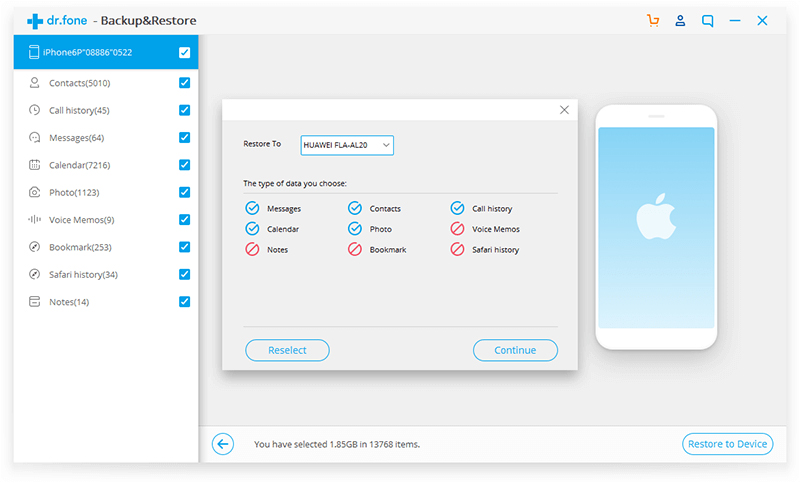
The software will pop up an new windows, then select the desired Android phone and click “Continue” button start to restore iTunes backup to Android.
Note: The selected data can’t be restored if the Android phone doesn’t support the corresponding data type you select, such as Notes, Bookmark and Safari history.
Part 3: How to Restore iCloud Backup to Android
iCloud is a good service for us manage data on Cloud, I believe most iPhone/iPad users backup the data to iCloud free, it is a good habit to backup and protect your important data regularly. Once your iDevice is stolen, you can restore iCloud data to iPhone, iPad, iPod or even Android devices, let’s teach you how to download and restore iCloud data to Android phone with 1 click.
With Android ToolKit – Android Backup & Restore, you can easily download and restore iCloud backup to Android, it allows you preview the downloaded data one by one before restoing. What’s more, this Android ToolKit won’t wipe the existing data and settings of your Android phone after restoring. Let’s shows you how to restore contacts, SMS, photos, videos, etc. from iCloud backup file to Android phone.
Step 1. Run Program & Connect your Android Phone to Computer
Run Android ToolKit – Android Backup & Restore on your computer, select “Backup & Restore” among all the functions.
Connect your Android phone to the computer via a USB cable, the software will detects it automatically, then click “Restore” starting the iCloud to Android restoring process.
Step 2. Login in Your iCloud Account
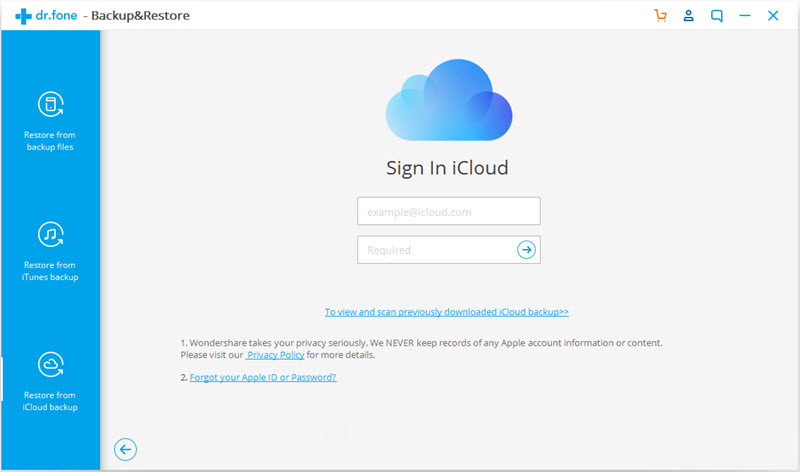
In this step, please choose “Restore from iCloud backup” from the left side, you will go to next step.
If you have enabled the two-factor authentication for your iCloud account, a verification code will be sent to your iPhone, please enter the verification code to the below box, and click “Verify“.

Step 3. Preview and Restore iCloud Backup Data to Android Phone
After verification successful, it means you allow the software analyze and detect all iCloud data. Only few minutes, the software will shows you all the backup history, please select one backup history and click “Download” button to download iCloud data to your computer.

After downloading iCloud backup data complete, you can preview all downloaded contents one by one, then select some or all of the contents and click “Restore to Device” to restore to your Android phone directly.

The software will pop up an new windows, please select an Android device you want to restore to, and click “Continue“.
Note: Some special data can’t be restored to Android, such as Notes, Voice memos, Bookmark, and Safari history.
More Android Data Recovery Tips:
How to Recover Deleted Data on Android without Root
How to Recover Deleted Photos on Android
How to Restore Lost Data from Rooting Android
How to Recover Lost Data from Android SD Card
How to Transfer iPhone Data to Samsung/Android
4 Ways to Backup & Restore Android Phone or Tablet
How to Manage Android on Computer
Safely Backup & Restore Android